Cooking a turkey in a Dutch oven might sound tricky, but it’s easier than you think. If you want juicy, flavorful turkey without the hassle of a big oven, this method is perfect for you.
Imagine carving into tender, golden-brown turkey that’s packed with rich taste and cooked evenly every time. By the end of this article, you’ll know exactly how to prepare and cook your turkey in a Dutch oven, impressing your family and friends with your delicious meal.
Ready to discover the secret to a perfect turkey? Let’s dive in!
Choosing The Right Turkey
Choosing the right turkey is key to a successful Dutch oven meal. The bird you pick affects cooking time, flavor, and how tender the meat turns out. Let’s break down the main factors to consider so you get the best results.
Fresh Vs Frozen
Fresh turkeys often have better texture and flavor, but they require quick use and careful handling. Frozen turkeys offer convenience and longer storage, but you must plan ahead to thaw them safely and fully.
Think about your schedule. Can you thaw a frozen bird over a few days, or do you need something ready to cook right away? If you pick frozen, avoid rushing the thaw in warm water, which can cause uneven cooking.
Size Considerations
Your Dutch oven limits the size of the turkey you can cook. Most ovens fit birds between 10 to 16 pounds comfortably. Bigger turkeys take longer to cook and might not fit well, affecting heat distribution.
Ask yourself: How many people are you feeding? If it’s just a few, a smaller bird cooks faster and stays juicier. Cooking a turkey that’s too large might result in dry edges before the center is done.
Quality Tips
Look for turkeys labeled “organic” or “free-range” for better taste and texture. These birds often have been raised with more natural diets and less stress, which improves meat quality.
Check the skin for firmness and color—it should be smooth and pale, not discolored or slimy. Also, consider buying from local farms or trusted butchers who can offer fresher options and answer your questions.

Credit: www.camfamcookery.com
Preparing The Turkey
Preparing your turkey properly is key to making the most of your Dutch oven cooking experience. Each step affects the final taste and texture, so it’s worth taking your time. Let’s walk through the essentials of getting your bird ready for the oven.
Thawing Safely
Thawing your turkey correctly is the foundation of safe cooking. Avoid any risk of bacteria growth by thawing it in the refrigerator. This method takes time—about 24 hours for every 4 to 5 pounds of turkey—but keeps the meat at a safe temperature.
If you’re short on time, you can thaw your turkey in cold water. Submerge it in its original packaging and change the water every 30 minutes. This speeds up thawing but requires your attention.
Cleaning And Patting Dry
Once thawed, remove the turkey from its packaging and check the cavity for any leftover giblets or neck pieces. Rinse the turkey briefly under cold water to remove any residue. Be sure to clean your sink and surrounding surfaces afterward to prevent cross-contamination.
Pat the turkey dry with paper towels thoroughly. Dry skin will crisp up better in the Dutch oven, giving you that desirable golden-brown finish. Moisture on the skin can lead to steaming instead of roasting.
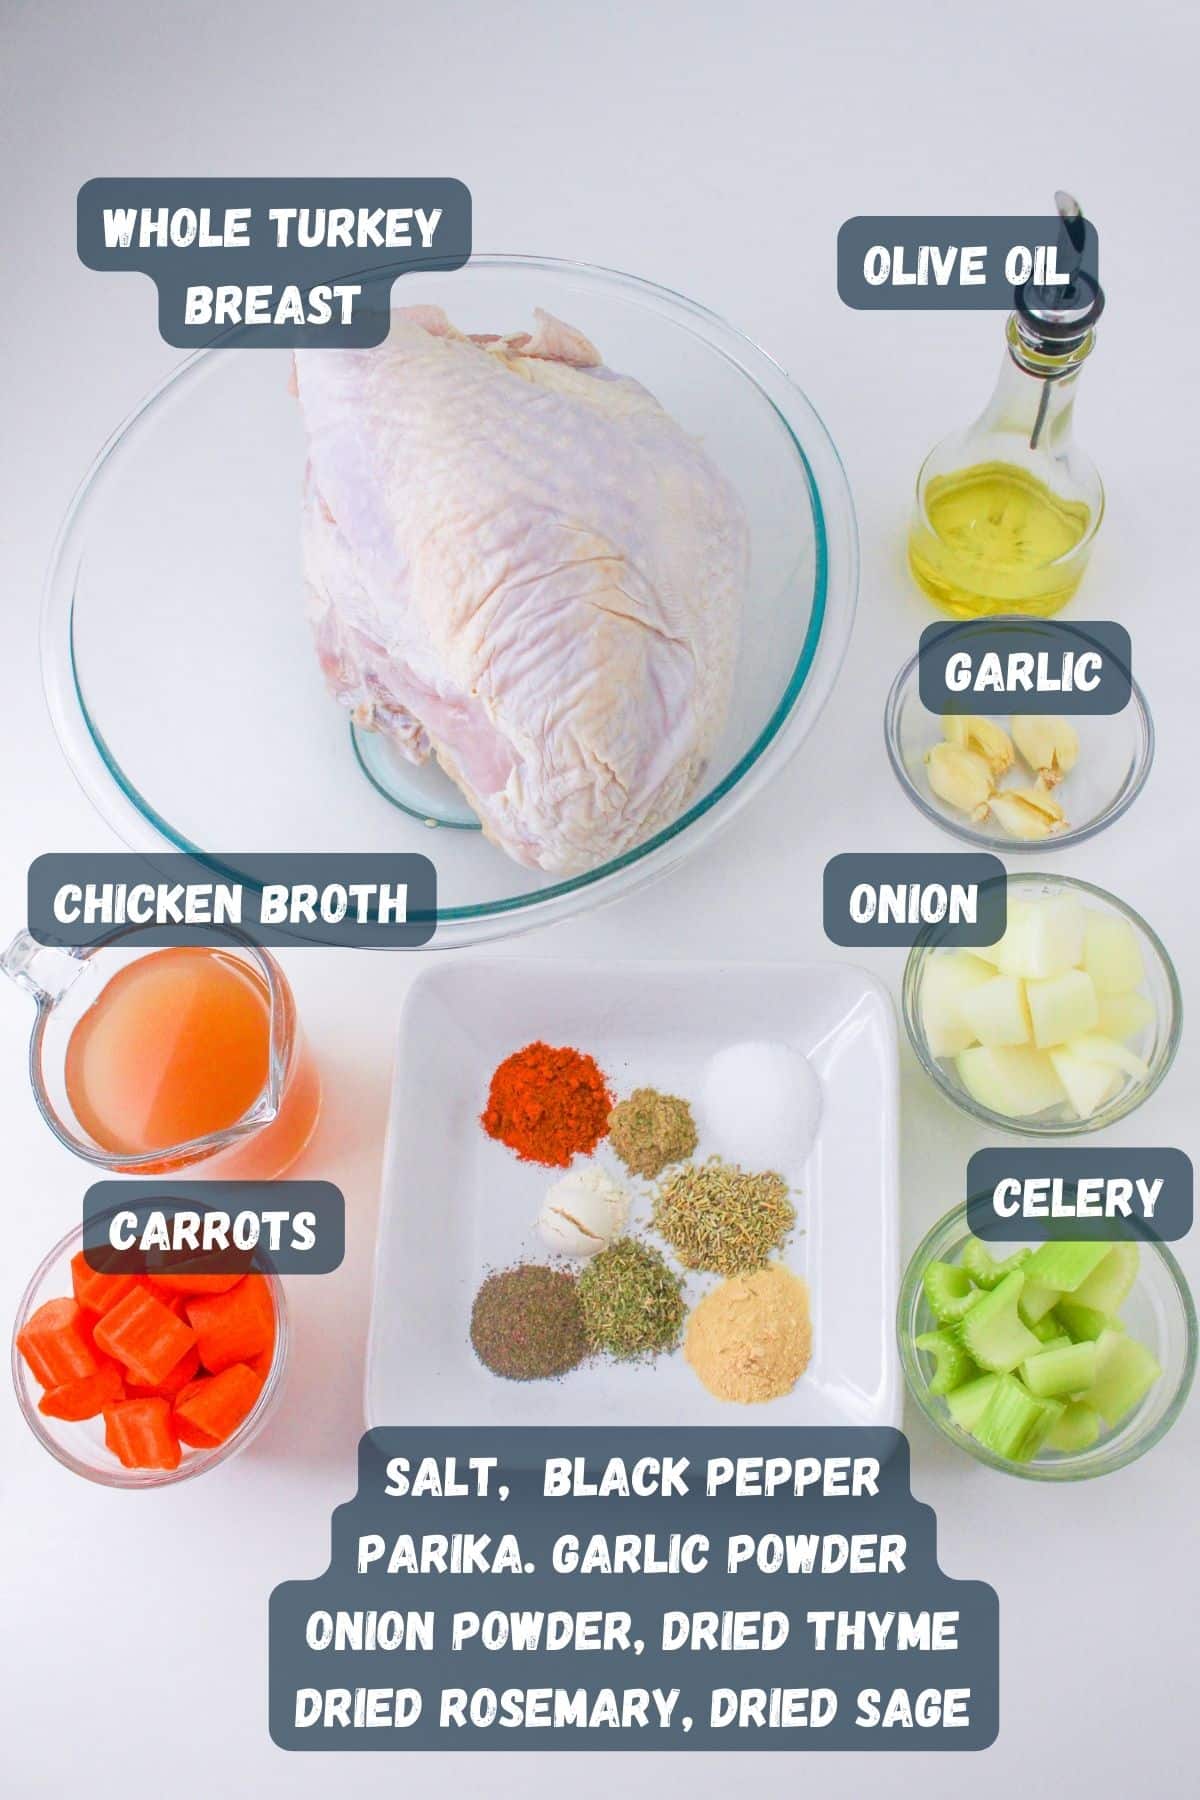
Seasoning And Marinating
Seasoning isn’t just about sprinkling salt and pepper. Think about flavors that complement your meal—fresh herbs, garlic, lemon, or spices like paprika. Rub these under the skin and inside the cavity to infuse the meat.
Marinating the turkey can add moisture and flavor. Even a simple mix of olive oil, lemon juice, and herbs left on the bird for a few hours or overnight makes a noticeable difference. Have you tried brining your turkey? It’s a game-changer for juiciness and tenderness.
Selecting The Dutch Oven
Selecting the right Dutch oven is key to cooking a perfect turkey. The size and material impact cooking time and flavor. The lid's design controls moisture and heat. Good heat distribution ensures even cooking. These factors work together to make your turkey tender and juicy.
Size And Material
Choose a Dutch oven large enough for your turkey. It should fit comfortably with space around it for air circulation. Cast iron is a popular choice. It holds heat well and cooks evenly. Enamel-coated cast iron is easier to clean and prevents sticking. Avoid pots that are too small; they can cause uneven cooking.
Lid Features
A tight-fitting lid is essential. It traps steam, keeping the turkey moist. Some lids have a raised lip to hold drippings. This helps baste the turkey during cooking. Heavy lids also help maintain steady heat. Make sure the lid seals well to avoid heat loss.
Heat Distribution
Even heat distribution prevents hot spots. Cast iron Dutch ovens excel in spreading heat evenly. This helps cook the turkey from all sides at once. Poor heat distribution can lead to dry or undercooked meat. Look for a Dutch oven known for its consistent heat control.
Cooking Setup
Cooking a turkey in a Dutch oven creates a moist and flavorful dish. Use herbs and butter for seasoning. Cover the bird and roast until golden brown and fully cooked.
Cooking a turkey in a Dutch oven brings a rich, hearty flavor. The cooking setup is key for a delicious result. A Dutch oven ensures even cooking and retains moisture. Let’s look at the essential setup steps to make your turkey perfect.
Oven Temperature
Set the oven to 325°F for slow, even cooking. This temperature helps keep the turkey juicy. Preheat the oven before placing the Dutch oven inside.
Using Coals Or Stovetop
Place coals on the lid for even heat distribution. If using a stovetop, maintain a medium heat. This ensures consistent cooking without burning.
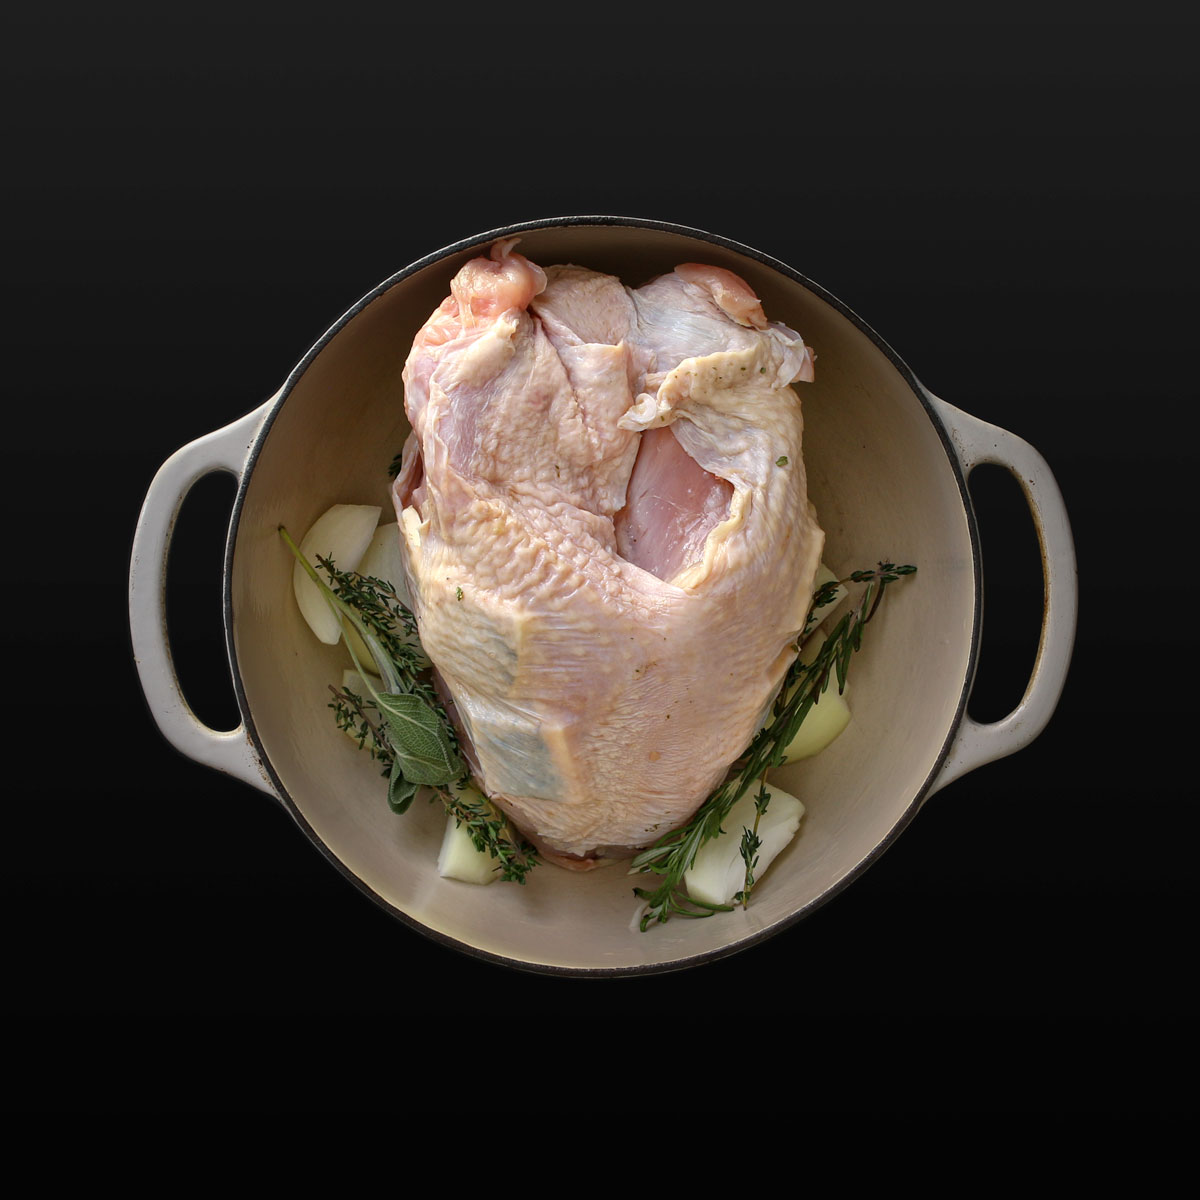
Positioning The Turkey
Place the turkey breast-side up in the Dutch oven. Ensure it fits snugly without touching the sides. This positioning allows the turkey to cook evenly. Use vegetables at the bottom to lift the turkey slightly. This prevents the turkey from sticking and adds flavor.
Cooking Process
Cooking a turkey in a Dutch oven creates a juicy, tender meal with a crispy skin. The process involves careful heat control and timing. This method locks in flavors and ensures even cooking. Follow these key steps to get perfect results every time.
Initial Searing
Start by heating the Dutch oven over medium-high heat. Add a small amount of oil to prevent sticking. Place the turkey breast-side down and sear each side for 3 to 5 minutes. This step creates a golden-brown crust. Searing helps seal in the juices and adds flavor.
Cooking Time Guidelines
After searing, reduce the heat to low or place the Dutch oven in a preheated oven at 325°F (163°C). Cooking time depends on the turkey’s weight.
- For a 10-pound turkey, cook for about 2.5 to 3 hours.
- For a 12-pound turkey, cook for 3 to 3.5 hours.
- For larger turkeys, add 15 minutes per extra pound.
Check the internal temperature with a meat thermometer. The turkey is safe when it reaches 165°F (74°C) in the thickest part of the thigh.
Basting Tips
Basting keeps the turkey moist and adds flavor. Use the juices collected in the Dutch oven. Baste every 30 minutes using a spoon or baster. Avoid opening the lid too often to keep the heat steady. Basting also helps the skin develop a nice, crispy texture.
Credit: cookthisagainmom.com
Checking Doneness
Checking the doneness of your turkey is essential to avoid undercooking or drying it out. Since cooking in a Dutch oven traps heat and moisture, the turkey can cook unevenly. Knowing how to check if your bird is perfectly done ensures a juicy and safe meal every time.
Using A Meat Thermometer
Insert a meat thermometer into the thickest part of the turkey’s thigh without touching the bone. The turkey is safe to eat when the temperature reaches 165°F (74°C). If you pull the thermometer out and the temperature is lower, put the turkey back in the Dutch oven and check again in 10-15 minutes.
Keep in mind that the thermometer gives you a precise reading, so relying on it can prevent guesswork. Have you ever cut into a turkey too early and found it undercooked? A quick thermometer check can save you from that disappointment.
Visual Indicators
Look for clear juices running from the turkey when you pierce the thigh with a fork or skewer. If the juices are pink or reddish, the turkey needs more time. The skin should be golden brown and crisp, but don’t rely on color alone to judge doneness.
Another sign is the leg’s ability to move easily when you wiggle it. If it feels stiff, the meat might still be tough or undercooked. These visual clues help confirm what the thermometer tells you.
Resting The Turkey
After removing the turkey from the Dutch oven, let it rest for at least 15-20 minutes. Resting allows the juices to redistribute, making the meat tender and juicy. Cutting into it too soon will cause the juices to run out, leaving the turkey dry.
Use this time to prepare your side dishes or set the table. Have you noticed how resting can transform even a simple turkey into a memorable centerpiece? It’s a small step that makes a big difference.
Serving Suggestions
Serving a turkey cooked in a Dutch oven is a special occasion that deserves thoughtful presentation. How you carve, what you serve alongside, and how you handle leftovers all shape the meal’s lasting impression. Let’s dive into practical ways to make your turkey feast memorable and hassle-free.
Carving Techniques
Carving your Dutch oven turkey doesn’t have to be intimidating. Start by letting the bird rest for at least 15 minutes; this keeps the juices inside, making each slice juicy and tender.
Use a sharp carving knife and remove the legs first by cutting through the joint where the thigh meets the body. Next, slice the breast meat in thin, even pieces against the grain to keep it tender.
Don’t discard the wings—they’re perfect for snacking or adding to a rich gravy. Have you tried offering guests a mix of dark and white meat slices? It lets everyone pick their favorite.
Side Dishes To Pair
Your Dutch oven turkey pairs beautifully with simple, comforting sides. Consider roasted root vegetables like carrots and parsnips, which complement the turkey’s savory flavor.
Another great choice is a fresh green salad with a light vinaigrette to add brightness and contrast. Don’t forget classic mashed potatoes or creamy stuffing to complete the plate.
Think about adding a tangy cranberry sauce or a herbed gravy to bring a burst of flavor. What side dishes do you usually crave with turkey? Trying something new could surprise your taste buds.
Storing Leftovers
Leftover turkey from your Dutch oven feast can make fantastic meals later. Slice or shred the meat and store it in airtight containers to keep it fresh for up to four days in the fridge.
If you want to freeze some, wrap the pieces tightly in foil or freezer bags to prevent freezer burn. Labeling the packages with dates helps you keep track.
Think about turning leftovers into sandwiches, soups, or casseroles. Have you ever tried turkey enchiladas or turkey pot pie? These ideas can turn your extra meat into exciting new dishes.
Credit: goodcheapeats.com
Troubleshooting Common Issues
Cooking a turkey in a Dutch oven can be incredibly rewarding, but sometimes things don’t go as planned. Knowing how to troubleshoot common issues will help you save your meal and impress your guests. Whether your turkey turns out dry, undercooked, or overcooked, there are practical fixes you can try right away.
Dry Turkey Fixes
If your turkey feels dry, don’t panic. One quick fix is to slice the meat thinly and serve it with a rich gravy or sauce. Adding moisture back in this way can transform dry slices into juicy bites.
Another tip is to shred the turkey and mix it with broth or a little butter before reheating. This method helps restore tenderness and flavor. Have you tried brining your turkey before cooking? It’s a great preventive step that keeps the meat moist from the start.
Undercooked Portions
Spotting undercooked turkey can be nerve-wracking, but there’s an easy way to finish cooking it safely. Return the Dutch oven to the stove or oven, cover it tightly, and cook on low heat until the internal temperature reaches 165°F (74°C).
If you’re short on time, cut the turkey into smaller pieces to speed up the cooking process. Always use a meat thermometer to check doneness—this tool is your best friend. Have you ever cut into your turkey too soon and faced this issue? Patience is key to perfect cooking.
Overcooked Turkey
Overcooked turkey often means tough, chewy meat, but you can still make it enjoyable. Try making turkey salad or sandwiches with plenty of mayo or a creamy dressing to soften the texture.
Another idea is to use the meat in soups or stews where it can simmer and absorb liquid, making it tender again. Remember, overcooking often results from cooking at too high a temperature, so monitoring heat closely next time can prevent this. What’s your favorite way to repurpose leftover turkey?
Frequently Asked Questions
How Long Does It Take To Cook A Turkey In A Dutch Oven?
Cooking a turkey in a Dutch oven takes about 3 to 4 hours. The exact time depends on the turkey’s size and oven temperature. Use a meat thermometer to ensure the internal temperature reaches 165°F for safe eating.
What Size Dutch Oven Is Best For Turkey Cooking?
Choose a Dutch oven large enough to fit your whole turkey comfortably. Typically, a 7 to 9-quart Dutch oven suits turkeys up to 12 pounds. This size ensures even cooking and enough space for added vegetables or herbs.
Can You Cook A Frozen Turkey In A Dutch Oven?
It is not recommended to cook a frozen turkey directly in a Dutch oven. Thaw the turkey completely before cooking to ensure even heat distribution and proper internal temperature, reducing food safety risks.
Should I Use Oil Or Butter When Cooking Turkey In A Dutch Oven?
Using butter or oil helps keep the turkey moist and adds flavor. Lightly coat the turkey with butter or oil before cooking. This prevents sticking and promotes a crispy, golden skin.
Conclusion
Cooking a turkey in a Dutch oven brings great flavor and tenderness. The process is simple and does not need fancy tools. You get juicy meat and crispy skin every time. This method works well for small to medium turkeys.
Try it for your next family meal or holiday. Enjoy the rich taste and easy cleanup. Cooking with a Dutch oven can make your turkey special and delicious. Give it a try, and your guests will be happy.