Cleaning a roasting pan can feel like a tough, messy job. You’ve just made a delicious meal, and now you face stubborn grease and burnt bits stuck to the pan.
But what if you could make this task easier and faster? You’ll discover simple, effective ways to clean your roasting pan so it looks almost new every time. Keep reading, and you’ll never dread scrubbing your pan again.

Credit: circulon.uk.com
Choosing The Right Cleaning Tools
Choosing the right tools makes cleaning a roasting pan easier and faster. The right scrubbers and cleaning solutions protect the pan’s surface. They help remove stuck-on food without damaging the pan. Using safe and effective tools saves time and effort.
Types Of Scrubbers And Sponges
Select scrubbers and sponges based on your pan’s material. Soft sponges work well for non-stick or coated pans. They clean gently without scratching. For stainless steel or cast iron pans, use scrubbers with more texture.
- Non-abrasive sponges for delicate surfaces
- Steel wool or wire brushes for tough stains on sturdy pans
- Silicone scrubbers that are reusable and gentle
- Scrubbing pads with a rough side for grease removal
Always avoid metal scrubbers on non-stick pans. They can ruin the coating and shorten the pan’s life.
Safe Cleaning Solutions
Use cleaning solutions that are strong but safe for your pan. Mild dish soap works well for most pans. It cuts grease without harsh chemicals. Baking soda is a natural cleaner and deodorizer.
- Mix baking soda with water to form a paste for scrubbing
- White vinegar helps break down burnt food and grease
- Commercial cleaners made for cookware are safe if used as directed
Avoid bleach or ammonia on your roasting pan. These chemicals can damage the pan’s finish and may be harmful to health.
Credit: circulon.uk.com
Prepping The Pan For Cleaning
Preparing your roasting pan for cleaning makes the process easier and faster. Start by addressing any stuck-on food and grease. This step prevents tough stains and helps protect the pan’s surface. Taking time to prep saves effort later and keeps your pan in great shape.
Soaking Techniques
Fill the pan with hot water to cover the burnt areas. Add a few drops of dish soap or a tablespoon of baking soda. Let it soak for at least 30 minutes. For stubborn stains, soak overnight. This softens the grime and loosens food particles. Avoid using boiling water on non-stick pans to protect their coating.
Removing Loose Debris
After soaking, use a plastic or wooden spatula to scrape off loose food bits. Be gentle to avoid scratching the pan. Rinse the pan with warm water to wash away debris. Use a soft sponge to wipe the surface lightly. Removing loose debris before scrubbing prevents spreading dirt and makes cleaning simpler.
Effective Cleaning Methods
Keeping your roasting pan spotless doesn't have to be a daunting task. There are simple, effective ways to tackle the mess without harsh chemicals or scrubbing endlessly. Let’s dive into some cleaning techniques that really work and can save you time and effort.
Using Baking Soda And Vinegar
Baking soda and vinegar create a natural fizz that helps break down baked-on food and grease. Sprinkle a generous layer of baking soda over the pan’s surface. Then, pour enough vinegar to cover the baking soda and watch it bubble.
Let the mixture sit for about 15 minutes. Afterward, scrub gently with a sponge or brush. This combo not only loosens grime but also deodorizes your pan, leaving it fresh and clean.
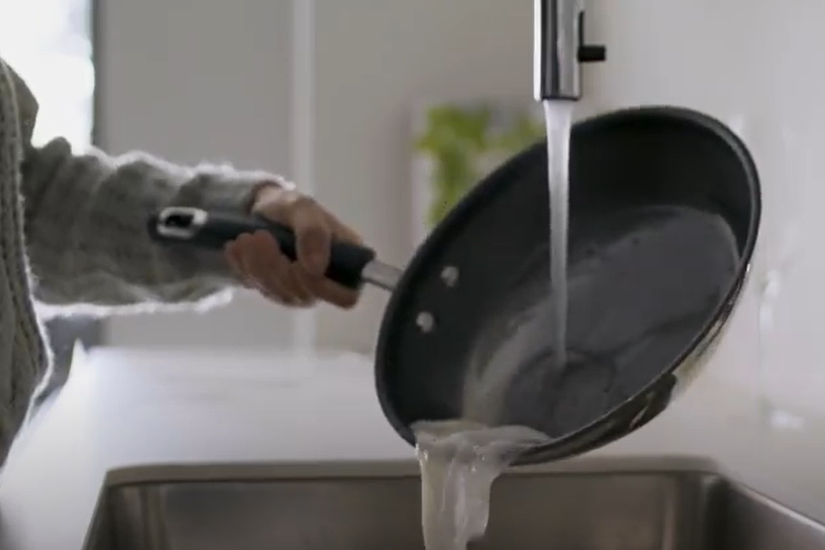
Applying Dish Soap And Hot Water
Sometimes, the simplest solution is the best. Fill your roasting pan with hot water and add a few drops of dish soap. Let it soak for at least 30 minutes to soften any stuck-on bits.
Use a non-abrasive scrubber to clean the pan, focusing on corners where residue hides. This method is gentle yet effective and works well if you clean your pan regularly.
Handling Stubborn Stains
Stubborn stains can test your patience. Try making a thick paste with baking soda and a small amount of water. Apply it directly to the stained areas and let it sit for an hour or more.
After soaking, scrub with a brush or sponge. For extra tough spots, add a bit of vinegar to the paste and repeat. Have you noticed how persistent stains often respond better to patience than brute force?
Cleaning Different Roasting Pan Materials
Different roasting pan materials need specific cleaning methods to avoid damage. Stainless steel can handle scrubbing, while nonstick pans require gentle washing. Cast iron should be cleaned carefully to keep its seasoning intact.
Cleaning different roasting pan materials requires specific care. Each type has unique cleaning needs. Knowing how to clean them ensures they last longer. Below are tips for various pan materials.
Stainless Steel Pans
Stainless steel pans are durable. They can handle tough cleaning. Start by soaking the pan in hot water. Add a few drops of dish soap. Let it sit for 30 minutes. Use a non-abrasive scrubber to remove stuck food. For stubborn stains, sprinkle baking soda. Scrub gently to avoid scratches. Rinse thoroughly and dry with a soft cloth.
Non-stick Pans
Non-stick pans need gentle care. Avoid metal scrubbers or steel wool. Fill the pan with warm water. Add mild dish soap. Let it soak for about 15 minutes. Use a soft sponge to clean. For burnt food, use a mixture of water and vinegar. Heat it in the pan for a few minutes. Rinse well and dry completely.
Enamel-coated Pans
Enamel-coated pans are stylish and delicate. Avoid harsh chemicals or abrasive tools. Soak the pan in warm soapy water. Use a soft cloth to clean the surface. For tough stains, make a paste of baking soda and water. Gently scrub the area. Rinse with clean water. Dry immediately to prevent water spots.
Drying And Maintaining Shine
After cleaning your roasting pan, drying it properly and maintaining its shine are crucial steps often overlooked. Neglecting these can lead to water spots, rust, or dullness that diminish your pan’s appearance and performance. Let’s dive into simple ways to keep your roasting pan looking its best after every use.
Proper Drying Techniques
Water left on your roasting pan can cause rust and stains. To avoid this, use a clean, soft towel to dry your pan immediately after washing. Don’t just air dry—this can leave spots and take longer to prevent moisture buildup.
If your pan has crevices or handles, use a microfiber cloth or paper towel to reach those tricky spots. You can even warm the pan slightly on the stove or in the oven (set to low heat) to help evaporate any remaining moisture. This quick trick ensures your pan is completely dry and ready for storage.
Polishing Tips
Want your roasting pan to shine like new? Polishing it regularly can restore its luster and protect the surface. Use a small amount of olive oil or a specialized metal polish to rub gently over the pan with a soft cloth.
Buff the surface in small circular motions until you see a gleaming finish. Avoid abrasive cleaners or steel wool—they can scratch and dull the metal. Instead, try natural options like baking soda paste for stubborn spots before polishing.
Have you noticed how a shiny roasting pan makes cooking more enjoyable? Taking a few extra minutes to polish transforms your kitchen tool and keeps it working beautifully for years.

Credit: food52.com
Preventing Future Stains
Preventing stains on your roasting pan saves time and effort later. Stains build up from burnt food and grease. Keeping the pan clean after each use helps avoid tough stains. Simple habits and protective tools keep your pan looking new.
Regular Cleaning Habits
Clean the pan right after cooking. Warm water and mild soap work best. Avoid letting food dry on the surface. Use a soft sponge to scrub gently. Rinse thoroughly to remove soap. Dry the pan completely before storing it.
Deep clean once a week if you use the pan often. Soak in warm soapy water for 30 minutes. Scrub with a non-abrasive pad to remove stuck bits. Repeat if necessary to keep the pan spotless.
Using Liners And Foil
Line the pan with aluminum foil or a baking liner. These protect the pan from direct contact with food. They catch drips and spills, making cleanup easier. After cooking, just lift the liner or foil out and toss it.
Reusable silicone liners also work well. They are easy to clean and eco-friendly. Using liners reduces the chance of burnt-on stains. This simple step keeps the roasting pan in good condition longer.
Frequently Asked Questions
How Do I Remove Burnt Food From A Roasting Pan?
Soak the pan in warm, soapy water for 30 minutes. Use a non-abrasive scrubber to gently remove burnt bits. Baking soda can help lift stubborn stains. Avoid harsh scrubbing to prevent damage. Rinse thoroughly and dry before storing.
What Is The Best Cleaner For Roasting Pans?
A mixture of baking soda and vinegar works well. It breaks down grease and baked-on food effectively. Avoid bleach or harsh chemicals that can damage your pan. For stainless steel pans, a gentle dish soap also works great.
Can I Clean A Roasting Pan In The Dishwasher?
Most roasting pans are dishwasher-safe, but check the manufacturer’s instructions first. Non-stick pans may lose coating in the dishwasher. Hand washing is usually better to maintain pan quality. Use a mild detergent and avoid high heat drying.
How Do I Prevent Roasting Pan Stains?
Line the pan with foil or parchment paper before cooking. Avoid high heat that can cause food to stick and burn. Clean the pan immediately after use to prevent residue buildup. Regular maintenance keeps the pan looking new longer.
Conclusion
Cleaning a roasting pan does not have to be hard. Use warm water and soap to soak stuck food. Scrub gently with a soft sponge or brush. Avoid harsh cleaners that can damage the pan. Dry the pan well to stop rust.
Regular cleaning keeps your pan ready for cooking. A clean pan helps your food taste better too. Try these simple steps after every use. You will save time and effort next time. Keep your roasting pan in great shape easily.