As an Amazon Associate, I earn from qualifying purchases.
Learning how to use a rice cooker is one of the easiest ways to get perfect rice every time. Measure, rinse, add water, press a button and walk away. The machine handles the heat and timing, and most models keep the rice warm until you are ready to eat.
That said, a few details make the difference between fluffy, separate grains and rice that is mushy or crunchy. This guide walks through the basic steps for any rice cooker, explains the common settings, covers water ratios for different types of rice, and shows what else you can cook in one.
How a Rice Cooker Works
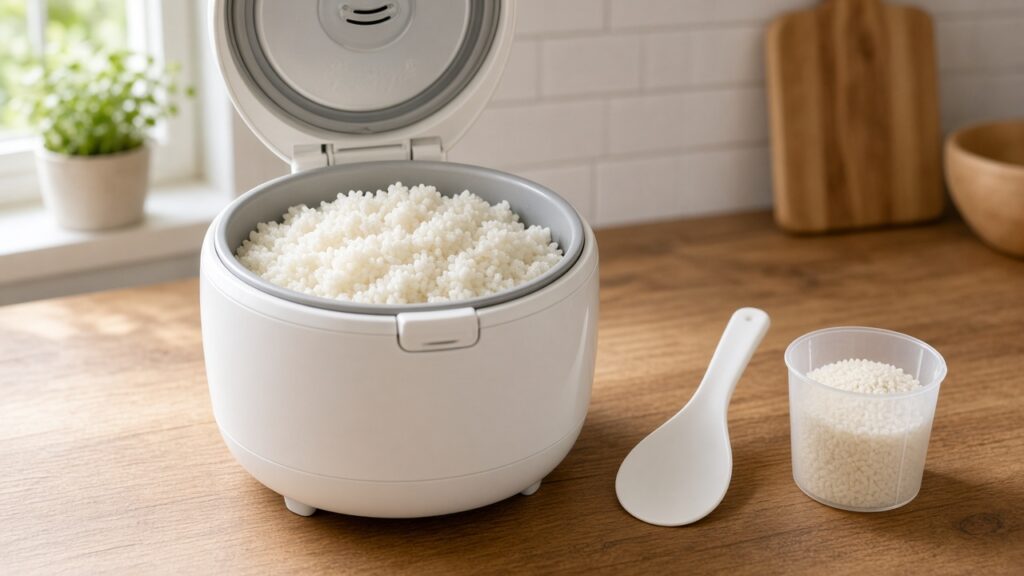
A basic rice cooker has a heating element, an inner pot and a thermostat. It heats the rice and water to a boil. As long as there is free water in the pot, the temperature stays around the boiling point of water. Once the rice absorbs all the water, the temperature starts to climb, the thermostat senses the change and the cooker switches to keep-warm mode.
More advanced "fuzzy logic" or microcomputer cookers use sensors and programmed cycles to adjust temperature and time during cooking. They often include presoaking and resting phases, which is why their cycles are longer.
What You Need
- A rice cooker with its inner pot
- The measuring cup that came with the cooker
- Rice
- Water
- A fine-mesh strainer or a bowl for rinsing
- A rice paddle
Important: The cup included with most rice cookers is smaller than a standard US measuring cup, usually about 180 ml, which is roughly 3/4 of a US cup. If your cooker came with one, use it for the rice and follow the water lines inside the pot, which are marked for that cup.
How to Use a Rice Cooker: Step by Step
- Measure the rice. Use the cooker's cup and level it off. Check your manual for the minimum amount; many full-size cookers work best with at least one or two cups of rice.
- Rinse the rice. Put the rice in a strainer or bowl and rinse under cool water, swishing with your hand, until the water runs mostly clear. This removes excess surface starch that can make rice gummy. You can rinse directly in the inner pot if the manufacturer allows, but avoid scraping a nonstick coating with metal utensils.
- Add the rice to the inner pot and spread it into an even layer.
- Add water. Fill to the line on the inner pot that matches the number of cups of rice and the type of rice, or use the ratios in the chart below.
- Wipe the outside of the pot dry and place it in the cooker. Water on the outside or bottom of the pot can affect heating.
- Close the lid and select the setting. On a basic model, press the cook switch. On a digital model, choose the rice type.
- Let it cook without opening the lid. Lifting the lid releases steam and can disrupt cooking.
- Let the rice rest. When the cooker switches to warm, leave the lid closed for about 10 to 15 minutes. This lets moisture distribute evenly through the grains.
- Fluff and serve. Use the rice paddle to gently fluff the rice from the bottom, cutting and folding rather than stirring.
Rice Cooker Water Ratios by Rice Type
If your cooker has water lines, follow those first. If not, use this chart as a starting point. Ratios are rice to water by volume using the same cup for both.
| Rice type | Rice to water ratio | Notes |
|---|---|---|
| White long grain | 1 : 1 1/2 | Rinse well |
| White jasmine | 1 : 1 1/4 to 1 1/2 | Rinse well |
| Basmati | 1 : 1 1/2 | Rinse; soaking 20 minutes helps |
| Short grain or sushi rice | 1 : 1 1/4 | Rinse until clear |
| Brown rice | 1 : 2 to 2 1/4 | Use brown rice setting if available |
| Wild rice blend | 1 : 2 1/2 to 3 | Check package |
| Quinoa | 1 : 2 | Rinse to remove bitterness |
Different brands, rice harvests and cooker designs vary, so adjust with an extra tablespoon or two of water for softer rice or less for firmer rice. Our detailed guide on how much rice to water in a rice cooker goes into ratios for every rice type.
Understanding Rice Cooker Settings
- White: The standard setting for white rice.
- Brown: A longer cycle with soaking for tougher brown rice bran.
- Quick cook: Shortens the cycle, sometimes at the expense of texture.
- Sushi or short grain: Optimized for stickier, glossy rice.
- Porridge or congee: Uses more water and a gentle, long cycle.
- Steam: Boils water to steam vegetables or proteins in a basket.
- Keep warm: Holds cooked rice at a safe serving temperature.
- Delay timer: Lets you schedule when the rice will finish.
If you have an Aroma cooker, see our brand-specific guide on how to cook rice in an Aroma rice cooker.
Tips for Perfect Rice Every Time
- Always rinse white rice unless the package specifically says not to, such as some enriched rice.
- Do not open the lid while it is cooking.
- Let it rest after the cycle finishes.
- Add flavor with a pinch of salt, a pat of butter, or by replacing part of the water with broth.
- Avoid overfilling. Do not cook more than the maximum line on the pot.
- Use the right cup for both rice and water to keep the ratio correct.
Other Foods You Can Cook in a Rice Cooker
A rice cooker is more versatile than its name suggests:
- Oatmeal. Steel-cut oats cook well on a porridge setting. Our guide on how to cook steel cut oatmeal in a rice cooker explains the method.
- Quinoa, farro and other grains.
- Steamed vegetables in the steaming basket while rice cooks below.
- Simple one-pot meals, such as rice with vegetables and seasonings.
- Congee with the porridge setting.
How to Clean a Rice Cooker
- Unplug the cooker and let it cool.
- Remove the inner pot and wash it with warm, soapy water and a soft sponge. Avoid abrasive pads on nonstick coatings.
- Wash removable lids, steam vents and the condensation collector if your model has them.
- Wipe the interior and heating plate with a damp cloth. Never immerse the main unit in water.
- Dry everything completely before reassembling.
Choosing a Rice Cooker
Basic on/off rice cookers are affordable and reliable for white rice. Fuzzy logic models cost more but handle brown rice, sushi rice and porridge with more precision and often keep rice warm longer without drying it out. For small kitchens, dorms or travel, a compact 3-cup model is enough. Our guide to the best mini rice cooker for travel covers small options.
You can compare models in a search for fuzzy logic rice cookers. Check price on Amazon. For simple everyday use, a basic rice cooker with steamer basket is often enough. Check price on Amazon.
Food Safety for Cooked Rice
Cooked rice should not sit at room temperature for long. Bacteria spores that survive cooking can grow if rice cools slowly. Serve rice hot or refrigerate leftovers promptly, ideally within an hour or two, and reheat until steaming hot. Many manufacturers recommend not leaving rice on keep-warm for extended periods, so check your manual for limits.
Frequently Asked Questions
Do you put water or rice in the rice cooker first?
Rice first. Rinse the rice, add it to the pot, then add water to the correct line. This makes it easier to measure accurately.
How long does a rice cooker take?
Basic cookers often take about 20 to 30 minutes for white rice. Fuzzy logic models can take 40 minutes to an hour, especially for brown rice, because they include soaking and resting stages.
Why is my rice mushy in the rice cooker?
Too much water, not rinsing off excess starch, or stirring the rice too vigorously after cooking can make it mushy. Reduce the water slightly and fluff gently.
Why is my rice crunchy?
Usually not enough water or opening the lid during cooking. Add a little more water next time and let the rice rest after the cycle finishes.
Can you cook less than one cup of rice in a rice cooker?
Most full-size cookers do not do well with very small amounts. Check your manual for the minimum, or use a mini cooker for single servings.
Final Thoughts
Once you know how to use a rice cooker, it becomes one of the most reliable tools in your kitchen. Measure with the right cup, rinse the rice, follow the water lines or ratio chart, keep the lid closed and let the rice rest before fluffing. From jasmine to brown rice to oatmeal, your rice cooker can handle much more than one simple side dish.