Do you want to enjoy fresh, cold ice without any hassle? Turning on the ice maker in your GE bottom freezer might seem tricky at first, but it’s easier than you think.
If you’re ready to have ice whenever you need it, this guide will walk you through the simple steps to get your ice maker up and running quickly. Keep reading, and you’ll never have to worry about running out of ice again!

Credit: www.dtappliance.com
Locate The Ice Maker
Locating the ice maker in your GE bottom freezer is the first step to getting it up and running. Knowing exactly where it sits saves you time and effort, especially if you’re new to this type of fridge. Let’s break down how to find it quickly and easily.
Identify The Bottom Freezer Model
Start by checking your refrigerator’s model number. You can usually find it inside the fridge, on the walls or near the door frame. This number helps you confirm that you have a bottom freezer model and allows you to look up the exact layout if needed.
Different models might place the ice maker in slightly different spots. Some have it built into the freezer drawer itself, while others position it on the side wall. Knowing your model helps avoid unnecessary searching or confusion.
Find The Ice Maker Compartment
Once you know your model, open the bottom freezer drawer fully. Look towards the back or side walls for a small compartment or a plastic bin. The ice maker usually sits here, complete with a water line and a small control arm or switch.
If you don’t see it immediately, check for a removable panel or cover. Some models hide the ice maker behind these to keep it protected. Remember, the ice bin is often near the top of the freezer drawer, making it easy to access and refill.
Have you noticed any unusual sounds or leaks near this area before? That can be a sign the ice maker is working or needs attention. Locating it accurately helps you monitor these signs better and maintain your fridge efficiently.
Prepare The Ice Maker
Preparing the ice maker in your GE bottom freezer ensures it works efficiently. This step is essential before turning on the ice maker. Proper preparation helps avoid common issues like no ice production or leaks.
Check The Water Supply
Verify that the water supply line is connected to the ice maker. The line must be free from kinks or damage. Make sure the water valve is fully open to allow water flow. Use clean, cold water for the best ice quality. Inspect for leaks around the connection points.
Ensure Proper Connection
Confirm that the ice maker is securely plugged into the power outlet. The electrical connection must be stable and free from damage. Check the ice maker’s switch or lever is in the "on" position. Look for any indicator lights that signal readiness. Proper connection ensures the ice maker runs smoothly.
Power On The Ice Maker
Powering on the ice maker in your GE bottom freezer is simple. It ensures you get fresh ice anytime. Understanding how to activate it helps avoid common issues. The ice maker can be turned on using different controls depending on the model. Follow clear steps to start making ice without hassle.
Use The Control Panel
Most GE bottom freezers have a control panel inside or on the door. This panel lets you manage the ice maker easily. To power on, locate the ice maker button or icon. Press it once to start the ice-making process. A light or symbol will show that the ice maker is active. This method is quick and requires no extra tools.
Manual On/off Switch
Some models include a manual switch inside the freezer compartment. Open the freezer and find the ice maker unit. Look for a small switch or lever labeled “On/Off.” Flip the switch to the “On” position to power the ice maker. This switch controls the water flow and ice production. It is a direct and reliable way to turn on the ice maker.

Credit: www.youtube.com
Adjust Ice Maker Settings
Adjusting the ice maker settings on your GE bottom freezer can enhance your ice-making experience. These settings allow you to customize the size and type of ice cubes, catering to your preferences and needs. Taking a moment to fine-tune these options can make a noticeable difference in your daily use.
Set Ice Cube Size
Choosing the right ice cube size is simpler than you might think. Many GE models let you select from small, medium, or large ice cubes. This option helps you control how quickly the ice melts and how much space it takes in your glass.
If you prefer drinks that chill fast without diluting, smaller cubes might suit you best. On the other hand, large cubes last longer and are perfect for cocktails or slow-sipping beverages. Have you noticed how different ice sizes affect your drink's taste and temperature?
Select Ice Type If Available
Some GE bottom freezers offer the ability to choose the type of ice your machine produces. Options might include crushed ice or cubed ice, depending on your model. This feature adds versatility, especially if you enjoy smoothies or cocktails requiring crushed ice.
Using crushed ice can also cool drinks faster and create a different texture experience. If your model includes this setting, try switching between types and see which fits your lifestyle better. Do you find one ice type more useful than the other in your daily routine?
Troubleshoot Common Issues
Check the ice maker’s power switch and ensure it is turned on. Clear any ice blockages that may stop the machine from working. Adjust the freezer temperature to the recommended setting for proper ice production.
Turning on your GE bottom freezer ice maker can sometimes be tricky. Common issues may arise during the process. Troubleshooting these problems can save you time and frustration. Let’s explore some solutions to these frequent issues.
Ice Maker Not Turning On
Check if the ice maker is properly connected to power. Ensure the switch is in the "On" position. Verify the power cord is plugged in securely. Inspect the circuit breaker to see if it has tripped. Reset it if necessary.
No Ice Production
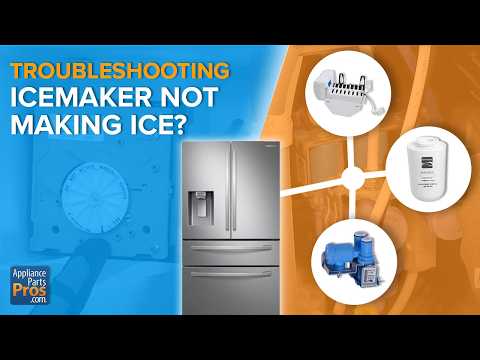
Make sure the water supply line is not kinked. Ensure the water valve is open. Inspect the ice maker's water filter. Replace it if it is clogged. Check the ice maker arm. It should be in the down position.
Water Leakage
Inspect the water supply line for any leaks. Tighten connections if loose. Examine the ice maker's water inlet valve. Replace it if malfunctioning. Check the freezer's drainage system. Clean any blockages you find.
Maintain Your Ice Maker
Maintaining your GE bottom freezer ice maker ensures it works well and lasts longer. Proper care prevents ice buildup and bad tastes. Simple habits keep your ice fresh and your machine running smoothly.
Regular attention helps avoid common problems like clogs or leaks. Clean parts and timely filter changes make a big difference.
Regular Cleaning Tips
- Turn off the ice maker before cleaning.
- Remove ice bin and empty all ice cubes.
- Use warm water and mild soap to clean the bin.
- Wipe the ice maker interior with a soft cloth.
- Check for ice clumps or frost build-up and remove gently.
- Dry all parts thoroughly before reassembling.
- Clean the ice maker every 3 months for best results.
Filter Replacement Schedule
Replace the water filter every 6 months or as recommended. A clean filter improves water taste and ice quality.
Check your user manual for the exact filter model and instructions. Some models have a filter indicator light to remind you.
Always use genuine GE filters to ensure proper fit and performance.
Credit: www.appliancerepairfortlauderdalefl.net
Frequently Asked Questions
How Do I Turn On The Ice Maker In Ge Bottom Freezer?
Locate the ice maker switch inside the freezer compartment. Flip the switch to the "On" position. Wait a few hours for ice production to start.
Where Is The Ice Maker Switch In Ge Bottom Freezer?
The switch is usually on the freezer's back wall or near the ice maker unit. Check your user manual for exact location.
Why Is My Ge Bottom Freezer Ice Maker Not Working?
Common issues include a turned-off switch, water supply problems, or a clogged water line. Check these first to troubleshoot.
How Long Does Ge Ice Maker Take To Make Ice?
Typically, it takes about 24 hours for the first batch of ice to form after turning it on.
Conclusion
Turning on your GE bottom freezer ice maker is simple and quick. Follow the steps carefully to avoid any issues. Make sure the water supply is connected and the switch is set to "on. " Regular checks keep ice coming smoothly.
Enjoy fresh ice anytime without hassle. This small task saves time and adds convenience to your daily routine. Now, your ice maker is ready to use. Easy, right?