Imagine having fresh, cold draft beer right in your home, ready whenever you want a perfect pour. Turning your mini fridge into a kegerator can make that dream a reality.
You don’t need to spend a fortune or buy a bulky appliance. With a few simple steps, your small fridge can become the ultimate beer dispenser. Ready to impress your friends and enjoy bar-quality beer at home? Keep reading, and I’ll show you exactly how to do it.
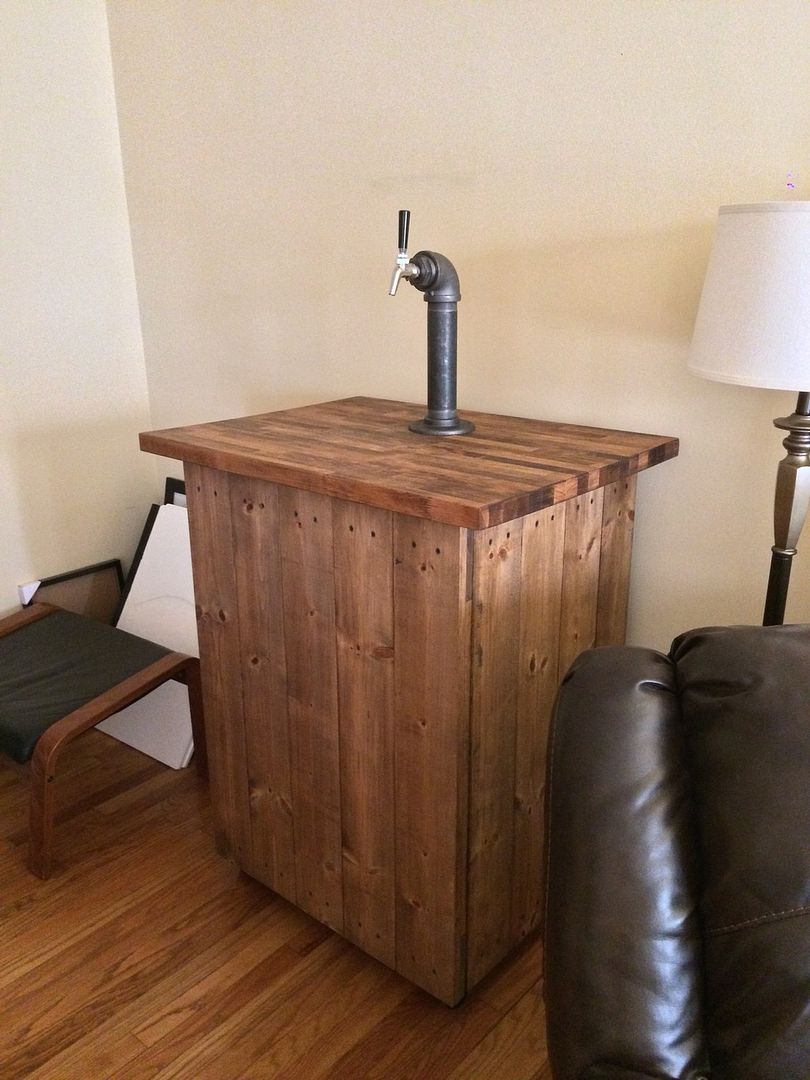
Credit: www.homebrewtalk.com
Choosing The Right Mini Fridge
Choosing the right mini fridge is the foundation for creating a great kegerator. The fridge you pick will affect how well your draft system works and how much beer you can store. Think about your space, how many kegs you want to keep, and the kind of cooling you need before making a decision.
Size And Capacity
Size matters more than you might think. You need a mini fridge that can comfortably fit a keg or two along with the necessary hardware like taps and CO2 tanks.
Measure your keg size first—most standard kegs require at least 19 inches in diameter and about 23 inches in height. If you want to store multiple kegs, look for wider or taller models.
Also, check the internal layout. Some fridges have removable shelves, which can give you more flexibility when fitting your equipment. Have you considered how often you’ll entertain and how much beer you want ready to serve?
Cooling System Types
Mini fridges come with different cooling systems, mainly compressor-based or thermoelectric. Compressor fridges are powerful and maintain consistent cold temperatures even in warmer rooms.
Thermoelectric coolers are quieter and use less energy but usually don’t get as cold and struggle in hot environments. If you live in a warm area or plan to keep your kegerator in a garage, a compressor fridge is a safer bet.
Think about where you’ll place your kegerator and how important noise is to you. Would a quiet fridge make your space more enjoyable?
Energy Efficiency
Energy efficiency is often overlooked but can save you money and hassle over time. Look for mini fridges with good insulation and Energy Star ratings.
Efficient fridges use less power to maintain the right temperature, which is crucial if your kegerator runs 24/7. Also, an energy-efficient fridge reduces the risk of overheating your beer, keeping the taste just right.
Have you checked your electricity costs lately? Investing in an efficient model might seem costly upfront but pays off quickly in utility savings.

Credit: www.youtube.com
Gathering Essential Tools And Materials
Gathering the right tools and materials is key for turning a mini fridge into a kegerator. Having everything ready makes the process smooth and efficient. Each item plays a role in building a functional kegerator that keeps your beer fresh and cold.
Start by understanding the parts you need. Focus on quality to ensure durability and performance. This section covers essential items to collect before starting your project.
Kegerator Conversion Kits
Kegerator conversion kits include most necessary parts for the build. They often contain taps, shanks, and mounting hardware. Buying a kit saves time and ensures compatibility between parts. Choose a kit that fits your mini fridge size and style.
Drill And Hole Saw
A drill and hole saw are vital for installing taps on the fridge door. The hole saw size depends on your tap’s diameter. Use sharp drill bits for clean cuts. Safety goggles protect your eyes from flying debris during drilling.
Co2 Tank And Regulator
The CO2 tank keeps beer fresh and carbonated. The regulator controls gas flow to maintain proper pressure. Pick a tank size suitable for your beer consumption. Make sure the regulator fits your CO2 tank and keg system.
Beer Kegs And Faucets
Choose beer kegs that match your preferred size and beer type. Cornelius kegs are popular for home use. Faucets control beer flow and pour speed. Select faucets designed for kegerator use to avoid leaks and foaming.
Preparing The Mini Fridge
Preparing the mini fridge is the first step to creating your own kegerator. This stage ensures the fridge is ready to hold the keg and dispense beer smoothly. Taking time here helps avoid problems later. The fridge must be cleared, clean, and planned carefully for taps. Each part must fit and work well with the keg system. Follow these key steps to get started.
Removing Shelves And Components
Start by unplugging the mini fridge for safety. Remove all shelves and trays inside. These parts take up space needed for the keg. Check for screws or clips that hold shelves in place. Keep these parts in case you want to restore the fridge later. Removing components creates a clear, open area inside the fridge. This space allows the keg to fit comfortably and keeps the cooling effective.
Cleaning And Sanitizing
Clean the inside of the fridge thoroughly. Use warm water and mild soap to wipe all surfaces. Avoid harsh chemicals that might leave bad smells. After cleaning, rinse with clean water. Next, sanitize the fridge with a food-safe sanitizer. This step kills bacteria and prevents beer contamination. Dry the inside completely before moving to the next step. A clean fridge keeps your beer fresh and tasty.
Planning Tap Placement
Decide where to place the tap on the mini fridge. The best spot is usually on the fridge door or top. Measure carefully to fit the tap system and lines. Keep the tap at a comfortable height for pouring. Make sure the fridge door can close tightly after installation. Mark the drilling points lightly with a pencil. Proper planning avoids leaks and keeps the fridge cold. This step is key for easy, smooth beer dispensing.
Installing The Tap System
Drill a hole on the fridge door to fit the tap system securely. Attach the faucet and connect it to the beer line for smooth pouring. Seal all openings to keep the fridge cold and prevent leaks.
Installing a tap system transforms a mini fridge into a kegerator. This process is rewarding and straightforward. Begin by gathering the necessary tools and components. You'll need a drill, a hole saw, a faucet, a tower, and beer lines. Follow the steps below to ensure a smooth installation.
Drilling The Tap Hole
Choose the right spot on the fridge. Avoid hitting cooling lines. Mark the location with a pencil. Use a drill with a hole saw attachment. Create a hole that fits the tower. This step is crucial for a snug fit. Clean the edges to avoid sharp metal.
Mounting The Faucet And Tower
Position the tower over the drilled hole. Align it properly to ensure a straight pour. Secure the tower with screws. Use a screwdriver for a tight fit. Attach the faucet to the tower. Ensure it is firmly in place. This setup is essential for easy dispensing.
Connecting The Beer Lines
Locate the keg inside the fridge. Attach the beer line to the keg's tap. Secure it tightly to prevent leaks. Connect the other end to the faucet. Ensure a snug fit for smooth flow. Check all connections for any loose fittings. This ensures a hassle-free beer experience.
Setting Up The Co2 System
Setting up the CO2 system is key to turning your mini fridge into a kegerator. It controls the pressure that pushes beer from the keg to the tap. Proper setup ensures fresh, bubbly beer every time.
Follow simple steps to install and adjust the CO2 system for best results. Safety and accuracy matter a lot in this process.
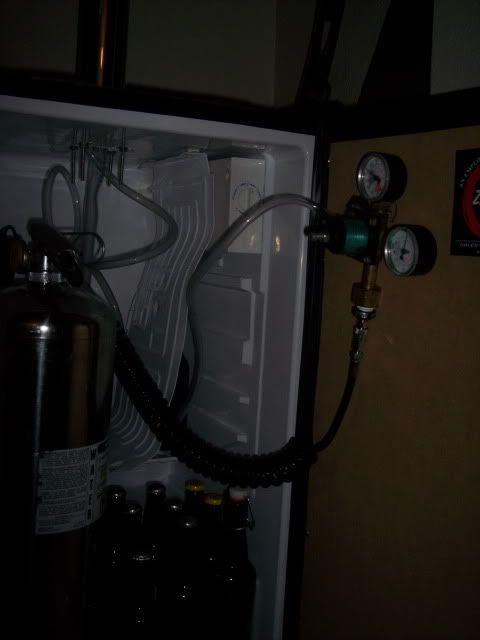
Installing The Co2 Tank
Place the CO2 tank in a secure spot near the mini fridge. Keep it upright to prevent leaks. Use a tank clamp or bracket to hold it firmly.
Check the tank valve for any dust or damage before use. Open the valve slowly to avoid sudden pressure bursts.
Attaching The Regulator
Connect the regulator to the CO2 tank valve carefully. Hand-tighten the connection first, then use a wrench for a snug fit. Avoid over-tightening to prevent damage.
The regulator controls gas flow from the tank. Make sure its gauges are visible and not blocked.
Adjusting Pressure Settings
Set the regulator’s pressure to match your beer type, usually between 10 and 14 PSI. Too high pressure causes foamy beer; too low leads to flat beer.
Turn the adjustment knob slowly while watching the pressure gauge. Test the beer flow from the tap to find the ideal setting.
Final Testing And Troubleshooting
Final testing and troubleshooting are key to a successful kegerator conversion. This stage ensures your setup works perfectly and avoids any issues during use. Take your time to check every part carefully. Proper testing guarantees a smooth pour and fresh, cold beer every time.
Checking For Leaks
Leaks can waste beer and cause pressure problems. Inspect all connections, hoses, and fittings closely. Use soapy water on joints and look for bubbles. Bubbles mean a leak is present. Tighten fittings or replace faulty parts to stop leaks. Repeat the test until no bubbles appear. This step is crucial for safety and performance.
Ensuring Proper Cooling
The mini fridge must keep the beer cold enough. Set the thermostat to about 36-38°F (2-3°C). Use a thermometer inside the fridge to confirm the temperature. Check the cooling for several hours. If the fridge does not reach the right temperature, adjust settings or improve ventilation. Proper cooling protects beer taste and foam quality.
Pouring The First Beer
Pour a test beer to check the system’s flow. Open the tap slowly to avoid too much foam. The beer should flow smoothly and cold. If the foam is too thick, adjust the pressure regulator. A steady, clear pour means your kegerator is ready. Enjoy your first glass and celebrate your work!
Maintenance Tips For Longevity
Keeping your mini fridge kegerator in top shape ensures it serves you well for years. Regular upkeep not only extends the life of your setup but also guarantees every pour tastes fresh and delicious. Let’s dive into the key maintenance tasks you shouldn’t overlook.
Regular Cleaning
Cleaning your kegerator isn’t just about appearances—it’s crucial for hygiene and taste. Residue from beer lines and taps can build up quickly, causing off-flavors and clogging. Aim to clean the beer lines and taps every two weeks using a suitable cleaning solution to keep every sip crisp.
Don’t forget to wipe down the interior and exterior surfaces of your mini fridge regularly. This prevents mold and keeps the appliance running smoothly. Have you noticed any sticky spots or unusual smells? That’s your cue to clean immediately.
Replacing Co2 Tanks
Your CO2 tank powers the flow of beer, so it’s vital to monitor its pressure and refill it before it runs out. Running low on CO2 can lead to flat beer and inconsistent pours. Keep a spare tank on hand to avoid interruptions during your next gathering.
Check the regulator and hoses for leaks or damage every time you replace the tank. Even a small leak wastes gas and can affect carbonation. How often have you checked your connections recently?
Monitoring Temperature
Temperature control is key to preserving beer quality. Your mini fridge should ideally stay between 34°F and 38°F for optimal taste. Use a separate thermometer to double-check the built-in thermostat’s accuracy since even slight deviations can impact flavor.
Adjust the temperature as seasons change to maintain a consistent chill. Too cold, and you risk freezing; too warm, and your beer may spoil faster. Are you paying attention to temperature shifts in your setup?
Credit: www.homebrewtalk.com
Frequently Asked Questions
How Do I Convert A Mini Fridge Into A Kegerator?
To convert a mini fridge into a kegerator, install a tap tower and CO2 tank. Modify the fridge door for the faucet. Ensure proper ventilation and temperature control for optimal beer storage and dispensing.
What Tools Are Needed To Make A Mini Fridge Kegerator?
You need a drill, wrench, screwdriver, and hole saw. Also, get CO2 tank, regulator, beer lines, and tap faucet. Safety gear is recommended during installation for a smooth conversion.
Can Any Mini Fridge Be Turned Into A Kegerator?
Most mini fridges can be converted, but size matters. Ensure the fridge fits your kegs and CO2 system. Larger mini fridges offer better space and temperature control for kegerator use.
How Do I Maintain The Mini Fridge Kegerator?
Clean the beer lines regularly to prevent clogs. Check CO2 levels and refill when needed. Keep the fridge temperature between 34-38°F for fresh beer. Regular maintenance ensures great taste and system longevity.
Conclusion
Turning a mini fridge into a kegerator is a fun project anyone can try. It saves money and adds convenience to your home. You get fresh, cold beer anytime without buying bottles. Just follow the steps carefully and take your time.
Soon, you will enjoy draft beer right from your fridge. Small changes make a big difference. Start building your kegerator today and enjoy the results. Simple, useful, and satisfying.