If you’re serious about preserving food safely, knowing how to sterilize mason jar lids is a must. Using lids that aren’t properly sterilized can spoil your hard work and even pose health risks.
But don’t worry—sterilizing your lids is easier than you might think. You’ll discover simple, step-by-step methods to make sure your lids are clean and ready for canning. Keep reading to protect your preserves and enjoy your homemade goods with confidence.
Why Sterilize Mason Jar Lids
Sterilizing mason jar lids is an essential step in home canning. It helps keep your preserved food safe and fresh. Without sterilization, harmful bacteria can grow and spoil your jars. Proper cleaning of lids ensures your canned goods stay tasty and last longer.
Preventing Contamination
Bacteria and mold can hide on jar lids. Sterilizing kills these germs before sealing your jars. This stops contamination that can ruin your food. Clean lids create a safe environment inside the jar.
Ensuring Food Safety
Food safety is a top priority in canning. Sterilized lids reduce the risk of foodborne illnesses. They prevent harmful microbes from entering the jar. This step protects your health and your family’s well-being.
Extending Shelf Life
Sterilized lids help keep food fresh for longer. They create a tight seal that blocks air and bacteria. This slows down spoilage and preserves flavor. Your homemade goods can last months or even years.
Tools Needed For Sterilization
Sterilizing mason jar lids requires specific tools to ensure safety and cleanliness. Having the right supplies helps prevent contamination. It also makes the process easier and more effective.
This section highlights the essential and optional tools needed. These tools prepare lids for safe food storage and preservation.
Essential Supplies
- Clean mason jar lids with sealing rings
- Large pot or canning kettle for boiling
- Tongs or jar lifter to handle hot lids
- Clean kitchen towels or drying rack
- Water for boiling and rinsing
Optional Equipment
- Dishwasher with a sanitize cycle
- Pressure cooker for faster sterilization
- Small brush to scrub lids gently
- Heat-resistant gloves for safe handling
- Thermometer to check water temperature
Preparing Lids For Sterilization
Preparing mason jar lids for sterilization is a key step to ensure your canned goods stay safe and fresh. Clean lids prevent contamination and help seals form tightly. Careful preparation also extends the life of your lids and preserves their sealing ability.
Start with a thorough cleaning to remove any dirt, dust, or residue. Then, inspect each lid closely to catch any defects or damage. Proper preparation helps you avoid problems during the canning process.
Cleaning Before Sterilizing
Rinse lids under warm running water to remove loose debris. Use a mild dish soap and a soft sponge to clean them gently. Avoid harsh scrubbing that can damage the sealing surface. Rinse thoroughly to remove all soap traces.
Place the lids on a clean towel to air dry. Avoid using cloth towels that may leave fibers on the lids. Clean lids improve sterilization and ensure a proper seal.
Inspecting For Damage
Check each lid for dents, rust, or warping. A damaged lid may not seal correctly, risking spoilage. Look closely at the rubber sealing ring inside the lid. It should be intact and flexible.
Discard any lids showing signs of damage or wear. Using only perfect lids helps maintain food safety during storage. Always inspect lids before sterilizing to ensure the best results.
Credit: www.foodnetwork.com
Boiling Method
Place mason jar lids in boiling water for 10 minutes to kill bacteria and germs. Use tongs to remove lids carefully and let them dry on a clean towel. This simple step ensures safe and clean lids for canning.
Sterilizing mason jar lids is crucial for successful canning, and the boiling method is a tried-and-true approach. It’s simple, effective, and can be done with minimal equipment. When you use the boiling method, you ensure that your lids are free from bacteria, yeast, and molds that could spoil your preserves.
Step-by-step Process
Start by placing a large pot on your stove and filling it with water. Make sure there’s enough water to cover the lids completely. Heat the water until it reaches a rolling boil. Once boiling, carefully add the mason jar lids using tongs to avoid burns. Allow the lids to boil for about 10 minutes. This timeframe is usually sufficient to achieve effective sterilization. Once done, use the tongs to remove the lids and place them on a clean towel to air dry. Avoid touching the inside of the lids to maintain their sterility.
Tips For Best Results
- Use Clean Equipment: Ensure the pot and tongs are clean before you start. This prevents any contaminants from getting on the lids. - Monitor the Time: Boiling for too long can damage the sealing compound on the lids. Stick to the 10-minute guideline for optimal results. - Drying Surface: Use a freshly laundered towel as your drying surface. It minimizes the risk of contamination post-boil. Have you ever wondered how one small oversight could affect your entire batch of canned goods? Ensuring the lids are properly sterilized is a small step that makes a big difference. By boiling your mason jar lids, you enhance the safety and longevity of your homemade preserves. Remember, attention to detail is key in preserving the quality of your efforts.
Oven Method
The oven method is a reliable way to sterilize mason jar lids, especially if you have a large batch to prepare. It uses dry heat to kill any bacteria or mold that might be lingering on your lids. This technique is straightforward and frees up stove space, which is handy during busy canning sessions.
Safe Temperature Settings
Set your oven to a temperature between 220°F and 250°F (104°C to 121°C). This range is hot enough to sterilize without damaging the lids or their sealing compound. Avoid higher temperatures; they can warp the metal or ruin the rubber seal, making your jars less effective for preserving.
Have you checked the manufacturer’s instructions on your lids? Some brands specify maximum heat limits, so it’s smart to follow those guidelines to keep your lids in top shape.
Duration And Monitoring
Place the lids on a clean baking sheet and heat them in the oven for about 10 to 15 minutes. This duration ensures thorough sterilization while preventing overheating. Keep an eye on them to catch any signs of warping or discoloration early.
After removing the lids from the oven, let them cool on a clean towel or rack. Never touch the sterilized side to avoid contamination. This careful handling maintains the sterility you worked hard to achieve.
Credit: www.creatingwithnicole.com
Microwave Method
The microwave method offers a quick way to sterilize mason jar lids. It uses steam to kill germs without harsh chemicals. This technique saves time and energy, making it ideal for busy crafters and canners. Knowing the right steps ensures your lids stay clean and safe.
Using A Microwave-safe Container
Place the mason jar lids in a microwave-safe container. Add about one inch of water to the container. The water creates steam that sterilizes the lids. Cover the container loosely with a microwave-safe lid or plastic wrap. This keeps the steam inside without causing pressure build-up.
Timing And Precautions
Microwave on high for about 2 to 3 minutes. Watch for steam escaping from the container. Use oven mitts to remove the hot container carefully. Let the lids cool inside the container before handling. Avoid microwaving metal lids directly to prevent sparks. Always check lids for damage before reuse.
Using Sterilizing Solutions
Using sterilizing solutions is a reliable way to ensure your mason jar lids are free from harmful bacteria before sealing your preserves. These solutions are designed to kill germs quickly without damaging the metal or rubber seals. Choosing the right solution and applying it properly can save your homemade goods from spoilage.
Types Of Solutions
- Bleach Solution:A common choice is a diluted bleach mix—typically one tablespoon of unscented bleach per gallon of water. It’s affordable and effective but needs thorough rinsing.
- Commercial Sterilizers:Products like Star San are popular among home canners. They work fast, don’t require rinsing, and are food-safe when used as directed.
- Hydrogen Peroxide:A gentle option that kills bacteria without harsh chemicals. However, it requires longer contact time and rinsing before use.
- Vinegar Solution:Though less powerful against all bacteria, a strong vinegar soak can help reduce microbial presence and is easy to find at home.
Application Instructions
Start by preparing your chosen sterilizing solution according to the instructions. Make sure the solution covers the entire lid, including the rubber seal, to ensure full sterilization.
Soak the lids for at least 2 minutes. Some commercial solutions require less time, so check the product label carefully.
After soaking, rinse the lids with clean, boiled water if the solution calls for it. Avoid touching the inside or rubber seal with your hands to keep them sterile.
Place the sterilized lids on a clean towel or drying rack. Use them immediately to prevent contamination. Have you ever experienced jars spoiling despite careful sealing? Using the right sterilizing solution could be the missing step.
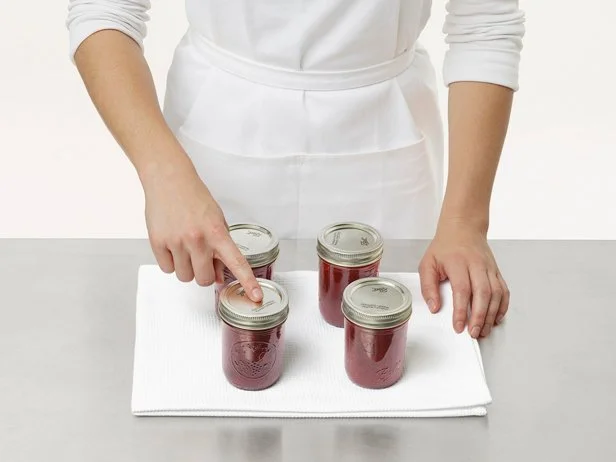
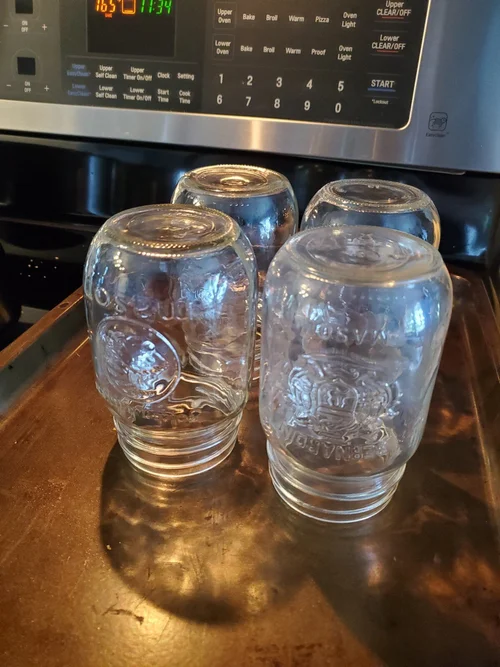
Drying And Storing Sterilized Lids
After sterilizing your mason jar lids, drying and storing them correctly is crucial to maintain their cleanliness and ensure they are ready for your next canning session. Moisture left on lids can lead to rust or contamination, which defeats the purpose of sterilizing. Let’s dive into practical ways to air dry and store your lids safely.
Air Drying Tips
Place your sterilized lids on a clean, dry kitchen towel or a wire rack. This allows air to circulate around them, helping water evaporate quickly. Avoid using paper towels, as they can leave fibers on the lids.
Keep the lids spaced apart to prevent trapping moisture between them. If you’re in a humid environment, consider using a fan nearby to speed up drying. Have you noticed how quickly lids dry when you give them room to breathe?
Proper Storage Techniques
Once dry, store your lids in a dry, cool place to prevent rust and contamination. Use a clean, airtight container or a resealable plastic bag to keep dust and pests away.
Avoid stacking lids directly on top of each other without any barrier, as it can trap moisture. Label your storage container with the sterilization date to keep track of freshness. How often do you check your stored lids before canning?
Common Mistakes To Avoid
Avoid using lids with rust or dents, as they may not seal properly. Skipping the boiling step can leave harmful bacteria behind. Ensure lids are fully submerged in hot water to sterilize them effectively.
Sterilizing mason jar lids might seem straightforward, but there are common pitfalls that can compromise your canning efforts. Overlooking these mistakes could lead to improperly sealed jars, risking the safety and quality of your preserved goods. Let’s dive into some key errors to avoid in this process.
Reusing Damaged Lids
Reusing damaged lids is a common mistake that many canning enthusiasts make in an attempt to save money. However, even a slight dent or warp in the lid can prevent a proper seal, jeopardizing the safety of your food. Always inspect your lids carefully before each use and invest in new ones if any damage is detected. You might think a minor bend is harmless, but it’s not worth the risk. A perfectly sealed jar ensures your food stays fresh and safe to consume.
Skipping Sterilization Steps
Skipping any sterilization step is a shortcut that can lead to serious consequences. Each step in the sterilization process is crucial to eliminate bacteria and other contaminants. Make sure you follow each step methodically to ensure your jars and lids are completely sterile. It’s easy to underestimate the importance of each step, especially when you’re in a hurry. Remember, taking the time to sterilize properly is essential for long-term preservation success. Have you ever rushed through the process and regretted it later? Taking shortcuts might save time initially, but it can cost you in terms of food quality and safety down the line.

Credit: www.canr.msu.edu
Additional Tips For Safe Canning
Safe canning depends not only on sterilizing your mason jar lids but also on maintaining a clean environment and handling your materials carefully. These additional tips help prevent contamination and ensure your preserved foods stay fresh and safe for longer. Paying attention to these details can make a big difference in your canning results.
Maintaining Clean Workspaces
Your workspace should be spotless before you start canning. Wipe down counters and tables with a food-safe disinfectant to remove any dust or germs that could contaminate your jars.
Keep all your tools—like funnels, tongs, and lids—in a clean area. Avoid placing them on surfaces that aren’t sanitized, as this increases the risk of introducing bacteria.
Have a dedicated spot for sterilized jars and lids to prevent accidental contact with unclean surfaces. This simple habit reduces the chance of contamination significantly.
Handling Jars And Lids Safely
Always wash your hands thoroughly before touching jars and lids. Even a tiny amount of grease or dirt can compromise the seal and spoil your preserves.
Use clean tongs or jar lifters to handle sterilized lids and jars. Avoid touching the inside of lids or the rim of jars with your fingers to keep them germ-free.
Check lids for any dents or rust before sterilizing. Damaged lids might not seal properly, so it’s better to use a fresh one to protect your food.
Frequently Asked Questions
How Do You Sterilize Mason Jar Lids Safely?
To sterilize mason jar lids, boil them in water for 10 minutes. Avoid washing with soap beforehand. Use clean tongs to remove and place them on a clean towel to air dry.
Can You Sterilize Mason Jar Lids In The Dishwasher?
Yes, you can sterilize lids in the dishwasher. Use the hottest cycle without detergent. Place lids on the top rack for best results. This method kills bacteria and prepares lids for safe canning.
Is It Necessary To Sterilize Mason Jar Lids?
Sterilizing lids is essential to prevent contamination. Proper sterilization ensures food safety and preserves quality. It kills harmful bacteria and molds that can spoil canned goods. Always sterilize lids before sealing jars.
How Long Should Mason Jar Lids Be Sterilized?
Boil mason jar lids for at least 10 minutes. This duration effectively kills bacteria and germs. For dishwasher sterilization, use the hottest cycle. Proper timing ensures lids are safe for food preservation.
Conclusion
Sterilizing mason jar lids keeps your food safe and fresh. Clean lids prevent bacteria and spoilage. Boiling or using hot water works well for sterilizing. Always dry lids fully before sealing jars. This simple step helps your preserves last longer.
Keep your canning process safe and easy. Enjoy homemade jams and pickles with confidence. Sterilized lids protect your hard work every time.