If your GE bottom freezer ice maker is acting up or you need to replace it, removing it yourself can save you time and money. But where do you start?
You might feel unsure about handling the parts or worry about causing damage. Don’t worry—this guide will walk you through the process step by step, using simple language and clear instructions. By the end, you’ll know exactly how to remove your ice maker safely and easily.
Keep reading to take control of your appliance repair with confidence.
Credit: www.searspartsdirect.com
Prepare The Freezer
Preparing the freezer is the first important step to safely remove the ice maker from your GE bottom freezer. This process ensures your safety and protects the appliance. Taking the right precautions avoids damage and makes the task easier.
Unplug The Refrigerator
Unplug the refrigerator from the power outlet. This stops electricity from flowing and prevents shocks. Never work on the ice maker while the appliance is powered. Wait a few minutes after unplugging to let any electrical charge dissipate.
Empty The Freezer Compartment
Remove all food items from the freezer compartment. Store them in a cooler or another freezer to keep them cold. Clearing the freezer gives you space to work safely and avoids food spoilage. Wipe any frost or ice buildup to make access easier.
Locate The Ice Maker
Open the freezer door and find the ice maker assembly. It is usually mounted on one side of the freezer wall. Look for a plastic cover or metal panel that houses the ice maker. Identifying its exact location helps you plan the removal steps clearly.

Credit: bexcodeservices.com
Gather Necessary Tools
Before removing the ice maker from your GE bottom freezer, gather all the necessary tools. Having the right tools ready makes the process faster and safer. It helps avoid damage to your appliance and saves time. Prepare your workspace and tools to ensure smooth removal.
List Of Required Tools
- Screwdriver set (Phillips and flathead)
- Nut driver or socket wrench (usually 1/4 inch)
- Pliers
- Towel or cloth (for water spills)
- Flashlight (for better visibility)
- Bucket or container (to catch water or ice)
Safety Precautions
Unplug the refrigerator before starting any work. This prevents electric shock.
Wear gloves to protect your hands from sharp edges.
Work in a dry area to avoid slipping or accidents.
Keep children and pets away from the workspace.
Handle tools carefully and follow manufacturer instructions.
Turn Off The Ice Maker
Turning off the ice maker is the first crucial step before removing it from your GE bottom freezer. This step ensures safety and prevents any water damage or electrical issues during the removal process.
Power and water supply must be disconnected to avoid accidents. Follow these simple actions to safely turn off the ice maker.
Disconnect Power To Ice Maker
Locate the power source for the ice maker. It may be a plug behind the freezer or a direct wire connection inside the unit.
Unplug the ice maker or switch off the circuit breaker that controls the freezer. This stops any electrical flow to the ice maker.
Double-check that the ice maker is completely off by trying to activate it. No sounds or movements should happen.
Shut Off Water Supply
Find the water supply valve connected to your freezer. It is usually located near the back or under the sink.
Turn the valve clockwise to close it. This stops water from flowing into the ice maker.
Open the freezer door and allow any remaining water in the line to drain out. This prevents leaks during removal.
Remove Ice Bin And Cover
Removing the ice bin and cover is the first step to access the ice maker in your GE bottom freezer. This process helps you clear space and safely reach the parts that need service or replacement. Follow the steps carefully to avoid damage.
Take Out The Ice Bin
Open the freezer door fully to get better access. Locate the ice bin inside the freezer compartment. Grip the ice bin firmly and pull it straight out. Be gentle to avoid spilling ice cubes. Set the ice bin aside on a flat surface.
Unscrew The Ice Maker Cover
Find the ice maker cover, usually a plastic shield over the ice maker. Check for screws holding the cover in place. Use a screwdriver that fits the screws properly. Turn each screw counterclockwise to remove them. Lift the cover carefully and place it aside. This exposes the ice maker for further work.
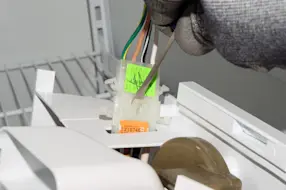
Disconnect Wiring And Water Line
Turn off the water supply before disconnecting the ice maker’s water line to avoid leaks. Carefully unplug the wiring harness to separate the ice maker from the freezer.
Removing the ice maker from your GE bottom freezer might seem like a daunting task, but breaking it down into steps can make the process seamless. One of the critical parts of this procedure is disconnecting the wiring and water line. It's essential to handle this step with care to avoid any damage or leaks. Ensuring that everything is properly disconnected will make the rest of the removal process much smoother.
Unplug Electrical Connectors
Before you begin, make sure the freezer is unplugged to avoid any electrical shock. Locate the electrical connectors that link the ice maker to the freezer. These are typically found behind or beneath the ice maker unit. Gently unplug each connector, ensuring you don't pull on the wires themselves. Sometimes a slight wiggle helps if they are stuck. Keep a mental note or take a picture of the connections for easier reconnection if needed.
Detach Water Line Tubing
After the electrical connectors are safely unplugged, it's time to move on to the water line tubing. This is crucial as it supplies water to the ice maker. Locate the water line, which is usually a clear or white tube running to the back of the ice maker. Carefully detach it by unscrewing or unclipping any fasteners. Be prepared for a small amount of water to spill out, so have a towel handy. Have you ever accidentally left a water line connected and dealt with a soggy mess? A small oversight can lead to unexpected cleanup, so double-check your work. Once the water line is detached, you’re one step closer to completing the ice maker removal.
Detach The Ice Maker Unit
Detaching the ice maker unit from your GE bottom freezer is a task that requires focus and care. This step is crucial before you can access the internal components or replace the unit. Taking your time here prevents damage and ensures a smooth process.
Remove Mounting Screws
Start by locating the screws that hold the ice maker in place. These are usually found on the side or back of the unit. Use a screwdriver that fits well to avoid stripping the screws.
Keep the screws in a safe spot as you’ll need them when reinstalling. If any screws seem stuck, a little extra pressure or a different screwdriver might help. Avoid forcing them too hard to prevent damage.
Carefully Extract Ice Maker
Once the screws are out, gently pull the ice maker away from the freezer wall. It may feel tight, but steady pressure works best. Watch for any wires or connectors attached to the unit.
Disconnect any electrical plugs by pressing on the release tabs—don’t yank the wires. If you feel resistance, double-check for hidden screws or clips. Handling the ice maker carefully will save you from unnecessary repairs.
Check For Residual Ice Or Water
Checking for residual ice or water is a vital step before removing the ice maker from a GE bottom freezer. Ice or water left inside can cause leaks or damage. It also makes the removal process harder. Taking time to clear out any remaining ice or water ensures a smooth and safe removal.
Clear Ice Buildup
Look inside the ice maker area for any ice buildup. Use a plastic scraper or a soft cloth to gently remove ice. Avoid using sharp tools that can damage the components. Let the ice melt if it is hard to remove. You can place a towel underneath to catch dripping water.
Dry The Area
After clearing the ice, wipe the area with a dry cloth. Make sure no moisture remains around the ice maker. This prevents slipping and electrical issues during removal. Leave the door open for a few minutes to air dry. A dry space helps keep the freezer clean and safe.

Credit: www.espares.co.uk
Reassemble And Test
Carefully reassemble the ice maker parts to ensure proper fit and function. Test the unit by restoring power and checking for ice production. Confirm all connections are secure to avoid leaks or malfunctions.
Reassemble and Test Reassembling the ice maker after removal can be a bit tricky, but with the right approach, you'll have it back up and running in no time. Make sure you've got all the necessary parts and tools before proceeding.
Replace Ice Bin And Cover
Carefully place the ice bin back into its original position, ensuring it's securely aligned with the surrounding components. This is a crucial step, as any misalignment can lead to improper function or even damage to the ice maker. Ensure the ice bin is properly seated and not loose. Make sure the cover is securely attached to the ice bin.
Plug In Refrigerator And Restore Water
Plug in your refrigerator and restore the water supply to the ice maker. This will allow the machine to function correctly and produce ice as expected. Locate the water supply line and connect it to the refrigerator's water inlet valve. Turn on the water supply to the refrigerator.
Run Ice Maker Test
To test the ice maker, you'll need to run a cycle to ensure it's functioning properly. This will also help you identify any potential issues that may have arisen during the reassembly process. Press the test button on the ice maker control panel. Observe the ice maker as it produces ice, checking for any signs of malfunction or irregularity. Now that you've reassembled the ice maker, it's essential to test it to ensure everything is working as it should. Remember, a properly functioning ice maker is crucial for maintaining the overall performance and efficiency of your refrigerator. By following these steps, you'll be able to diagnose and fix any issues that may have arisen during the removal process, ensuring your ice maker is back up and running in no time.
Frequently Asked Questions
How Do I Safely Disconnect The Ge Bottom Freezer Ice Maker?
First, turn off the water supply and unplug the refrigerator. Then, carefully disconnect the ice maker’s wiring harness and water line to avoid damage.
What Tools Are Needed To Remove Ge Bottom Freezer Ice Maker?
You will need a screwdriver, pliers, and possibly a socket wrench. These tools help remove screws and disconnect the ice maker from the freezer.
How To Prevent Water Leaks When Removing The Ice Maker?
Turn off the water supply valve before removal. Also, drain any residual water from the line to avoid leaks.
Can I Reinstall The Ice Maker After Removal?
Yes, the ice maker can be reinstalled by reversing the removal steps carefully. Ensure all connections are secure to avoid malfunctions.
Conclusion
Removing the ice maker from your GE bottom freezer is simple with clear steps. Take your time and follow the instructions carefully. Keep all screws and parts safe for reassembly or future use. This task does not need special skills or tools.
You can fix or replace the ice maker yourself. Stay patient and work slowly to avoid damage. Now, you are ready to handle this repair confidently.