If you’ve ever needed to clean or fix your Ge Profile refrigerator, you know that removing the freezer drawer can be tricky. But don’t worry—this guide will make it simple for you.
Whether your drawer is stuck, hard to slide, or you just want to give it a thorough clean, learning the right steps will save you time and frustration. Keep reading, and you’ll discover an easy, step-by-step method to remove your freezer drawer safely and quickly.
Your fridge will thank you!

Credit: www.geappliances.com
Tools Needed
Removing the freezer drawer from a GE Profile refrigerator requires a few simple tools. Having the right tools ready makes the task easier and faster. These tools help prevent damage to the drawer and fridge parts.
Gathering the tools before starting saves time and effort. Keep everything within reach to work smoothly. Below are the essential tools needed for this job.
Flathead Screwdriver
A flathead screwdriver helps to gently pry and release clips. It fits well into small spaces around the drawer. Use it carefully to avoid scratching surfaces.
Phillips Screwdriver
This screwdriver is needed to remove screws holding the drawer. GE Profile models often use Phillips screws. Make sure the screwdriver size matches the screws.
Work Gloves
Wear gloves to protect your hands from sharp edges. Gloves also improve grip on cold and slippery parts. Choose comfortable gloves for better control.
Towel Or Cloth
Place a towel or cloth on the floor before removing the drawer. It prevents scratches and catches any falling parts. Use a clean cloth to avoid dirt buildup.
Flashlight
A flashlight helps to see inside dark freezer areas. It makes locating screws and clips easier. Use a small, bright flashlight for better visibility.
Locate The Freezer Drawer
Locating the freezer drawer in a GE Profile refrigerator is the first step before removal. This drawer usually sits at the bottom or in the middle section of the fridge. Knowing its exact position helps avoid confusion and damage.
Most GE Profile models have a clear design, making the freezer drawer easy to spot. It typically has a handle that runs across the front, allowing easy grip. The drawer slides out smoothly on rails.
Identify The Freezer Compartment
Look for the coldest section of the refrigerator. The freezer drawer is colder than the fridge shelves. It often has a frost-free or sealed look to keep the cold air inside.
Check The Refrigerator Model
Model numbers help confirm the drawer's location. Find the model number inside the fridge door or manual. Use it to find the exact layout online or in the user guide.
Observe The Drawer Design
The freezer drawer usually has a sturdy handle. It may have a vent or small holes for air circulation. The drawer is larger and deeper than regular shelves.
Clear The Surrounding Area
Remove any items blocking the drawer. Clearing space prevents accidents during removal. It also makes the drawer easier to pull out fully.
Empty The Drawer
Emptying the freezer drawer is the first and most crucial step before you attempt to remove it from your GE Profile refrigerator. This task might seem simple, but it requires careful attention to avoid spills, freezer burn, or damage to your frozen goods. Clearing out the drawer not only makes it lighter and easier to handle but also prevents any unwanted mess during removal.
Clear Out All Items
Start by taking everything out of the freezer drawer. Use a sturdy container or a cooler to temporarily store the frozen items, especially if you expect the removal process to take some time. This keeps your food safe from thawing and helps you stay organized.
Check For Ice Buildup
Look for any ice or frost that might have formed around the drawer edges or inside. Ice buildup can make the drawer stick, increasing the risk of damage when pulling it out. Gently chip away any large ice chunks using a plastic scraper or warm cloth.
Clean The Drawer Before Removal
Wipe the drawer inside and out with a damp cloth to remove crumbs or frost. Cleaning now prevents any mess from spreading when the drawer is removed. Plus, it gives you a fresh surface to inspect for cracks or damage before putting it back.
Identify The Drawer Type
Start by checking the type of drawer in your GE Profile freezer. Different drawers may have unique removal features or clips. Identifying the drawer type helps you choose the right removal method.
Identifying the type of freezer drawer in your GE Profile Refrigerator is crucial. Different models have unique drawer designs. Knowing your drawer type ensures you handle it properly. It prevents damage and makes removal easier.
Understand Your Refrigerator Model
Check the model number of your refrigerator. It’s usually on the inside wall. This number can guide you to the right manual. Manuals often list specific drawer types for each model.
Check For Sliding Mechanism
Observe how the drawer moves. Does it slide out smoothly or lift? Some drawers have a simple slide mechanism. Others might require lifting before sliding out. Understanding this helps in safe removal.
Inspect The Drawer Handles
Look at the drawer handles. Some have built-in grips for easy removal. Others might need extra care. Knowing this detail helps you plan the removal process.
Look For Safety Locks
Some freezer drawers have safety locks. These prevent accidental removal. Check for any locking mechanism. Unlocking it is essential before attempting to remove the drawer.
Note The Drawer Size And Shape
Examine the drawer’s size and shape. Larger drawers might need two people to remove. Smaller ones can be handled alone. Shape also affects how you pull them out. Understanding these aspects can make the process seamless. It ensures you remove the drawer without damage.
Release The Drawer Stops
Releasing the drawer stops is a crucial part of removing the freezer drawer from your GE Profile refrigerator. These stops are designed to prevent the drawer from sliding out unintentionally, so you need to handle them carefully to avoid damage. Understanding how to properly release these stops will make the removal process smooth and safe.
Locate The Drawer Stops
Start by opening the freezer drawer fully. Look along the sides of the drawer rails to find the drawer stops. They usually appear as small tabs or clips near the back of the rails.
These stops can be tricky to spot if you're not expecting them. Take your time to inspect both sides carefully before attempting to release anything.
Understand The Stop Mechanism
Each drawer stop works like a catch that holds the drawer in place. Some models have a lever you can push or pull, while others require you to press down or lift a tab.
Knowing the type of mechanism your drawer uses will save you from forcing it and causing damage. Have you noticed if your drawer stops move easily, or do they feel locked tight?
Release The Stops Safely
Use your fingers or a flat tool like a screwdriver to gently press or lift the drawer stops. Avoid using too much force—these parts are usually plastic and can break if handled roughly.
Once the stops are released, the drawer should slide out smoothly. If it still feels stuck, double-check if both stops are fully disengaged before pulling harder.
Remove The Drawer Carefully
Removing the freezer drawer from your GE Profile refrigerator requires a gentle touch. Careless handling can damage the drawer or the tracks. Taking time to be careful ensures the drawer stays intact and works smoothly after reinstallation.
Pay close attention to how the drawer moves along the rails. Avoid forcing it out if it feels stuck. Small obstacles or ice buildup might be the cause. Taking a slow approach can prevent cracks or breaks.
Clear The Surrounding Area
Make space around the freezer drawer before removal. Remove any items on or near the drawer. This prevents accidents and gives you room to work freely.
Support The Drawer Firmly
Hold the drawer firmly from both sides. Use open hands to avoid pinching your fingers. Supporting the drawer evenly prevents it from tilting or slipping.
Slide The Drawer Out Slowly
Gently pull the drawer outward in a straight line. Pause if you feel resistance. Check for hidden catches or frozen areas. Slowly easing the drawer out reduces stress on the parts.
Lift The Drawer Off The Rails
Once the drawer reaches the end of the tracks, slightly lift it. This helps clear the rails without bending or scraping. Keep your hands steady to maintain control.
Inspect For Damage Or Obstructions
After removing the drawer, examine it carefully. Look for cracks, broken parts, or ice buildup. Clear any debris from the rails before reinstalling. This keeps the drawer running smoothly.
Handle Common Issues
Removing the freezer drawer from your GE Profile refrigerator can sometimes bring up a few common issues. These problems might slow you down or even cause some frustration. Understanding how to handle stuck drawers, broken clips, and misaligned tracks can save you time and keep your fridge in great shape.
Stuck Drawer
A drawer that won’t budge can feel like it’s stuck for good. Often, ice buildup or debris gets trapped around the drawer edges or tracks, blocking smooth movement. Try gently warming the area with a hairdryer on low heat to melt any ice, then carefully wiggle the drawer free.
If the drawer still resists, check inside for any hidden obstructions like food packages or broken parts. Patience is key here—forcing the drawer might cause damage. Could a quick clean-up routine prevent this from happening again?
Broken Clips
Clips hold the drawer in place and help it glide smoothly. Over time, these clips can break or crack, especially if the drawer is removed roughly. If you notice the drawer feels loose or falls out unexpectedly, inspect the clips for damage.
Replacing broken clips is usually straightforward. You can order exact parts from GE or trusted appliance stores. Have you kept your refrigerator’s manual handy? It often shows how to swap out these small parts without hassle.
Misaligned Tracks
Misaligned tracks are a sneaky problem that can cause the drawer to jam or not close properly. Tracks may shift if the drawer is pulled out unevenly or if heavy items press against them. Take a close look at the tracks and make sure they line up perfectly on both sides.
If you spot misalignment, loosen the screws slightly, adjust the tracks by hand, then retighten. Double-check by sliding the drawer back in slowly. Have you ever noticed how a small tweak can make a big difference in drawer movement?
Credit: www.homedepot.com
Reinstall The Drawer
Reinstalling the freezer drawer on your GE Profile refrigerator is a straightforward task that ensures your appliance functions smoothly and keeps your food organized. After cleaning or maintenance, putting the drawer back correctly prevents any cold air leaks and keeps everything in place. Let’s look at how to reinstall the drawer safely and efficiently.
Align The Drawer With The Slides
First, check the metal or plastic tracks inside the freezer compartment where the drawer slides in. Make sure these tracks are clean and free of debris to avoid any sticking or jamming. Carefully position the drawer so the rollers or guides fit into the tracks, aligning them evenly on both sides.
Slide The Drawer Back Gently
Once aligned, slowly push the drawer into the freezer. Avoid forcing it, as this can damage the tracks or drawer. You should feel the rollers glide smoothly; if not, pull the drawer out and realign before trying again.
Secure The Drawer In Place
After sliding the drawer fully in, check if it clicks or locks into position. Some GE Profile models have a small latch or stopper to keep the drawer secure. If your drawer has this feature, engage it to prevent the drawer from sliding out accidentally.
Test The Drawer Movement
Open and close the drawer a few times to ensure it moves smoothly without resistance. If it feels loose or wobbly, double-check the alignment and track condition. A properly installed drawer should glide effortlessly and stay firmly in place when closed.
Check For Proper Sealing
Finally, close the freezer door and check if the drawer seals well inside. A poor seal can lead to frost build-up or inefficient cooling. If you notice gaps, adjust the drawer position or inspect the seals for damage.
Maintenance Tips
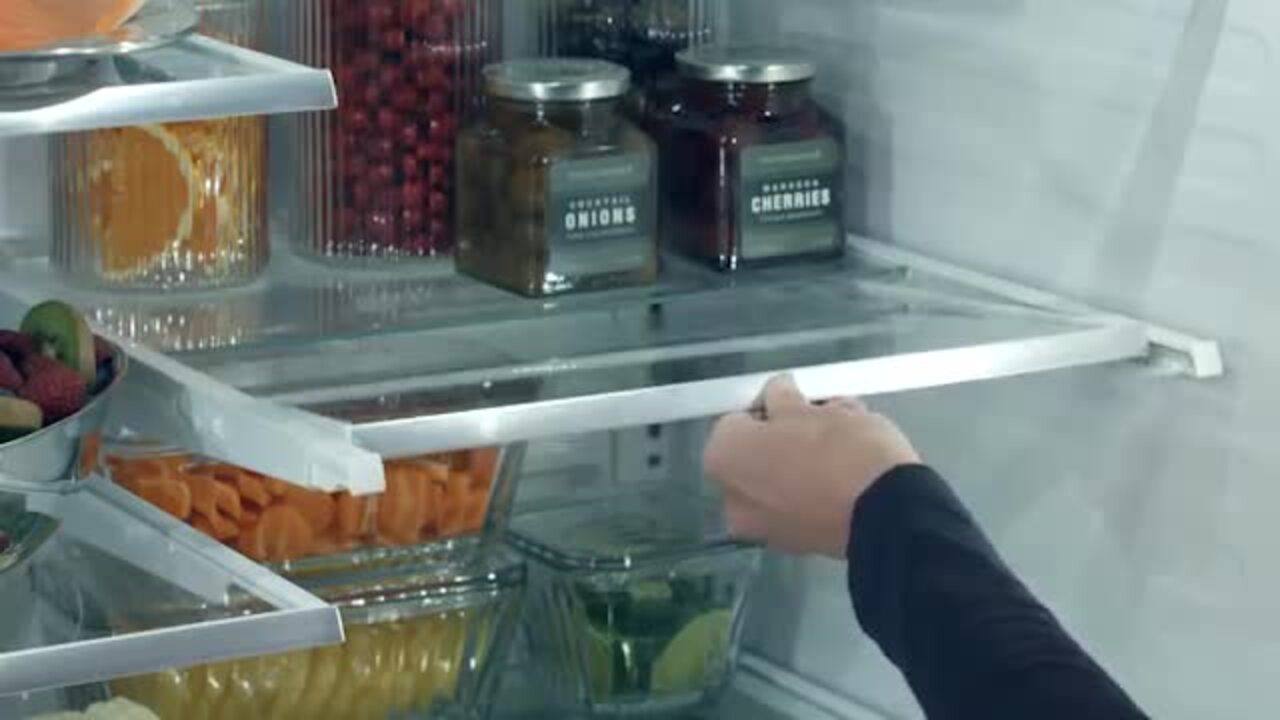
Gently pull the freezer drawer straight out until it stops. Lift the front slightly to release it from the track, then slide it completely out. Handle with care to avoid damage while cleaning or repairing.
Maintaining your GE Profile Refrigerator can enhance its lifespan. Regular maintenance keeps it running efficiently and reduces energy costs. One crucial part is handling the freezer drawer with care. Here's a guide on maintenance tips for removing and caring for the freezer drawer.
Regular Cleaning
Clean the freezer drawer monthly. Remove any food debris and spills. Use a gentle cleanser and soft cloth. This prevents bacteria and odors from developing.
Inspect For Damage
Regularly check for any cracks or damage. Inspect the drawer seals and rails. Damaged parts can affect efficiency and cooling.
Lubricate Drawer Rails
Lubricate the drawer rails every few months. Use a food-safe lubricant. This ensures smooth operation and prevents wear.
Check Seals
Examine the seals for wear and tear. Replace them if they are loose. Good seals keep cold air inside and save energy.
Organize Contents
Organize the items in the freezer. Avoid overloading the drawer. Proper organization helps with air circulation.
Proper Handling
Always pull the drawer gently. Avoid slamming it shut. Gentle handling prevents damage to the rails and seals.

Credit: www.famoustate.com
Frequently Asked Questions
How Do I Safely Remove The Freezer Drawer From Ge Profile Fridge?
First, empty the freezer drawer completely. Pull the drawer out to its full extension. Lift the front slightly and then pull it out carefully to avoid damage.
What Tools Are Needed To Remove Ge Profile Freezer Drawer?
Generally, no tools are required. If screws hold the drawer, a Phillips screwdriver might be needed. Check your model’s manual for specific instructions.
Can I Remove The Freezer Drawer For Cleaning?
Yes, removing the drawer allows thorough cleaning. Use mild soap and warm water. Dry completely before reinstalling to prevent ice buildup.
How Do I Avoid Damaging Freezer Drawer Rails?
Pull the drawer straight out without forcing it. Avoid tilting excessively to protect the rails and rollers. Follow your refrigerator’s manual for guidance.
Conclusion
Removing the freezer drawer from your GE Profile refrigerator is simple. Follow each step carefully for the best results. Take your time to avoid damage. This task helps with cleaning or fixing inside the freezer. Use basic tools and clear instructions.
You can do it without calling a technician. Keep your refrigerator working well by maintaining it regularly. Now, you are ready to handle this task easily and safely.