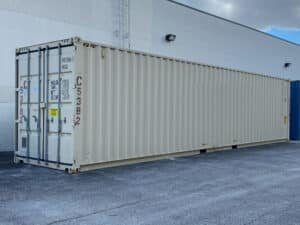
Are you thinking about turning a storage container into a comfortable, usable space? One of the most important steps is learning how to insulate a storage container properly.
Without good insulation, your container can get unbearably hot in summer and freezing cold in winter. But don’t worry—this guide will show you simple, effective ways to keep your container cozy year-round. By the end, you’ll know exactly what materials to use and how to install them so your storage container works perfectly for your needs.
Ready to make your container a space you’ll actually want to use? Let’s dive in.
Benefits Of Insulating Storage Containers
Insulating a storage container offers more than just a cozy interior—it transforms the space into a functional, efficient, and protective environment. Whether you use your container for tools, seasonal items, or even as a small workspace, insulation can make a big difference. Here’s how adding insulation benefits your container and why it’s worth the effort.
Energy Savings
Insulation helps keep the temperature inside your storage container stable, reducing the need for extra heating or cooling. This means you’ll spend less on electricity or fuel if you use climate control devices. Imagine cutting your energy bills simply by adding a layer of insulation—it’s a smart investment that pays off over time.
Temperature Control
Have you noticed how uninsulated containers can get scorching hot in summer and freezing cold in winter? Insulation acts like a barrier against extreme temperatures, keeping the inside environment much more comfortable. This control allows you to use your container year-round without worrying about weather fluctuations damaging your stored items or making the space unusable.
Protecting Stored Items
Your belongings deserve protection from moisture, mold, and temperature swings that can cause damage. Insulating helps regulate humidity and temperature, which prevents rust on tools, warping of wood, and spoilage of sensitive materials. Think about your valuable items staying in top condition—doesn’t that make insulation seem like a no-brainer?
Extending Container Lifespan
Containers face wear and tear from weather and temperature changes, leading to quicker deterioration. Insulation reduces the stress caused by these elements, helping prevent condensation buildup that can cause rust and corrosion. By insulating, you’re not just improving the inside—you’re protecting your investment and making your container last longer.

Credit: www.buyinsulationonline.co.uk
Choosing The Right Insulation Material
Choosing the right insulation material affects your storage container’s comfort and energy use. The best insulation blocks heat in summer and cold in winter. It also fits your budget and installation skills. Consider durability, moisture resistance, and ease of application. Some materials work better for metal containers than others. This guide covers popular insulation types to help you decide.
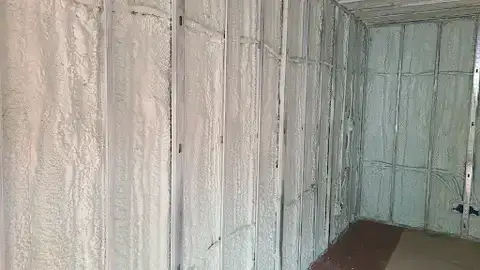
Spray Foam
Spray foam expands to fill gaps and cracks tightly. It creates a strong air seal that stops drafts well. This foam resists water and mold growth, keeping the container dry. It lasts for many years without losing effectiveness. Professional installation is best for good results. Spray foam offers excellent insulation but costs more upfront.
Rigid Foam Panels
Rigid foam panels come in sheets easy to cut and fit. They have high insulation value for their thickness. Panels resist moisture, making them good for damp areas. Installation involves attaching panels to container walls with adhesive or screws. They add structure and can be covered with drywall or wood. Rigid foam is a durable, cost-effective choice.
Fiberglass Batts
Fiberglass batts are soft and easy to handle. They fit between metal studs or framing inside the container. Batts provide good insulation but absorb moisture if not protected. Use a vapor barrier to prevent dampness and mold. Fiberglass is affordable and widely available. Wear protective gear during installation to avoid skin irritation.
Reflective Foil
Reflective foil insulation reflects radiant heat away from the container. It works best in hot climates to reduce cooling costs. This insulation is thin and lightweight, easy to install on walls and ceiling. Use it with other insulation types for better results. Reflective foil also helps prevent condensation inside the container.
Natural Insulation Options
Natural materials include sheep wool, cork, and cellulose. They are eco-friendly and safe to handle. These options offer good insulation and moisture control. Natural insulation can be more expensive or harder to find. They also require proper installation to avoid settling or pests. Ideal for those seeking sustainable building materials.
Preparing The Container For Insulation
Preparing a storage container for insulation is a crucial first step. It ensures the insulation works well and lasts longer. Taking time to prepare the container properly prevents problems later. Clean, dry, and repair the container before adding insulation. This process creates a solid base for the insulation material.
Cleaning And Drying
Start by removing dirt, dust, and debris from the container walls. Use a broom or vacuum to clear loose particles. Wash the surfaces with soap and water to remove grease or stains. Rinse well and allow the container to dry completely. Moisture inside the container can cause mold and damage insulation.
Sealing Gaps And Holes
Check the container for gaps, cracks, and holes. These openings let air and moisture enter. Seal them with silicone caulk or expanding foam. Pay close attention to door edges and corners. Proper sealing improves insulation efficiency and keeps the container airtight.
Addressing Rust And Damage
Inspect the container for rust spots or dents. Rust weakens the metal and can spread quickly. Scrape off loose rust with a wire brush. Treat the area with a rust converter to stop further corrosion. Fill dents or holes with metal filler or welding if needed. Repairing damage ensures a stable surface for insulation.
Step-by-step Insulation Process
Insulating a storage container can protect your belongings from extreme temperatures. It helps in maintaining a stable interior climate. Follow this simple step-by-step insulation process to keep your container in top condition.
Measuring And Cutting Insulation
Begin by measuring the container's interior dimensions. Take accurate measurements of walls, ceiling, and floor. Use these measurements to cut the insulation material. Ensure each piece fits snugly without gaps. Use a sharp knife or insulation cutter for clean cuts.
Applying Insulation Material
Choose an appropriate insulation type like spray foam, rigid foam, or fiberglass. For spray foam, apply evenly across surfaces. If using rigid foam, secure panels with adhesive or screws. Fiberglass batts should fit tightly between framing. Fill all gaps and crevices to prevent heat loss.
Installing Vapor Barriers
Vapor barriers are essential to prevent moisture build-up. Install a plastic sheet or foil barrier over the insulation. Overlap seams by several inches for full coverage. Use tape or staples to secure the barrier in place. Ensure the barrier covers all insulated areas completely.
Finishing Interior Surfaces
After insulation, finish the interior surfaces. Install drywall or plywood over the insulated walls. Secure them with screws to the container’s metal frame. Finish with paint or wallpaper for a polished look. Ensure all edges and seams are sealed for a professional finish.
Ventilation And Moisture Control
Controlling ventilation and moisture is key to making your storage container comfortable and long-lasting. Without proper airflow, your container can become a trap for humidity, leading to rust, mold, and damage to stored items. Managing moisture effectively keeps the air fresh and protects both the container and its contents.
Installing Vents
Adding vents lets fresh air flow in and stale, moist air flow out. Choose vents with covers to prevent rain and pests from entering. Position vents on opposite walls or near the floor and ceiling to create a natural air circulation.
Think about where you place your container. If it’s in a humid area, more ventilation helps. You might even add adjustable vents so you can control airflow depending on the weather.
Using Dehumidifiers
A dehumidifier actively removes moisture from the air inside your container. It’s especially useful if your container is sealed tight or located in a damp environment. You can pick from electric models or simple moisture-absorbing packs depending on your power availability.
Running a dehumidifier regularly prevents that sticky, damp feeling inside. I once stored vintage furniture in a container without one, and the humidity left spots that were hard to clean. It’s a small investment that saves you headaches.
Preventing Condensation
Condensation happens when warm air meets cold surfaces, causing water to form. To stop this, add insulation that includes a vapor barrier. This layer stops moisture from passing through walls and collecting inside.
Also, avoid blocking airflow inside the container. Keep stored items off the floor and away from walls to let air circulate freely. Have you noticed water droplets on your container walls? That’s your signal to boost insulation or ventilation.
Credit: www.conexwest.com
Additional Efficiency Tips
Boosting your storage container’s insulation goes beyond just basic materials. Small changes can improve energy efficiency and comfort. These tips help maintain a stable temperature inside. They also reduce energy costs and extend the life of insulation.
Using Thermal Curtains
Thermal curtains add an extra layer of insulation to doors and windows. They block drafts and prevent heat loss. These curtains are thick and made from special fabric. Installing them is simple and cost-effective. Close curtains during cold nights or hot days. This keeps the inside temperature steady and reduces the work your insulation must do.
Adding Exterior Shade
Shade helps lower the heat that reaches the container walls. Use awnings, shade sails, or plant trees nearby. Shade cuts down on direct sunlight and heat buildup. This prevents the container from becoming too hot inside. Shade also protects the insulation from weather damage. Place shading structures on the sunniest sides for best results.
Regular Maintenance Checks
Inspect your container regularly to keep insulation effective. Look for cracks, leaks, or moisture damage. Fix any gaps or holes quickly to stop heat loss. Check seals around doors and windows. Clear debris and dirt that can trap moisture. Proper maintenance keeps insulation working well and prevents costly repairs later.

Credit: americantrailerrentals.com
Frequently Asked Questions
What Materials Are Best For Insulating Storage Containers?
Rigid foam panels and spray foam are ideal for insulating storage containers. They provide excellent thermal resistance and are moisture-resistant, ensuring durability and energy efficiency inside the container.
How Do I Prepare A Storage Container For Insulation?
Clean and dry the container interior thoroughly. Seal any gaps or rust spots. This preparation ensures proper insulation adhesion and prevents moisture buildup inside the container.
Can I Insulate A Storage Container Myself?
Yes, you can insulate a storage container yourself with basic tools. Follow instructions carefully for cutting and fitting insulation materials to achieve effective results.
How Much Does It Cost To Insulate A Storage Container?
Costs vary based on insulation type and container size. On average, expect to spend between $500 and $2,000 for materials and supplies for effective insulation.
Conclusion
Proper insulation keeps your storage container comfortable year-round. It stops heat loss in winter and blocks heat in summer. Using the right materials makes a big difference. Simple steps can save energy and protect your items inside. Take time to seal gaps and add layers carefully.
This helps avoid moisture and mold problems. Good insulation means your container lasts longer and stays dry. Start with a clear plan and follow easy methods. Your storage space will be more useful and safe. Small efforts bring lasting comfort and protection.