If you love fresh, cold beer straight from the tap, setting up your own kegerator is a game-changer. But if you’ve never hooked one up before, it can feel a bit tricky.
Don’t worry—you’re about to learn simple steps that anyone can follow. By the end of this guide, you’ll have your kegerator ready to pour perfect pints whenever you want. Ready to impress your friends and enjoy your favorite brew at home?
Let’s get started!
Choosing The Right Kegerator
Choosing the right kegerator is a key step that can make or break your home draft beer experience. The perfect unit fits your space, meets your serving needs, and keeps your beer fresh and cold. Understanding what’s available helps you avoid costly mistakes and ensures you get the most out of your investment.
Types Of Kegerators
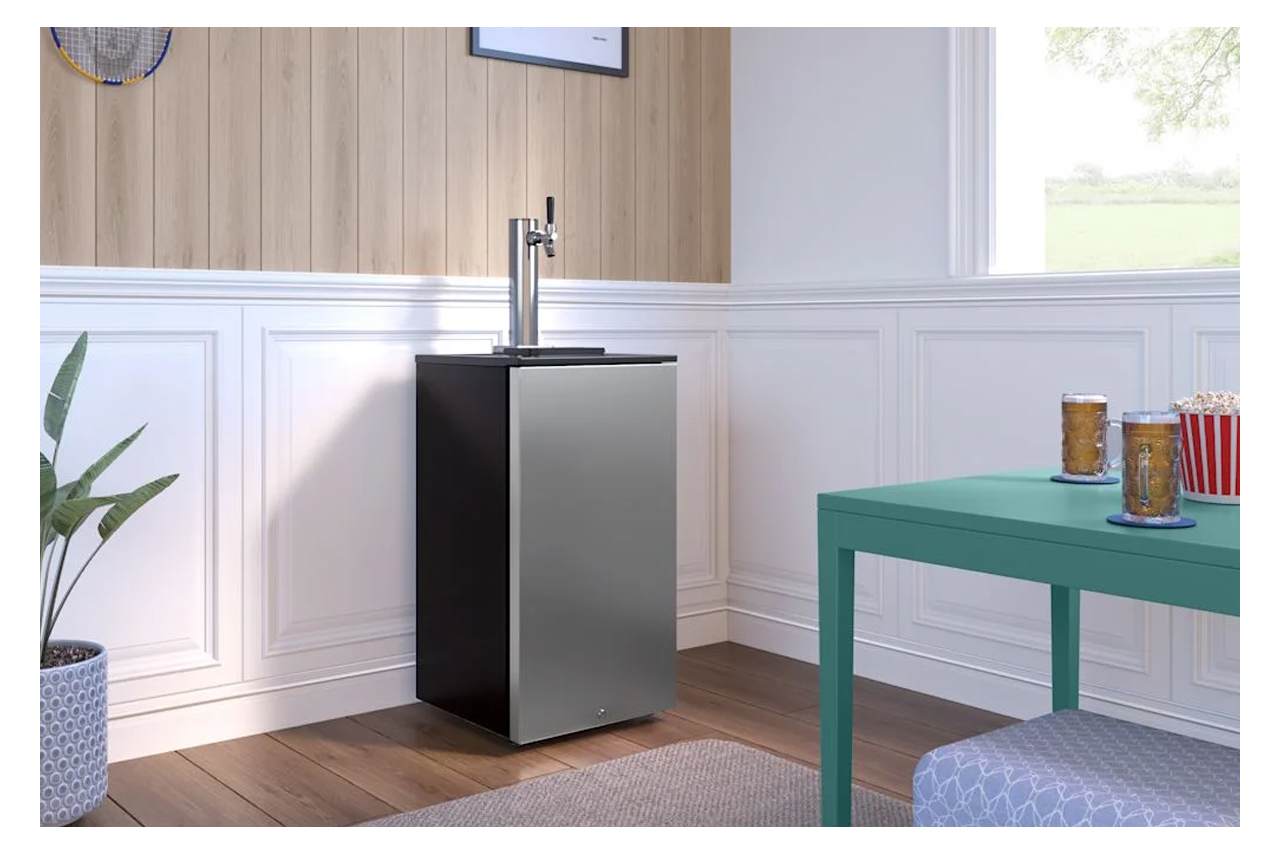
Kegerators come in several styles, each suited for different needs and spaces. You’ll find:
- Freestanding kegerators– Great for flexibility, these units can be placed anywhere with enough ventilation.
- Built-in kegerators– Designed to fit under a counter, perfect for integrating into your kitchen or bar area.
- Portable kegerators– Compact and lightweight, ideal if you want to take your draft system to parties or tailgates.
Think about where you’ll place your kegerator and how often you might move it. That will help you decide which type fits your lifestyle best.
Size And Capacity Considerations
Size matters when selecting a kegerator. You need enough room for your keg, CO2 tank, and sometimes extra storage. Measure your available space carefully before shopping.
Capacity depends on how much beer you plan to serve and how many taps you want. A single-tap kegerator is simpler and takes less space, while dual or triple taps let you offer variety without swapping kegs constantly.
Ask yourself: Do you usually host large gatherings, or is this just for your own enjoyment? Your answer will guide you toward the right capacity.
Essential Features To Look For
Focus on features that improve convenience and beer quality. Temperature control is critical—look for units with adjustable thermostats to keep your beer perfectly chilled.
Also consider:
- Built-in drip trays to keep your area clean.
- Removable shelves or keg holders for easy loading.
- Quiet compressors if noise is a concern in your living space.
- Compatible CO2 tank sizes and easy refill options.
From experience, investing a bit more upfront in a kegerator with precise temperature control and sturdy construction saves frustration down the line. What features would make serving beer easier and more enjoyable for you?
Credit: www.fergusonhome.com
Gathering Your Supplies
Before you start hooking up your kegerator, gathering the right supplies is key. Without the proper equipment, your setup can quickly turn frustrating or worse, damage your beer quality. Having everything ready lets you focus on enjoying fresh draft beer instead of troubleshooting your system.
Kegs And Co2 Tanks
Your keg is the heart of the system. Choose the right size—whether it’s a standard half-barrel or a smaller mini keg depends on your space and how often you plan to refill.
CO2 tanks keep your beer fresh and flowing smoothly. A 5-pound CO2 tank is a good starting point for most home setups, balancing size and how long it lasts. Have you checked if your local beer supplier offers tank refills or exchanges?
Regulators And Hoses
The regulator controls the CO2 pressure going into your keg. This is crucial because too much pressure can make your beer foamy, while too little will cause flat pours. Make sure you get a regulator that fits your CO2 tank and has a gauge for easy pressure monitoring.
Hoses connect everything together. Use food-grade, beer-line tubing to avoid off-flavors. Length matters too—longer hoses can reduce pressure, so keep them as short as possible without restricting movement.
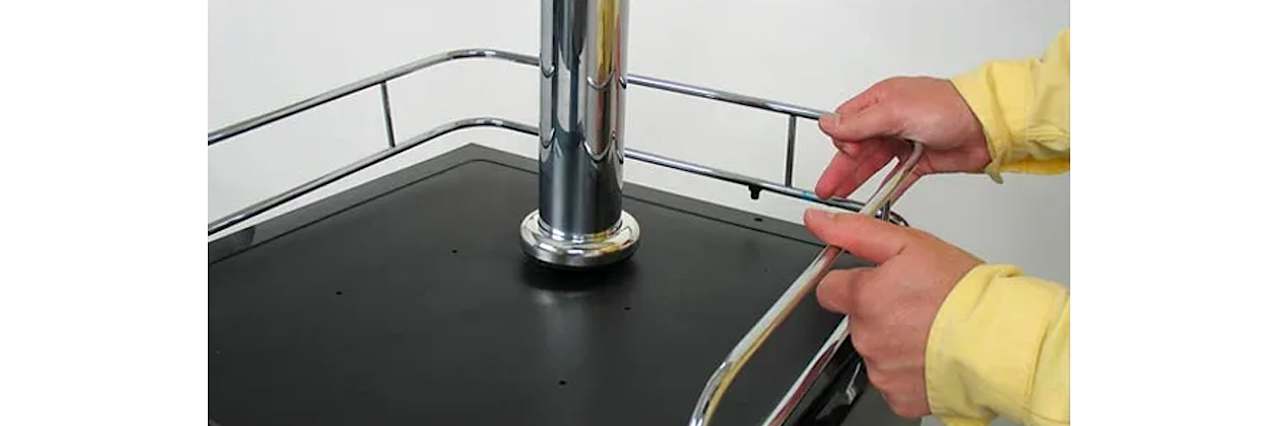
Faucets And Couplers
Faucets are what you use to pour your beer. Different styles exist, from basic taps to fancy draft towers. Pick one that matches your kegerator’s design and your pouring preferences.
Couplers link your keg to the beer line. They come in various types depending on the keg brand, so double-check compatibility. Using the wrong coupler is a common mistake that can waste beer and cause leaks.
Preparing The Kegerator
Preparing the kegerator is essential for perfect draft beer. Cleanliness ensures great taste and safety. Proper setup keeps the beer cold and ready to serve. Small details make a big difference in the pouring experience.
Cleaning And Sanitizing
Start by cleaning all parts that touch the beer. Use warm water and mild detergent to wash the keg coupler, lines, and faucet. Rinse everything thoroughly to remove soap residues.
Sanitize the equipment with a food-safe sanitizer. This step kills bacteria and prevents contamination. Let the parts dry completely before assembly.
Setting The Temperature
Set the kegerator temperature between 36°F and 38°F (2°C to 3°C). This range keeps beer fresh and carbonated. Use the built-in thermostat or a digital controller for accuracy.
A stable temperature avoids foaming and flat beer. Check the temperature regularly, especially during hot weather or heavy use.
Installing The Drip Tray
The drip tray catches spills and keeps the area clean. Slide the tray into its slot at the bottom of the door or under the faucet. Make sure it fits snugly and does not block airflow.
Empty and clean the drip tray regularly to avoid odors and mold. A clean tray improves the overall look and function of your kegerator.
Connecting The Co2 System
Connect the CO2 tank to the regulator tightly to avoid leaks. Attach the gas line from the regulator to the keg coupler securely. Check all connections before turning on the CO2 to ensure proper flow.
Connecting the CO2 system is a vital step in setting up your kegerator. This system ensures your beer stays fresh and carbonated. A well-connected CO2 system ensures a smooth pour every time. Let's explore how to connect each part of the CO2 system properly.
Attaching The Regulator
First, securely attach the regulator to the CO2 tank. This device controls the gas flow. Hand-tighten the nut connecting the regulator to the tank. Use a wrench for a snug fit. Ensure no gas leaks from the connection. Check the pressure gauges to verify it's working.
Connecting The Co2 Hose
Next, connect the CO2 hose to the regulator. This hose delivers CO2 to your keg. Secure one end to the regulator's output valve. Tighten it firmly with a clamp to prevent leaks. Connect the other end to the keg coupler. This ensures the CO2 reaches your beer.
Adjusting The Pressure
Finally, set the correct pressure on the regulator. This is crucial for carbonation and flow. Start with a pressure of 10-12 PSI for most beers. Adjust as needed based on the beer type. Monitor the gauges to keep pressure steady. Regularly check for leaks or pressure changes.
Hooking Up The Keg
Hooking up the keg is the heart of setting up your kegerator. Getting this right means fresh, perfectly poured beer every time you open the tap. It’s not just about connecting parts; it’s about understanding what fits and works best for your specific keg and setup.
Choosing The Correct Coupler
Not all couplers are the same, and using the wrong one can cause leaks or prevent beer from flowing. Identify your keg type first—common options include D, S, U, and G couplers. Check the keg’s brand or tap into online resources to match the coupler to your keg style.
For instance, if you have a Cornelius-style keg, a ball-lock or pin-lock coupler is necessary. Using the right coupler ensures a snug fit and smooth beer flow without contamination.
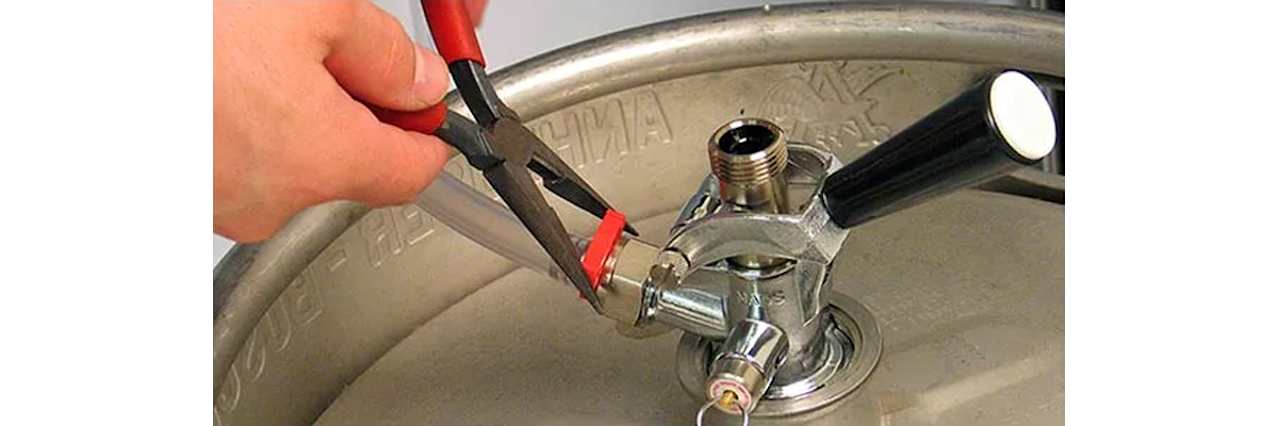
Attaching The Coupler To The Keg
Before attaching, make sure the keg valve and coupler are clean to avoid off-flavors. Align the coupler with the keg valve carefully, then twist or lock it into place depending on the model. You should feel it seal firmly—no wiggle room.
Don’t rush this step; an improper seal can cause CO2 leaks or loss of beer pressure. Once attached, pull the handle out and push it down to engage the keg and start the beer flow.
Connecting Beer Lines
Beer lines carry your brew from the keg to the faucet, so secure connections are crucial. Attach the beer line to the coupler’s beer out port using a hose clamp for a tight seal. Double-check for any cracks or wear in the lines to prevent contamination or leaks.
Keep your beer lines clean and straight to maintain great taste and avoid clogs. Have you ever noticed a flat or off-flavored beer? It’s often due to dirty or damaged beer lines. Make routine cleaning part of your setup for the best pours.
Testing And Tuning
Testing and tuning your kegerator ensures a smooth pour and perfect taste. This step is essential after setup. It helps find small issues before serving guests. Take your time to get everything right.
Checking For Leaks
Leaks can waste beer and cause pressure problems. Listen for hissing sounds near connections. Use soapy water on joints to spot bubbles. Bubbles mean gas is escaping. Tighten loose fittings carefully. Replace damaged seals or hoses if needed.
Pouring The First Draft
Start with a slow, steady pour. Hold the glass at a 45-degree angle. This reduces foam and keeps beer fresh. Watch how the beer flows from the tap. Check the color and clarity. These signs show if the system works well.
Adjusting Foam And Flow
Too much foam? Lower the gas pressure slightly. Foam that disappears too fast? Increase pressure a little. Adjust the faucet handle speed for better flow. Keep the beer cold to reduce foam. Small changes make a big difference in taste and look.
Maintenance Tips
Keeping your kegerator in good shape ensures fresh, tasty beer every time. Proper maintenance stops clogs, leaks, and off-flavors. Simple habits protect your investment and boost performance. Small efforts save big headaches later.
Regular Cleaning Schedule
Clean all parts that touch beer every two weeks. This includes taps, lines, and faucets. Use warm water and a keg line cleaner. Remove buildup to avoid bad taste and bacteria. Wipe the exterior to keep it looking new.
Replacing Co2 Tanks
Check CO2 levels weekly to avoid running out. Replace tanks before they become empty. Always close the valve before swapping tanks. Inspect hoses and connections for leaks or damage. Keep a spare tank ready for busy days.
Troubleshooting Common Issues
- Foamy beer: Check temperature and CO2 pressure.
- Weak carbonation: Tighten CO2 connections and check tank level.
- Slow pour: Clean or replace clogged beer lines.
- Leaks: Inspect all seals and fittings.
- Off-flavors: Deep clean kegerator parts and lines.
Credit: www.fergusonhome.com
Credit: www.fergusonhome.com
Frequently Asked Questions
How Do I Connect Co2 To A Kegerator?
Attach the CO2 tank regulator to the tank valve. Connect the gas line from the regulator to the keg coupler. Ensure all connections are tight to prevent leaks. Turn on the CO2 and adjust the pressure for proper carbonation.
What Tools Are Needed To Hook Up A Kegerator?
You need a CO2 tank, regulator, gas and liquid lines, keg coupler, and wrench. A screwdriver may help with securing fittings. These tools ensure a proper and secure kegerator setup.
How To Prevent Beer Foaming In A Kegerator?
Set CO2 pressure between 10-14 PSI to avoid foaming. Check beer line length; 5-7 feet is ideal. Keep beer cold and avoid shaking the keg. Proper setup maintains smooth, foamy-free pours.
Can I Use Any Keg With My Kegerator?
Most kegerators fit standard Cornelius or commercial kegs. Check your kegerator’s specifications for compatible keg types. Using the correct keg ensures proper fitting and optimal beer dispensing.
Conclusion
Hooking up a kegerator is simpler than it seems. Follow each step with care and patience. Check all connections to avoid leaks or spills. Keep your kegerator clean for the best taste. Enjoy fresh, cold beer anytime at home. With practice, setup becomes faster and easier.
Your kegerator will be the center of fun gatherings. Cheers to great beer and good times!