If you want to master the art of cooking a perfect rib eye steak on your gas grill, you’re in the right place. Imagine biting into a juicy, flavorful steak with a beautiful char on the outside and tender, mouthwatering meat inside.
It’s easier than you think to get that restaurant-quality steak at home. You’ll discover simple steps and expert tips that will help you grill your rib eye steak to perfection every time. Ready to impress yourself and your guests? Let’s fire up that grill and get started!

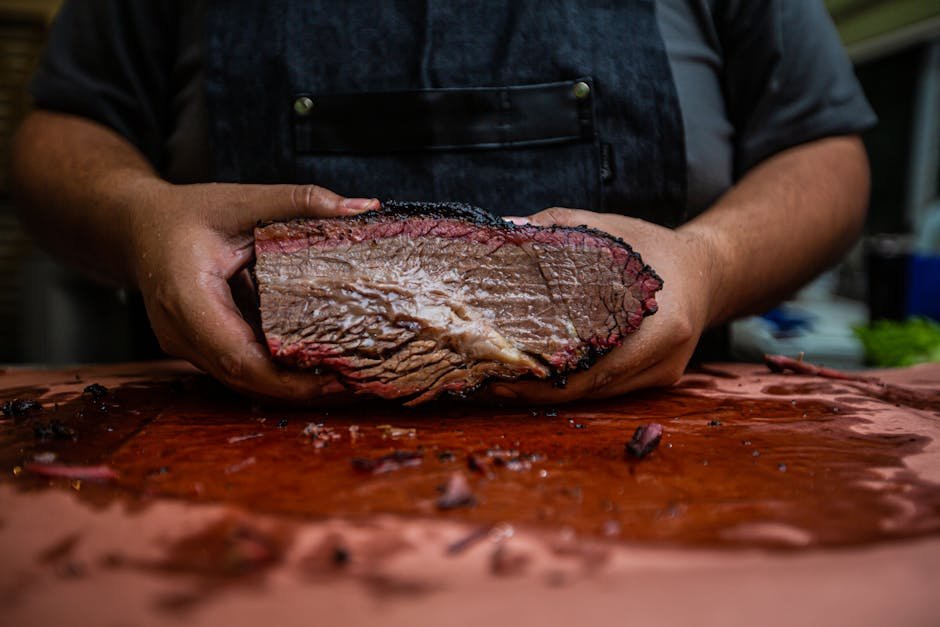
Credit: girlscangrill.com
Choosing The Right Rib Eye
Choosing the right rib eye steak is the foundation of a great grilling experience. The quality and characteristics of your cut directly affect flavor, tenderness, and how well it cooks on your gas grill. Understanding what to look for helps you get the best steak for your taste and budget.
Thickness And Marbling
The thickness of your rib eye influences cooking time and how evenly the steak cooks. Aim for a steak that's at least 1 to 1.5 inches thick to avoid overcooking the outside while the inside stays underdone.
Marbling refers to the thin streaks of fat running through the meat. This fat melts during grilling, keeping your steak juicy and flavorful. Choose a rib eye with visible, evenly distributed marbling for the best taste and tenderness.
Fresh Vs. Frozen
Fresh rib eye steaks often have better texture and flavor compared to frozen ones. If you can, pick fresh from the butcher or meat counter.
However, frozen steaks can still be great if thawed correctly. Thaw your steak slowly in the fridge overnight to retain moisture and avoid a mushy texture.
Selecting Quality Meat
Look for meat that is bright red with firm texture. Avoid steaks with any grayish or brown spots as they may be old or poorly stored.
Don’t hesitate to ask your butcher about the source of the meat and whether it’s grain-fed or grass-fed. This info can help you understand the flavor profile and cooking behavior of your rib eye.
Have you ever noticed how a well-marbled steak almost melts in your mouth? That’s the kind of quality worth hunting for at the store.
Preparing The Steak
Preparing your rib eye steak properly sets the foundation for a delicious grilled meal. The way you handle the steak before it hits the gas grill affects its texture, flavor, and overall juiciness. Taking time to prepare the steak will help you achieve that perfect balance of a crispy crust and tender inside.
Bringing To Room Temperature
Before grilling, let your rib eye sit out for about 30 to 60 minutes to reach room temperature. This step helps the steak cook more evenly, avoiding a cold center with an overdone exterior. Have you noticed how steaks sometimes come out unevenly cooked? This simple trick can fix that.
Seasoning Techniques
Seasoning is more than just sprinkling salt and pepper. Start by patting the steak dry with paper towels to ensure a good sear. Then, apply a generous amount of coarse salt and freshly cracked black pepper on both sides.
- Salt draws out moisture and enhances flavor.
- Pepper adds a subtle heat and aroma.
- Press the seasoning gently into the meat to help it stick.
Do you prefer your seasoning bold or mild? Adjust the amounts based on your taste, but don’t be shy about seasoning well.
Using Marinades And Rubs
Marinades can add extra flavor and tenderness, but they’re not always necessary for a quality rib eye. If you choose to marinate, keep it simple and avoid overpowering the natural beef taste. A mix of olive oil, garlic, herbs, and a splash of acid like lemon juice works well.
Dry rubs, on the other hand, create a flavorful crust and can be applied just before grilling or several hours ahead. Try combining smoked paprika, garlic powder, onion powder, and a pinch of cayenne for a smoky kick.
Ever tried a rub that completely changed your steak experience? Experiment with different spice blends to find your favorite.
Setting Up The Gas Grill
Setting up your gas grill correctly is crucial for cooking the perfect rib eye steak. It ensures even cooking and helps you achieve that delicious sear without burning the meat. Let’s break down the essential steps to get your grill ready.
Cleaning And Preheating
Start by cleaning your grill grates thoroughly. Old grease and food bits can cause flare-ups and affect the flavor of your steak.
Use a grill brush to scrape off any residue while the grill is still warm but not hot. Then, preheat your grill by turning all burners to high for about 10-15 minutes. This not only sterilizes the grates but also helps in getting a nice sear on your steak.
Creating Heat Zones
Setting up heat zones is key for controlling how your steak cooks. Turn one side of your grill to high heat and the other side to low or off. This creates a direct heat zone and an indirect heat zone.
Start your rib eye on the hot side to sear and develop a crust, then move it to the cooler side to finish cooking to your preferred doneness. Have you tried this before? It’s a game-changer for avoiding overcooked or burnt steaks.
Oil The Grates
Before placing your steak on the grill, oil the grates to prevent sticking. Use a paper towel dipped in high smoke point oil like canola or grapeseed oil.
Hold it with tongs and rub it over the hot grates carefully. This step helps your rib eye lift easily off the grill and gives you those beautiful grill marks you want to see.

Credit: myincrediblerecipes.com
Grilling The Rib Eye
Grilling rib eye steak on a gas grill brings out rich flavors and a juicy texture. The process needs attention to heat and timing. Proper grilling makes the meat tender and tasty. Follow these tips for a perfect steak every time.
Searing For Flavor
Searing locks in juices and creates a tasty crust. Preheat the grill until very hot. Place the rib eye directly on the grill grates. Let it cook without moving for 2-3 minutes.
Flip the steak and sear the other side. This process builds a deep, smoky flavor. Avoid pressing the steak down. Let the grill do the work.
Using Direct And Indirect Heat
Start with direct heat to sear the steak’s surface. After searing, move the steak to a cooler part of the grill. This uses indirect heat to cook the inside evenly.
Close the grill lid while cooking with indirect heat. This traps heat and cooks the meat thoroughly. Avoid flipping too often for best results.
Timing For Doneness Levels
Use a timer to track cooking times. For rare, grill about 4-5 minutes total. Medium rare needs 6-7 minutes. Medium takes 8-9 minutes, and well done 10-12 minutes.
Check the steak’s firmness or use a meat thermometer. Rare is 125°F, medium rare 135°F, medium 145°F, and well done 160°F. Let the steak rest for 5 minutes before cutting. This keeps the juices inside.
Checking Steak Doneness
Checking the doneness of your rib eye steak is key to grilling success. It ensures you get the perfect texture and flavor every time. Overcooking or undercooking can ruin the experience, so paying close attention to doneness will elevate your grilling game.
Using A Meat Thermometer
A meat thermometer is the most reliable tool for checking steak doneness. Insert it into the thickest part of the steak without touching the bone or fat to get an accurate reading.
- Rare: 120-130°F (49-54°C)
- Medium Rare: 130-135°F (54-57°C)
- Medium: 135-145°F (57-63°C)
- Medium Well: 145-155°F (63-68°C)
- Well Done: 155°F+ (68°C+)
Remember to remove the steak from the grill a few degrees before it hits your target temperature; it will continue to cook while resting. This prevents overshooting your desired doneness.
Touch Test Method
If you don’t have a thermometer handy, the touch test is a useful skill to develop. It involves comparing the firmness of the steak to different parts of your hand.
- Relax your hand and press the fleshy area below your thumb for a rare feel.
- Touch your thumb to your middle finger and feel the same area for medium rare.
- For medium, touch your thumb to your ring finger and compare.
- Thumb to pinky finger gives you the firmness of a well-done steak.
Practice this technique a few times with your grilled steaks, and you’ll soon trust your finger as much as a thermometer.
Visual Indicators
Visual cues can quickly tell you if your steak is close to done. Look for juices pooling on the surface—clear juices usually mean medium to well done, while red or pink juices suggest rarer meat.
The steak’s surface should have a nicely browned crust from the grill marks. If the outside looks done but the steak feels soft, it’s likely rare inside.
Ask yourself: does the steak spring back slightly when pressed? This bounce is a good sign that the steak is cooked just right and still juicy.
Resting The Steak
Resting the steak allows juices to redistribute, ensuring tenderness. It enhances flavor and prevents a dry texture.
Resting the steak is a crucial step in grilling. It ensures your rib eye is juicy and flavorful. Many grill enthusiasts often overlook this step. But, it makes a big difference.
Why Resting Matters
Resting allows juices to redistribute throughout the steak. This results in a tender bite. Cutting too soon causes juices to spill out. The steak becomes dry and less flavorful. Letting it rest retains its natural moisture.
Proper Resting Time
The ideal resting time is about 5 to 10 minutes. This time frame lets the fibers relax. A relaxed steak is easier to cut and chew. Larger cuts may need a bit longer. Always aim for a perfect balance.
Covering The Steak
Cover the steak loosely with foil. This keeps it warm without overcooking. The foil traps heat while allowing moisture to circulate. Avoid wrapping it tightly. A gentle cover is all it needs. This simple step enhances the overall taste.
Serving Tips
Serving a rib eye steak fresh off the gas grill is a rewarding experience. Proper serving enhances both flavor and presentation. The way you slice, pair, and present your steak changes the whole meal. Here are some simple tips to make your steak dinner memorable.
Slicing Against The Grain
Cut the steak across the muscle fibers, not with them. This makes the meat tender and easier to chew. Look closely at the steak to find the lines of muscle. Slice thin pieces against these lines for the best texture.
Pairing With Sides And Sauces
Choose sides that balance the rich flavor of rib eye. Grilled vegetables, baked potatoes, and fresh salads are great choices. Simple sauces like garlic butter or chimichurri add extra taste without overpowering the steak. Keep sides light and fresh to complement the meat’s richness.
Presentation Ideas
- Arrange slices neatly on a warm plate.
- Garnish with fresh herbs like rosemary or parsley.
- Add a lemon wedge for a touch of color and zest.
- Serve with small bowls of sauce on the side.
- Use wooden or cast iron platters for a rustic look.
Good presentation makes your meal inviting and enjoyable. It turns a simple steak into a special dining experience.
Troubleshooting Common Issues
Troubleshooting common issues while cooking rib eye steak on a gas grill can save your dinner from disappointment. Even with careful preparation, things might not always go as planned. Understanding how to react when problems arise helps you maintain control and still enjoy a perfectly cooked steak.
Avoiding Overcooking
Overcooking is a frequent problem, especially if you rely only on timing and not on temperature checks. Use a meat thermometer to monitor the steak’s internal temperature closely. Aim for about 130°F (54°C) for medium-rare and pull the steak off the grill a few degrees before your target since it continues to cook while resting.
Another tip is to create a two-zone fire on your grill—high heat on one side and low heat on the other. Start by searing the steak on high heat, then move it to the cooler side to finish cooking gently. This technique prevents the outside from burning while the inside reaches your desired doneness.
Dealing With Flare-ups
Flare-ups happen when fat drips onto the burners, causing sudden flames that can char your steak. Keep a spray bottle of water nearby to control small flames quickly without cooling the grill too much. If flare-ups persist, move the steak to a cooler part of the grill until the flames die down.
Trimming excess fat from your rib eye before grilling reduces the chances of flare-ups. Also, avoid pressing down on the steak, which can cause fat to drip and fuel the flames. Think about how you can manage the grill environment instead of just reacting to the flames.
Fixing Dry Or Tough Steak
If your rib eye comes out dry or tough, it might have been overcooked or lacked proper resting time. Rest the steak for at least 5 minutes after grilling—this lets the juices redistribute and keeps the meat tender. Cutting into the steak too soon causes those flavorful juices to escape.
Consider marinating your steak or using a dry rub to add moisture and flavor before cooking. If the steak is already dry, serve it with a sauce or butter to add richness. Have you ever thought about how a simple rest period can transform your steak’s texture?

Credit: girlscangrill.com
Frequently Asked Questions
How Long To Cook Rib Eye On Gas Grill?
Cook rib eye steak 4-5 minutes per side for medium-rare. Adjust time for desired doneness. Use a meat thermometer for accuracy.
What Temperature To Grill Rib Eye Steak?
Preheat gas grill to high heat, around 450-500°F. This ensures a good sear and juicy interior for the steak.
Should Rib Eye Be Rested After Grilling?
Yes, rest rib eye steak for 5-10 minutes after grilling. This helps juices redistribute, making the steak tender and flavorful.
How To Prevent Rib Eye From Sticking On Grill?
Oil the grill grates and lightly brush steak with oil. Preheat grill properly to create a non-stick surface for the rib eye.
Conclusion
Grilling a rib eye steak on a gas grill is simple and fun. Start with good meat and a hot grill. Season the steak well and watch the cooking time closely. Use a meat thermometer for perfect doneness. Let the steak rest before cutting.
This keeps the juices inside and makes it tender. Enjoy your delicious, juicy rib eye with your favorite sides. Cooking steak this way brings great flavor every time. Try it today and enjoy a tasty meal outdoors.