Have you ever thought about turning your freezer into a refrigerator? It might sound unusual, but it’s easier than you think—and it can save you money and space.
Imagine having extra fridge space without buying a new appliance. You’ll discover simple steps to make that switch happen. By the end, you’ll know exactly how to convert your freezer into a fridge that works perfectly for your needs. Keep reading to unlock this smart and practical home hack!
Understanding The Need
Freezers and refrigerators both keep food cold but serve different purposes. A freezer stores food at temperatures below freezing. It preserves food for months by stopping bacteria growth. A refrigerator keeps food cool but above freezing. It slows down bacteria growth to keep food fresh for days or weeks.
Converting a freezer to a refrigerator can save money. It also fits specific needs when extra fridge space is required. Understanding why you need this change is important before starting. It helps decide if the conversion is the best choice.
Differences In Temperature Settings
Freezers usually run at or below 0°F (-18°C). Refrigerators run between 35°F and 40°F (1.7°C to 4.4°C). These temperature differences affect how food stays fresh or frozen. Changing a freezer to a fridge means adjusting this setting carefully.
Energy Consumption And Efficiency
Freezers use more energy to maintain colder temperatures. Running a freezer as a fridge can reduce power use. It may also extend the appliance’s life by reducing workload. Energy savings matter for long-term use and bills.
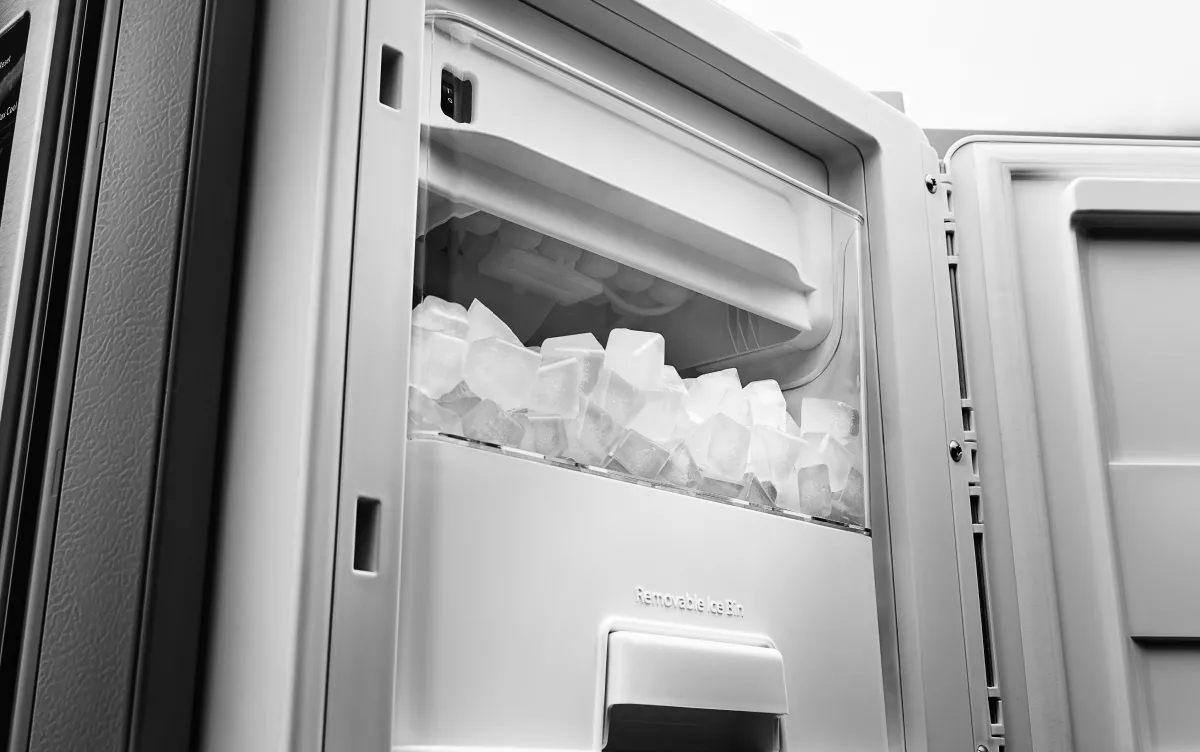
Space And Storage Needs
Extra fridge space helps store fresh fruits, vegetables, and drinks. Freezer compartments often have different shelving than refrigerators. Conversion allows better use of space for fresh food storage. It adapts the appliance to fit household needs.
Cost-effectiveness Of Conversion
Buying a new refrigerator can be expensive. Converting an existing freezer saves money. It avoids the cost of a new appliance. Also, it uses equipment already available at home.
Choosing The Right Freezer
Choosing the right freezer is key for a smooth conversion to a refrigerator. Not every freezer suits this change. Some models handle temperature shifts better than others. Picking the right one saves time and energy.
Understanding Freezer Types
Chest freezers and upright freezers differ in design and cooling methods. Chest freezers often hold cold air better when opened. Upright freezers offer easier access but may lose cold air faster. Knowing these helps in selecting the best freezer for conversion.
Checking Temperature Controls
Freezers with adjustable thermostats work best. You need to set the temperature above freezing. Some freezers have digital controls, others use manual dials. Choose a model with clear and reliable temperature settings.
Assessing Size And Capacity
Consider space and storage needs. A freezer too small may not fit your items as a fridge. Too large wastes energy. Measure your available space and pick a size that fits comfortably.
Energy Efficiency Matters
Energy-efficient freezers save electricity during the conversion. Look for models with good energy ratings. These models keep running costs low. Energy efficiency also supports eco-friendly living.
Inspecting The Seal And Insulation
Good door seals prevent cold air leaks. Strong insulation keeps temperature stable. Check seals for cracks or wear. A well-insulated freezer keeps the converted fridge working well.
Gathering Necessary Tools
Gathering the right tools is key to converting a freezer into a refrigerator. Having everything ready makes the process smoother and safer. It helps avoid delays and mistakes during the conversion. Preparation also saves time and reduces frustration.
Use tools designed for electrical and appliance work. Each tool plays a specific role in the conversion. Knowing their purpose helps you work confidently and correctly.
Essential Hand Tools
- Screwdrivers (both flathead and Phillips)
- Wrench or socket set
- Wire cutters and strippers
- Multimeter for electrical testing
- Utility knife
- Needle-nose pliers
Safety Equipment
- Insulated gloves to protect from shocks
- Safety goggles to guard your eyes
- Face mask to avoid dust inhalation
- Work apron or old clothes
Additional Materials
- Thermostat suitable for refrigerator settings
- Electrical tape for secure wiring
- Replacement wiring if needed
- Cleaning supplies for appliance prep
Adjusting The Thermostat
Adjusting the thermostat is key to changing a freezer into a refrigerator. The thermostat controls the temperature inside the appliance. Setting it correctly ensures your food stays fresh and safe. This section explains how to find and set the thermostat for the best results.
Identifying The Thermostat
Locate the thermostat inside your freezer. It is usually a small dial or digital control. Look near the top or back wall of the unit. Some models have a knob with numbers or temperature marks. Others have a digital panel with buttons. Knowing the type helps in adjusting it properly.
Setting The Temperature
Freezers are colder than refrigerators. Set the thermostat to a higher temperature. Aim for 35°F to 40°F (1.6°C to 4.4°C). This range keeps food fresh without freezing it. Turn the dial slowly or press buttons to adjust. Wait 24 hours and check the temperature with a thermometer. Fine-tune the setting if needed.
Installing A Temperature Controller
Installing a temperature controller is key to converting a freezer into a refrigerator. It controls the cooling cycle by adjusting the compressor’s activity. This keeps the temperature higher than a freezer's, suitable for refrigeration. Without this device, the freezer will stay too cold, spoiling your food.
The process requires careful selection and wiring of the controller. Correct setup ensures safe and reliable operation. It also helps save energy by running the compressor only when needed.
Selecting A Temperature Controller
Choose a controller designed for refrigeration use. Look for digital models with clear temperature settings. A controller with a temperature range from 35°F to 50°F works well. It should have a sensor probe that fits inside the freezer compartment.
Check the maximum load capacity of the controller. It must handle the compressor’s power. Some controllers come with alarms for temperature deviations. This feature can help protect your food from spoilage.
- Opt for a model with easy-to-read display
- Choose one with a reliable temperature sensor
- Ensure the controller supports your compressor’s voltage
- Pick a controller with simple installation instructions
Wiring The Controller
Unplug the freezer before starting any wiring work. Safety first. Connect the controller between the power source and the freezer’s compressor. The controller will act as a switch to turn the compressor on or off.
Follow the wiring diagram provided with the controller. Usually, the power cord plugs into the controller input. The compressor’s power wire plugs into the controller output. Attach the temperature sensor inside the freezer, away from direct contact with cooling elements.
- Use insulated wire connectors for secure connections
- Keep wires away from sharp edges to avoid damage
- Double-check all connections before plugging in
- Test the controller by setting desired temperature
After wiring, power on the freezer and monitor the temperature. Adjust the controller settings as needed. Proper installation means the freezer now cools at refrigerator temperatures.
Ensuring Proper Ventilation
Proper ventilation is essential when converting a freezer into a refrigerator. Without good airflow, your appliance can overheat, reducing efficiency and lifespan. Ensuring your freezer breathes well will keep it running smoothly and save you from unexpected breakdowns.
Checking Airflow
Start by examining the vents on your freezer. Make sure none are blocked by dust, dirt, or debris. Even a small obstruction can cause your appliance to work harder and use more energy.
Feel the air coming out of the vents when the freezer is running. Is it steady and cool? If the airflow feels weak or warm, your freezer might be struggling to dissipate heat properly.
Take a moment to clean the coils and vents using a vacuum or a soft brush. I once ignored a clogged vent, and the freezer overheated within days. After cleaning, the airflow improved significantly, and so did the cooling.
Positioning The Freezer
Your freezer’s placement affects ventilation more than you might think. Avoid pushing it flush against a wall. Leave at least 2-3 inches of space around the back and sides to allow air to circulate freely.
Consider placing the freezer in a cool, dry area away from direct sunlight or heat sources like ovens. Heat around the appliance makes it harder for your freezer to maintain the right temperature.
Have you checked if your freezer door opens fully without obstruction? Keeping the door clear prevents unnecessary strain on the seals and maintains proper airflow inside. Positioning is not just about fitting the appliance in your space; it’s about letting it breathe comfortably.
Monitoring Temperature
Monitoring temperature is key when converting a freezer into a refrigerator. Freezers are designed to maintain much colder temperatures than refrigerators. Without proper checks, food can spoil or freeze unexpectedly. Keeping the temperature steady ensures your converted appliance works safely and efficiently.
Using A Thermometer
Use a reliable thermometer inside the unit. Digital thermometers with clear displays work best. Place the thermometer in the middle shelf for accurate readings. Avoid placing it near the door or walls, where temperatures vary.
Check the thermometer regularly to see if the temperature stays between 35°F and 40°F (2°C to 4°C). This range keeps food fresh and safe. Adjust the thermostat if the temperature is too low or too high.
Regular Temperature Checks
Check the temperature at least twice a day. Morning and evening checks help catch any changes early. Write down the readings in a notebook or app. Tracking trends helps identify problems before they spoil food.
Look for signs like frost buildup or unusual noises. These may indicate the temperature is not stable. Make adjustments as needed to keep the refrigerator working properly.

Credit: www.youtube.com
Energy Efficiency Tips
Energy efficiency is key when converting a freezer into a refrigerator. It not only saves money on your electricity bill but also helps your appliance last longer. Paying attention to small details can make a big difference in how much power your converted fridge uses.
Maintaining Optimal Settings
Adjust the temperature settings carefully. Refrigerators work best between 35°F and 38°F (1.7°C to 3.3°C). Setting it too cold wastes energy and risks freezing your food.
Keep an eye on the thermostat after conversion. Some freezers have only one setting meant for freezing, so you might need to install a separate temperature controller. This lets you fine-tune the temperature precisely, improving energy efficiency.
Sealing Gaps And Leaks
Check the door seal thoroughly. Any cracks or gaps let cold air escape and warm air enter, forcing the compressor to work harder. You can use weatherstripping tape or replace the gasket to keep the seal tight.
Don’t forget to inspect the hinges and door alignment. Doors that don’t close properly waste energy and reduce cooling efficiency. A tight seal keeps your fridge running smoothly and cuts down on electricity use.
Troubleshooting Common Issues
Converting a freezer to a refrigerator can save money and space. Still, this process may cause some common issues. Knowing how to fix these problems helps keep your appliance running smoothly. It also protects your food from spoilage and ensures proper cooling.
Handling Temperature Fluctuations
Temperature swings can spoil food and waste energy. Check the thermostat setting first. It should be set between 35°F and 38°F for a refrigerator.
Ensure the door seals tightly. Loose seals let warm air inside, causing fluctuations. Clean the gasket to remove dirt or debris.
Keep the appliance away from heat sources like ovens or direct sunlight. This can affect cooling performance. Also, avoid overloading the fridge to allow air circulation inside.
Addressing Unexpected Noises
Strange sounds may indicate a mechanical issue or dirt buildup. Listen carefully to locate the noise source.
- Check the fan motor for dust or damage.
- Inspect the compressor for unusual vibrations.
- Make sure the appliance is level on the floor.
Clean dust from coils at the back or bottom of the unit. This reduces strain on parts and lowers noise. Tighten any loose screws or panels to stop rattling sounds.
Credit: www.tataneu.com
Credit: www.tataneu.com
Frequently Asked Questions
How Do I Change Freezer To Refrigerator Temperature?
Adjust the freezer thermostat to around 37°F (3°C). This setting cools without freezing, effectively converting it to a refrigerator. Monitor the temperature for accuracy and adjust as needed to maintain optimal freshness for stored food.
Can All Freezers Be Converted To Refrigerators?
Most freezers can be converted by adjusting temperature controls. However, some models lack precise thermostat settings. Check your appliance manual to confirm compatibility before attempting the conversion to avoid damage or inefficiency.
Is It Energy Efficient To Convert A Freezer To Refrigerator?
Converting a freezer to a refrigerator can increase energy use slightly. Freezers are designed to maintain lower temperatures, so running them warmer may affect efficiency. Use energy-saving settings and monitor usage to minimize power consumption.
What Foods Can I Store In A Converted Freezer?
Store fresh produce, dairy, and leftovers safely in a converted freezer. These items require refrigeration temperatures above freezing. Avoid storing frozen goods as they may thaw or spoil at higher temperatures.
Conclusion
Converting a freezer to a refrigerator saves money and space. It only takes a few simple steps. Adjusting the temperature setting is key. Keep an eye on the fridge for a few days. This helps you know if it works well.
You can store fresh food safely after conversion. Try this easy project at home today. It makes your kitchen more useful without extra cost.