Imagine having fresh, perfectly chilled draft beer right in your home, anytime you want. Turning your mini fridge into a kegerator can make that dream come true without breaking the bank.
You don’t need to be a pro or have special tools—just a bit of guidance and some simple steps. You’ll discover how easy it is to transform your ordinary mini fridge into a stylish, functional kegerator. Ready to impress your friends and upgrade your home bar?
Keep reading to learn exactly how to do it.
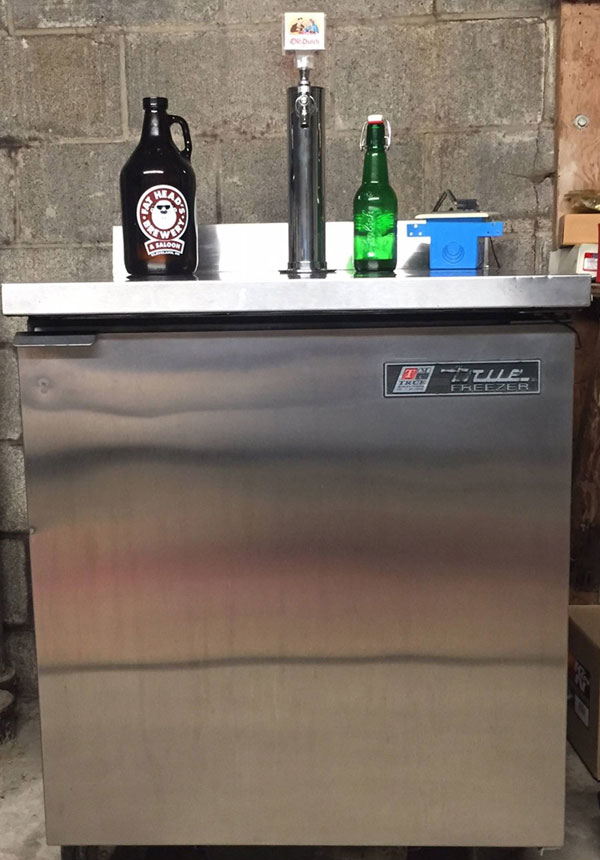
Credit: www.homebrewtalk.com
Choosing The Right Mini Fridge
Choosing the right mini fridge is the foundation of a successful kegerator project. The fridge you pick will determine how well your beer stays cold and how smoothly your setup functions. It’s not just about size—energy use, cooling ability, and special features all play a crucial role.
Size And Capacity Considerations
Your mini fridge must fit the keg and all necessary equipment, including CO2 tanks and tubing. Measure your keg’s height and diameter carefully before shopping. Don’t forget to leave some room for ventilation and easy access.
Think about how many kegs you want to store. A single keg setup needs less space, but if you plan to serve multiple beers, choose a larger model. Have you checked if the fridge door opens wide enough to pull out the keg without hassle?
Energy Efficiency And Cooling Performance
Energy efficiency affects your electricity bill and how often you’ll need to maintain the fridge. Look for models with good insulation and energy-saving ratings. Efficient cooling keeps your beer at the perfect temperature without running the compressor constantly.
Cooling performance matters more than you might expect. Mini fridges with adjustable thermostats give you better control, so your beer doesn’t freeze or get warm. Have you noticed how some fridges cool unevenly? That can spoil the quality of your draft.
Fridge Features To Look For
- Removable shelves:These make space for kegs and gear easier to create.
- Reversible door:Flexibility in door direction can help fit the fridge in tight spots.
- Temperature control:Precise settings help maintain ideal draft conditions.
- Ventilation space:Check if there is enough room around the fridge for airflow to prevent overheating.
Some mini fridges come with built-in handles or lockable doors, which add convenience and security. What features would make your daily use simpler? Choosing wisely now saves you from headaches during installation and use.
Gathering Essential Tools And Materials
Gathering the right tools and materials is key to converting a mini fridge into a kegerator. Each item plays a role in creating a functional and efficient beer dispenser. Skipping any essential tool can slow down the project or cause issues later. Prepare everything before starting to ensure smooth progress.
Kegerator Conversion Kits
Kegerator conversion kits contain most parts needed for the build. They usually include a tap tower, faucet, and shank. Kits save time by bundling compatible pieces. Choose a kit that fits your mini fridge size. Look for kits with clear instructions to simplify installation.
Co2 Tanks And Regulators
CO2 tanks keep beer fresh and carbonated. Pick a tank size based on your usage frequency. Regulators control the gas flow to maintain perfect pressure. Proper pressure prevents foamy or flat beer. Secure the tank safely to avoid accidents.
Tubing And Fittings
Food-grade tubing connects the keg to the faucet. Use tubing that fits both the keg coupler and faucet shank tightly. Fittings ensure leak-free connections between parts. Check all tubing and fittings for cracks or damage before use.
Drill And Cutting Tools
A drill helps create holes in the fridge for taps and lines. Use the correct drill bit size to match your fittings. Cutting tools trim tubing and modify fridge parts as needed. Work carefully to avoid damaging the fridge or yourself.
Preparing The Mini Fridge
Preparing the mini fridge is the first key step to convert it into a kegerator. This process ensures the fridge is clean, clear inside, and ready for new parts. Proper preparation helps the kegerator work well and last longer.
Emptying And Cleaning
Start by unplugging the mini fridge from the power source. Remove all food, drinks, and any loose items inside. Use a mild soap and warm water to clean all interior surfaces. Wipe down the door seals and shelves. Let the fridge dry completely to prevent mold and odors.
Removing Shelves And Interior Components
Take out all removable shelves and compartments. This creates space for the keg and other equipment. Keep the screws and parts safe if you want to reuse them. Some mini fridges have fixed parts that may need careful handling. Remove any lighting or plastic covers that block space.
Planning Tap Placement
Decide where the tap will go on the fridge door or top. Measure the area to fit the tap and handle comfortably. Mark the spot with a pencil or tape. Make sure there is enough room inside for the faucet hardware. Plan the tap location for easy pouring and refilling.
Credit: www.homebrewtalk.com
Installing The Tap System
Installing the tap system is a crucial step in converting a mini fridge into a kegerator. It allows you to pour your favorite draft beer with ease. This process involves creating a hole for the tap, attaching the faucet, and securing the shank tightly. Each part must fit perfectly for smooth operation and to avoid leaks.
Drilling The Tap Hole
Choose the right spot on the fridge door for the tap. Mark the center point carefully. Use a drill with a hole saw bit that matches your shank size. Drill slowly to avoid cracking the fridge surface. Clean the edges of the hole to remove any sharp pieces.
Mounting The Faucet
Insert the faucet through the hole from outside. Align it straight for easy pouring. Tighten the faucet’s nut inside the door by hand. Use a wrench to secure it firmly but avoid over-tightening. Check the faucet handle moves freely without wobbling.
Securing The Shank
Attach the shank from inside the fridge through the same hole. Slide the rubber gasket over the shank to prevent leaks. Screw the locknut onto the shank and tighten it against the door. Ensure the shank is stable and does not move. This keeps the faucet secure and the system leak-free.
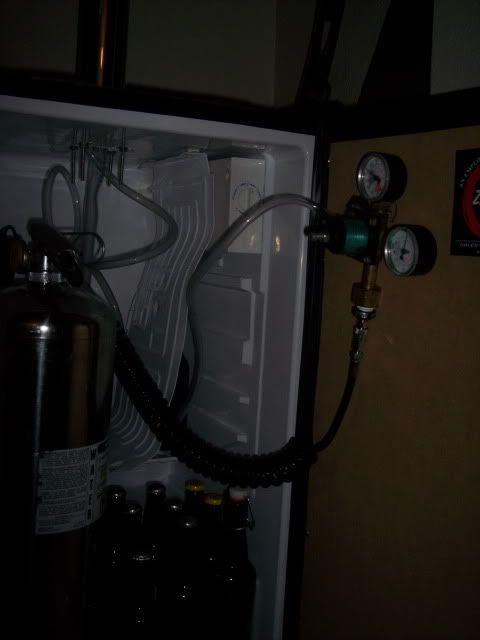
Setting Up The Co2 System
Setting up the CO2 system is a crucial part of converting your mini fridge into a fully functional kegerator. This system controls the pressure and flow of carbon dioxide, which keeps your beer fresh and perfectly carbonated. Getting the connections right ensures your draft system operates smoothly without leaks or pressure issues.
Connecting The Co2 Tank
Start by securing your CO2 tank in a stable, upright position near your mini fridge. Make sure the tank valve is fully closed before attaching anything. This prevents accidental gas release and keeps you safe during setup.
Remove the protective cap from the tank’s valve and check the threads for any dirt or damage. A clean connection is key to preventing leaks. If you’ve got a new tank, it might have a small amount of oil or dust, so wipe it gently with a cloth.
Attaching The Regulator
The regulator controls how much CO2 flows into your kegerator. Attach the regulator to the tank valve by screwing it on clockwise until it’s hand-tight. Avoid over-tightening, which can damage the threads.
Once connected, open the tank valve slowly and listen for any hissing sounds. If you hear a leak, use a soapy water solution around the connection points to spot bubbles—this is a simple leak test you can do yourself. Tighten or adjust the fittings as needed.
Running The Gas Line
Next, connect the gas line from the regulator outlet to the keg coupler. Cut the gas line tubing to the right length so it reaches comfortably without stretching or kinking. A kinked line can restrict gas flow, affecting carbonation.
Push the tubing firmly onto the barb fittings, then secure it with hose clamps. This keeps the gas line airtight. Have you checked your tubing for cracks or wear? Old tubing can cause leaks and spoil your beer.
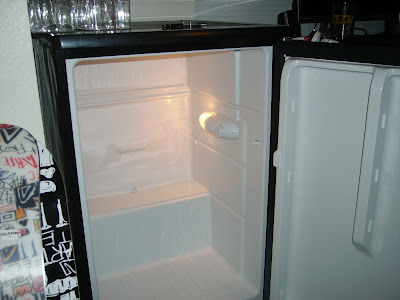
Arranging The Keg Inside The Fridge
Arranging the keg inside your mini fridge is a crucial part of turning it into a fully functional kegerator. It’s not just about fitting the keg; you need to ensure everything is set up for smooth dispensing and consistent cooling. Getting this right can save you a lot of hassle later on.
Positioning The Keg
Start by placing the keg so it sits stable and upright. You want it close enough to the door for easy access but not blocking airflow or cooling vents.
Check the dimensions of your mini fridge against your keg size—sometimes slight adjustments can make all the difference. If you have a smaller keg, consider adding a foam pad beneath it to keep it steady and prevent vibrations.
Connecting Beer Lines
Once the keg is positioned, connect the beer lines carefully. Make sure the connectors fit tightly to avoid leaks, as even small drips can cause trouble over time.
Route the lines along the side walls to keep them from kinking or getting pinched when you open and close the door. Securing them with clips or tape helps maintain a clean setup and prevents accidental disconnections.
Ensuring Proper Cooling
Proper cooling is key to keeping your beer fresh and tasty. Don’t block the fridge’s internal fans or vents with the keg or equipment. Air needs to circulate freely around the keg for even cooling.
Consider using a temperature controller if your mini fridge doesn’t have precise settings. You want to maintain a steady temperature between 34°F and 38°F. Have you ever had beer served too warm? It’s disappointing, and a stable cold environment prevents that.
Testing And Troubleshooting
Check all connections for leaks and ensure the CO2 tank works properly. Test the temperature control and adjust as needed for optimal cooling. Troubleshoot common issues like pressure drops or uneven cooling to keep your kegerator running smoothly.
Transforming your mini fridge into a kegerator is a rewarding DIY project, but the real test lies in ensuring everything works perfectly. This stage is where testing and troubleshooting come into play. It’s crucial to ensure your beer flows smoothly, tastes great, and is served at the perfect pressure. Below, we’ll explore the key aspects of testing and troubleshooting your newly converted kegerator.
Checking For Leaks
Leaks can be a real buzzkill, often leading to wasted CO2 and flat beer. To check for leaks, spray a soapy water solution over all connections, including the regulator, CO2 tank, and any joints. If you see bubbles forming, tighten the connections until they stop. Taking the time to detect leaks now saves you from future headaches.
Adjusting Co2 Pressure
Getting the CO2 pressure just right is essential for a perfect pour. Start with a pressure setting of around 12 PSI and adjust based on your beer type and preference. Too high, and you’ll get a glass full of foam; too low, and the beer may not flow at all. Experiment by pouring a few test glasses and observing the results.
Optimizing Pour Quality
A great pour is the hallmark of an excellent kegerator. If your beer is too foamy or flat, consider adjusting your beer line length or the CO2 pressure. A longer beer line can slow the flow, reducing foam. Ask yourself, is the beer pouring too fast or too slow? Your adjustments here will be key to achieving that perfect pour every time. Testing and troubleshooting may seem daunting, but with a little patience, your kegerator will be the life of your next party.
Credit: homebrewersassociation.org
Maintenance Tips For Longevity
Regular cleaning and checking seals keep your converted kegerator working well. Avoid overfilling and maintain proper temperature for longer use. Simple care ensures your mini fridge stays efficient as a kegerator.
Transforming a mini fridge into a kegerator is a brilliant idea for beer enthusiasts looking to enjoy a fresh pint at home. However, maintaining your DIY kegerator is crucial for its long-term performance and efficiency. Proper maintenance ensures your system runs smoothly and delivers the perfect pour every time. Below are essential maintenance tips to maximize your kegerator's lifespan.
Cleaning The Lines Regularly
Regularly cleaning the beer lines is vital to prevent any buildup of yeast, mold, or bacteria that could spoil the taste of your beer. Aim to clean the lines every two weeks using a cleaning kit that includes a cleaning solution and a brush. This simple task will keep your beer tasting fresh and your system in top condition.
Monitoring Co2 Levels
Keeping an eye on CO2 levels is crucial for maintaining the right carbonation and preventing flat beer. Check the pressure gauge regularly and adjust as needed to ensure your beer is perfectly carbonated. If you've ever poured a pint that tastes just right, you know the importance of this small yet impactful step.
Fridge Upkeep
A clean fridge is a happy fridge. Remove and wipe down the shelves and surfaces inside the fridge every month to eliminate any spills or sticky residue. Additionally, inspect the door seal to ensure it closes tightly, helping maintain the ideal temperature for your brew. Maintaining your kegerator doesn't have to be a daunting task. Implement these simple tips into your routine, and you'll enjoy fresh, delicious beer from your homemade setup for years to come. Are you ready to keep your kegerator in peak condition?
Frequently Asked Questions
How Do I Turn A Mini Fridge Into A Kegerator?
To convert a mini fridge, install a CO2 tank, keg coupler, and draft tower. Ensure proper temperature control and seal the fridge door tightly.
What Tools Are Needed For A Mini Fridge Kegerator?
You need a drill, hole saw, wrench, screwdriver, and tubing cutter. These tools help install taps and connect CO2 lines securely.
Can A Mini Fridge Maintain Beer Freshness?
Yes, mini fridges keep beer at optimal 36-38°F. This temperature preserves flavor and carbonation for fresh draft beer.
How Much Space Is Required Inside The Fridge?
Ensure enough room for the keg, CO2 tank, and tubing. A 3. 2 to 5 cubic foot fridge is ideal for most kegs.
Conclusion
Converting a mini fridge into a kegerator is simple and fun. You save money and enjoy fresh draft beer at home. With a few tools and steps, anyone can do it. This project fits small spaces and adds style to your room.
Take your time, follow instructions, and stay safe. Soon, you will have a cool kegerator ready for parties or relaxing evenings. Enjoy the fresh taste of beer straight from your own setup. Cheers to your new kegerator!