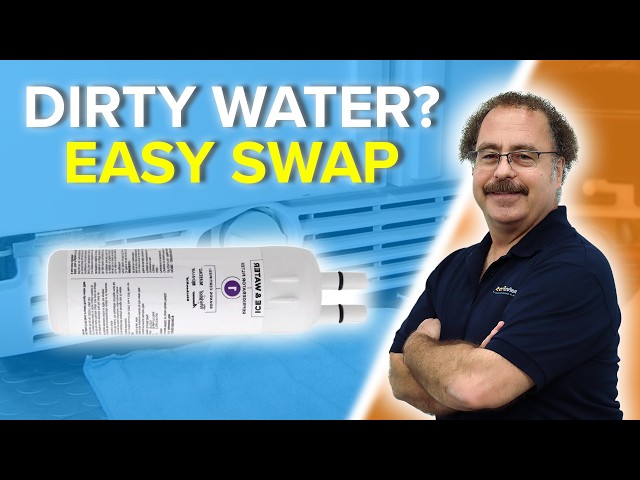
Is your Whirlpool refrigerator’s water not tasting as fresh as it used to? It might be time to change your water filter.
Knowing how to replace your water filter can save you money and keep your water clean and healthy. In this guide, you’ll find simple, step-by-step instructions that anyone can follow. By the end, you’ll feel confident and ready to improve the quality of your water in just minutes.
Let’s get started and make sure your fridge is working at its best!
Credit: www.youtube.com
Gather Necessary Tools
Gathering the right tools before changing your Whirlpool refrigerator’s water filter saves time. It makes the process easier and smoother. Having everything ready avoids frustration and mistakes.
The tools needed are simple and often found in most homes. Prepare these items to ensure a quick filter change. This step helps keep your water fresh and clean.
Water Filter Replacement
Use the correct replacement filter model for your Whirlpool refrigerator. Check your user manual or the old filter for the model number. Using the right filter ensures proper fit and water quality.
Towel Or Cloth
Keep a towel or cloth nearby to catch any drips or spills. It helps keep the area dry and clean. A small mess is common when changing the filter.
Gloves
Wear gloves to keep your hands clean and prevent contamination. Gloves protect you from germs and dirt. They also provide a better grip on the filter.
Flashlight
A flashlight helps you see the filter housing clearly. Some refrigerator models have filters in dark or hard-to-reach spots. Good lighting prevents mistakes during removal and installation.
Instructions Manual
Keep your Whirlpool refrigerator manual handy. It contains specific instructions for your model. Reading it ensures you follow the correct steps and avoid damage.

Credit: www.whirlpool.com
Locate The Water Filter
Knowing where the water filter sits in your Whirlpool refrigerator is key. It helps you replace it quickly and keep water fresh. Water filters block dirt and chemicals, so clean filters mean better tasting water and ice.
Most Whirlpool refrigerators have the water filter in easy-to-reach spots. Finding it first saves time and avoids confusion during replacement. This part guides you to locate the filter with simple tips.
Check The Refrigerator Door
Many Whirlpool models place the filter inside the refrigerator door. Open the main door and look at the top right or left corner. The filter might be hidden behind a small cover or panel.
Look Inside The Fresh Food Compartment
Some filters sit inside the fresh food section. Open the fridge fully and scan the upper walls or ceiling. The filter will be in a plastic housing, usually cylindrical or rectangular.
Inspect The Base Or Grille Area
Occasionally, the filter is near the bottom, behind the kickplate or grille. Check the front base of the fridge. You might see a round or rectangular cover that holds the filter.
Refer To The User Manual
The user manual lists the exact filter location for your model. Find your Whirlpool model number on the fridge label. Use it to search the manual online or in paper form.
Use Visual Clues On The Filter
Filters often have labels or arrows pointing to “Water In” or “Water Out.” Spotting these helps confirm the filter’s spot. It looks like a small cartridge or tube.
Remove The Old Filter
Removing the old water filter from your Whirlpool refrigerator is a straightforward task, but it requires careful attention to avoid any mess or damage. Before you start, prepare yourself by having a towel or small container nearby to catch any drips. This step ensures a smooth transition to installing the new filter without water spills or interruptions.
Turn Off Water Supply
Begin by turning off the water supply to your refrigerator. This prevents water from flowing while you remove the filter, reducing the risk of leaks or water damage.
You can usually find the water valve behind the refrigerator or under the sink. Turning the valve clockwise will shut off the water flow.
Have you noticed how many people skip this step and end up with a flooded kitchen? Taking a moment here can save you from a bigger headache.
Eject The Filter
Locate the filter compartment inside your refrigerator, usually in the upper right corner or behind a small panel.
Press the eject button or twist the filter counterclockwise, depending on your model. The filter should slide out easily without much force.
If it feels stuck, avoid using excessive force. Instead, check if there’s a locking mechanism you missed or consult your user manual.
Once removed, place the old filter in a plastic bag or container to prevent water from dripping onto your floor or shelves.
Install The New Filter
Installing the new water filter in your Whirlpool refrigerator is a straightforward process that ensures clean and fresh water for your household. Taking a moment to prepare the new filter correctly will make the installation smoother and prevent any issues. Ready to get your fridge back to delivering crisp water? Let’s dive into the next steps.
Prepare The New Filter
Start by removing the new filter from its packaging carefully. Avoid touching the filter’s O-rings or sealing parts to keep them clean and intact.
Check the filter for any protective caps or covers and remove them. These caps are there to protect the filter during shipping but must come off before installation.
Look at your refrigerator’s manual or the filter itself to confirm it’s the correct model. Using the right filter type guarantees proper fit and function.
Insert The New Filter
Locate the filter housing inside your fridge. This is usually found in the upper right or bottom grille area depending on your model.
Align the new filter with the housing, matching the arrows or guide marks. This helps ensure it seats correctly without forcing it.
Push the filter firmly into place until you hear a click or feel it lock. This confirms it’s securely installed and ready to use.
Have you noticed any resistance during insertion? If yes, double-check the alignment and avoid using excessive force to prevent damage.
Once installed, run water through the dispenser for a few minutes to flush out any air or loose particles. This step is crucial for optimal water quality and taste.
Reconnect Water Supply
After replacing the water filter on your Whirlpool refrigerator, reconnecting the water supply is crucial. This step ensures water flows smoothly to the dispenser and ice maker. Proper reconnection avoids leaks and water damage. Follow clear instructions for a safe and secure connection.
Turn On The Water Supply Valve
Locate the water supply valve behind or under the refrigerator. Slowly open the valve by turning it counterclockwise. Listen for water flowing into the refrigerator. Opening the valve too fast may cause pressure shocks and leaks.
Check For Leaks Around Connections
Inspect the water line and filter area for any signs of leaks. Wipe around connections with a dry cloth. Watch for drips or wet spots. Tighten loose fittings carefully to stop leaks without damaging the threads.
Flush The Water Line
Dispense water from the refrigerator to clear air and impurities. Run water for about 3 to 5 minutes. This step helps remove trapped air and ensures clean water flow. The water may sputter at first; this is normal.
Flush The New Filter
Flushing the new filter is essential after installation. It clears out any loose carbon particles and air. This process ensures clean, fresh water from your Whirlpool refrigerator. A proper flush also improves taste and removes odors. Follow these simple steps to flush the new filter correctly.
Run Water Through Dispenser
Start by running cold water through the dispenser. Use a large cup or container to catch the water. Let it flow for about 3 to 5 minutes. This helps push out any trapped air and carbon dust inside the filter. The water may look cloudy at first, but it will clear up soon. Keep the water running steadily for best results.
Check For Leaks
After flushing, check around the filter for leaks. Look closely at the filter housing and connections. Any dripping or moisture means the filter is not sealed properly. Turn off the water supply if you see leaks. Remove and reinstall the filter, making sure it fits tightly. Once secure, test the dispenser again to confirm no leaks remain.
Reset The Filter Indicator
The filter indicator on your Whirlpool refrigerator helps track when to change the water filter. Resetting this indicator after installing a new filter ensures accurate monitoring. This step keeps your fridge running smoothly and your water clean.
Resetting the filter indicator is quick and simple. It only takes a few seconds but is important for proper maintenance.
Locate The Filter Reset Button
Find the filter reset button on your refrigerator control panel. It is usually near the water or ice dispenser controls. Check your user manual if you have trouble locating it.
Press And Hold The Reset Button
Press the reset button firmly. Hold it down for about 3 to 5 seconds. Watch the indicator light; it will start blinking or turn off.
Confirm The Indicator Has Reset
Release the button and check the filter indicator. It should turn off or show a green light. This means the reset was successful.
Test The Water Dispenser
Use the water dispenser to check if everything works fine. The water should flow smoothly without any error signals. This confirms the filter reset process is complete.
Maintenance Tips
Keeping your Whirlpool refrigerator’s water filter in top shape is key to enjoying clean, fresh-tasting water every day. Proper maintenance not only protects your health but also extends the life of your appliance. Let’s look at practical tips that help you know when and how to replace your water filter effectively.
Regular Replacement Schedule
Your Whirlpool refrigerator’s water filter usually needs changing every six months. This timeline helps prevent buildup of contaminants that can affect water taste and quality. Setting a reminder on your phone or calendar can make this task easier to remember.
Some models have a filter indicator light that alerts you when it’s time to replace the filter. If your fridge doesn’t have this feature, marking the date of your last replacement on the filter itself can be a simple solution. Have you tried keeping a sticker or note on the fridge door? It’s a straightforward way to stay on track.
Signs Of Filter Replacement
Knowing the signs that indicate your water filter needs a change can save you from drinking unpleasant or unsafe water. If the water tastes strange, has a strange odor, or looks cloudy, it’s time to swap the filter. These changes happen because the filter is no longer effectively removing impurities.
Another sign is a decrease in water flow from the dispenser or ice maker. A clogged filter restricts water flow, leading to slower dispensing or smaller ice cubes. Paying attention to these subtle changes can prevent bigger issues down the road.
- Unusual taste or smell in water
- Cloudy or discolored water
- Reduced water flow or pressure
- Filter indicator light turns on
Have you noticed any of these signs recently? Acting quickly keeps your water fresh and your refrigerator running smoothly.

Credit: www.searshomeservices.com
Frequently Asked Questions
How Often Should I Change Whirlpool Refrigerator Water Filter?
Change the water filter every 6 months for optimal performance. Frequent use or poor water quality may require earlier replacement. Regular changes ensure clean, fresh-tasting water and prevent clogging or damage to your refrigerator’s filtration system.
How Do I Locate The Water Filter In Whirlpool Fridge?
The water filter is usually inside the fridge compartment, near the top right or bottom grille. Check your Whirlpool model manual for exact location. It’s designed for easy access to allow quick and simple replacement without tools.
Can I Use Any Water Filter For Whirlpool Refrigerators?
No, use only Whirlpool-approved water filters for compatibility and safety. Generic filters might not fit properly or meet filtration standards. Using the correct filter ensures clean water and maintains your fridge’s warranty.
What If Water Filter Change Doesn’t Stop Bad Taste?
If water tastes bad after changing the filter, flush the system by running several gallons through. Check filter installation for proper fit. Persistent issues might indicate plumbing problems or need for professional service.
Conclusion
Changing the water filter in your Whirlpool refrigerator keeps water fresh and clean. It takes only a few minutes and simple steps. Regular replacement helps avoid bad tastes and clogs. Remember to check the filter type before buying a new one.
Follow the instructions carefully to fit the filter right. Clean water means better health for you and your family. Stay on top of filter changes for the best fridge performance. Easy to do, worth the effort. Keep your water pure and enjoy every glass.