If you’ve ever struggled with a dull blade while working on a project, you know how frustrating it can be. Changing the blade in your Stanley utility knife might seem tricky, but it’s actually quick and simple once you know the steps.
In this guide, you’ll learn exactly how to replace your blade safely and efficiently. By the end, you’ll save time, avoid accidents, and keep your knife working like new. Ready to make your next cut smooth and easy? Let’s dive in.
Credit: www.roofingcontractor.com
Choosing The Right Blade
Choosing the right blade for your Stanley utility knife is key to safe, clean cuts. The correct blade matches the job and material you work with. Using the proper blade keeps your knife sharp longer and reduces effort.
Knowing which blade fits your project helps avoid damage to the knife or the surface. It also ensures precise control during cutting. Below, learn about types of Stanley utility blades and signs you need to replace them.
Types Of Stanley Utility Blades
- Standard Blades:General purpose blades for cutting cardboard, plastic, and light materials.
- Snap-Off Blades:Blades with segments that break off to reveal a fresh edge.
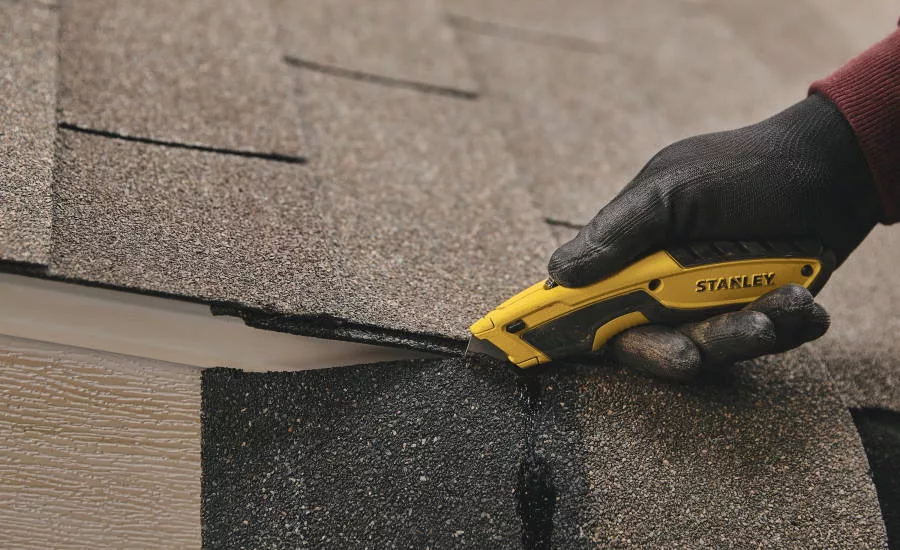
- Hook Blades:Designed for cutting roofing materials, linoleum, and carpet.
- Heavy-Duty Blades:Thick, durable blades for tougher materials like leather and rubber.
- Specialty Blades:Blades shaped for specific tasks, such as carpet or wallpaper removal.
When To Replace The Blade
- Blade feels dull or requires extra force to cut.
- Edges appear chipped, bent, or cracked.
- Cut lines become uneven or jagged.
- Blade rust or corrosion is visible.
- Work safety feels compromised due to blade condition.
Preparing For Blade Change
Changing the blade in a Stanley utility knife requires careful preparation. Proper setup ensures a smooth and safe blade replacement. Taking time to prepare saves effort and avoids accidents.
Gathering the right tools and following safety steps are essential. This section guides you through these important preparations before changing the blade.
Gathering Necessary Tools
Collect all tools needed for the blade change. Keep everything within reach to avoid interruptions.
- Stanley utility knife
- New replacement blades
- Small screwdriver or blade release tool (if required)
- Protective gloves
- Clean cloth or paper towel
Having these tools ready makes the process faster and easier. Check the blade packaging to confirm the correct blade type.
Ensuring Safety Precautions
Safety is a top priority when handling utility knife blades. The blades are very sharp and can cause injury.
- Wear protective gloves to avoid cuts.
- Work on a stable surface with good lighting.
- Keep fingers clear of the blade edge.
- Dispose of old blades safely in a blade container or wrapped securely.
Taking these precautions reduces the risk of accidents. Stay focused and handle the knife carefully throughout the blade change.
Removing The Old Blade
Slide the blade lock to release the old blade safely. Hold the knife steady and carefully pull the blade out. Dispose of the used blade in a proper container to avoid injury.
Removing the blade from your Stanley utility knife might seem daunting at first, but with the right approach, it becomes a straightforward task. If you're new to this, don't worry—many have been in your shoes. The key is to focus on safety and precision. Let's dive into the steps to ensure you change that blade like a pro.
Unlocking The Knife
First, you need to unlock your Stanley utility knife. Most models have a simple mechanism, usually a button or a lever, that you need to slide or press. This action releases the blade lock, allowing you to access the blade. Make sure you perform this action on a stable surface to prevent any accidents. It's a good idea to keep your hands dry and steady during this process. Remember, the aim is to control the knife, not struggle with it.
Safely Extracting The Blade
With the knife unlocked, it's time to extract the old blade. Carefully slide the blade out, ensuring you grip it from the unsharpened side. If it feels stuck, gently wiggle it free—never force it. Consider wearing gloves to add an extra layer of safety. Have you ever tried handling a blade with bare hands and felt that slight slip? It’s a lesson in caution. Once the blade is out, place it on a flat surface away from your workspace. This prevents any accidental cuts and keeps your environment safe. Changing a blade might seem like a small task, but it’s a skill that enhances your DIY toolkit. Have you ever thought about how a simple task like this can boost your confidence in handling tools? Safety and precision are your allies here.

Credit: www.youtube.com
Installing The New Blade
Installing the new blade in your Stanley utility knife is a straightforward process that ensures safety and efficiency during your next cutting task. Taking a moment to properly position and secure the blade will save you from unnecessary slips and accidents. Let's focus on how to get your blade perfectly aligned and firmly fixed.
Aligning The Blade Correctly
Before you snap the blade into place, check its orientation carefully. The sharp edge should face outward, ready to cut, while the notches on the blade must line up with the locking mechanism inside the knife.
Misalignment can lead to blade wobbling or even falling out, which is risky. Hold the blade steady and slide it gently into the slot until you feel it click or rest firmly. If it doesn’t fit smoothly, double-check the blade direction—you might be trying to install it upside down.
Securing The Blade In Place
Once the blade is aligned, it's crucial to lock it securely. Most Stanley utility knives have a simple locking mechanism, like a slider or a screw, that holds the blade tight.
Push the slider back to clamp the blade or tighten the screw with a screwdriver if your model requires it. Give the blade a slight wiggle to confirm it won’t move during use. A securely fastened blade means you can focus on your project, not on your safety gear.
Testing The New Blade
After installing a new blade in your Stanley utility knife, testing it is essential to ensure it’s ready for safe and efficient use. Skipping this step can lead to accidents or poor cutting performance. Let’s look at how you can confidently verify your blade is secure and effective.
Checking Blade Stability
Hold your utility knife firmly and gently wiggle the blade. It should feel solid with no noticeable movement or looseness. If you detect any shift, the blade may not be locked in properly.
Try tightening the blade clamp or re-inserting the blade. A stable blade reduces the risk of slipping during use and improves your cutting precision.
Performing A Safety Cut
Choose a scrap piece of cardboard or similar material for a test cut. Make a few controlled, shallow cuts to see how the blade performs.
Pay attention to how smoothly the blade cuts and whether it stays firmly in place. If the cuts are jagged or the blade shifts, it’s better to stop and check the installation again.
Have you ever rushed to use a new blade only to find it dull or loose? Taking a moment to test your blade saves time and prevents injury.
Maintaining Your Utility Knife
Maintaining your Stanley utility knife ensures it lasts longer and works safely. Regular care keeps the blade sharp and the handle clean. Proper maintenance prevents rust and damage. It also makes blade changes easier and quicker. A well-kept knife performs better and protects you from accidents.
Regular Cleaning Tips
Clean your utility knife after each use. Wipe the blade with a dry cloth to remove dust and debris. Use a small brush to clear dirt from the handle and blade slot. Avoid water to stop rust from forming. If the blade is sticky, use a bit of rubbing alcohol on a cloth. Dry the knife completely before storing it. Check the blade for any signs of rust or damage.
Proper Storage Practices
Store your Stanley utility knife in a dry place. Avoid damp areas to prevent rust on the blade. Use a sheath or cover to protect the blade edge. Keep the knife out of reach of children. Store it in a toolbox or drawer with other tools. Always retract the blade fully before storage. This prevents accidental cuts and blade damage.

Credit: supply.coreandmain.com
Frequently Asked Questions
How Do I Safely Remove The Old Blade In A Stanley Knife?
First, retract the blade fully. Press the blade release button or slide mechanism. Carefully pull out the old blade using pliers or fingers with caution. Always wear gloves to avoid cuts. Dispose of the old blade in a blade-safe container to prevent injury.
What Type Of Blade Fits A Stanley Utility Knife?
Stanley utility knives use standard snap-off blades or fixed utility blades. Ensure the replacement blade matches the model of your Stanley knife. Using the correct blade ensures proper fit and safe operation. Always check the packaging or manual for blade compatibility.
How Often Should I Change The Blade In My Stanley Knife?
Change the blade when it becomes dull or difficult to cut. A sharp blade provides cleaner cuts and improves safety. Frequent use may require blade changes more often. Regular inspection of the blade helps maintain cutting efficiency and prevents accidents.
Can I Reuse Stanley Utility Knife Blades?
No, Stanley utility knife blades are designed for single use until dull. Snap-off blades allow you to break off the dull segment to reveal a new sharp edge. Reusing dull blades decreases cutting efficiency and increases the risk of injury.
Conclusion
Changing a blade in a Stanley utility knife is simple and quick. Always handle the blade with care to avoid cuts. Keep your knife sharp for better and safer cutting. Regular blade changes help your knife work like new. Now you can change blades easily and safely anytime.
Stay safe and enjoy your cutting tasks with confidence.