Cooking a whole chicken in a Dutch oven is a simple way to create a juicy, flavorful meal. But you might be wondering—how long does it actually take?
Getting the timing right is key to making sure your chicken is perfectly cooked, tender, and safe to eat. You’ll discover the exact cooking times, helpful tips, and tricks to master your Dutch oven chicken every time. Keep reading, and soon you’ll be serving up a delicious, mouthwatering dish that everyone will love.
Choosing The Right Chicken
Choosing the right chicken is a key step before you start cooking in your Dutch oven. The kind of chicken you pick influences cooking time, flavor, and texture. Knowing what to look for can save you from overcooking or ending up with dry meat.
Fresh Vs Frozen
Fresh chicken usually cooks faster and can have a better texture. If you buy frozen, make sure to thaw it completely before cooking. Cooking a frozen chicken directly in the Dutch oven increases the cooking time and can lead to uneven cooking.
Think about your schedule too. If you forget to thaw your chicken, it might be tempting to cook it frozen, but this can affect the final result. A fully thawed chicken ensures even heat penetration, so your meat stays juicy.
Size And Weight Considerations
The size and weight of your chicken matter a lot for timing. Smaller chickens, around 3 to 4 pounds, usually take less time to cook—about 1 to 1.5 hours in the Dutch oven.
For larger chickens, expect to add 20 to 30 minutes of cooking time per extra pound. You might wonder how to tell if your chicken is the right size. A good rule is to choose a bird that fits comfortably inside your Dutch oven without crowding.
Overcrowding can prevent heat from circulating well and lead to uneven cooking. If your chicken is too big, it might be better to cut it into parts or choose a bigger pot.

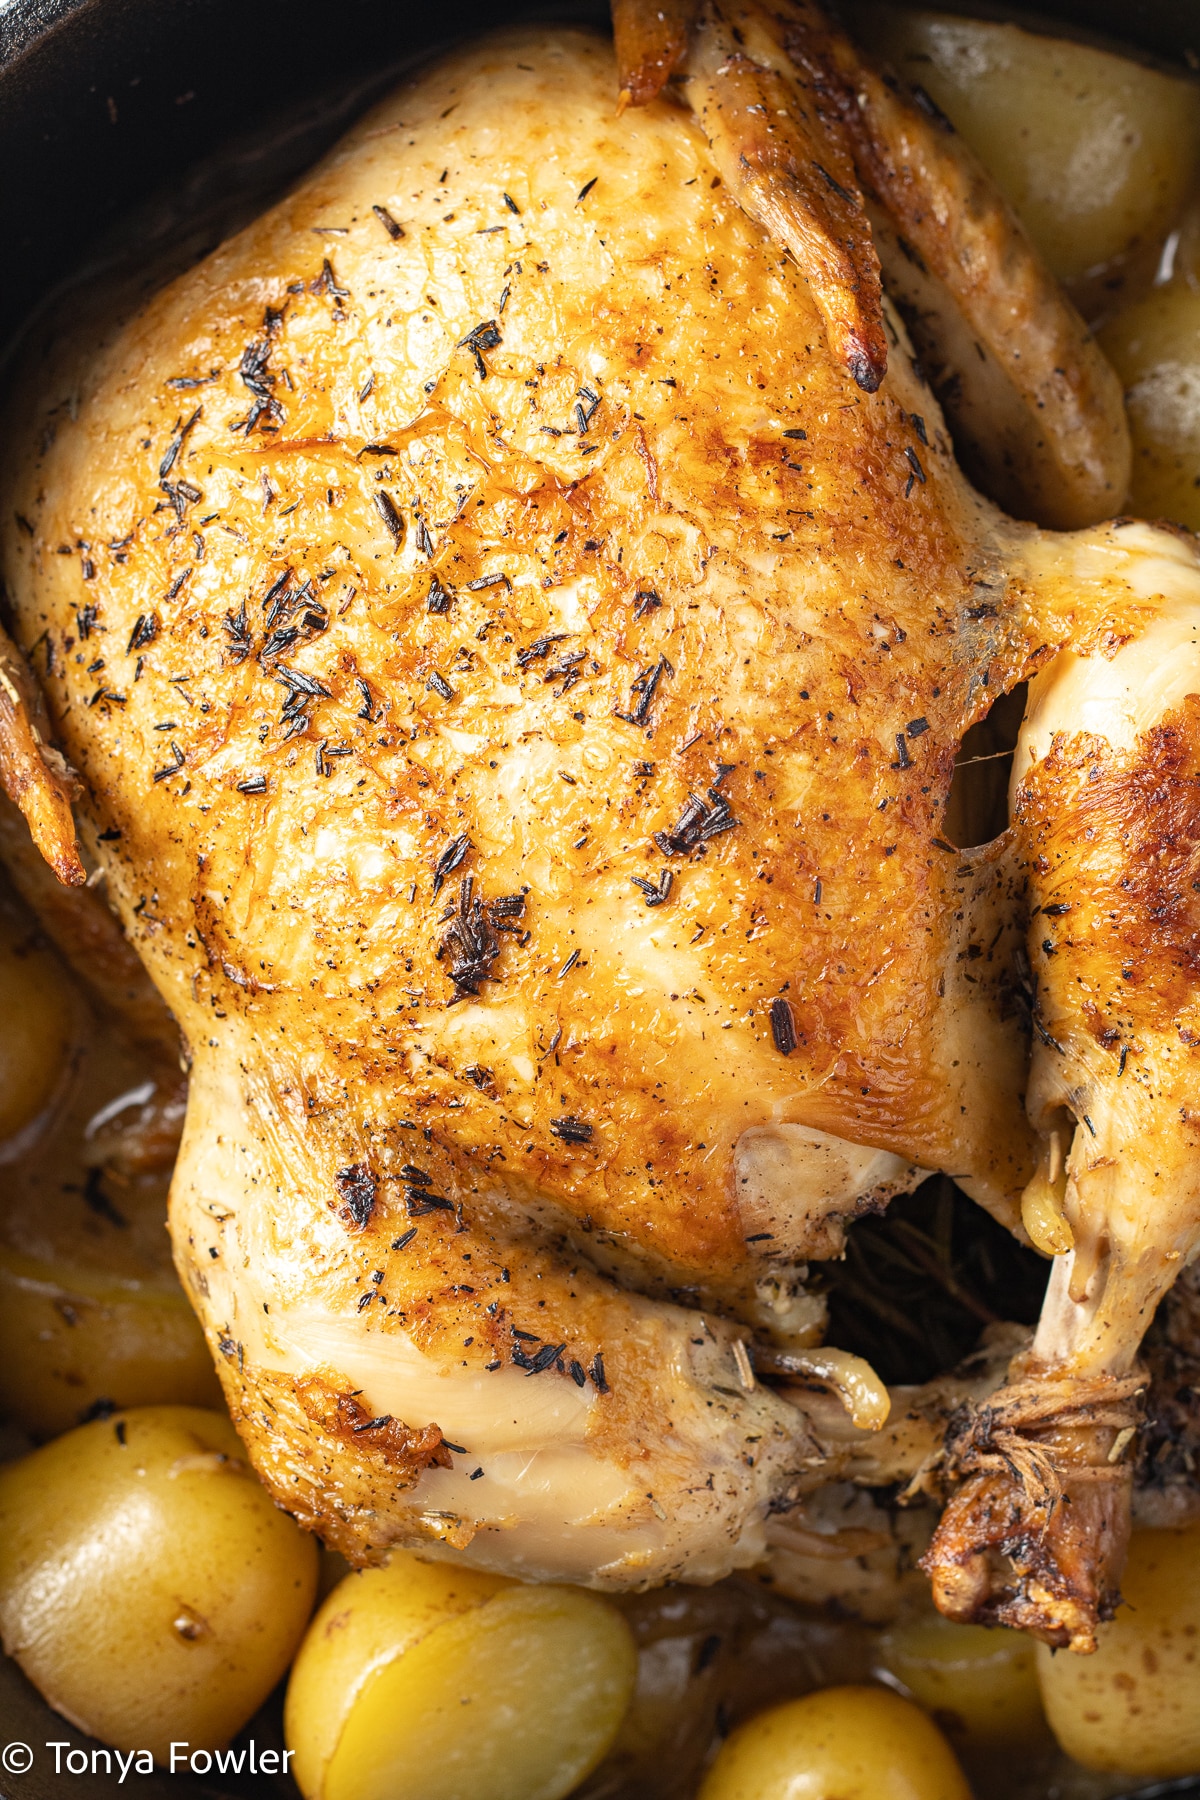
Credit: www.theseasonedmom.com
Preparing The Chicken
Preparing the chicken properly is the first step to a delicious Dutch oven meal. It helps the meat cook evenly and absorb flavors. Taking time to clean, season, and stuff the chicken improves the final taste and texture.
Cleaning And Trimming
Rinse the chicken under cold water to remove any residue. Pat it dry with paper towels to prevent sogginess. Trim excess fat and remove leftover feathers or skin pieces. Check the cavity for giblets and set them aside or discard. Proper cleaning ensures a fresh base for cooking.
Seasoning Tips
Use salt and pepper as a simple base seasoning. Rub the chicken inside and out for even flavor. Add herbs like thyme, rosemary, or sage for aroma. Garlic powder and paprika add mild spice and color. Massage the spices into the skin for better absorption.
Stuffing Options
Stuffing adds moisture and flavor from the inside. Classic options include lemon halves, onion quarters, and garlic cloves. Fresh herbs like parsley or thyme work well inside the cavity. For a heartier stuffing, try bread cubes mixed with herbs and broth. Avoid overstuffing to allow heat circulation during cooking.
Selecting The Dutch Oven
Selecting the right Dutch oven is key to cooking a whole chicken perfectly. The right pot ensures even heat and proper cooking. It also affects how easy the cooking process will be. Consider material and size carefully to get the best results.
Material Types
Cast iron is a popular choice for Dutch ovens. It holds heat well and cooks food evenly. Enameled cast iron offers the same benefits but is easier to clean. It also does not need seasoning.
Aluminum Dutch ovens heat quickly but may not keep heat as long. They are lighter and often less expensive. Stainless steel versions are durable and rust-resistant. However, they may not distribute heat as evenly as cast iron.
Size And Capacity
Choose a Dutch oven size based on the chicken size you plan to cook. A 5 to 7-quart Dutch oven fits most whole chickens. It leaves enough space for air circulation and basting.
Too small a pot will crowd the chicken, causing uneven cooking. Too large a pot may dry out the chicken due to excess air space. Think about how many servings you want and pick accordingly.
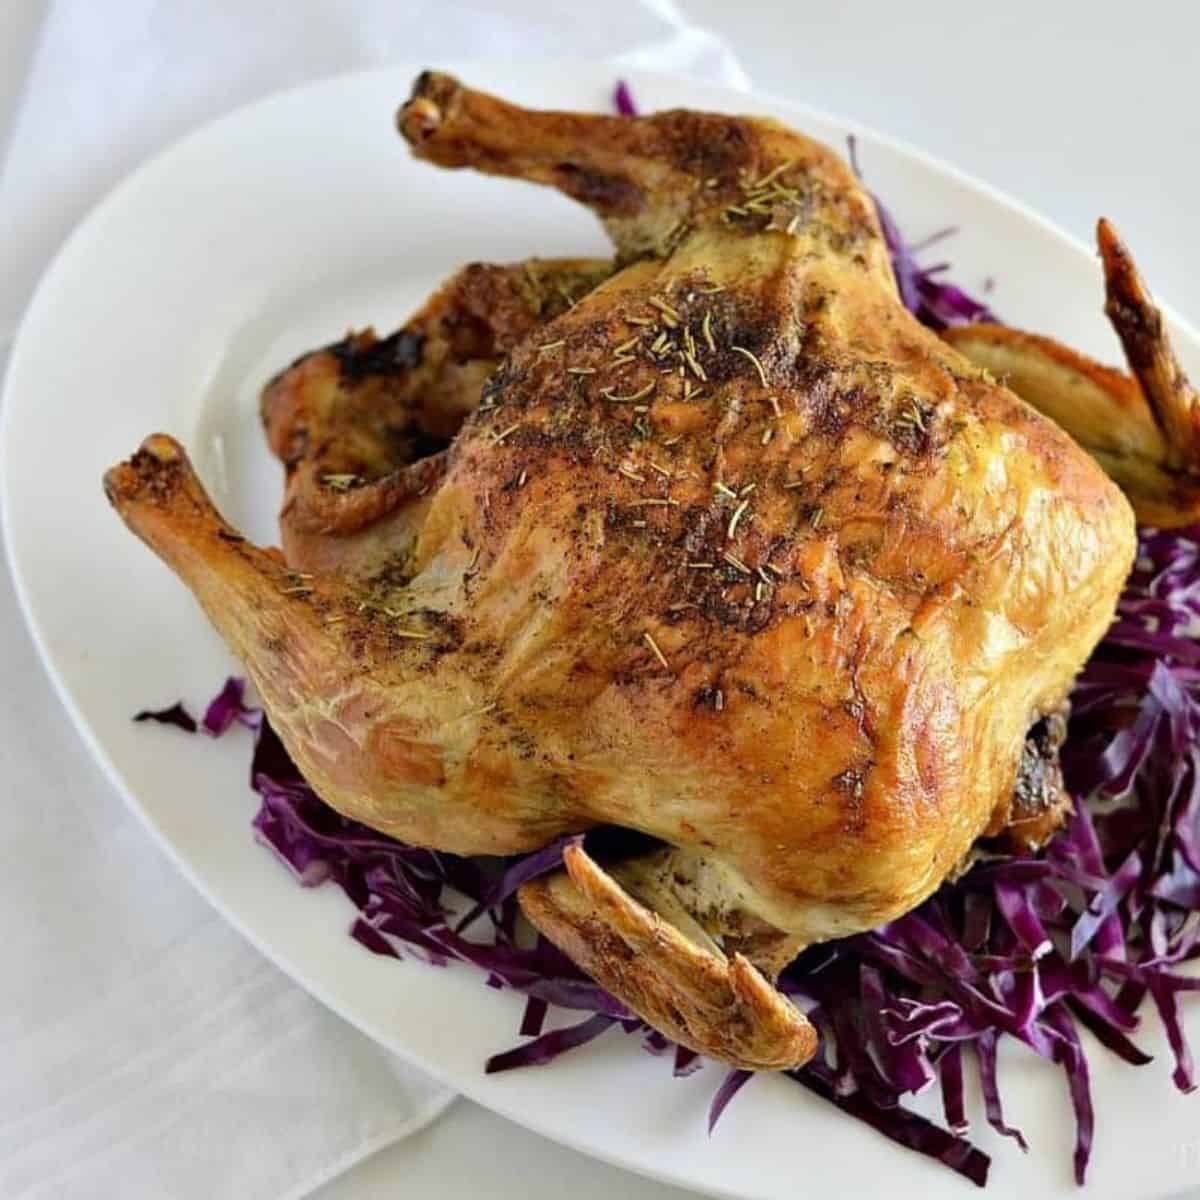
Credit: www.themidwestkitchenblog.com
Cooking Temperature And Time
Cooking a whole chicken in a Dutch oven takes about 1. 5 to 2 hours. The oven should be set to 375°F (190°C). Ensure the chicken reaches an internal temperature of 165°F (74°C) for safe consumption.
Cooking a whole chicken in a Dutch oven is a simple process. Achieving the right temperature and cooking time is key. This ensures the chicken is tender and juicy. A Dutch oven creates an even cooking environment.
Optimal Oven Temperature
Set your oven to 375°F (190°C). This temperature allows the chicken to cook evenly. It also helps to lock in the juices. Ensure the lid is tightly sealed. This keeps the heat consistent inside the Dutch oven.
General Cooking Times By Weight
The cooking time depends on the chicken's weight. Here are the general guidelines:
- 3-4 lbs: Cook for about 1.5 to 2 hours.
- 4-5 lbs: Cook for about 2 to 2.5 hours.
- 5-6 lbs: Cook for about 2.5 to 3 hours.
Check the internal temperature. It should reach 165°F (74°C) at the thickest part.
Adjusting For Altitude And Oven Variations
Cooking at high altitudes requires adjustments. Increase the cooking time slightly. This helps compensate for lower air pressure. Always use an oven thermometer. This ensures your oven's temperature is accurate. If your oven tends to run hot or cold, adjust accordingly. Check the chicken's doneness towards the end of cooking. This prevents overcooking or undercooking.
Step-by-step Cooking Process
Cooking a whole chicken in a Dutch oven creates a juicy and flavorful meal. The process is simple but requires attention to each step. Follow these instructions carefully for the best results.
Preheating The Dutch Oven
Start by placing the Dutch oven on the stove. Heat it over medium-high heat for about 5 minutes. This step ensures the pot is hot enough to brown the chicken evenly. Avoid overheating, which can burn the chicken skin later.
Browning The Chicken
Pat the chicken dry with paper towels. Rub it with salt, pepper, and your favorite spices. Add a small amount of oil to the Dutch oven. Place the chicken breast side down. Brown each side for 4 to 5 minutes until golden. This locks in juices and adds flavor.
Covering And Roasting
Once browned, flip the chicken breast side up. Add vegetables or herbs if desired. Cover the Dutch oven with its lid. Transfer it to a preheated oven at 350°F (175°C). Roast for 1 to 1.5 hours depending on the chicken size.
Checking For Doneness
Use a meat thermometer to check the chicken's internal temperature. Insert it into the thickest part of the thigh. The chicken is done at 165°F (74°C). If not yet reached, continue roasting and check every 10 minutes. Let the chicken rest for 10 minutes before carving.
Credit: www.thisvivaciouslife.com
Ensuring Juicy Results
Achieving a juicy whole chicken in a Dutch oven is all about moisture control and technique. You want every bite to be tender and flavorful, not dry or tough. The following tips will help you keep your chicken moist throughout the cooking process.
Using Broth Or Liquid
Adding liquid like chicken broth or even water to your Dutch oven creates steam, which keeps the chicken moist as it cooks. Pour about 1 to 2 cups of broth into the bottom of the pot before placing your chicken inside. This liquid not only prevents drying out but also enhances flavor during roasting.
Think about the last time you roasted a chicken without any liquid—did it seem a bit dry? A splash of broth can make a noticeable difference. You can also experiment by adding wine or a mix of broth and herbs for extra depth.
Basting Techniques
Basting means spooning the cooking juices over the chicken every 20 to 30 minutes. This simple step refreshes the skin and keeps the meat underneath juicy. Use a large spoon or baster to collect the liquid from the bottom of the Dutch oven and pour it evenly over the top.
Don’t skip this step even if it seems time-consuming. Basting can turn a good roast into a great one. If your Dutch oven has a tight-fitting lid, you might find the chicken stays moist even with less frequent basting, but checking in regularly never hurts.
Resting The Chicken
After your chicken is cooked, let it rest for at least 15 minutes before carving. Resting allows the juices to redistribute throughout the meat instead of spilling out when you cut it. Cover the chicken loosely with foil to keep it warm during this time.
Have you noticed how sometimes the first slice of a roast chicken looks dry? That’s usually because it was cut too soon. Giving it time to rest ensures every piece stays juicy and tender, making your meal more enjoyable.
Common Mistakes To Avoid
Cooking a whole chicken in a Dutch oven can be incredibly rewarding, but it’s easy to make mistakes that affect the final dish. Knowing what to avoid helps you get that perfect balance of juicy, flavorful meat and crispy skin. Let’s look at some common pitfalls that might be holding your chicken back from tasting its best.
Overcooking
Leaving your chicken in the Dutch oven for too long dries it out fast. The meat becomes tough and loses its natural juices, turning what should be a tender meal into a disappointment. Using a meat thermometer can save you here—aim for an internal temperature of 165°F (75°C) in the thickest part of the bird.
If you’ve ever pulled a chicken out only to find it dry and stringy, you know how frustrating it feels. Try checking the temperature 10 minutes before the estimated finish time next time. This simple step can prevent your chicken from becoming overcooked and dry.
Underseasoning
It’s tempting to skip seasoning or just add a pinch of salt, but underseasoning dulls the whole dish. Your chicken needs a good amount of salt, pepper, and herbs to bring out its natural flavors. Don’t be shy—rub the seasoning all over the skin and inside the cavity for the best taste.
I once cooked a Dutch oven chicken that was perfectly cooked but lacked seasoning. It taught me that no matter how well you cook, flavor is king. Have you ever tasted a meal that was cooked right but felt bland? That’s what underseasoning does.
Skipping Rest Time
Cutting into your chicken right away may seem tempting, but it’s a mistake. Resting lets the juices redistribute, making the meat moist and tender. If you slice too soon, all those flavorful juices spill out onto the cutting board.
Try letting your chicken rest for 10 to 15 minutes after cooking. This pause makes a noticeable difference in texture and taste. Do you want your chicken to be juicy or dry? Resting is the simplest trick to keep it juicy.
Serving Suggestions
Serving a whole chicken cooked in a Dutch oven is a rewarding experience that can bring warmth and satisfaction to your meal. How you present and accompany the chicken can elevate the dining experience. Let's look at some smart serving suggestions that make your meal both delicious and memorable.
Side Dishes
Pair your Dutch oven chicken with sides that soak up the rich flavors and add texture to the plate. Roasted vegetables like carrots, potatoes, and Brussels sprouts work beautifully—they can even cook alongside the chicken for convenience and flavor harmony.
Consider a fresh green salad to add a crisp contrast, or creamy mashed potatoes for a comforting touch. If you like, toss in some crusty bread to mop up the savory juices. What simple side have you tried that surprised you with how well it complements the chicken?
Carving Tips
Carving your whole chicken properly makes serving easier and more enjoyable. Start by letting the chicken rest for about 10-15 minutes after cooking; this keeps the juices locked inside for moist, flavorful meat.
Use a sharp knife and begin by removing the legs and thighs. Then, slice the breast meat thinly against the grain for tenderness. Remember, neat carving not only looks appetizing but also helps you portion the chicken evenly for your guests.
Frequently Asked Questions
How Long Does A Whole Chicken Take In A Dutch Oven?
A whole chicken usually takes 1. 5 to 2 hours to cook in a Dutch oven at 350°F. Cooking time depends on the chicken's size and oven temperature. Always check for an internal temperature of 165°F for safety.
What Temperature Is Best For Dutch Oven Chicken?
The ideal temperature for cooking a whole chicken in a Dutch oven is 350°F. This temperature ensures even cooking and a tender, juicy result without drying out the meat.
Should I Cover The Dutch Oven While Cooking Chicken?
Yes, cover the Dutch oven with its lid while cooking. Covering traps heat and moisture, helping the chicken cook evenly and stay juicy.
How To Check If Dutch Oven Chicken Is Fully Cooked?
Use a meat thermometer to check the chicken's internal temperature. It should read 165°F in the thickest part to ensure it is safely cooked.
Conclusion
Cooking a whole chicken in a Dutch oven takes time and care. Usually, it needs about 1 to 1. 5 hours at a moderate temperature. Always check the chicken’s internal temperature to be sure it’s fully cooked. Rest the chicken for a few minutes before serving.
This helps keep the meat juicy and tender. Using a Dutch oven makes cooking simple and tasty. Enjoy your meal with confidence and ease.