Are you ready to take your cooking skills up a notch and impress everyone with perfectly cooked, juicy chicken? Learning how to put a chicken on a rotisserie is easier than you think.
With the right steps, you’ll get crispy skin and tender meat every time. Keep reading, and you’ll discover simple tips that make the process smooth and stress-free. By the end, you’ll be confident to serve a delicious rotisserie chicken that everyone will love.
Let’s get started!
Credit: www.idratherbeachef.com
Choosing The Right Chicken
Choosing the right chicken is crucial before you even start putting it on a rotisserie. The perfect bird can make all the difference in taste, texture, and cooking time. Knowing what to look for will save you from common pitfalls and help you achieve that juicy, evenly cooked rotisserie chicken you crave.
Size And Weight Considerations
The size of your chicken affects how it cooks on the rotisserie. A chicken that is too large may not cook evenly, leaving the inside underdone while the outside gets overcooked.
Most rotisserie spits handle chickens weighing between 3 to 5 pounds best. This range allows for consistent rotation and heat distribution. Have you ever tried cooking a massive bird that just wouldn’t fit properly? That’s why size matters here.
If you want your chicken to cook faster, choose a smaller bird. It will also be easier to handle when skewering it onto the spit.
Fresh Vs. Frozen Chicken
Fresh chicken often results in better flavor and texture on the rotisserie. It tends to retain moisture during cooking, which is key for juicy meat.
Frozen chicken can work too, but you must thaw it completely before cooking. Cooking a partially frozen chicken can lead to uneven cooking and a dry finish.
Think about your schedule: do you want the convenience of frozen chicken, or can you plan ahead and get fresh? Your choice will impact your rotisserie experience significantly.
Preparing The Chicken
Preparing the chicken properly sets the stage for a perfect rotisserie meal. Cleanliness and trimming help the chicken cook evenly and improve flavor. Careful preparation also prevents flare-ups and ensures a juicy roast.
Cleaning And Patting Dry
Start by rinsing the chicken under cold water. Clean inside the cavity to remove any leftover parts. Use paper towels to pat the chicken dry. Removing moisture helps the skin crisp up during cooking. A dry surface also allows seasonings to stick better.
Trimming Excess Fat And Skin
Check the chicken for extra fat or loose skin. Trim away large fat deposits with kitchen scissors. Remove any hanging skin that might burn on the rotisserie. This step reduces flare-ups and keeps the chicken from dripping too much fat. Trimmed chicken cooks more evenly and tastes cleaner.
Seasoning And Marinating
Seasoning and marinating are key to a tasty rotisserie chicken. They add flavor and help keep the meat juicy. The right spices and liquids make the chicken more delicious. This step prepares the chicken for slow, even cooking on the rotisserie. Let’s explore some simple dry rubs and marinade options. Also, learn the best timing for these flavors to soak in.
Basic Dry Rubs
Dry rubs are easy to apply and create a flavorful crust. Use a mix of salt, pepper, and spices. Here are some common ingredients:
- Paprika for color and mild heat
- Garlic powder for a savory touch
- Onion powder to add depth
- Dried herbs like thyme or rosemary
- Brown sugar for a hint of sweetness
Rub the mixture evenly over the whole chicken. Cover all sides for balanced flavor. Let it sit a bit before cooking.
Marinade Options
Marinades soak deep into the meat, making it tender and tasty. Use an acid base like lemon juice or vinegar. Combine with oil and herbs for a balanced mix. Try these simple marinades:
- Lemon juice, olive oil, garlic, and rosemary
- Soy sauce, honey, garlic, and ginger
- Yogurt, lemon, cumin, and coriander
Place the chicken in a sealed bag or container. Pour marinade over it, coating well. Keep it cold while it rests.
Timing For Best Flavor
More time means better flavor penetration. Aim to marinate at least 2 to 4 hours. Overnight marinating is even better for deep taste. Dry rubs can be applied 30 minutes to an hour before cooking. Do not marinate longer than 24 hours. Too long can change the meat’s texture. Always refrigerate the chicken during marinating.

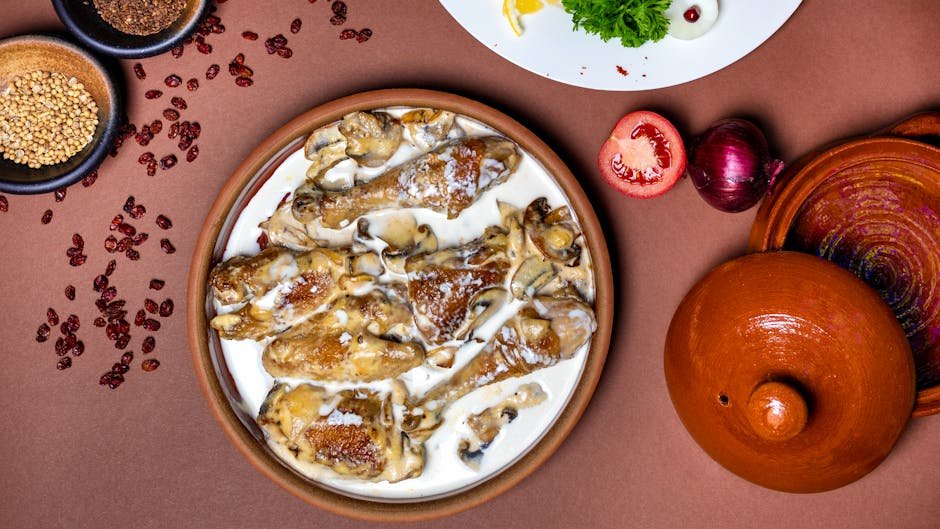
Credit: www.kalofagas.ca
Setting Up The Rotisserie
Setting up the rotisserie properly is key to cooking a perfectly roasted chicken. It ensures even cooking and keeps the bird juicy and flavorful. Getting this right can make the difference between a meal you savor and one you regret.
Choosing The Right Equipment
Your rotisserie setup starts with selecting the right gear. Not all rotisserie kits are created equal, and the size and weight capacity matter a lot. You want a spit rod that can hold your chicken securely without bending or slipping.
Look for a motor that runs quietly and steadily. A weak or noisy motor can cause uneven rotation or interruptions in cooking. Also, consider the type of grill or oven you have—some rotisseries are designed specifically for gas grills, while others fit electric models.
Have you checked if your rotisserie kit includes forks or clamps? These parts are essential to hold the chicken in place as it spins. Missing or loose clamps can cause the chicken to wobble or fall off mid-cook, ruining your dinner.
Assembling The Rotisserie Spit
Once you have your equipment ready, assembly is your next focus. Start by sliding the spit rod through the chicken’s cavity, making sure it’s centered. This helps the bird rotate evenly and cook uniformly on all sides.
Next, secure the chicken with the spit forks or clamps on both ends. Tighten them enough to hold the chicken firmly but avoid tearing the skin. If the bird shifts during cooking, you risk uneven roasting and a mess inside your grill.
Double-check the balance by spinning the spit by hand. Does it turn smoothly without wobbling? If not, adjust the clamps or reposition the chicken until it’s stable. This step prevents motor strain and ensures consistent rotation throughout the cooking process.
Securing The Chicken On The Spit
Slide the chicken onto the spit rod, ensuring the cavity faces the heat source. Secure it tightly with the spit forks to prevent wobbling. Balance the chicken evenly for smooth rotation and even cooking.
Securing the chicken on the spit is a crucial step in rotisserie cooking. This ensures even cooking and prevents the chicken from falling off. A well-secured chicken results in juicy meat and crispy skin. Let's explore how to achieve this perfect setup.
Trussing Techniques
Trussing keeps the chicken compact. It prevents wings and legs from flopping around. Use butcher's twine for this task. Tie the legs together tightly. Tuck the wings under the body. This step helps the chicken cook evenly. A neat, trussed chicken looks appealing too.
Balancing The Chicken
Balancing is key for smooth rotation. Slide the chicken onto the spit rod. Ensure the center of gravity is aligned. Use counterweights if needed. Secure the chicken with forks on each side. Tighten the screws firmly. A balanced chicken rotates without wobbling, ensuring even cooking.
Cooking The Chicken
Cooking a chicken on a rotisserie gives it a juicy, even roast with crispy skin. The key is steady heat and slow rotation. This section covers how to prepare your rotisserie, set the right temperature, and keep the chicken moist.
Preheating The Rotisserie
Start by heating the rotisserie to the right temperature before placing the chicken. Preheat your grill or oven to about 350°F (175°C). This ensures even cooking from the start. Make sure the rotisserie spit and forks are clean and ready.
Temperature And Timing Guidelines
Keep the heat steady at 350°F for a whole chicken. Cooking time depends on weight—usually about 15 minutes per pound. For example, a 4-pound chicken needs around 1 hour. Use a meat thermometer to check doneness. The chicken is done when the internal temperature reaches 165°F (74°C).
Monitoring And Basting
Watch the chicken as it cooks to avoid burning. Baste every 20 minutes with a mix of oil, butter, or marinade. This keeps the skin crispy and meat juicy. Rotate the spit smoothly and check the chicken’s color and temperature often.
Checking For Doneness
Checking for doneness is a crucial step when cooking chicken on a rotisserie. It ensures the meat is safe to eat and perfectly juicy. Relying on guesswork can lead to undercooked or dried-out chicken, so using reliable methods will give you confidence every time.
Using A Meat Thermometer
A meat thermometer is your best friend for accuracy. Insert it into the thickest part of the chicken, avoiding bones, to get the true internal temperature.
The safe internal temperature for cooked chicken is 165°F (74°C). Reaching this number means the chicken is fully cooked and safe to eat. If you don’t have a thermometer, you’re missing a simple tool that can save your meal from disaster.
When I first started rotisserie cooking, I ignored the thermometer and ended up with dry breast meat. After using one, the difference was clear—the chicken stayed juicy and tender every time.
Visual And Texture Cues
Not everyone owns a meat thermometer, so visual and texture checks are good backup methods. Look for golden-brown skin that’s crisp but not burnt.
Check the juices by piercing the thickest part with a skewer or knife. Clear juices mean the chicken is cooked; pink or red juices indicate it needs more time. Also, the meat should feel firm but springy when pressed gently.
Ask yourself: Does the meat pull apart easily? If yes, your rotisserie chicken is likely done. If not, give it a few more minutes to avoid toughness.

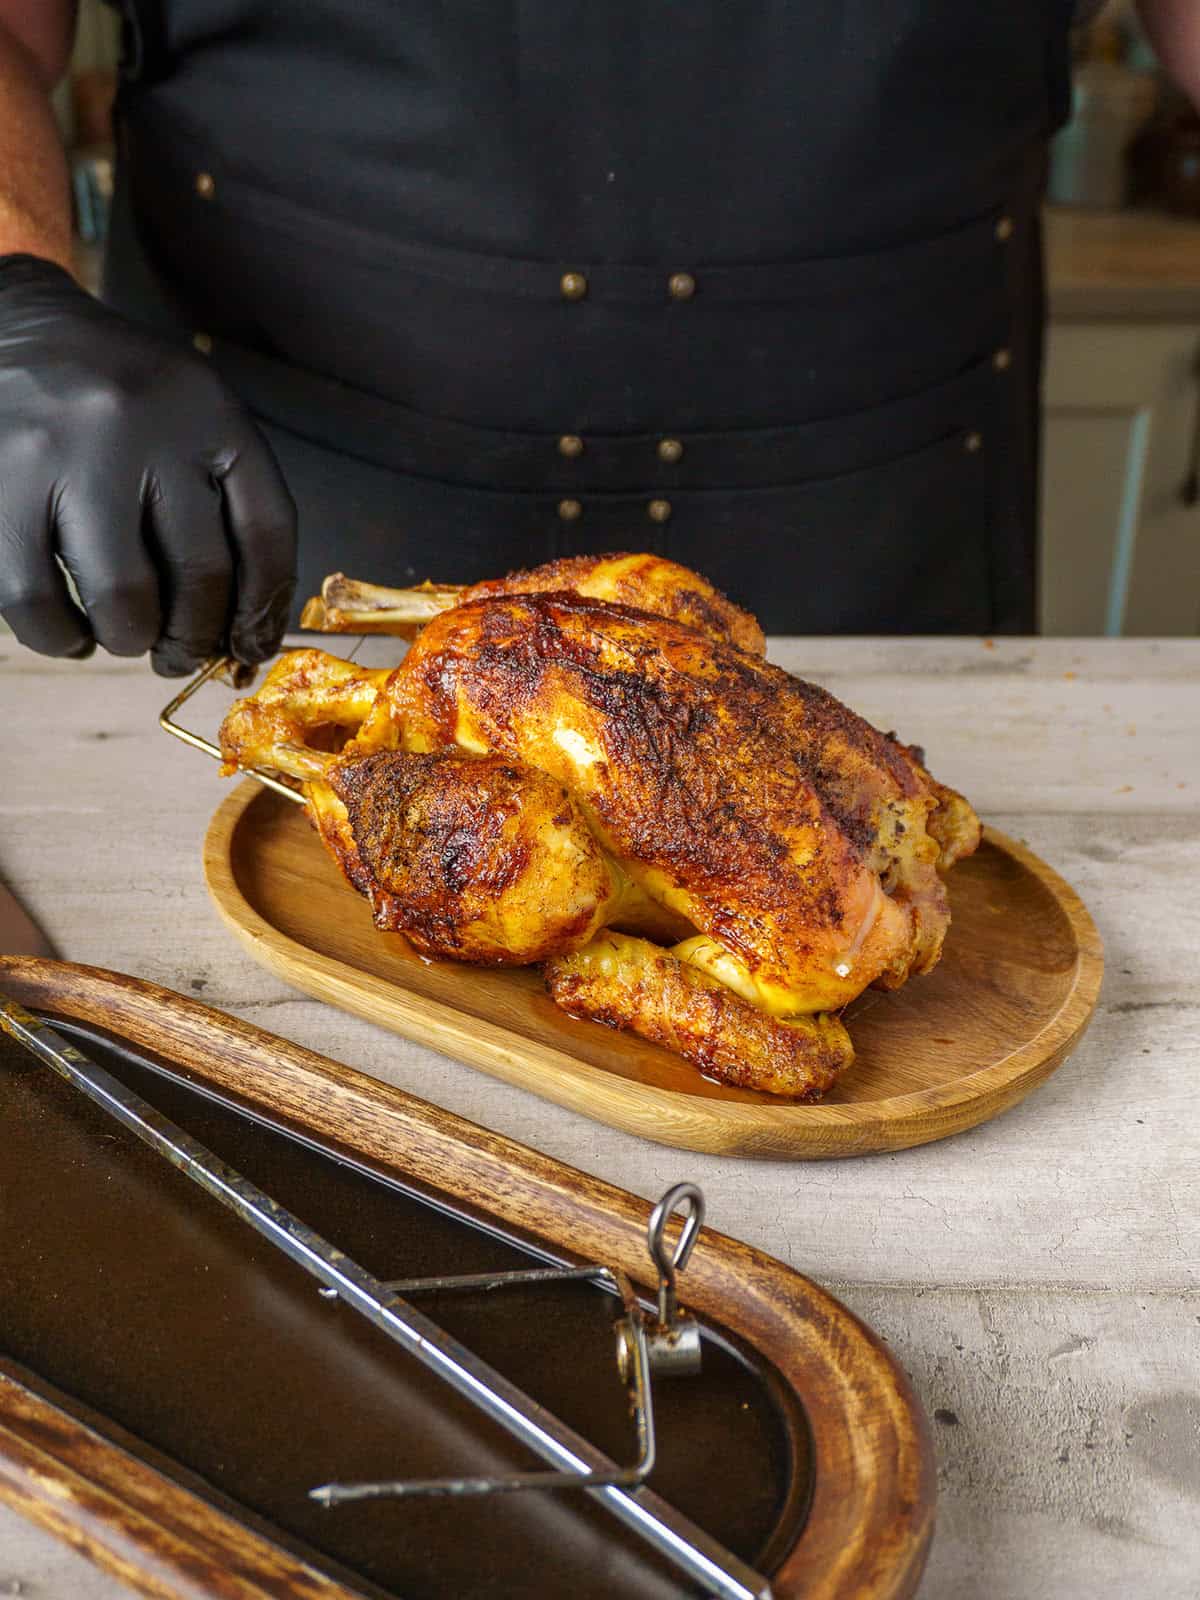
Credit: whatsgabycooking.com
Removing And Resting The Chicken
Carefully remove the chicken from the rotisserie to keep its shape intact. Let it rest for 10 to 15 minutes to allow juices to settle and enhance flavor. Resting helps the meat stay moist and tender before slicing.
Removing and resting the chicken is a crucial step in the rotisserie process. It ensures that all your hard work results in a juicy, flavorful meal. When done correctly, these final touches can elevate your cooking from good to great.
Safe Removal Techniques
Removing a chicken from a rotisserie can be tricky if you're not prepared. Make sure you have the right tools on hand, such as heat-resistant gloves and sturdy tongs. Carefully grip the chicken and gently slide it off the spit, being mindful of any hot juices that might splash. Avoid using sharp objects to pry the chicken off, as this can tear the skin and let all those delicious juices escape. Instead, let the chicken cool for a minute or two to make handling easier. Always prioritize safety to prevent burns and spills.
Resting Time Importance
Resting your chicken is not just a culinary suggestion—it's a must. Allowing the chicken to rest for about 10-15 minutes after removing it from the rotisserie gives the juices time to redistribute. This results in a moist and tender bite that everyone will appreciate. Have you ever cut into a roast too soon and watched all the juices run out? That's what resting prevents. During this short pause, you can prepare any sides or set the table, ensuring everything is ready for the perfect meal.
Serving Suggestions
Serving a rotisserie chicken is more than just placing it on the table. How you carve and pair it can elevate the entire meal experience. Paying attention to these details ensures every bite is as enjoyable as the first.
Carving Tips
Start by letting the chicken rest for about 10 minutes after cooking. This helps the juices settle, making the meat juicier and easier to carve.
Use a sharp knife or carving set. Begin by cutting off the legs and thighs in one smooth motion. Then, carefully slice the breasts off the bone in even, thin pieces.
Want to impress your guests? Present the carved pieces on a warm platter with some fresh herbs. It looks inviting and keeps the chicken warm longer.
Side Dish Pairings
Think about balance: rich, juicy chicken pairs well with fresh, crisp sides. A simple green salad with a light vinaigrette can brighten the meal.
Consider roasted vegetables like carrots, Brussels sprouts, or sweet potatoes. Their caramelized flavors complement the smoky taste of rotisserie chicken.
Don’t forget carbs! Fluffy mashed potatoes or a wild rice pilaf add comforting textures that round out the plate nicely.
- Steamed asparagus with lemon zest
- Garlic butter corn on the cob
- Herb-infused couscous
- Fresh tomato and cucumber salad
What side dishes do you reach for when serving chicken? Experimenting with different flavors can turn a simple meal into something memorable.
Cleaning And Maintenance
Keeping your rotisserie clean and well-maintained is essential for delicious, safe meals every time you cook. Neglecting this part can lead to buildup, unpleasant odors, and even damage to your equipment. Let’s look at practical ways to keep your rotisserie spit and accessories in top shape.
Cleaning The Rotisserie Spit
After cooking, the spit often has grease and food residue stuck to it. Scrubbing it immediately with hot, soapy water makes the job easier and prevents hardened grime. Use a stiff brush or sponge to remove stuck-on bits, paying special attention to the prongs that hold the chicken in place.
If your spit is dishwasher safe, give it a run through the dishwasher for a deeper clean. Otherwise, soak it in warm water for 15-20 minutes before scrubbing to loosen stubborn residue. Don’t forget to dry it thoroughly to avoid rust and keep it shiny.
Storing Your Equipment
Proper storage extends the life of your rotisserie tools. Store the spit and forks in a dry, cool place to prevent rust and corrosion. Wrapping them in a clean cloth or placing them in a protective case helps avoid scratches and dust buildup.
Have you ever found a missing part just when you needed it? Keep all small pieces like screws and forks together in a labeled container. This small effort saves time and frustration when you’re ready to cook again.
Frequently Asked Questions
How Do You Prepare A Chicken For Rotisserie Cooking?
Remove giblets and pat the chicken dry. Season inside and out. Truss the legs and wings tightly to ensure even cooking on the rotisserie.
What Type Of Spit Rod Is Best For Rotisserie Chicken?
Use a sturdy, stainless steel spit rod. It should be long enough to balance the chicken securely. This prevents wobbling during cooking.
How Do You Secure A Chicken On The Rotisserie Spit?
Insert the spit rod through the chicken cavity. Use forks or prongs to lock the chicken in place. Tighten screws or clamps to prevent slipping.
What Temperature Should A Rotisserie Chicken Be Cooked At?
Cook the chicken at medium heat, around 300-350°F (150-175°C). This ensures even cooking and crispy skin without burning.
Conclusion
Putting a chicken on a rotisserie is simple and rewarding. Start by securing the chicken properly on the spit rod. Make sure it is balanced to cook evenly. Turn the rotisserie slowly for juicy and tender meat. Keep an eye on the temperature for safe cooking.
Enjoy the delicious flavors from slow roasting. With practice, this method becomes easier and fun. Give it a try and taste the difference. Perfect for family meals or special occasions. A great way to cook chicken every time.