Craving a creamy, delicious milkshake but don’t have a blender? You’re not alone.
It might seem impossible at first, but making a milkshake without a blender is easier than you think. Imagine enjoying that thick, sweet treat right at home, using simple tools you already have. You’ll discover easy tricks to whip up a perfect milkshake without any fancy gadgets.
Keep reading, and you’ll never have to skip your milkshake craving again.
Ingredients Needed
Making a milkshake without a blender might seem tricky, but it all starts with the right ingredients. Having simple, quality ingredients on hand makes the process smoother and the taste better. You don’t need fancy tools to enjoy a creamy, delicious milkshake.
Essential Ingredients
- Milk:Whole milk is best for creaminess, but you can use any kind you have. Even plant-based milk works well.
- Ice Cream:Vanilla is classic, but chocolate or strawberry add fun twists. Choose a good quality ice cream for richer flavor.
- Sugar or Sweetener:Optional, depending on how sweet your ice cream is. A little sugar can balance flavors perfectly.
- Flavorings:Vanilla extract, cocoa powder, or fruit syrups can enhance your milkshake’s taste.
Optional Add-ins For Extra Flavor
- Fresh fruits like bananas or strawberries, mashed or finely chopped
- Chocolate chips or cookie crumbs for texture
- Peanut butter or nutella for a rich twist
Tools And Containers You’ll Need
- A large mixing bowl to combine ingredients
- A sturdy whisk or fork for mixing
- A jar with a tight lid or a sealed container to shake the mixture
Have you ever found yourself craving a milkshake but didn’t have a blender? Gathering these ingredients and tools ahead of time can turn that craving into a quick, satisfying treat. What flavors will you try first?

Credit: www.thekitchn.com
Using A Jar And A Spoon
Making a milkshake without a blender is simple with just a jar and a spoon. This method works well when you want a quick treat and have limited tools. The jar helps mix ingredients tightly, while the spoon breaks down ice cream and blends flavors smoothly. It takes a bit of effort but gives satisfying results.
Step-by-step Process
- Choose a jar with a tight lid for easy shaking.
- Put ice cream and milk into the jar. Use about two scoops of ice cream and half a cup of milk.
- Close the lid tightly to avoid spills.
- Shake the jar vigorously for about 1 to 2 minutes.
- Open the jar and use a spoon to stir and mash any remaining ice cream chunks.
- Shake again for 30 seconds to mix well.
- Check the thickness. Add more milk or ice cream to adjust.
- Pour into a glass and enjoy immediately.
Tips For Best Results
- Use full-fat ice cream for creamier texture.
- Chill the jar before starting to keep the milkshake cold.
- Use a spoon with a flat edge for easier mashing.
- Shake hard but carefully to avoid leaks.
- Add small amounts of milk to control thickness.
- Try adding flavor syrups or fruits for variety.
- Serve quickly to enjoy the best texture and temperature.
Whisking By Hand
Whisking by hand is a simple way to make a milkshake without a blender. It takes some effort but gives a fresh, creamy result. This old-school method works well when you lack electric tools.
The key is to mix ingredients thoroughly and add air for smoothness. It is perfect for small servings or quick milkshake cravings. Let’s explore what tools you need and how to create creaminess by whisking.
Tools Required
- A large mixing bowl or deep cup
- A sturdy whisk with comfortable grip
- Measuring cups and spoons
- A spoon or spatula for scraping
Choose a bowl that allows enough space for vigorous whisking. A metal or glass bowl works best. The whisk should be strong enough to handle thick liquids without bending.
Technique To Create Creaminess
Start by pouring cold milk and ice cream into the bowl. Add any flavorings or sweeteners. Whisk quickly in a circular motion to mix well.
Lift the whisk often to let air into the mixture. This adds lightness and smooth texture. Keep whisking for about 3 to 5 minutes until the shake looks thick and creamy.
Use the spatula to scrape the sides and mix all ingredients evenly. Chill the milkshake briefly if needed before serving. Whisking by hand takes patience but results in a tasty, fresh milkshake.

Credit: www.youtube.com
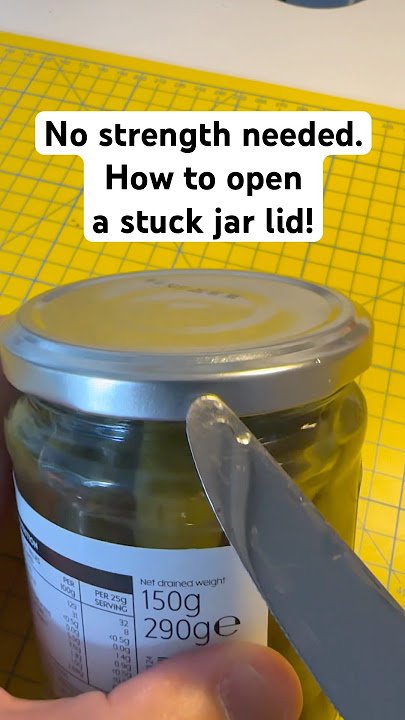
Shaking In A Sealed Container
Shaking in a sealed container can create a delicious milkshake without a blender. Combine ice cream, milk, and flavoring in a jar. Shake vigorously until smooth and creamy. Enjoy your homemade treat!
Making a milkshake without a blender might sound challenging, but it's simpler than you think. Shaking in a sealed container is a surprisingly effective method that requires minimal tools, making it perfect for those spontaneous milkshake cravings. Imagine the satisfaction of creating a creamy, delicious treat using just your hands and a few basic ingredients.
Choosing The Right Container
Selecting the right container is crucial for a successful shake. Look for a large, sturdy jar with a tight-fitting lid. A mason jar is ideal due to its durability and secure seal. A well-sealed container prevents leaks and ensures your ingredients mix thoroughly. If you don't have a mason jar, a reusable water bottle with a screw-top lid can work too. Make sure the container has enough room to allow the ingredients to move around.
Shaking Method
Once you've chosen your container, it's time to get shaking. Add your ice cream, milk, and any flavorings or extras like chocolate syrup or fruit. Fill the jar no more than halfway to leave space for shaking. Seal the lid tightly and start shaking vigorously. Use both hands and shake in different directions to mix the ingredients well. Shake for about 1-2 minutes or until you feel the mixture is smooth and creamy. The physical effort is part of the fun—consider it a mini workout with a sweet reward! Does the thought of crafting a milkshake with your own hands add a new layer of enjoyment to the experience?
Using A Fork Or Potato Masher
Making a milkshake without a blender might sound tricky, but using simple kitchen tools like a fork or potato masher can get the job done. These tools help you break down and mix your ingredients effectively, even if you don’t have fancy gadgets at hand. It’s all about how you handle the ingredients and combine them for a smooth, creamy shake.
Breaking Down Ingredients
Start by softening your ice cream or frozen fruit. A fork works well for this because its tines can break up chunks into smaller pieces. Press down and mash repeatedly until the ingredients become easier to mix.
If you’re using a potato masher, it’s even more efficient at crushing harder bits like frozen berries or ice cubes. The flat, broad surface lets you apply more pressure, speeding up the process. Remember, smaller pieces mix better and create a smoother texture.
Mixing Tips
Once your ingredients are broken down, add your milk gradually. Pour a little at a time and stir vigorously with your fork or masher. This prevents the mixture from becoming too watery or too thick all at once.
- Use circular motions to evenly combine everything.
- Scrape the sides of your bowl frequently to avoid clumps.
- Don’t rush—mixing by hand takes a bit of patience but yields great results.
Have you ever tried making a milkshake this way? It can be surprisingly satisfying to create a creamy treat without electricity. What other kitchen hacks have you found useful in a pinch?
Flavor Variations Without A Blender
Creating a milkshake without a blender does not limit your flavor options. You can still enjoy many tasty variations by using simple tools like a whisk or a fork. These techniques help mix ingredients well, making the milkshake smooth and flavorful.
Choosing the right flavors is key. Fresh fruits, syrups, and spices all work great. Mixing and matching these can give you endless milkshake possibilities, even without a blender.
Fruit-based Milkshake Variations
Use ripe fruits like bananas, strawberries, or mangoes. Mash them with a fork until soft. Stir into cold milk and ice cream. This creates a natural sweetness and fresh taste without chunks.
Chocolate And Coffee Flavors
Mix cocoa powder or instant coffee with milk and ice cream. Whisk vigorously to dissolve powders. Add a touch of sugar or honey for extra sweetness. These flavors blend well and give a rich taste.
Spiced Milkshake Options
Add cinnamon, nutmeg, or vanilla extract to your milkshake mix. Stir or whisk to combine. These spices add warmth and depth to simple milk and ice cream blends.
Nut Butter And Cookie Flavors
Stir peanut butter or almond butter into the milk and ice cream. Crush cookies into small pieces and mix in. Use a spoon or fork to combine well. This gives a creamy texture with crunchy bits.
Common Mistakes To Avoid
Making a milkshake without a blender can be fun and simple. Many people make common mistakes that spoil the texture or taste. Avoiding these errors helps you get a smooth, creamy shake every time.
Using Warm Ingredients
Cold ingredients make a thick, refreshing milkshake. Using warm milk or ice cream melts the shake too fast. Always chill your milk and ice cream before mixing.
Skipping Proper Mixing Tools
Mixing by hand needs the right tools. Using a spoon alone often leaves lumps. A whisk or a fork helps blend ingredients smoothly.
Adding Too Much Liquid
Too much milk makes the shake thin and watery. Add milk slowly to control the thickness. Stop adding when the shake looks creamy but pourable.
Not Soften Ice Cream Slightly
Ice cream straight from the freezer is hard to mix. Let it sit for 5 minutes to soften. This step makes hand mixing easier and results smoother.
Ignoring Rest Time
After mixing, let the shake rest for a minute. This helps flavors blend and thicken the shake. Stir once more before serving for best texture.

Credit: bakingmischief.com
Serving Suggestions And Presentation
Serving and presenting a milkshake without a blender can be just as delightful. The way you serve your milkshake enhances the whole experience. A simple touch can turn a homemade shake into a treat.
Presentation makes your milkshake more inviting. It shows care and creativity. Here are some ideas to make your milkshake look and feel special.
Choosing The Right Glass
Use a tall glass for a classic look. Clear glasses show off the milkshake’s color and texture. A wide rim allows for toppings and garnishes. Chill the glass before pouring to keep the shake cold longer.
Adding Toppings For Appeal
- Whipped cream adds a creamy, fluffy top.
- Sprinkles or chocolate chips create fun colors and textures.
- Fresh fruit slices add natural sweetness and color.
- Drizzle chocolate or caramel syrup for a rich touch.
Using Straws And Spoons
Thick straws help sip thicker shakes easily. Choose colorful or striped straws for extra charm. A long spoon works well for scooping up toppings or thicker parts of the shake.
Serving On A Tray
Place the glass on a small tray. Add a napkin and a small spoon beside it. This makes your milkshake feel like a special treat. Perfect for serving guests or a cozy snack time.
Frequently Asked Questions
How Can I Make A Milkshake Without A Blender?
You can whisk milk, ice cream, and flavorings vigorously by hand. Use a fork or a whisk in a large bowl until smooth and creamy. Adding crushed ice helps blend ingredients better without a blender.
What Tools Replace A Blender For Milkshakes?
Common alternatives include a whisk, fork, mason jar, or a hand mixer. A mason jar allows shaking ingredients vigorously, while a whisk and fork help mix and aerate the milkshake evenly.
Can I Use A Jar To Mix A Milkshake?
Yes, fill a mason jar halfway with ingredients, seal tightly, and shake vigorously. This method combines ingredients well and creates a creamy texture without a blender.
How To Get A Smooth Milkshake Texture Without Blending?
Use softened ice cream and full-fat milk for easier mixing. Whisk or shake ingredients thoroughly until smooth. Crushing ice finely before mixing also helps achieve a creamy texture.
Conclusion
Making a milkshake without a blender is easy and fun. You only need simple tools like a jar or a whisk. Mixing by hand may take a little time, but the result tastes great. You can enjoy your favorite flavors anytime, even without special gadgets.
Try different recipes and find what you like best. This method works well for quick treats and small servings. Give it a try and enjoy a creamy milkshake without any hassle. Simple steps, tasty results. What could be better?