If you want to keep your Jack Lalanne Power Juicer working like new, knowing how to take it apart is a must. Whether you need to clean every nook and cranny or replace a part, taking your juicer apart might seem tricky at first.
But don’t worry—you’re about to learn simple steps that make the process easy and stress-free. By the end of this guide, you’ll feel confident handling your juicer, saving time and money on repairs. Ready to get started? Let’s dive in and unlock the secrets to maintaining your juicer like a pro.
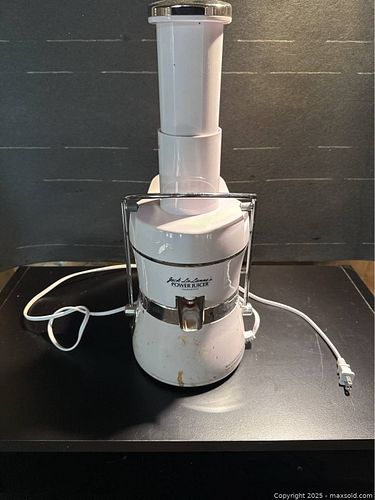
Credit: maxsold.com
Tools Needed
Before you start taking apart your Jack Lalanne Power Juicer, gathering the right tools is essential. Having everything ready saves time and prevents frustration. It also ensures you avoid damaging any parts during the process.
Basic Tools For Disassembly
- Screwdrivers:A set of both Phillips and flathead screwdrivers is crucial. Different screws might be holding your juicer together, so having multiple sizes helps.
- Wrench or Pliers:Sometimes nuts or bolts need loosening. A small adjustable wrench or a pair of pliers can give you the grip and leverage you need.
- Soft Cloth or Towel:Use this to protect delicate surfaces and keep your workspace clean. Juicers can be slippery, so having a cloth nearby is smart.
Optional Tools That Make The Job Easier
- Plastic Pry Tools:These tools help gently separate snap-fit parts without scratching. If you want to keep your juicer looking new, these are worth considering.
- Small Brush:A toothbrush or small brush can clear out pulp or debris during disassembly. This makes cleaning simpler and keeps parts in good condition.
- Container for Screws:Keeping screws and small parts organized prevents losing them. A small bowl or magnetic tray works well.
Why Using The Right Tools Matters
You might wonder, “Can’t I just use whatever I have on hand?” The answer is no, not really. Using the wrong screwdriver or tool can strip screws or crack plastic parts.
Once, I tried taking apart a juicer without the right screwdriver. It ended up with damaged screws that made reassembly a nightmare. Having the correct tools not only protects your juicer but also saves time and stress.
So, what tools do you have ready for your next appliance project? Preparing beforehand makes all the difference.
Safety Precautions
Taking apart your Jack Lalanne Power Juicer can be straightforward, but safety must come first. Ignoring safety precautions can lead to injuries or damage to the appliance. Before you start, it's important to prepare yourself and your workspace properly.
Unplug The Juicer Completely
Always unplug the juicer from the electrical outlet before you begin disassembly. This simple step prevents accidental startups that could cause serious harm.
Have you ever felt a sudden jolt while cleaning a plugged-in appliance? Avoid this risk by double-checking the power connection every time.
Use Protective Gloves
The blades inside the Jack Lalanne Power Juicer are extremely sharp. Wearing protective gloves shields your hands from cuts while handling internal parts.
Even if you think you’re careful, one slip can lead to injury. Gloves give you confidence and protect your skin during the process.
Work On A Stable Surface
Choose a flat, sturdy surface to take apart your juicer. This reduces the risk of parts falling and breaking or causing injury.
Have you noticed how unstable surfaces make small tasks frustrating? A stable workspace keeps everything organized and safe.
Keep Parts Organized And Away From Children
Small components can be choking hazards or get lost easily. Place all parts in a designated bowl or tray during disassembly.
Think about the last time you lost a tiny screw—how much time did it waste? Keeping parts organized also speeds up reassembly.
Read The Manual For Specific Warnings
Your juicer’s manual contains important safety information tailored to the model. Skipping this step can lead to avoidable mistakes.
Have you ever missed a crucial detail because you didn’t read instructions? Checking the manual ensures you know what to expect.
Unplugging And Preparing
Before you dive into taking apart your Jack Lalanne Power Juicer, the very first thing you need to do is make sure it’s completely safe to handle. Unplugging the device is not just a precaution—it’s essential for your safety and the longevity of your juicer. Preparing the workspace properly will save you time and avoid any unnecessary frustration during the process.
Ensure The Juicer Is Unplugged
Always double-check that your juicer is unplugged from the electrical outlet. It might seem obvious, but it’s easy to overlook when you’re eager to get started. Handling the juicer while it’s still connected can lead to electric shock or damage to the motor.
Take a moment to physically pull the plug out rather than just switching off the power strip. This guarantees no power is running to the machine. Have you ever accidentally left an appliance plugged in and felt that sudden jolt of worry? Avoid that by making this your first habit.
Clear And Prepare Your Workspace
Set up a clean, flat surface where you can comfortably work on your juicer. A kitchen counter or a sturdy table works best. Keep a towel or a soft cloth nearby to place the parts on once they are removed.
- Clear away any clutter or liquids to prevent accidents.
- Have a small bowl or container ready to hold tiny screws or pieces.
- Good lighting will help you see small components clearly.
Having everything organized before you start keeps you focused and reduces the chance of losing parts. Do you find that an orderly workspace helps you work more efficiently? This step can actually make the difference between a smooth process and a frustrating one.
Gather Necessary Tools
Not all juicers require tools for disassembly, but it’s smart to have a few basics on hand. A screwdriver set (both flathead and Phillips) is typically useful. Sometimes, a pair of pliers can help with stubborn pieces.
Check your juicer’s manual for any special instructions about tools. If you don’t have the manual, simple tools usually do the trick. Having these ready before you start will prevent interruptions.
Removing The Juicer Lid
Removing the juicer lid is a key step in taking apart a Jack Lalanne Power Juicer. The lid covers the main parts inside and keeps everything secure during use. Taking it off carefully helps you clean the juicer well and check for any issues.
This process is simple but requires attention. The lid fits tightly to prevent leaks. Follow the right technique to avoid damage and ensure easy reassembly.
Locate The Locking Mechanism
The juicer lid locks in place with a safety arm. Find this arm on the side of the lid. It keeps the lid stable during juicing. This feature stops the juicer from running if the lid is not secure.
Release The Safety Arm
Lift the safety arm gently upward. This unlocks the lid from the juicer base. Do not force it, as the arm can break. If it feels stuck, try moving it slowly back and forth.
Lift The Lid Straight Up
Hold the lid firmly with both hands. Pull it straight up to remove it. Avoid twisting or tilting the lid. This prevents damage to the locking parts and seals.
Clean And Inspect The Lid
After removal, clean the lid thoroughly. Use warm water and mild soap. Check the rubber seal for cracks or dirt. A clean seal ensures tight locking and no leaks.
Detaching The Juice Container
Pull the juice container gently away from the juicer base. Twist slightly if it feels stuck, then lift it straight up. Keep a firm grip to avoid spills during removal.
Detaching the juice container from your Jack Lalanne Power Juicer is a crucial step in disassembling your appliance for cleaning or maintenance. Getting this part right ensures you maintain the juicer’s performance and hygiene. If you've ever found yourself hesitating at this step, you're not alone. Many users experience this, but once you know the process, it becomes second nature.
Understanding The Juice Container
The juice container is where all your freshly squeezed juice collects. It’s usually transparent, allowing you to see the juice level as you operate the machine. Knowing its exact position and how it fits in the juicer is essential for detaching it smoothly.
Ensuring Safety First
Before you begin, ensure the juicer is unplugged. This prevents any accidental operation. Safety should always be your top priority, especially when dealing with electrical appliances.
Locating The Locking Mechanism
Most Jack Lalanne juicers have a locking mechanism that secures the juice container in place. Familiarize yourself with this mechanism. It typically involves a latch or a couple of hooks.
Releasing The Lock
Once you’ve identified the locking mechanism, gently release it. You might need to press or lift a latch. This step is critical to avoid damaging the juicer or the container.
Removing The Juice Container
With the lock disengaged, carefully slide the juice container out. Hold it firmly to prevent spills. If it feels stuck, check if the lock is fully released or if there's any juice residue causing resistance.
Cleaning The Container
After detaching, clean the juice container immediately. Use warm, soapy water to remove any pulp or juice residue. This ensures your juicer is ready for the next use and maintains hygiene. Detaching the juice container might seem daunting at first, but with these steps, it becomes a breeze. Have you ever faced any challenges while taking apart your juicer? Sharing your experiences can be helpful to others.

Credit: www.amazon.ca
Taking Out The Pulp Collector
Taking out the pulp collector from your Jack Lalanne Power Juicer is an essential step for cleaning and maintenance. This part often holds the bulk of leftover fruit and vegetable pulp, which can build up quickly. Removing it properly ensures your juicer stays efficient and extends its lifespan.
Locate The Pulp Collector
First, identify where the pulp collector sits on your juicer. It’s usually attached to the back or side of the machine, designed to catch the pulp as juice is extracted. Knowing exactly where it is helps you avoid unnecessary force or damage when removing it.
Unlock The Pulp Collector
The pulp collector is typically secured by a simple locking mechanism. Look for tabs or clips on the sides that hold it firmly in place. Gently press or lift these to release the collector without bending or breaking any parts.
Remove The Pulp Collector Carefully
Once unlocked, pull the pulp collector straight out. Avoid twisting or jerking it, as this can misalign the juicer’s components. A smooth, steady motion prevents wear and tear and keeps your juicer ready for the next use.
Check For Residual Pulp Inside
After removal, inspect the inside of the pulp collector for stuck pulp. Sometimes small pieces cling to corners or edges, making thorough cleaning necessary. Removing all residue helps maintain hygiene and juicer performance.
Clean And Dry The Pulp Collector
Wash the pulp collector under running water with mild soap. Use a soft brush to reach tight spots and remove stubborn pulp. Dry it completely before reattaching to avoid mold or odor buildup.
Removing The Filter Basket
Removing the filter basket from your Jack Lalanne Power Juicer is a crucial step for cleaning and maintenance. This component often traps pulp and juice residues that can affect the juicer’s performance if not cleaned regularly. Knowing how to properly remove it will save you time and keep your juicer running smoothly.
Locate And Unlock The Juicer Cover
Start by unplugging your juicer to ensure safety. The filter basket sits directly under the juicer cover, so you need to unlock and lift the cover first.
- Find the locking tabs on either side of the juicer cover.
- Press or twist these tabs gently to release the cover.
- Lift the cover straight up to expose the filter basket.
Have you noticed how a stuck cover can make this step tricky? A little wiggle and patience usually do the trick.
Lift Out The Filter Basket Carefully
The filter basket is delicate and filled with tiny holes that juice passes through. Handle it gently to avoid bending or damaging it.
- Grip the basket firmly but gently around the edges.
- Pull it straight up and out of the juicer base.
- If it feels stuck, check for any pulp or debris blocking it and clear gently.
Have you experienced frustration trying to remove a stuck filter basket? Clearing any leftover pulp first helps this process a lot.
Inspect And Clean The Filter Basket
Once removed, take time to inspect the filter basket for any clogs or damage. A clean basket ensures smooth juicing and better juice quality.
- Rinse the basket under running water right after use.
- Use a soft brush to remove pulp stuck in the mesh.
- Check for tears or holes that could affect juicing efficiency.
How often do you clean this part? Regular care extends the life of your juicer and keeps your juice fresh.
Disassembling The Auger
Carefully unlock the juicer’s locking arm to release the auger. Gently pull the auger straight out for cleaning or replacement. Ensure no force is used to avoid damage.
Disassembling the auger of your Jack Lalanne Power Juicer can seem daunting. With the right steps, it's straightforward and manageable. The auger is a vital component that helps extract juice efficiently. Carefully disassembling it ensures your juicer remains in top condition. Follow these instructions for a seamless experience.
Understanding The Auger
The auger is the spiral-shaped part inside the juicer. It pushes fruits and vegetables against the juicing screen. Over time, residue can build up, affecting performance. Regular cleaning helps maintain efficiency.
Gather Your Tools
Before starting, gather necessary tools. A soft cloth, mild soap, and water are essential. These tools make the process easier and prevent damage.
Ensure Safety First
Unplug the juicer from the power source. Ensure it is completely turned off. This step prevents accidents during disassembly.
Remove The Juicer Lid
Start by removing the juicer lid. Press the release button and lift the lid gently. Place it aside on a clean surface.
Detach The Pulp Collector
Next, remove the pulp collector. Pull it out carefully and set it aside. This provides clear access to the auger.
Dislodge The Auger
Grip the auger firmly with both hands. Twist it counterclockwise to loosen. Once loose, pull it out gently.
Inspect And Clean The Auger
Examine the auger for any debris or residue. Use a soft cloth to wipe it clean. Rinse it under warm water with mild soap.
Reassemble The Juicer
After cleaning, place the auger back. Twist it clockwise to secure. Reattach the pulp collector and juicer lid. Plug in the juicer and it's ready for use.
Cleaning Each Part
Cleaning each part of your Jack Lalanne Power Juicer properly ensures it works efficiently and lasts longer. Taking the time to clean every piece thoroughly prevents buildup that can affect taste and performance. Let’s break down how to clean each part effectively.
Cleaning The Juicing Cone And Filter Basket
These parts catch pulp and juice, so they get messy quickly. Rinse them immediately after juicing to stop pulp from drying and sticking. Use a soft brush or an old toothbrush to scrub the filter basket gently, removing pulp stuck in the tiny holes.
If you notice stubborn residue, soak these parts in warm soapy water for 10-15 minutes before scrubbing. This makes cleaning easier and keeps the juicer’s performance sharp.
Washing The Juicer Lid And Feed Chute
The lid and feed chute can trap bits of fruit and vegetables. Wipe them down with a damp cloth to remove juice splashes and pulp. For a deeper clean, detach these parts and wash them with warm water and mild soap.
Make sure to rinse thoroughly to avoid soap taste in your next juice. Have you noticed how small juice spills can build up over time? Regular cleaning here keeps everything fresh.
Cleaning The Juice Container And Pulp Collector
The juice container needs a quick rinse after use to prevent sticky residue. For the pulp collector, empty it immediately and wash it with warm water. Pulp can dry quickly and become hard to remove if left too long.
Using a sponge or soft cloth helps avoid scratches while giving these parts a good clean. Do you find that cleaning these containers right away saves you time later?
Wiping Down The Motor Base
The motor base should never be submerged in water. Instead, wipe it gently with a damp cloth to remove any juice splashes or dust. Avoid using harsh chemicals that could damage the surface.
Keeping the base clean helps maintain the juicer’s appearance and prevents sticky buildup that can interfere with buttons or vents.
Reassembling Tips
Reassembling your Jack Lalanne Power Juicer correctly ensures it works smoothly every time. Take your time and follow these tips to avoid mistakes. A careful approach helps keep your juicer safe and efficient for long use.
Organize Parts Before Reassembly
Lay all parts on a clean surface. Group similar pieces together. This makes it easier to find parts when you need them. Check each piece for damage or leftover pulp. Clean any residue before putting parts back.
Follow The Original Order
Reattach parts in the reverse order of disassembly. Start with the base and motor. Place the filter basket carefully. Align the pulp container and feed chute correctly. Proper order prevents leaks and jams.
Align And Lock Pieces Securely
Make sure all parts fit tightly. Listen for clicks or snaps when locking. Loose parts can cause the juicer to stop working. Check that the locking arm is firmly in place. This step is crucial for safe operation.
Test The Juicer Before Use
Plug in and run the juicer without food first. Listen for unusual sounds or vibrations. Check for leaks or loose parts. Stop immediately if something feels wrong. Testing helps avoid damage and ensures safety.

Credit: gvcloudsecure.com
Frequently Asked Questions
How Do I Safely Disassemble A Jack Lalanne Juicer?
First, unplug the juicer and remove the pulp container. Detach the juicing cover and filter basket carefully. Handle sharp parts with caution. Follow the user manual for step-by-step guidance to avoid damage or injury.
What Tools Are Needed To Take Apart The Juicer?
No special tools are required. Most parts can be removed by hand. Use a soft brush or cloth for cleaning. Refer to the manual for any specific instructions on disassembly.
How Often Should I Disassemble The Juicer For Cleaning?
Disassemble the juicer after every use. This prevents pulp buildup and maintains performance. Regular cleaning ensures hygiene and extends the juicer’s lifespan.
Can I Damage The Juicer By Incorrect Disassembly?
Yes, forcing parts can cause damage. Follow instructions carefully and handle components gently. Proper disassembly avoids wear and maintains the juicer’s functionality.
Conclusion
Taking apart your Jack Lalanne Power Juicer is simple and clear. Follow each step carefully for safety and success. Keep parts organized to avoid confusion later. Clean every piece to keep your juicer working well. Doing this regularly helps your juicer last longer.
Remember, patience and care make the process easy. Enjoy fresh juice from a well-maintained machine every day.