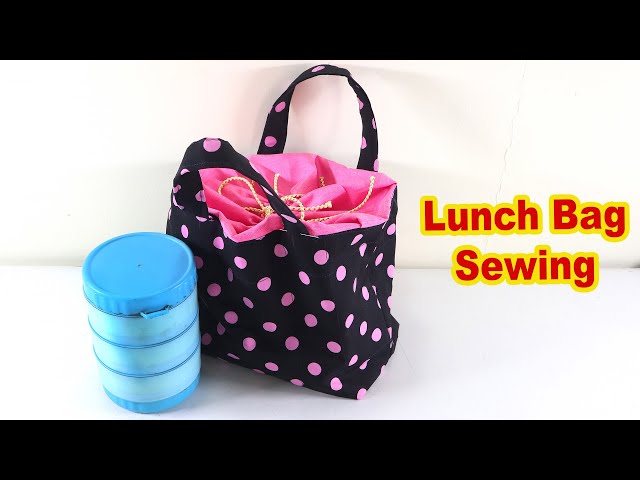
Are you tired of using disposable bags or plastic containers for your lunch? Imagine having a lunch box that’s not only stylish but also made by you.
Sewing your own lunch box is easier than you think, and it gives you full control over the size, design, and materials. In this guide, you’ll discover simple steps to create a durable, personalized lunch box that fits your lifestyle perfectly.
Ready to turn your creativity into something useful every day? Keep reading, and let’s get started!

Credit: www.youtube.com
Materials Needed
Before sewing a lunch box, gather the right materials. Having the correct items makes the process smoother and more enjoyable. Choose fabrics and tools carefully to ensure durability and style. Prepare all supplies to keep your workspace organized and efficient.
Fabric Choices
- Cotton fabric is easy to sew and clean.
- Oilcloth or laminated cotton offers water resistance.
- Insulated fabric keeps food warm or cool longer.
- Choose bright or patterned fabric for a fun look.
- Use a sturdy fabric for the outer layer to last longer.
Sewing Tools
- Sewing machine speeds up the stitching process.
- Sharp scissors or rotary cutter for clean cuts.
- Measuring tape or ruler to ensure accurate sizes.
- Pins or clips to hold fabric pieces together.
- Seam ripper to fix any mistakes quickly.
Additional Supplies
- Zippers or Velcro for easy opening and closing.
- Thread matching your fabric color for neat seams.
- Interfacing or batting to add structure and padding.
- Fabric marker or chalk for marking sewing lines.
- Iron and ironing board to press seams flat.
Choosing The Right Fabric
Choosing the right fabric is key to sewing a lunch box that lasts and works well. The fabric must stand up to daily use and spills. It should keep food safe and easy to clean. Picking the best material helps make a lunch box both useful and attractive.
Durability Factors
Durable fabric resists tears and wear. Thick canvas and heavy-duty cotton are good choices. These fabrics hold shape and handle rough use. Reinforced stitching works well with strong fabric. Avoid thin or delicate materials. They wear out quickly and offer less protection.
Water-resistant Options
Water-resistant fabric keeps food fresh and dry. Look for nylon or polyester with a coating. These fabrics block moisture and spills. They stop leaks from soaking through. Water-resistant fabrics make cleaning easier too. They add a layer of protection for your lunch.
Easy-to-clean Materials
Lunch boxes get dirty fast. Choose fabric that wipes clean or is machine washable. Vinyl and laminated cotton work well here. They don’t absorb stains or odors. Easy cleaning saves time and keeps your lunch box fresh. Avoid fabrics that hold dirt or get damaged by soap.
Cutting The Fabric
Cutting the fabric is a crucial step in sewing your lunch box. It sets the foundation for the entire project. If your pieces aren’t cut accurately, the lunch box won’t come together properly, no matter how well you sew.
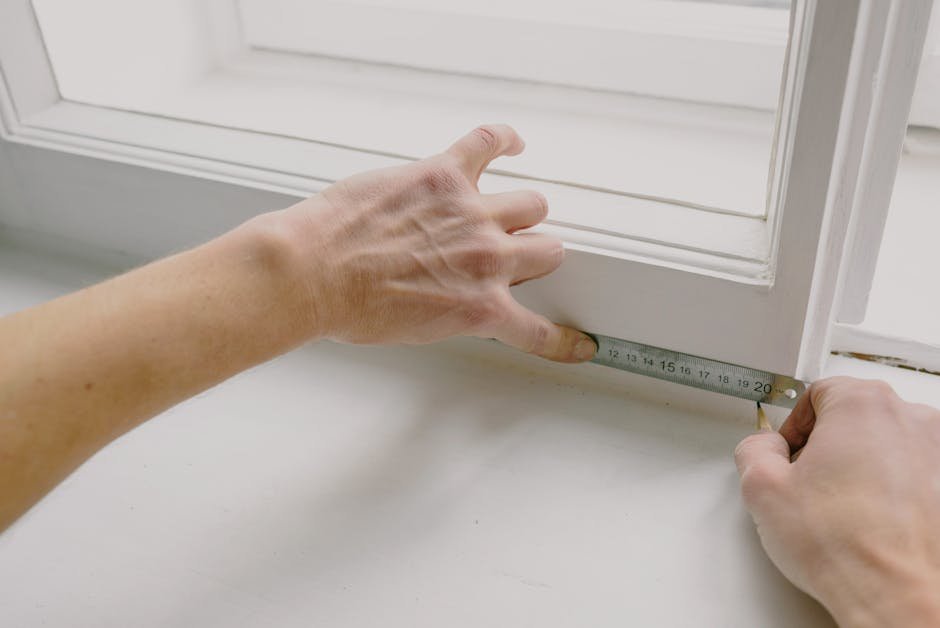
Measuring Dimensions
Start by deciding the size of your lunch box. Think about what you usually carry—are you packing a sandwich, snacks, or a full meal? Measure those items to determine the width, height, and depth you’ll need.
Add a little extra space for seams and padding—usually about half an inch on each side. Don’t forget to include allowances for zippers or closures if you plan to add them. Double-check your measurements before moving on; mistakes here can be costly.
Marking Patterns
Once you have your measurements, it’s time to mark the fabric. Use a fabric pencil or tailor’s chalk for clear, removable lines. Lay your fabric flat on a clean surface and pin your pattern pieces down to keep them from shifting.
Mark not only the outlines but also any special features like pockets or folds. This helps you visualize how the pieces will come together. Have you noticed how marking carefully makes the sewing process smoother and less stressful?
Cutting Tips
- Use sharp fabric scissors—dull blades can cause jagged edges that fray easily.
- Cut slowly and follow your marked lines exactly to maintain the shape.
- Keep your fabric on a flat surface to avoid distortion while cutting.
- Cut one piece at a time if your fabric is thin or slippery to prevent mistakes.
Here’s a quick tip from experience: cutting fabric in well-lit areas helps you see the lines clearly and avoid errors. Have you ever cut fabric in poor light and ended up with uneven edges? It’s frustrating and wastes material.
Sewing The Main Pieces
Sewing the main pieces of your lunch box sets its shape and strength. This stage brings together the fabric parts that form the body of the lunch box. Focus on accuracy and neat stitching to ensure a polished look. Use a durable thread to keep the lunch box sturdy and lasting through daily use.
Stitching The Sides
Align the side pieces with the front and back panels carefully. Pin the edges to hold them in place before sewing. Use a straight stitch along the edges, leaving a small seam allowance. Sew slowly to keep the lines straight and even. Check that the fabric edges match perfectly at the corners.
Creating The Base
Attach the base piece to the bottom edges of the sewn sides. Match the corners precisely for a square or rectangular shape. Sew with a strong stitch, reinforcing the corners for extra support. The base carries the weight of the contents, so make sure it is secure. Press the seams flat to reduce bulk and improve the lunch box’s shape.
Reinforcing Seams
Go over the seams with a second line of stitching for added strength. Use backstitching at the start and end to lock the threads firmly. Reinforce areas that will face more stress, such as corners and handles. This step prevents the seams from unraveling over time. A solid structure helps the lunch box hold its form and last longer.
Adding Insulation And Lining
Adding insulation and lining makes your lunch box more practical. It keeps food fresh and helps maintain temperature. This part of sewing needs careful choice of materials and precise stitching. Follow these steps to create a durable, insulated lunch box.
Choosing Insulation Material
Pick insulation that is thin but effective. Common choices include foam, thermal batting, or insulated fleece. Foam sheets offer good protection and keep heat inside. Thermal batting is soft and adds a slight cushion. Insulated fleece combines warmth and flexibility for easy sewing.
Consider the thickness to avoid making the lunch box bulky. Also, check if the material is washable and safe for food use. A lightweight option helps keep the lunch box easy to carry.
Attaching The Lining
The lining protects the insulation and adds a clean interior. Choose a fabric that is easy to wipe or wash, like nylon or oilcloth. Cut the lining fabric to the same size as the outer fabric.
Pin the lining to the insulation carefully. Make sure the right sides face each other. Sew along the edges, leaving a small opening to turn the lunch box inside out later. Press the seams flat for a smooth finish.
Securing Layers
Hold all layers firmly together to prevent shifting. Use pins or fabric clips around the edges. Sew a topstitch close to the edge to lock the layers in place.
Quilting the layers with straight lines or simple patterns also works well. This adds strength and keeps the insulation evenly spread. Check that the stitches do not create holes that reduce insulation efficiency.
Credit: www.youtube.com
Attaching Handles And Closures
Attaching handles and closures to a lunch box involves sewing sturdy fabric for easy carrying. Ensure even stitching for a balanced look. Secure the closures for a snug fit, keeping your lunch safe and fresh.
Attaching handles and closures is crucial for a functional lunch box. It ensures the lunch box is easy to carry and keeps contents secure. This section will guide you through selecting handle styles, sewing handles, and adding closures like zippers or Velcro.
Selecting Handle Styles
Choose handles that match your lunch box style. Consider durability and comfort. Common options include fabric straps, leather, or webbing. Each type offers a different look and feel. Select a style that complements your fabric and design.
Sewing Handles
Position your handles where they balance the lunch box. Mark the spots with chalk or a fabric pen. Cut your handle material to the desired length. Fold the raw edges inwards for a clean look. Sew the handles securely onto the marked spots. Use a reinforced stitch for extra strength. Double-check the alignment to ensure balance and comfort.
Adding Zippers Or Velcro
Decide between zippers or Velcro based on ease of use. Zippers offer a secure closure and a sleek finish. Velcro is easier for children to open and close. Pin the zipper or Velcro in place along the opening. Sew it with a straight stitch, ensuring it's aligned. Test the closure to ensure it functions smoothly. Adjust if needed for a perfect fit.
Finishing Touches
Finishing touches make your sewn lunch box look neat and last longer. These steps help tidy your project and add a personal flair. Taking time here improves the overall quality and appearance.
Trimming Threads
Cut off all loose threads carefully. Use small, sharp scissors for precision. This keeps the lunch box clean and professional. Avoid pulling threads to prevent fabric damage.
Pressing Seams
Iron the seams flat using a low heat setting. Press from the wrong side to protect the fabric. This step shapes the lunch box and smooths bulky areas. Use a pressing cloth to avoid shine marks.
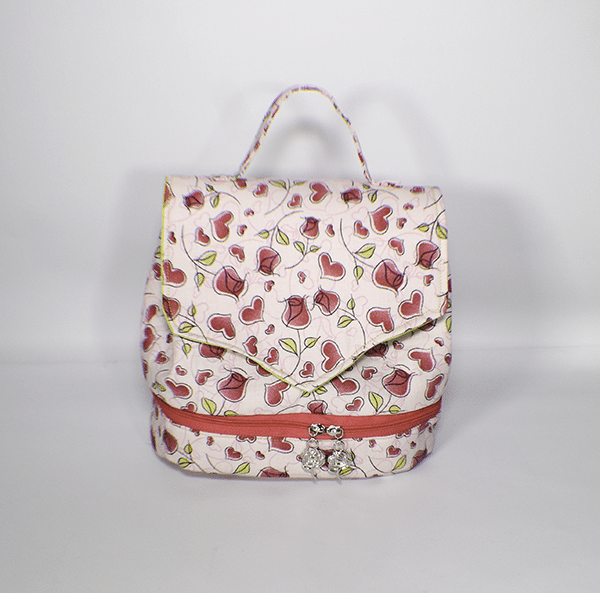
Personalizing Your Lunch Box
Add your unique touch with simple decorations. Sew on patches, embroidery, or fabric paint designs. Use name tags or labels for easy identification. Personalization makes your lunch box special and fun.
Credit: sewverycrafty.com
Care And Maintenance Tips
Taking good care of your handmade lunch box ensures it lasts longer and stays fresh for everyday use. Simple maintenance habits can keep the fabric vibrant and the insulation effective. Let’s look at easy ways to clean and store your lunch box without damaging your hard work.
Cleaning Instructions
After each use, wipe the inside of your lunch box with a damp cloth to remove crumbs and spills. For a deeper clean, hand wash it with mild soap and lukewarm water. Avoid harsh detergents or bleach, as they can weaken the fabric and ruin any waterproof layers.
If your lunch box has removable liners, take them out and wash separately to prevent mold buildup. Air dry your lunch box completely before storing to stop any moisture from causing odors or mildew. Have you noticed how a quick clean after each use makes your lunch box feel like new every day?
Storage Suggestions
Store your lunch box in a cool, dry place away from direct sunlight to preserve the fabric color and prevent fading. Avoid folding or crushing it, especially if it contains insulation foam, which can lose its shape. Keeping it open or loosely closed helps air circulate, reducing moisture buildup.
If you don’t use your lunch box daily, consider placing a small sachet of baking soda inside to absorb any lingering smells. This simple trick saved my lunch box from smelling stale after a week of storage. How do you make sure your lunch box stays fresh between uses?
Frequently Asked Questions
What Materials Do I Need To Sew A Lunch Box?
You need fabric, insulation, lining, zipper, thread, and sewing tools. Choose waterproof and durable fabrics for best results. Insulation keeps food fresh and temperature controlled.
How Long Does It Take To Sew A Lunch Box?
It usually takes 2 to 3 hours for beginners. Experienced sewers may finish faster. Time varies based on complexity and sewing skills.
Can I Customize The Size Of My Lunch Box?
Yes, you can easily adjust dimensions to fit your needs. Measure your containers and add seam allowances. Custom sizing ensures a perfect fit for your lunch.
What Type Of Insulation Is Best For Lunch Boxes?
Foam or thermal batting works best to maintain temperature. These materials are lightweight and flexible. They keep food warm or cold effectively.
Conclusion
Sewing a lunch box is easier than it seems. You only need basic materials and simple steps. This project saves money and lets you choose your style. Enjoy making a unique lunch box for school or work. Keep practicing to improve your sewing skills.
Soon, you will create more useful items by yourself. Give it a try and have fun sewing!