Is your Whirlpool refrigerator’s water not tasting as fresh as it used to? It might be time to replace the water filter.
Changing your filter is easier than you think, and doing it right can keep your water clean and your fridge running smoothly. In this guide, you’ll find simple, step-by-step instructions that anyone can follow. Keep reading, and you’ll save money, avoid costly repairs, and enjoy crisp, refreshing water every day.
Let’s get started!
Signs To Replace The Filter
Knowing when to replace the water filter in your Whirlpool refrigerator is key to keeping your water clean and tasting fresh. Ignoring the signs can lead to poor water quality and even damage your appliance. Watch for specific indicators that tell you it’s time for a new filter.
Reduced Water Flow
Have you noticed the water coming from your fridge slows down or drips weakly? This often means the filter is clogged with impurities. A blocked filter restricts water flow, making it harder for your refrigerator to deliver water quickly.
Try comparing the water flow speed before and after replacing the filter. You’ll likely see a big difference. Don’t wait too long—slow flow can strain the system and reduce overall efficiency.
Change In Water Taste
Does your water taste odd or have an unusual smell? A change in taste is one of the clearest signs your filter isn’t doing its job. Over time, filters lose their ability to trap contaminants, allowing them to pass through.
Think about the last time your water tasted fresh and clean. If it’s no longer that way, it’s time to swap the filter. Drinking water that tastes off can affect your enjoyment and even your health.
Filter Indicator Light
Many Whirlpool refrigerators come with a filter indicator light designed to alert you when it’s time to replace the filter. Have you seen that light turn on or start blinking? This smart reminder helps you stay on top of filter maintenance.
Don’t ignore this signal—it’s based on your water usage and time since the last change. Resetting the indicator after replacement ensures you won’t miss the next alert.
Tools Needed
Before you start replacing the water filter in your Whirlpool refrigerator, gathering the right tools is essential. Having everything ready makes the process smooth and less frustrating. You don’t want to be halfway through the task only to realize you’re missing something important.
Replacement Water Filter
This is the most obvious tool but also the most crucial. Ensure you get the exact model recommended for your Whirlpool refrigerator. Using the wrong filter can cause leaks or even damage your fridge’s water system.
Soft Cloth Or Towel
Water spills are common when changing the filter. A soft cloth or towel helps you quickly clean up any drips and keep your floor dry. It also protects the fridge’s surface from scratches during the process.
Gloves
Wearing gloves keeps your hands clean and prevents any contaminants from getting on the new filter. It’s a simple step, but it makes the experience more hygienic and comfortable, especially if you deal with water frequently.
Flashlight
Sometimes the filter compartment is in a dimly lit area inside the fridge. A flashlight helps you see clearly, making it easier to remove the old filter and install the new one properly. Have you ever struggled to find the filter in poor light? A flashlight saves time and frustration.
Locating The Water Filter
Finding the water filter in your Whirlpool refrigerator is the first step to ensuring clean and fresh-tasting water. Locating it might seem tricky if you’ve never done it before, but knowing where to look can save you time and frustration. Let’s look at the common spots where Whirlpool places their water filters.
Inside The Refrigerator
Many Whirlpool models store the water filter inside the fridge compartment. You’ll typically find it in the upper right or left corner, near the top shelf. It often looks like a small, round or rectangular cartridge that blends in with the interior walls.
Open your fridge door and scan the sides or ceiling area for a filter cover. Sometimes it’s behind a small panel that you can easily twist or pull open. Have you checked behind the crisper drawers? Some models hide the filter there, so it’s worth a quick look.
Near The Base Or Grille
If the filter isn’t inside the fridge, check near the base or grille at the bottom front of your refrigerator. Whirlpool sometimes places the filter behind a removable grille or kick plate. This location can be less obvious, but it’s easy to access once you remove the cover.
Look for a small round or rectangular housing that holds the filter cartridge. If you’re unsure, consult your user manual for the exact spot or take a moment to feel around the grille area. Have you ever found that the filter is tucked away in a spot you wouldn’t expect? It’s quite common with some Whirlpool designs.

Credit: www.youtube.com
Removing The Old Filter
Removing the old water filter from your Whirlpool refrigerator is a straightforward task, but it requires a bit of care to avoid spills or damage. Knowing the right technique can save you time and frustration. Depending on your refrigerator model, you might encounter different removal methods.
Twisting Method
Many Whirlpool refrigerators use a twist-and-pull design for the water filter. You’ll usually find the filter inside the fridge compartment or at the base grille.
- Grip the filter firmly.
- Turn it counterclockwise about a quarter turn until it releases.
- Pull the filter straight out carefully to avoid water dripping.
This method feels satisfying because it gives you clear feedback when the filter unlocks. If the filter feels stuck, don’t force it. Instead, check your user manual for any locking mechanisms or try gently wiggling the filter as you twist.
Push-button Release
Some Whirlpool models feature a push-button release instead of twisting. This design makes removal quick and easy, especially if you’re not comfortable with twisting motions.
- Locate the release button near the filter housing.
- Press and hold the button firmly.
- While holding the button, pull the filter straight out.
If the filter doesn’t come out immediately, double-check that you’re pressing the correct button or that it’s fully depressed. This method minimizes mess since it controls the filter’s release more smoothly.
Which removal style does your Whirlpool refrigerator use? Knowing this will help you prepare and avoid surprises during your filter replacement. Remember, handling the filter carefully prevents water spills and keeps your fridge running smoothly.
Installing The New Filter
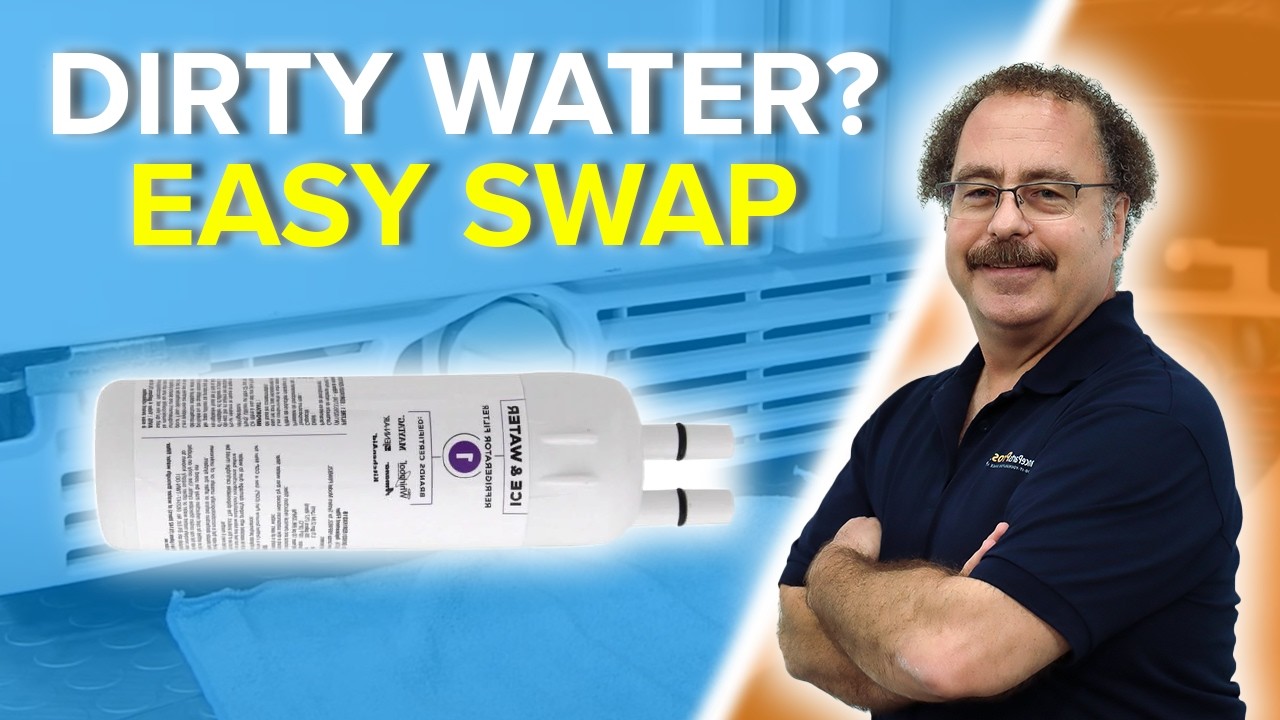
Push the new filter into the slot firmly until it clicks in place. Turn the filter clockwise to lock it securely. Check for leaks by running water through the dispenser briefly.
Installing the New Filter Swapping out the old water filter in your Whirlpool refrigerator can feel like a daunting task. However, once you've removed the used filter, installing the new one is straightforward and rewarding. You'll not only ensure the water and ice from your fridge taste fresh, but you'll also maintain the appliance's efficiency.
Aligning The Filter
Begin by locating the filter slot inside your refrigerator. This is typically situated in the upper right-hand corner or behind the base grille. Hold the new filter in your hand, ensuring the arrow on the filter is pointing upwards. This direction ensures the filter will fit properly and function as intended. Have you ever tried putting together a puzzle with the pieces in the wrong orientation? It just doesn't work, right?
Securing The Filter In Place
Push the filter into the slot firmly. You should feel it click into place. This click signals that the filter is properly installed and ready to use. Twist the filter clockwise until it is snug. Remember, you don't need to use excessive force. If you're struggling, double-check the alignment. The trick is to ensure it feels secure without being overly tight. Your new filter is now installed and ready to provide clean, fresh water. Don't forget to run a few gallons of water through the system to flush out any air or particles. This simple step is often overlooked but crucial for optimal performance.
Credit: www.youtube.com
Flushing The New Filter
Flushing the new filter removes air and loose carbon particles from the water line. Run water for several minutes until it flows clear and tastes fresh. This step ensures clean, fresh water from your Whirlpool refrigerator.
Flushing a new water filter is crucial. It ensures clean and fresh water. It also removes any manufacturing residues present in the filter. Completing this step improves the taste and quality of your water. Follow these simple steps to properly flush your new filter.
Running Water Through
First, place a container under the water dispenser. This catches the water during flushing. Press the water dispenser lever. Allow the water to run through the new filter. Continue running the water for about five minutes. This ensures any debris is flushed out.
Clearing Air Bubbles
Air bubbles often form in a new filter. They can cause sputtering when dispensing water. To clear them, run water in short bursts. Press the lever for about five seconds. Then, release it for another five seconds. Repeat this process until sputtering stops. This helps to ensure a smooth water flow.
Resetting The Filter Indicator
Resetting the filter indicator on your Whirlpool refrigerator is a key step after installing a new water filter. This reset lets the fridge know the filter has been replaced and ensures accurate tracking of filter life. Skipping this step might cause the indicator to show the wrong status, leading to either premature alerts or delayed filter changes.
Using The Control Panel
Most Whirlpool refrigerators come with a control panel that allows you to reset the filter indicator quickly. Look for a button labeled “Filter Reset” or “Water Filter.”
- Press and hold this button for about 3 to 5 seconds until the indicator light changes.
- The light usually turns off or changes color, signaling the reset is complete.
- If you hear a beep, it confirms the reset has been accepted by the system.
Have you noticed your fridge’s control panel responds faster than you expect? It’s designed that way to make maintenance easier, so don’t rush—hold the button long enough for the reset to register properly.
Manual Reset Options
If your model doesn’t have a digital control panel, resetting the filter indicator might require a manual approach. Some Whirlpool refrigerators use a physical button or dial near the filter compartment or inside the fridge.
- Press and hold the reset button for about 10 seconds.
- Alternatively, turn the dial or switch to the reset position, then back to normal.
- Check the indicator light to confirm it has turned off or changed color.
Sometimes, the manual reset can feel less intuitive, but it’s just as effective. If the light remains on, double-check you held the button long enough or try again to ensure the fridge registers the new filter.

Credit: www.searshomeservices.com
Maintenance Tips
Maintaining your Whirlpool refrigerator’s water filter ensures clean water and extends the filter’s life. Simple habits keep the system running smoothly and improve water taste. Follow these tips to avoid common problems and enjoy fresh water every day.
Regular Replacement Schedule
Change the water filter every six months. This keeps the filter working well and removes impurities effectively. Some models show an indicator light to remind you. Mark your calendar or set a phone alert to avoid forgetting. Using an old filter can cause bad taste and reduce water flow.
Keeping The Filter Area Clean
Clean the filter area during each replacement. Wipe the filter housing with a soft cloth to remove dust and dirt. Avoid using harsh chemicals that can damage plastic parts. Check for any mold or buildup and clean gently. A clean filter area helps maintain water quality and prevents blockages.
Frequently Asked Questions
How Often Should I Replace My Whirlpool Water Filter?
You should replace your Whirlpool water filter every 6 months. This ensures clean, fresh water and optimal appliance performance.
How Do I Locate The Water Filter In My Whirlpool Fridge?
The water filter is usually inside the fridge compartment, near the top right corner or behind the grille.
What Tools Do I Need To Replace The Whirlpool Water Filter?
No special tools are needed. Simply twist and pull out the old filter, then insert the new one.
Can I Use Any Water Filter In A Whirlpool Refrigerator?
Use only Whirlpool-approved filters to ensure compatibility and maintain water quality. Generic filters may cause damage or poor performance.
Conclusion
Replacing a water filter in your Whirlpool refrigerator is simple and quick. Regularly changing the filter keeps water fresh and clean. Follow the steps carefully to avoid mistakes. A clean filter helps your fridge work better and saves money. Don’t wait until water tastes bad or slows down.
Take action today to enjoy pure water every day. This small task makes a big difference in your home. Keep your family healthy with clear, filtered water. Easy to do, and worth the effort.