Is your gas grill not heating up like it used to? A worn-out burner could be the reason why your cooking isn’t turning out perfect.
Replacing a burner might sound tricky, but with the right steps, you can fix it yourself and get back to grilling delicious meals in no time. In this guide, you’ll learn exactly how to replace a burner on your gas grill quickly and safely.
Keep reading, and soon you’ll be firing up your grill with confidence again!

Credit: www.searshomeservices.com
Tools And Materials Needed
Before you start replacing the burner on your gas grill, gathering the right tools and materials is essential. Having everything on hand makes the job smoother and safer. Missing a key item can lead to frustration or even damage.
Essential Tools For Replacing A Grill Burner
- Adjustable wrench:Useful for loosening and tightening nuts and bolts without stripping them.
- Screwdrivers:Both flathead and Phillips types are often needed to remove screws holding the burner in place.
- Pliers:Handy for gripping and pulling stubborn parts or connectors.
- Wire brush:Helps clean connections and remove debris before installing the new burner.
- Flashlight:Good lighting makes it easier to see inside the grill, especially in tight spots.
Materials You’ll Need
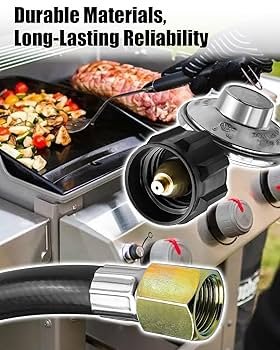
- Replacement burner:Make sure it matches your grill’s make and model for proper fit and performance.
- High-temperature grill paint (optional):Use this if you want to touch up any scratched areas to prevent rust.
- Heat-resistant gloves:Protect your hands from sharp edges and hot surfaces while working.
- Gas leak detector spray or soapy water:Important for checking connections after installation to ensure safety.
Why Preparing Properly Makes A Difference
When I replaced a burner without the right screwdriver, the screws stripped, and I had to spend extra time fixing that problem. Having the correct tools lets you focus on the task, not troubleshooting mistakes. Do you ever find yourself halfway through a project only to realize you’re missing something crucial?
Gathering your tools and materials upfront keeps the process straightforward. It also helps avoid unnecessary trips to the store or delays. Think about your last DIY project—did missing a tool slow you down? Preparing properly can save you time and frustration on your grill repair.
Safety Precautions
Replacing a burner on your gas grill involves handling flammable gas and metal parts, which can be risky without the right safety measures. Taking precautions not only protects you but also ensures your grill works properly after the replacement. Let's look at key safety steps you should take before and during the process.
Turn Off The Gas Supply Completely
Before you begin, make sure the gas supply is turned off at the tank or propane source. Even a small leak can cause dangerous flare-ups when you start working on the burner. Double-check by turning the valve clockwise until it stops and listen for any hissing sounds indicating a leak.
Disconnect The Gas Tank Safely
Always detach the gas tank from your grill to avoid accidental gas flow. Use a wrench if needed to loosen the connection without forcing it. Keep the tank in a well-ventilated outdoor area away from sparks or flames during the repair.
Work In A Well-ventilated Outdoor Area
Gas fumes can build up quickly and cause asphyxiation or explosions. Performing the burner replacement outdoors allows any residual gas to disperse safely. Avoid enclosed spaces like garages or sheds during your work.
Wear Protective Gear
Protect your hands with gloves to avoid cuts from sharp edges on the grill parts. Safety glasses will shield your eyes from rust, debris, or unexpected sparks. These simple protections make a big difference in preventing injuries.
Check For Gas Leaks Before Restarting
After installing the new burner, check for leaks by applying soapy water to the connections and watching for bubbles. This quick test can save you from dangerous gas leaks when you turn the grill back on. Have a fire extinguisher nearby just in case.
Have you ever skipped a safety step and faced a problem? Taking these precautions might seem slow, but they prevent accidents that can ruin your grilling experience. Safety first means more enjoyable cookouts later.
Turn Off The Gas Supply
Turning off the gas supply is the most critical safety step before replacing a burner on your gas grill. It might seem obvious, but skipping this can lead to dangerous leaks or even fires. Taking a moment to ensure the gas is completely shut off protects you and your home.
Locate The Gas Valve
Start by finding the gas valve. It’s usually near the propane tank or where the gas line connects to your house’s natural gas system.
Sometimes the valve looks like a small knob or lever. If you’re unsure, check your grill’s manual or look for a red or yellow handle.
Turn The Valve To The Off Position
Once you find the valve, turn it clockwise until it stops. This closes the gas flow.
You should feel resistance, and the valve will no longer turn easily. This confirms the gas supply is shut off completely.
Double-check The Gas Is Off
After turning the valve off, open the grill lid and try lighting the burners briefly.
No flames or gas smell means you’re safe to proceed. If you still smell gas, turn off the valve again and wait a few minutes before testing.

Credit: www.youtube.com
Remove Grill Grates And Flavorizer Bars
Before you can replace the burner on your gas grill, you need to clear the cooking area by removing the grill grates and flavorizer bars. These components protect the burner and distribute heat evenly, but they also block access. Taking them off carefully will give you the space you need to work safely and efficiently.
Lift Off The Grill Grates
Start by lifting the grill grates straight up and off the grill. They can be heavy or greasy, so wearing gloves helps keep your hands clean and secure your grip. If they feel stuck, gently wiggle them side to side instead of forcing them, which could cause damage.
Remove The Flavorizer Bars
Next, slide out the flavorizer bars that sit just below the grill grates. These bars catch drippings and vaporize them to add flavor, but they can get clogged with grease over time. Pull each bar out carefully, noting their position so you can replace them exactly the same way later.
Inspect The Area For Debris
With grates and bars removed, take a moment to check the interior for any debris or grease buildup. Cleaning this area now can prevent flare-ups and improve the efficiency of your new burner. Use a brush or cloth to wipe down accessible surfaces before moving on.
Locate And Remove The Old Burner
Locating and removing the old burner on your gas grill is a critical step before installing a new one. This process may seem straightforward, but understanding the burner type and carefully disconnecting it ensures safety and a proper fit for the replacement. Let's dive into how you can identify and remove your grill’s burner with confidence.
Identify The Burner Type
Start by opening your grill and examining the burner closely. Burners come in different shapes and sizes—some are straight tubes, while others have multiple ports for gas flow. Knowing whether you have a single-piece burner or a multi-piece assembly helps you find the correct replacement and avoid unnecessary hassle.
Look for any model numbers or markings stamped on the burner or inside the grill’s body. These details often match the replacement parts available online or at your local store. If you’re unsure, take a clear photo of the burner and compare it with options before purchasing.
Disconnect The Burner
Once you identify the burner type, you need to safely disconnect it from your grill. Begin by turning off the gas supply completely to prevent any leaks or accidents. Next, locate the screws or clamps that hold the burner in place—these are usually at the back or underneath the grill.
Carefully unscrew or unclip the burner, making sure not to damage the gas tubes or igniter wires. If the burner is connected to a gas manifold, gently disconnect the tubes by loosening the fittings with a wrench. Take your time here; forcing parts can cause damage that’s costly to fix.
Have you ever tried removing a burner without turning off the gas first? It’s a risk not worth taking. Safety always comes first when dealing with gas appliances.
Clean The Burner Area
Cleaning the burner area is a crucial step before replacing the burner on your gas grill. Dirt, grease, and food residue can build up around the burners, causing uneven flames or blockages. Taking the time to clean this area ensures your new burner works efficiently and lasts longer.
Gather The Right Cleaning Tools
Before you start, make sure you have the proper tools ready. A stiff wire brush, a putty knife, and a vacuum cleaner or compressed air can make the job easier. Having these on hand will help you remove stubborn grime and debris quickly.
Remove Loose Debris And Grease
Start by brushing off loose particles from the burner area using the wire brush. Scrape away thick grease deposits with the putty knife to avoid clogging the new burner. Don’t rush—thorough cleaning prevents future flare-ups or uneven heating.
Clean The Burner Tubes And Ports
Check the burner tubes for any blockages or rust spots. Use a pipe cleaner or a small brush to clear out the ports where the gas flows out. Keeping these passages clear is vital for a steady, even flame.
Wipe Down Surrounding Surfaces
After clearing debris, wipe the surrounding grill surfaces with a damp cloth. This removes any residual grease that could ignite unexpectedly. Clean surfaces also make it easier to spot any damage or rust that might need attention before installing the new burner.
Check For Signs Of Damage Or Wear
While cleaning, look closely for cracks, rust, or warping in the burner area. These issues can affect grill performance and safety. Spotting them early can save you from bigger problems down the line.
Install The New Burner
Installing the new burner is a key part of fixing your gas grill. A proper fit ensures safety and even heat distribution. Take your time to position the burner well before securing it. This step affects how well your grill cooks food and how long the burner lasts.
Align The Burner Correctly
Start by placing the burner into the grill’s burner bracket. Make sure the burner ports face downward for proper flame flow. The burner tube should line up with the gas supply valve. Check that the burner’s holes match the grill’s design. Proper alignment helps the gas flow evenly and prevents flare-ups.
Secure The Burner In Place
Once aligned, fasten the burner using screws or clips provided. Tighten screws gently to avoid damage but ensure the burner doesn’t move. Use a screwdriver or wrench as needed. Double-check that the burner stays steady when gently pushed. A secure burner prevents gas leaks and maintains safety during cooking.
Reconnect The Gas Supply
After replacing the burner on your gas grill, reconnecting the gas supply is a crucial step to ensure everything functions safely and efficiently. This part requires careful attention to detail to avoid leaks and potential hazards. Taking your time here can save you from unexpected grill troubles later on.
Check The Gas Hose For Damage
Before reconnecting, inspect the gas hose closely. Look for cracks, splits, or any signs of wear that could cause leaks. If the hose looks damaged, replace it immediately to keep your grilling experience safe.
Securely Attach The Hose To The Regulator
Attach the gas hose firmly to the regulator. Make sure the connection is tight but avoid over-tightening, which can damage the fittings. A snug fit keeps the gas flowing properly without leaks.
Use Soapy Water To Test For Leaks
Once connected, apply soapy water around the hose joints and regulator. Turn on the gas slightly without lighting the grill. If bubbles form, you have a leak that needs fixing before you proceed.
Double-check The Valve Positions
Ensure the gas valve on the tank and the burner valves are both off before reconnecting. Once everything is connected, open the tank valve slowly to avoid sudden gas surges. This step helps prevent accidents and ensures smooth gas flow.
Light The Grill To Confirm Proper Gas Flow
After checking for leaks, ignite the grill to test the burner. The flame should be steady and blue, indicating efficient gas flow. If the flame flickers or goes out, recheck your connections and hose condition.
Test The New Burner
Testing the new burner is crucial before enjoying your gas grill again. This step ensures safety and proper function. Take your time to check every detail carefully. A well-tested burner helps avoid accidents and improves cooking results. Follow these simple checks to confirm your burner works as it should.
Check For Leaks
Start by turning off the gas supply. Mix soap and water in a spray bottle. Spray the solution on all connections around the burner. Slowly turn on the gas without lighting the grill. Look for bubbles forming at the connections. Bubbles mean gas is leaking. Tighten or reattach connections if bubbles appear. Repeat the test until no bubbles form. Never use a flame to check for leaks.
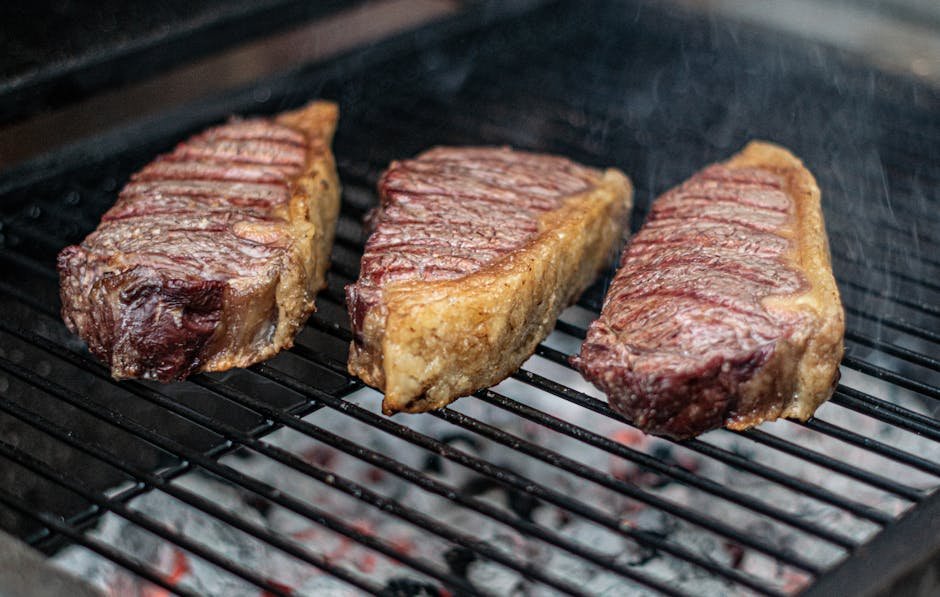
Ensure Proper Flame
Light the burner carefully. Observe the flame color and size. A good flame is mostly blue with small yellow tips. The flame should be steady and even along the burner. Flickering or large yellow flames indicate a problem. Adjust the air shutter if possible. Check for blockages in the burner holes. Clean or replace the burner if flame issues persist. Proper flames mean efficient cooking and safety.
Reassemble The Grill
Reassembling your gas grill after replacing the burner is a crucial step to ensure it functions safely and efficiently. Taking your time here can save you from future problems like gas leaks or uneven flames. Let’s walk through the process carefully to get your grill back in perfect shape.
Align The Burner Correctly
Make sure the new burner sits properly in its place. Check that the burner’s gas ports line up with the gas valves. Misalignment can cause poor flame distribution or even dangerous gas buildup.
Have you noticed uneven flames before? This step often fixes that problem.
Secure The Burner With Screws Or Clips
Once aligned, fasten the burner using the screws or clips you removed earlier. Tighten them enough to hold the burner firmly but avoid over-tightening, which can strip the threads.
Keeping the burner secure prevents movement that could affect grilling performance.
Reinstall The Heat Shields
Put the heat shields back over the burner. These protect the burner from dripping grease and help distribute heat evenly.
Skipping this can lead to faster burner wear and flare-ups when grilling.
Replace The Cooking Grates
Carefully place the cooking grates back onto the grill. Ensure they sit flat and stable to avoid food slipping or uneven cooking.
Have you ever cooked on a wobbly grate? It’s not just annoying—it can be unsafe.
Check The Gas Connections
Before you fire up the grill, double-check all gas connections for tightness. Use a soapy water solution to spot any leaks—bubbles will form if gas is escaping.
Why risk a gas leak when a quick check can give you peace of mind?
Test The Grill Safely
Turn on the gas and ignite the burner while standing back. Watch the flame carefully—it should be steady and blue. Yellow or flickering flames indicate a problem that needs fixing.
Testing now prevents surprises during your next cookout.
Maintenance Tips
Keeping your gas grill burner in top shape extends its life and ensures your cookouts stay safe and efficient. Small maintenance habits make a big difference in how well your burner performs and how often you’ll need to replace parts. Let’s look at practical tips that you can start using right away.
Cleaning Your Burner Regularly
Grease and food particles can clog burner holes and affect flame quality. Use a soft brush or a grill cleaning tool to remove debris after every few uses. Avoid harsh chemicals; warm soapy water usually does the trick without damaging the burner’s surface.
Checking For Rust And Corrosion
Rust weakens the metal and can cause holes or cracks in your burner. Inspect your burner visually every month, especially if your grill is stored outside. If you spot rust, gently scrub it off with a wire brush and consider applying a high-temperature paint designed for grills.
Ensuring Proper Flame Color And Shape
Blue flames with small yellow tips indicate a healthy burner. If your flame is mostly yellow or uneven, it might mean blockage or gas flow problems. Adjust the air shutter or clean the burner ports to restore a steady blue flame, which helps your grill heat evenly.
Protecting Your Grill From Weather
Rain and humidity speed up wear and tear on burners. Use a grill cover whenever you’re not grilling, especially during bad weather or in winter. Storing your grill in a dry place can save you money and frustration by reducing burner replacements.
Testing Gas Flow And Leak Detection
Even a small gas leak is dangerous and affects burner performance. Make a simple leak test by applying soapy water to gas connections; bubbles indicate leaks. Tighten connections or replace faulty parts immediately to keep your grill safe and efficient.

Credit: www.searspartsdirect.com
Frequently Asked Questions
How Do I Know When To Replace A Gas Grill Burner?
Replace the burner if flames are uneven or won’t light. Rust, holes, or cracks also mean replacement is needed for safety and performance.
What Tools Are Needed To Replace A Gas Grill Burner?
You need a screwdriver, pliers, and possibly a wrench. These tools help remove the old burner and install the new one securely.
Can I Replace A Burner Myself Safely?
Yes, replacing a burner is safe if you turn off the gas and disconnect the tank first. Follow instructions carefully to avoid damage.
How Much Does It Cost To Replace A Gas Grill Burner?
Burner replacements typically cost between $20 and $50. Prices vary based on brand and grill model, but it’s affordable compared to buying a new grill.
Conclusion
Replacing a burner on a gas grill is easier than it seems. You only need a few tools and some patience. Follow the steps carefully, and your grill will work like new. Regular maintenance keeps your grill safe and efficient.
Now, you can enjoy cooking outdoors without worry. Take your time and double-check each step. Soon, you will have a perfect flame for your next barbecue. Simple tasks can save money and extend your grill’s life. Give it a try and feel proud of your work.