If you’ve ever needed to move your side-by-side refrigerator or clean behind it, you know how tricky those big doors can be. Removing them might sound complicated, but with the right steps, you can do it yourself—quickly and safely.
In this guide, you’ll learn exactly how to remove your refrigerator doors without stress or damage. Keep reading, and you’ll gain the confidence to handle this task like a pro, saving time and avoiding costly repairs. Let’s get started!

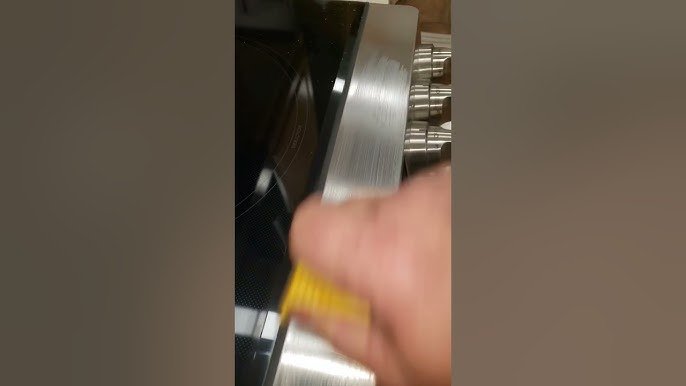
Credit: www.espares.co.uk
Tools Needed
Before you start removing the doors of your side-by-side refrigerator, it's crucial to gather the right tools. Having everything ready will make the process smoother and prevent any frustrating interruptions.
Think about the last time you tried a DIY task without the proper tools. Did you get the job done efficiently, or did you wish you had prepared better? This time, you can avoid that by equipping yourself properly.
Basic Hand Tools
- Screwdrivers:Both Phillips and flathead screwdrivers are essential. Different screws on your fridge may require different heads.
- Adjustable Wrench:Useful for loosening bolts holding the door hinges in place.
- Pliers:Handy for gripping and pulling pins or clips.
Additional Helpful Tools
- Socket Set:Some refrigerators use bolts that need specific socket sizes.
- Utility Knife:To carefully cut any sealant or adhesive around the door edges.
- Putty Knife:Can assist in gently prying open any stuck parts without damage.
Safety Gear
- Gloves:Protect your hands from sharp edges and cold surfaces.
- Safety Glasses:Shield your eyes from dust or debris when loosening screws or prying parts.
Preparing these tools will save you time and help avoid damage to your refrigerator. Do you have all these items on hand, or will you need to make a quick trip to the hardware store before you begin?
Prepare The Refrigerator
Preparing your side-by-side refrigerator is essential before removing the doors. This step ensures safety and makes the process easier. Take time to organize and secure the area around the appliance.
Unplug The Appliance
Always unplug the refrigerator before starting any work. This prevents electric shock and protects the appliance. Locate the power cord behind the unit and pull it out from the socket carefully.
Empty The Doors
Remove all items from the door shelves and compartments. This reduces weight and avoids spills or damage. Take out bottles, jars, and any loose objects to make the doors lighter.
Clear The Surrounding Area
Move any furniture or objects near the refrigerator. This gives you enough space to work safely. Clear the floor to prevent tripping and protect your walls from scratches during door removal.
Locate The Hinges
Locating the hinges is the first important step in removing refrigerator doors from a side-by-side model. The hinges hold the doors firmly in place and need careful handling. Knowing exactly where these hinges are makes the removal process safe and smooth.
Hinges are usually found along the side edges of each door. They connect the door to the refrigerator body and allow it to swing open and close. Before starting, identify these parts clearly to avoid any damage.
Check The Top And Bottom Of The Doors
Look at the top corner of each door. You will see a metal bracket attached to the fridge frame. The bottom corner may have a similar bracket. These brackets are the door hinges.
Some refrigerators have three hinges: one at the top, one in the middle, and one at the bottom. Others have just two. Count how many you have before moving forward.
Remove Any Covers Or Caps
Many hinges have plastic or metal covers hiding the screws. These covers keep the screws clean and safe. Gently pry off these covers using a flat tool or your fingers.
Keep the covers in a safe place. You will need them when reattaching the doors.
Locate The Screws Holding The Hinges
Once the covers are removed, look for the screws attaching the hinges to the fridge and doors. These screws secure the doors firmly.
Note the size and type of screws. This helps when choosing the right screwdriver later.
Inspect For Additional Safety Locks
Some models have extra safety locks or pins near the hinges. These prevent accidental door removal. Identify these parts before trying to remove the door.
Removing or unlocking these safety features may require extra tools or steps.

Credit: www.espares.co.uk
Remove The Top Hinge
Removing the top hinge is the first critical step in detaching the doors of a side-by-side refrigerator. This hinge holds the door securely to the fridge body, allowing it to swing open and close smoothly. Carefully handling the top hinge ensures safety and prevents damage to the appliance or the door.
Unscrew The Hinge Cover
Locate the hinge cover at the top corner of the refrigerator door. It usually has screws holding it in place. Use a screwdriver that fits the screws properly. Turn the screws counterclockwise to loosen and remove them. Set the screws and hinge cover aside safely for reassembly later.
Lift Off The Hinge
With the cover removed, the hinge itself is exposed. Support the door firmly with one hand to avoid sudden drops. Gently lift the hinge straight up to detach it from the fridge. Keep the hinge in a safe place to prevent loss. Now the door is free at the top and ready for removal.
Detach The Door
Removing side-by-side refrigerator doors requires lifting the door carefully after unscrewing the hinges. Disconnect any wiring before fully detaching the door to avoid damage.
Detaching the door is a crucial step in removing refrigerator doors. It requires careful handling to prevent damage to the appliance and ensure personal safety. Follow these instructions to successfully detach the door from your side-by-side refrigerator.
Lift The Door Off The Bottom Hinge
First, ensure the door is fully open to avoid obstruction. Look for the bottom hinge pin. It's usually visible when the door is open. Gently lift the door upward. Keep it straight to prevent bending the hinge. You might need a second person to help if the door is heavy. Once lifted, the door should come off the hinge easily. Place it in a secure spot temporarily.
Set The Door Aside Safely
Choose a flat, stable surface to set the door. This prevents accidental falls or scratches. Place a soft cloth or towel on the surface first. This protects the door's finish from damage. Lean the door against a wall for extra support. Ensure it's not in a high-traffic area to avoid accidents. Keep all screws and parts in a safe place for reassembly.

Credit: www.searspartsdirect.com
Remove The Bottom Hinge
Removing the bottom hinge is a crucial step in taking off the doors of a side-by-side refrigerator. This hinge supports the door’s weight and allows it to swing open smoothly. Carefully handling this part prevents damage to the door and the fridge.
Start by preparing your workspace. Clear the area around the refrigerator to avoid accidents. Have a helper nearby, as the door might be heavy once the hinge is loose.
Gather The Necessary Tools
Use the right tools for a smooth removal. Most refrigerators need a socket wrench or a screwdriver for hinge bolts. Check your fridge’s manual to confirm the tool type.
Support The Door Before Removing The Hinge
Hold the door firmly to stop it from falling. Use a wedge or a sturdy object to keep the door stable. This step keeps the door secure while you work on the hinge.
Loosen And Remove The Bottom Hinge Bolts
Loosen the bolts carefully, turning them counterclockwise. Remove each bolt one by one. Place the bolts somewhere safe to avoid losing them.
Lift The Door Off The Bottom Hinge
Once the bolts are out, gently lift the door off the hinge. Keep it steady and move slowly to prevent damage. Ask for help if the door feels too heavy.
Repeat For The Other Door
After successfully removing one side of your refrigerator door, it's time to tackle the other. The process mirrors the first door, but staying attentive to details can save you from common mistakes. Have you noticed how small differences in hinge placement or wiring can change the approach? Paying close attention ensures both doors come off smoothly and safely.
Check The Hinges And Screws
Start by inspecting the hinges of the second door. Make sure all screws are fully loosened before attempting to lift the door off. Sometimes, screws might be tighter or rusted on one side, so having a screwdriver or drill handy is essential.
Disconnect Any Electrical Connections
If your side-by-side fridge has wiring for features like ice makers or water dispensers, carefully unplug these before moving the door. Pulling the door off without disconnecting wires can cause damage. Remember how easy it was to forget this step the first time? Avoid the same slip here.
Lift The Door Off The Frame
With hinges freed and wires disconnected, gently lift the door upward to remove it from the frame. It might feel heavy, so don’t rush. If you have a helper, this is the perfect moment to ask for a hand. A steady lift prevents scratches and injury.
Set The Door Safely Aside
Place the removed door on a soft surface to avoid dents or scratches. Protecting the door now saves you from costly repairs later. Have some old blankets or a carpet nearby to cushion the door effectively.
Tips For Reinstallation
Ensure all hinges and screws are tightly secured during reinstallation for proper door alignment. Check the door seals carefully to avoid air leaks and maintain fridge efficiency. Align the doors evenly to prevent closing issues and improve the appliance’s lifespan.
Reinstalling refrigerator doors can be tricky. Proper alignment is crucial. Uneven doors can lead to cooling issues. Follow these tips for a smooth reinstallation.
1. Check Alignment Before Tightening
Ensure doors align perfectly before tightening screws. Use a level to check. Adjust as needed.
2. Secure Hinges Properly
Attach hinges firmly but not too tight. This ensures smooth door movement.
3. Reconnect Electrical Components
Reconnect any wires or sensors. Ensure they are correctly positioned and secure.
4. Test Door Seal
Close doors and check the seal. A proper seal keeps cold air in. Adjust if there's a gap.
5. Inspect Door Handles
Attach handles securely. Ensure they are straight and not loose.
6. Adjust Door Swing
Test the door swing. It should open and close smoothly. Adjust the hinges if needed.
7. Reattach Accessories
Reinstall any shelves or bins. Ensure they fit snugly in place.
8. Perform A Final Check
Do a final inspection. Make sure everything is tight and secure.
Frequently Asked Questions
How Do I Safely Remove Side-by-side Refrigerator Doors?
First, unplug the fridge and remove all items inside. Unscrew the hinge covers and bolts carefully. Support the door while detaching hinges to avoid damage. Slowly lift the door off the hinges and set it aside safely.
What Tools Are Needed To Remove Refrigerator Doors?
You typically need a screwdriver, socket wrench, and a putty knife. A helper is also useful for holding doors. Always check your fridge manual for specific tools or instructions for your model.
Can I Remove Fridge Doors Without Damaging The Seals?
Yes, gently detach the doors without bending or stretching the seals. Avoid pulling the gasket too hard. Use a soft cloth to protect the seals when handling and reinstall the doors carefully to maintain a tight seal.
How Long Does It Take To Remove Side-by-side Refrigerator Doors?
Removing doors usually takes 15 to 30 minutes. Time varies based on your experience and fridge model. Preparing tools and clearing space can speed up the process.
Conclusion
Removing side-by-side refrigerator doors can be simple and safe. Follow each step carefully to avoid damage or injury. Take your time and keep all screws and parts organized. Use the right tools to make the job easier. Once doors are off, clean or move the fridge as needed.
You can put the doors back on by reversing the steps. This guide helps you handle the task without stress. Feel confident to try it yourself with these clear instructions.