If your Samsung bottom freezer’s ice maker is causing trouble or you simply want to replace it, knowing how to remove it safely is key. You might be worried about damaging your fridge or making the process more complicated than it needs to be.
Don’t worry—this guide will walk you through each step clearly and easily. By the end, you’ll feel confident handling the ice maker yourself, saving time and avoiding costly repairs. Keep reading to discover the simple way to remove your Samsung bottom freezer ice maker without stress.

Credit: www.espares.co.uk
Tools Needed
Before you start removing the ice maker from your Samsung bottom freezer, gathering the right tools is essential. Having everything at hand makes the process smoother and safer. Missing a tool halfway through can turn a quick task into a frustrating experience.
Basic Hand Tools
- Screwdriver Set:A set with both Phillips and flathead screwdrivers is crucial. Samsung models often use different screw types, so having multiple options avoids unnecessary trips to the store.
- Nut Driver or Socket Wrench:Some screws or bolts securing the ice maker require a nut driver or socket wrench. Check your model’s specifications to pick the right size.
Electrical Safety Tools
- Multimeter:Use a multimeter to test electrical connections before you touch any wires. It ensures you don’t accidentally work on a live circuit.
- Insulated Gloves:Wearing insulated gloves protects your hands from electrical shocks and sharp edges inside the freezer.
Additional Helpful Tools
- Plastic Pry Tools:These help in gently removing panels without scratching or damaging the freezer’s interior.
- Towel or Small Container:Ice maker removal can cause water drips. Keep a towel or container nearby to catch any spills and keep your floor dry.
Have you ever started a repair only to realize you don’t have a crucial tool? Taking a few minutes to assemble the right equipment saves time and stress. Plus, it makes the removal process much safer for both you and your appliance.
Safety Precautions
Removing the ice maker from a Samsung bottom freezer needs careful attention. Safety is the top priority to avoid damage or injury. Taking the right precautions helps the process go smoothly. Prepare your workspace and tools before starting. Follow safety rules to protect yourself and your appliance.
Disconnect The Power Supply
Always unplug the refrigerator from the wall outlet. This stops electrical shocks and accidental starts. Use a dry hand to pull the plug. Never remove the ice maker while the fridge is powered on.
Turn Off The Water Supply
Locate the water valve connected to the fridge. Close the valve to stop water flow. Prevent leaks and water damage by ensuring the valve is fully off.
Wear Protective Gloves
Use gloves to protect your hands from sharp edges. The ice maker parts can be cold and rough. Gloves also keep your hands dry during the process.
Keep Tools Handy And Safe
Use the right tools like screwdrivers or pliers. Avoid using broken or worn-out tools. Place tools on a flat surface to prevent slips and falls.
Work In A Clean, Dry Area
Clear the space around the fridge. Remove any water or ice spills. A dry area reduces slipping hazards and keeps parts clean.
Preparing The Freezer
Preparing your Samsung bottom freezer before removing the ice maker is essential to make the process smooth and safe. Taking the right steps now can prevent messes, electrical hazards, and potential damage. Think about what you need to do to create a clean, safe workspace inside your freezer.
Emptying The Freezer
Start by removing all the food items from the freezer. This step is crucial because it gives you clear access to the ice maker without any obstructions. Plus, emptying the freezer helps avoid accidental spills or freezing damage to your food.
Place perishable items in a cooler with ice packs or transfer them to another freezer temporarily. You don’t want your groceries to spoil while you’re working on the appliance. Clearing the shelves and drawers also lets you inspect for any hidden ice buildup around the ice maker.
Unplugging The Unit
Always unplug your freezer before you touch any internal components. This simple safety step protects you from electrical shock and prevents the freezer’s control board from short-circuiting. You can usually find the plug behind or beneath the unit.
If unplugging feels inconvenient, consider turning off the circuit breaker instead. But make sure you verify that the unit has no power before proceeding. Have you ever underestimated how dangerous electricity can be when working with appliances? Taking a moment to unplug ensures you don’t pay the price.
Locating The Ice Maker
Knowing exactly where your ice maker is located in a Samsung bottom freezer is the first step to successfully removing it. This might sound simple, but many users overlook this detail and end up frustrated. Understanding the layout of your fridge helps you avoid unnecessary damage and saves time.
Identifying The Ice Maker Compartment
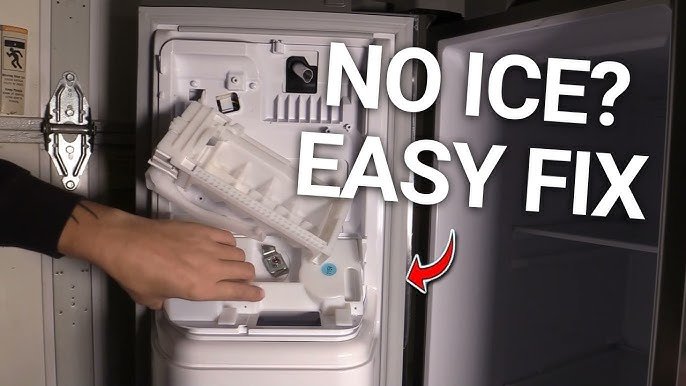
In Samsung bottom freezer models, the ice maker is usually found in the freezer section, often on one side. It’s typically housed in a plastic or metal enclosure that blends with the freezer interior. Look for a rectangular box with a small door or cover—this is your ice maker unit.
Using Your Refrigerator Manual
Have you checked your fridge’s user manual? It contains diagrams that pinpoint the ice maker’s exact location. If you’ve misplaced the physical copy, Samsung’s website offers downloadable manuals based on your model number.
Visual Clues Inside The Freezer
Open your freezer drawer fully and scan the sides and back walls. The ice maker often connects to a water line, so look for small tubes or hoses running into a box-like structure. Sometimes the ice bin itself gives away the position—it sits right below the ice maker.
Access Points For Removal
Once you locate the ice maker, check how it’s mounted. You’ll often find screws or clips holding it in place. Knowing these access points makes removal straightforward and prevents you from forcing parts that shouldn’t be moved.
Disconnecting The Water Line
Disconnecting the water line is a crucial step when removing the ice maker from your Samsung bottom freezer. It ensures safety and prevents any water leakage that could damage your kitchen floor. Handling the water line carefully avoids unnecessary repairs and keeps your appliance in good shape.
Locate The Water Supply Valve
Start by finding the water supply valve behind or near your refrigerator. This valve controls the water flow to the ice maker. Turning it off stops water from flowing, so you can disconnect the line without a mess.
Turn Off The Water Supply
Use the valve handle to shut off the water supply completely. If the valve is stuck, try gently wiggling it or use pliers for better grip. Have a towel ready to catch any residual water when you disconnect the line.
Release Pressure In The Water Line
Press the ice maker’s water dispenser or run the water line to release trapped pressure. This step reduces the chance of water spraying when you disconnect the tubing. It’s a simple trick that saves you from surprise spills.
Disconnect The Tubing From The Refrigerator
Look for the quick-connect fitting or compression nut securing the water line to the fridge. Press the fitting’s release collar or use a wrench to loosen the nut. Pull the tubing straight out to avoid kinking or damaging it.
Check For Water Leaks
After disconnecting, inspect the tubing and valve for any drips or leaks. Even a small leak can cause damage over time. Keeping a dry workspace is key to a smooth ice maker removal process.
Credit: www.youtube.com
Removing The Ice Maker Assembly
Removing the ice maker assembly from your Samsung bottom freezer might seem tricky, but with the right approach, it becomes manageable. This step is essential if you want to clean, repair, or replace the ice maker. Taking your time and being careful ensures you avoid any damage to the freezer or the assembly itself.
Removing The Cover
Start by locating the ice maker cover inside the freezer compartment. Usually, it’s a plastic shield protecting the internal components. Gently pry the cover off using your fingers or a flat tool, but avoid forcing it to prevent cracks or breaks.
Once the cover is off, you’ll see the ice maker more clearly. This makes the next steps easier and safer. Have a flashlight handy if the freezer lighting is dim.
Unscrewing The Ice Maker
Look for the screws holding the ice maker in place. They are typically Phillips-head screws, so a standard screwdriver will work. Carefully remove each screw and keep them somewhere safe—you’ll need them if you plan to reinstall the unit.
The ice maker might feel slightly stuck after the screws are out. Don’t yank it; instead, gently wiggle the unit free. This avoids bending or damaging the mounting points.
Detaching Electrical Connectors
Before pulling the ice maker away completely, you’ll find one or more electrical connectors attached. These supply power to the ice maker’s motor and sensors. Press the release tabs and pull the connectors apart carefully.
If you’re unsure about the connectors, take a photo before unplugging. It helps when reconnecting later. Always handle wires gently to avoid loosening or breaking them.
Cleaning Up
Removing the ice maker from a Samsung bottom freezer involves disconnecting the power. Next, locate and unscrew the mounting brackets. Carefully detach the wiring harness and gently slide the ice maker out.
Cleaning up after removing your Samsung bottom freezer ice maker is an essential step to ensure the longevity and efficiency of your appliance. A clean freezer not only looks better but also operates more efficiently. Dust and grime can build up over time, so taking the time to clean thoroughly is worth the effort.
Organize Your Tools And Cleaning Supplies
Before you start cleaning, gather everything you need. This might include a soft cloth, a mild detergent, and a small brush for hard-to-reach areas. Having everything ready will make the process smoother and quicker.
Wipe Down The Interior
Once the ice maker is removed, use a damp cloth with a mild detergent to wipe down the interior surfaces. Focus on the areas where the ice maker was installed, as they can accumulate more dirt. Remember to dry the surfaces thoroughly to prevent any water residue from freezing.
Clean The Ice Maker Components
If you're planning to reinstall the ice maker, clean its components separately. Use a soft brush to remove any ice or debris stuck on the parts. This ensures that when you put it back, it operates efficiently without any blockages.
Inspect For Damages
While cleaning, take a moment to inspect the ice maker and freezer compartment for any signs of wear or damage. Look for cracks or any components that might need replacement. Early detection of issues can save you from bigger problems down the line.
Reassemble With Care
Once everything is clean, carefully reinstall the ice maker. Ensure all connections are secure and the unit is properly aligned. Double-check that there’s no water leakage when you turn it back on. Doesn't it feel great to have a pristine, well-functioning freezer? Taking these simple steps can make a big difference in your kitchen routine. What cleaning tips do you swear by for your kitchen appliances?
Reassembling And Testing
Reassembling and testing your Samsung bottom freezer ice maker is a crucial step to ensure everything works smoothly. It’s not just about putting parts back together; it’s about confirming that your effort results in a fully functional ice maker. You want to avoid leaks, malfunctions, or any issues that could cause frustration later.
Carefully Reattach The Ice Maker Components
Start by aligning the ice maker unit back into its original position inside the freezer. Make sure all connectors, especially the water line and electrical plugs, fit snugly without forcing anything. Loose connections can cause the ice maker to stop working or leak water.
Secure the mounting screws firmly but don’t overtighten them. This keeps the ice maker stable while preventing damage to plastic parts. Double-check every clip and hook to confirm nothing is left loose.
Restore Power And Water Supply
After reassembling, reconnect your freezer to the power source. If you turned off the water supply before removal, turn it back on now. Watch for any unusual sounds or leaks immediately after restoring these connections.
Pay close attention to the water inlet valve and tubing. Any sign of dripping or hissing needs immediate attention to avoid bigger problems later.
Run A Test Cycle To Verify Operation
Activate the ice maker’s test mode if available, or simply wait for the unit to complete a full ice-making cycle. This usually takes a few hours but can vary based on model and temperature settings. Monitor the process closely to spot any issues early.
Check the ice quality and quantity once the cycle finishes. Ice cubes should be clear, properly shaped, and dispensed smoothly. If your ice maker jams or produces tiny or misshapen ice, it’s time to revisit the assembly steps or inspect the water filter.
Troubleshooting Tips If Ice Maker Doesn’t Work
- Verify all electrical connections are secure and undamaged.
- Confirm the water supply valve is fully open.
- Reset the ice maker by unplugging the freezer for a few minutes and plugging it back in.
- Inspect the water filter and replace it if clogged or expired.
Have you ever noticed how a small missed connection can stop the entire ice maker from working? Paying attention to these details saves you time and potential repair costs. Now, with your ice maker properly reassembled and tested, enjoy fresh ice without worry.

Credit: www.espares.co.uk
Frequently Asked Questions
How Do I Safely Remove The Ice Maker From Samsung Freezer?
First, unplug the refrigerator to ensure safety. Then, locate and disconnect the water line. Unscrew the mounting screws holding the ice maker. Gently pull it out without forcing. Follow your model’s manual for specific steps to avoid damage.
What Tools Are Needed To Remove Samsung Ice Maker?
You typically need a screwdriver, usually Phillips or flathead. A towel helps to catch water drips. Optionally, gloves protect your hands. Check your model’s instructions to confirm tools. Having these ready makes removal smooth and safe.
Can I Remove Ice Maker Without Turning Off Water Supply?
It’s best to turn off the water supply to prevent leaks. Disconnecting the water line while water is on can cause spills. Turning off water ensures a cleaner and safer removal process.
How Do I Avoid Damaging Freezer When Removing Ice Maker?
Handle the ice maker gently and avoid using excessive force. Remove screws carefully and keep track of them. Disconnect wires and water lines with care. Follow manufacturer guidelines closely to prevent damage.
Conclusion
Removing the ice maker from your Samsung bottom freezer is simple. Follow the steps carefully and take your time. Keep safety in mind and unplug the fridge first. Use the right tools to avoid damage. After removal, clean the area to prevent any issues.
This guide helps you do the job without trouble. Enjoy a smooth and easy process every time.