
Are you ready to elevate your baking game by mastering the art of using a pastry bag? Imagine effortlessly decorating cakes, cookies, and pastries like a professional, all from the comfort of your own kitchen.
Whether you're a seasoned baker or a novice who’s just starting out, learning how to put together a pastry bag is a skill that will transform your culinary creations. This guide will provide you with simple, step-by-step instructions to ensure you can confidently fill and use a pastry bag.
Discover how this one tool can unleash your creativity, turning ordinary desserts into extraordinary masterpieces. Ready to impress your family and friends with stunning, homemade treats? Let’s get started!
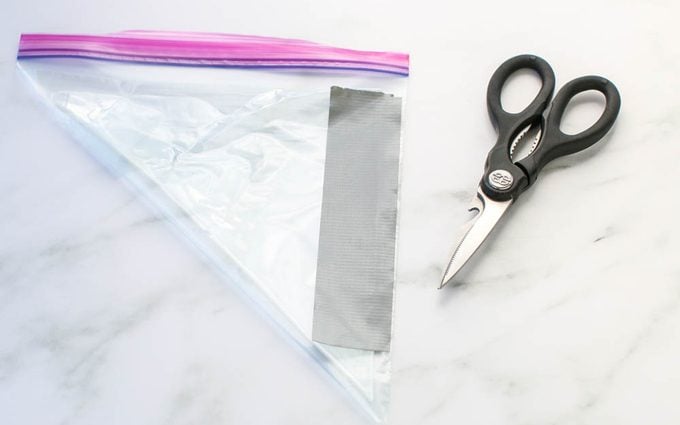
Credit: www.tasteofhome.com
Choosing The Right Pastry Bag
Choosing the right pastry bag is crucial for a smooth decorating experience. The type of bag you pick affects your control, ease of use, and cleanup. Understanding the differences between options helps you find the best fit for your baking style and projects.
Disposable Vs Reusable Bags
Disposable pastry bags are convenient and great for quick tasks or when you want to avoid cleaning. They are perfect if you’re working with multiple colors or types of icing and want to switch without fuss.
Reusable bags, usually made from silicone or heavy-duty fabric, last longer and provide better grip. They’re eco-friendly and cost-effective if you bake regularly. However, they require cleaning, which can be a bit time-consuming.
Ask yourself: Do you prefer convenience or sustainability? Your answer will guide your choice here.
Material Options
Pastry bags come in several materials, each with pros and cons. Plastic disposable bags are thin and flexible but might tear under pressure. Fabric bags are durable and provide a solid grip but can soak up oils or colors, making them harder to clean.
Silicone bags are a popular reusable option—they’re flexible, easy to clean, and don’t absorb odors or colors. Nylon bags often have a non-slip texture but can stain over time.
Think about the types of frosting or batter you use most often. Some materials handle thick fillings better, while others excel with delicate creams.
Selecting The Correct Size
Pastry bags come in various sizes, typically ranging from 8 inches to 20 inches. Smaller bags (8-12 inches) offer better control for detailed work like piping flowers or writing.
Larger bags (14-20 inches) hold more icing, reducing the need to refill during big projects like cake covers or cupcakes. But they can be bulky and harder to manage for beginners.
Consider the scale of your projects and your hand strength. Would you rather refill often or handle a heavier bag?

Credit: bakabee.com
Picking The Perfect Piping Tip
Picking the perfect piping tip shapes the look of your desserts. Each tip creates a unique pattern and texture. Knowing the right tip helps you decorate with confidence. It makes your pastries look professional and neat.
Common Tip Shapes
- Round Tips:Smooth lines and dots, ideal for writing and outlining.
- Star Tips:Create ridged patterns, perfect for rosettes and shells.
- Leaf Tips:Make delicate leaf shapes and floral designs.
- Petal Tips:Used for making flower petals and ruffles.
- Basketweave Tips:Create woven textures and stripes.
Tip Sizes And Their Uses
| Tip Size | Use |
|---|---|
| Small (1-3 mm) | Fine details, writing, and delicate designs. |
| Medium (4-8 mm) | Flowers, borders, and medium-sized decorations. |
| Large (9+ mm) | Big rosettes, shells, and bold patterns. |
Cleaning And Maintenance
- Rinse tips with warm water immediately after use.
- Use a small brush to clean inside the tip.
- Dry tips completely to avoid rust or damage.
- Store tips in a dry, organized container.
- Check tips regularly for clogs or wear.
Preparing The Pastry Bag
Preparing the pastry bag correctly sets the stage for smooth decorating. It helps control the flow of icing or batter. Proper preparation prevents mess and frustration during use.
Focus on securing the tip, adding a coupler if needed, and folding the bag for better handling. These steps make your pastry bag ready for creative work.
Fitting The Tip Securely
Choose the tip that fits your decorating task. Push it firmly into the pastry bag’s narrow end. Make sure it stays in place without slipping out. A secure tip keeps the icing flow even and neat.
Using A Coupler For Flexibility
A coupler allows easy tip changes without emptying the bag. Place the base of the coupler inside the bag’s tip hole. Screw the ring over the outside to hold it tight. This tool adds convenience for varied designs.
Folding The Bag For Stability
Fold the top edge of the pastry bag down about two inches. This creates a cuff to hold while piping. It keeps the bag steady and prevents icing from leaking out. A good fold makes decorating cleaner and more comfortable.
Filling The Pastry Bag
Filling the pastry bag is a crucial step that sets the foundation for your decorating success. Getting it right helps you maintain control and precision while piping. Let’s dive into how to choose your filling, avoid air bubbles, and fill without the usual mess.
Choosing The Right Filling
Your filling needs the right consistency. Too thick, and it won’t squeeze out smoothly; too thin, and it will drip or lose shape. Cream cheese frosting, ganache, or buttercream all work well when slightly whipped to a spreadable texture.
Think about what you’re decorating. For delicate designs, a stiffer filling holds better. For softer designs, something more fluid is easier to work with. Have you noticed how a runny filling can cause frustration mid-piping? Adjust your recipe accordingly.
Techniques To Avoid Air Bubbles
Air bubbles cause uneven piping and can lead to sudden spurts of filling. Before filling, gently tap the bowl to bring bubbles to the surface. Use a spatula to press the filling down as you add it to the bag.
Filling the bag slowly and smoothing the surface reduces trapped air. Rolling the top of the bag down over your hand as you fill helps push air out. Have you ever had a bubble explode mid-piping? These small steps save you from that mess.
Filling Without Making A Mess
Messy counters and sticky hands are common, but easy to avoid. Fold the top of your pastry bag over a tall glass or jar to hold it open. This keeps your hands free and makes filling cleaner.
Use a spatula to scoop filling into the bag instead of spooning it directly. Don’t overfill; leave enough space to twist and seal the bag comfortably. What’s your biggest challenge with filling bags—spills or overfilling? Try these tips to keep your workspace tidy and your filling ready to pipe.
Holding And Using The Pastry Bag
Holding and using a pastry bag correctly makes decorating easier and more precise. It helps you control the flow of icing or batter smoothly. Proper technique reduces hand fatigue and improves your results.
Proper Grip And Hand Position
Hold the top of the bag with your dominant hand. Twist it slightly to keep the filling inside. Use your other hand to guide the tip. Keep your wrist steady and relaxed. This grip gives you better control and comfort.
Controlling Pressure For Consistency
Apply even pressure with your dominant hand. Squeeze the bag gently, not too hard. Steady pressure creates a smooth, continuous flow. Stop squeezing to pause or change direction. Practice helps you find the right pressure level.
Common Piping Techniques
- Straight Lines: Move the bag steadily for clean lines.
- Dots: Squeeze, then lift quickly for small dots.
- Stars: Use a star tip and apply pressure while moving in small circles.
- Ruffles: Move the tip back and forth gently.
Try these techniques on parchment paper first. This builds confidence before decorating cakes or cookies.
Cleaning And Storing Pastry Bags
Keeping your pastry bags clean and well-stored is key to maintaining their performance and hygiene. Whether you use reusable or disposable bags, proper care can save you money and keep your kitchen safe. Let’s dive into practical tips that make cleaning and storing your pastry bags simple and effective.
Cleaning Reusable Bags And Tips
After using a reusable pastry bag, rinse it immediately with warm water to remove any leftover icing or batter. Avoid letting the residue dry inside—it becomes much harder to clean.
Use a small brush or a cloth to gently scrub the inside. Mild dish soap works well, but avoid harsh detergents that might damage the bag material.
Rinse thoroughly to remove all soap, then hang the bag upside down to air dry completely. This prevents mold and unpleasant odors from developing.
Have you ever noticed your bag smelling funny after storage? Proper drying is often the missing step.
Storing For Longevity
Store your clean, dry pastry bags in a cool, dry place away from direct sunlight. Heat and moisture can degrade the material over time, making the bags brittle or sticky.
Keep your bags flat or loosely rolled to avoid creases that might cause cracks. If you use multiple bags, consider a dedicated container or drawer organizer to keep them neat and ready for your next baking session.
Remember, storing bags properly means less waste and more baking fun.
Tips For Disposable Bag Disposal
Disposable pastry bags offer convenience but require responsible disposal. Check if your local recycling program accepts these plastics—many do not.
If recycling isn’t an option, try to minimize waste by cutting off only the used portion and saving the rest for smaller tasks.
Consider compostable options if you want to reduce your environmental impact. It’s a simple switch that can make a big difference.
How often do you throw away bags that still have usable parts? Small changes in disposal habits can add up.

Credit: www.onehundreddollarsamonth.com
Frequently Asked Questions
How Do I Choose The Right Pastry Bag Size?
Select a pastry bag size based on your project. Smaller bags suit detailed work, while larger bags hold more filling. Consider your comfort and control for best results. Using the correct size improves precision and reduces mess during decorating or filling.
What Materials Are Pastry Bags Made From?
Pastry bags come in plastic, silicone, and cloth. Plastic bags are disposable and affordable. Silicone bags are reusable and durable. Cloth bags offer traditional use but require cleaning. Choose material based on your preferences and usage frequency.
How Do I Prevent Filling From Leaking Out The Pastry Bag?
To prevent leaks, seal the bag tightly at the top. Avoid overfilling to reduce pressure on seams. Use a sturdy bag with no holes. Holding the bag properly ensures smooth and controlled dispensing of the filling.
Can I Reuse A Disposable Pastry Bag Safely?
Disposable pastry bags are meant for single use. Reusing can cause contamination and bag failure. For multiple uses, opt for washable silicone or cloth bags. Proper cleaning maintains hygiene and extends bag lifespan for consistent baking results.
Conclusion
Putting together a pastry bag is simple and quick. Choose the right tip for your design. Cut the bag carefully to fit the tip snugly. Fill the bag without overstuffing it. Hold the bag firmly while piping for best results.
Practice makes the process easier and more fun. Enjoy creating beautiful designs with your pastry bag. Baking becomes more creative and rewarding this way. Try different tips and fillings to explore new styles. Keep your tools clean for safe and tasty treats.
Happy baking!


