
Are you ready to take your cake decorating skills to the next level? Mastering the art of frosting is crucial, and it all begins with knowing how to put a frosting bag together.
Imagine the satisfaction of creating beautifully frosted cupcakes and cakes that not only taste delicious but look stunning. But here's the catch: a poorly assembled frosting bag can turn your sweet dreams into a messy nightmare. You don’t want that, right?
This guide will show you the simple steps to set up your frosting bag like a pro, ensuring a smooth piping experience every time. Stick with us, and you’ll discover tips and tricks that make the process easy and enjoyable, leaving your friends and family in awe of your creations. Ready to dive in? Let's get started!
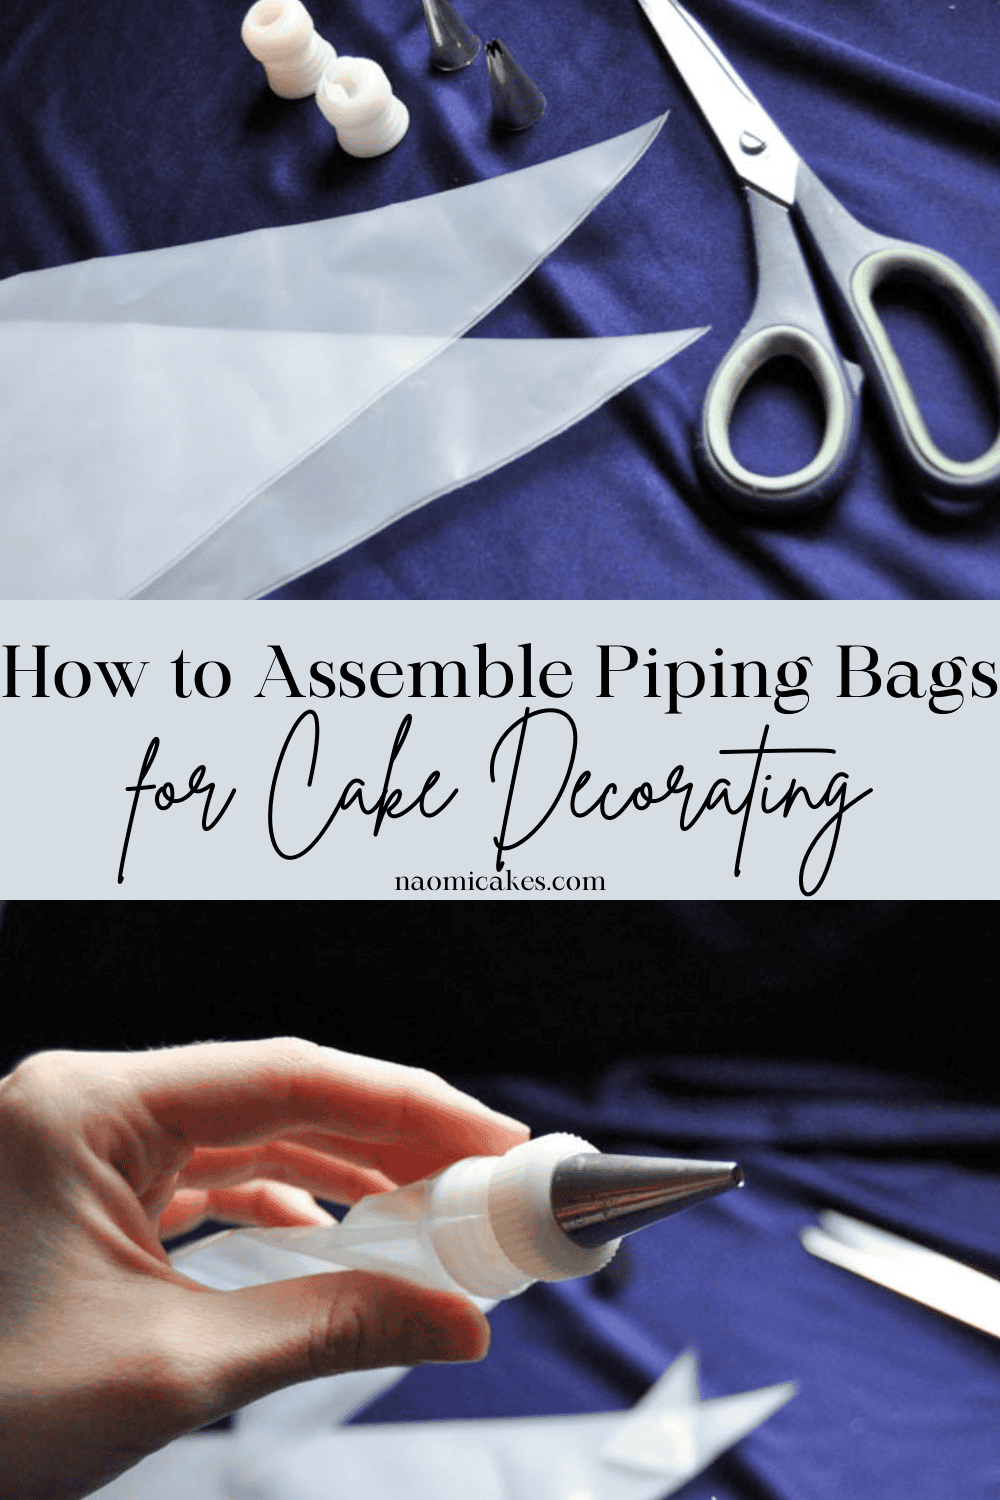
Credit: naomicakes.com
Choose The Right Bag
Choosing the right frosting bag is key to easy and neat decorating. The bag affects control, comfort, and the final look of your frosting. Different bags suit different tasks and skill levels. Picking the right one helps you work faster and cleaner. Consider type, material, and size before starting.
Disposable Vs Reusable Bags
Disposable bags are great for quick projects and easy cleanup. They are made of thin plastic and used once. Good for beginners or when you want less washing.
Reusable bags are thicker and last many uses. They are often made from silicone or cloth. These bags save money over time and reduce waste. They need washing after each use.
Choose disposable for convenience. Pick reusable for durability and environment.
Material Options
Plastic is common for disposable bags. It is flexible but can tear easily.
Silicone bags are strong and flexible. They do not stain or hold odors.
Cloth bags are washable and sturdy. They work best for thick frostings.
Each material feels different in hand. Match the bag to your comfort and frosting type.
Size Matters
Small bags work well for fine details and small amounts of frosting. They give more control.
Large bags hold more frosting and suit big projects. They reduce refilling time.
Choose the size based on your project scale. Using the right size keeps your work smooth and tidy.

Credit: www.amazon.co.uk
Select The Nozzle Tip
Selecting the right nozzle tip is key to creating stunning frosting designs. The tip you choose shapes the final look of your cake or cupcake. Understanding different tip shapes and sizes will help you achieve the effect you want.
Common Tip Shapes
Nozzle tips come in various shapes that produce unique patterns. Round tips create smooth lines and dots, perfect for writing or simple decorations. Star tips add texture with ridged edges, making rosettes and swirls stand out.
Leaf tips help you pipe realistic leaves and petals, while petal tips form delicate ruffles and flower petals. Each shape changes how frosting flows, so try a few to see what fits your style best.
Tip Sizes And Effects
Tip size controls the thickness of your frosting lines and shapes. Smaller tips (around 1-3) are great for fine details like writing or outlining. Larger tips (8-12) cover more surface and create bold decorations.
Think about your design before choosing a size. Would you like tiny dots or broad swirls? Having a range of sizes on hand makes it easier to switch up your designs and impress your guests.
Cleaning And Maintenance
Keeping your nozzle tips clean ensures smooth frosting flow every time. Wash tips right after use with warm, soapy water to remove any leftover frosting. Use a small brush to clear out hard-to-reach spots inside the tip.
Dry tips thoroughly to avoid rust or damage, especially if they are metal. Proper care extends their lifespan and saves you money on replacements. Do you notice changes in your frosting’s flow? It might be time for a thorough cleaning.
Prepare The Frosting
Preparing the frosting is a key step before filling your piping bag. The right texture and color make decorating easier and more fun. You want the frosting smooth and ready to pipe without clumps or air bubbles. Here are some tips to help you get the perfect frosting consistency and color.
Consistency Tips
Frosting should be thick enough to hold shape but soft enough to pipe smoothly. Add small amounts of milk or water to thin it if too thick. Add powdered sugar a little at a time if it is too runny. Stir well after each addition to check the texture. Aim for a creamy, spreadable consistency that flows easily through the bag.
Coloring The Icing
Use gel or paste food coloring for bright, rich colors. Liquid colors can thin the frosting, so avoid them. Add color a drop at a time and mix well. Keep adding until you reach the desired shade. Mix thoroughly to avoid streaks and uneven color.
Avoiding Air Bubbles
Air bubbles can cause uneven piping and break the frosting flow. To remove bubbles, stir frosting gently but thoroughly. Tap the bowl lightly on the counter to release trapped air. Press frosting through the bag slowly to avoid trapping new bubbles. Smooth frosting makes for clean, professional decorating.
Credit: partylicious.net
Assemble The Bag
Putting together a frosting bag might seem simple, but doing it right makes a big difference in your decorating control and the final look of your cakes or cupcakes. Each step in assembling the bag ensures smooth frosting flow and prevents messy leaks. Let’s break down how to get your frosting bag ready quickly and efficiently.
Fitting The Nozzle
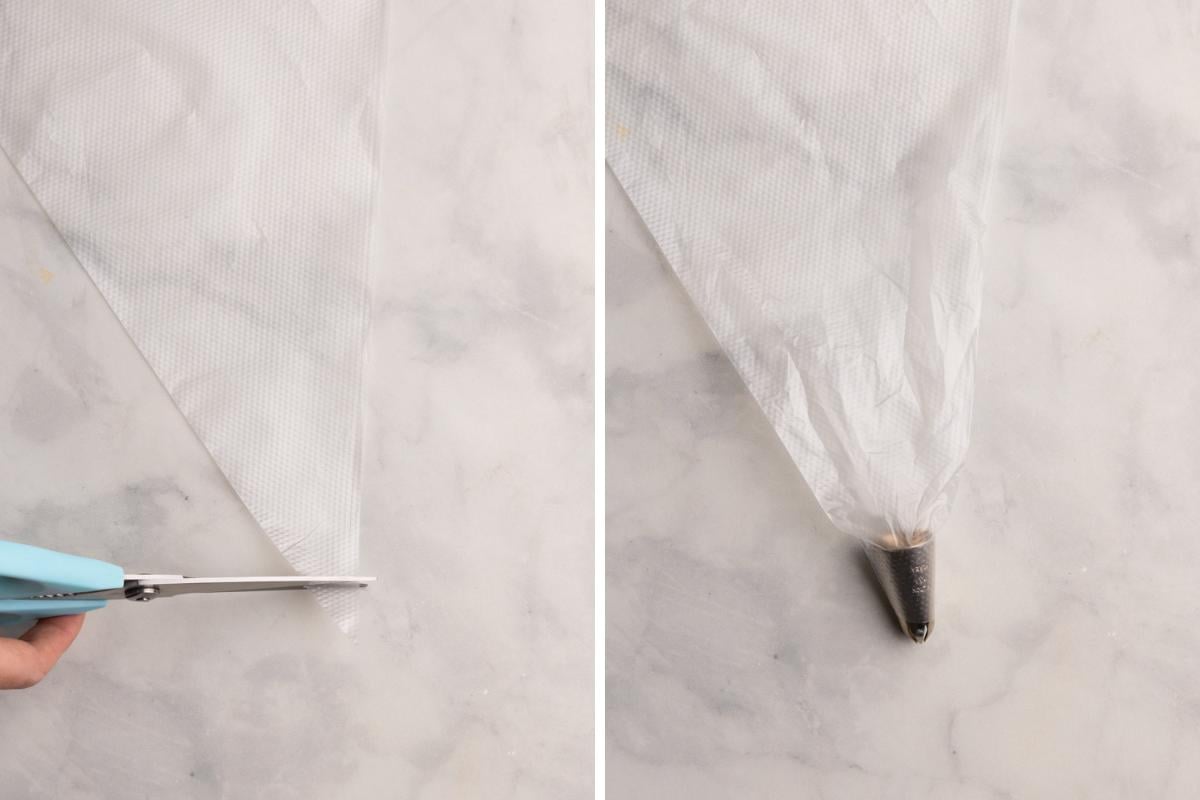
Start by choosing the right nozzle for your design. Slide the nozzle into the wide end of the piping bag, pushing it through until it fits snugly at the tip. If your bag has a coupler, secure the nozzle by tightening the ring over it—this keeps the tip firmly in place while you work.
Have you ever squeezed frosting only to have the nozzle pop out? That usually happens when it’s not fitted tightly enough. A well-fitted nozzle gives you better control and avoids frosting spills.
Filling The Bag
Filling the bag is easier if you fold the top edge down to create a cuff. This keeps the bag open and clean while you add frosting. Use a spatula to scoop frosting into the bag, aiming to fill it about halfway—too much makes handling tricky; too little wastes time on refills.
Try to avoid air pockets. Air bubbles can cause sudden bursts of frosting when you squeeze, which can ruin your design. Gently press the frosting down as you fill to keep it compact.
Sealing The Opening
After filling, unfold the cuff and twist the top of the bag to seal it tightly. This keeps the frosting from escaping the top and lets you apply pressure exactly where you want. You can hold the twisted end with your dominant hand to guide the flow smoothly.
Ever struggled with frosting oozing out the back? Twisting and sealing the opening is your best defense against that. It also helps keep your workspace cleaner.
Techniques For Piping
Piping techniques shape the look of your frosted treats. These skills help you create neat, beautiful designs with ease. Practice and attention to detail bring the best results. Focus on how you hold the bag, control pressure, and use common piping patterns to improve your frosting skills.
Holding The Bag Correctly
Hold the frosting bag firmly but gently. Use your dominant hand near the top to squeeze. Support the bag’s tip with your other hand. Keep your wrist steady and relaxed. This grip gives better control over the flow of frosting. Avoid gripping too tight to prevent hand fatigue.
Controlling Pressure
Pressure control is key for smooth piping. Apply steady, even pressure with your squeezing hand. Start slowly to avoid sudden bursts of frosting. Practice releasing pressure gradually as you finish each design. Consistent pressure helps create clean lines and shapes. Adjust pressure based on the size of the tip and design details.
Common Piping Patterns
- Dots:Squeeze small dots by holding the tip just above the surface. Stop pressure before lifting the bag.
- Lines:Move the bag steadily while applying pressure. Keep the tip close to the surface.
- Swirls:Pipe in a circular motion for rosettes or shells. Control speed and pressure for smooth curves.
- Zigzags:Use quick side-to-side movements to create zigzag patterns. Keep pressure even throughout.
Troubleshooting Tips
Putting together a frosting bag can sometimes be trickier than it looks. Small issues like leaks, uneven flow, or spills can slow down your decorating process and cause frustration. Tackling these common problems quickly will keep your frosting bag working smoothly and your baking fun on track.
Preventing Leaks
Leaks usually happen when the bag isn’t sealed tightly around the piping tip. Make sure you push the tip all the way into the bag and then fold the bag’s edge over the tip’s base.
Using a coupler can also help secure the tip and prevent leaks. If you notice frosting escaping from the seam of the bag, try twisting the top of the bag tighter or using a clip to seal it.
Fixing Uneven Flow
Uneven frosting flow often means the bag is either overfilled or underfilled. If the bag is too full, it’s hard to control the pressure, causing bursts or slow flow. Try filling the bag only halfway to keep a steady grip and smooth flow.
Another cause can be the consistency of your frosting. Too thick frosting clogs the tip, while too thin frosting runs out too fast. Adjust by adding a little powdered sugar to thicken or a drop of milk to thin it out.
Cleaning Up Spills
Spills are almost inevitable, but quick cleanup keeps your workspace tidy and your frosting fresh. Keep a damp cloth or paper towel nearby to wipe off any frosting on the outside of the bag or your hands.
If frosting drips inside the bag’s opening, remove the tip and wipe it clean before continuing. This prevents buildup that can block the flow or cause uneven designs.
Frequently Asked Questions
How Do I Assemble A Frosting Bag Correctly?
To assemble a frosting bag, insert the piping tip inside the bag's narrow end. Trim the tip's excess bag material. Push the tip firmly into place. Fill the bag with frosting, folding the top to secure it. This method prevents mess and ensures smooth frosting flow.
What Is The Best Tip For Frosting Bags?
The best tip depends on the design you want. For detailed work, use small round tips. For flowers or stars, use star-shaped tips. Always choose stainless steel tips for durability. Match the tip size to your project for best results.
How Much Frosting Should I Fill In The Bag?
Fill the frosting bag about two-thirds full. Overfilling makes it hard to control and causes spills. Underfilling requires frequent refills and slows decorating. This amount provides a good balance for smooth and easy piping.
Can I Reuse A Frosting Bag After Cleaning?
Yes, reusable frosting bags can be cleaned with warm soapy water. Make sure to dry them completely before storing. Disposable bags are for single use only. Reusable bags save money and reduce waste when maintained properly.
Conclusion
Putting a frosting bag together is simple with the right steps. Choose your tip, place it inside the bag, and add frosting carefully. Twist the top to keep frosting from spilling. Practice squeezing gently to get smooth, even lines. This method helps you decorate cakes and cupcakes with ease.
Keep your tools clean for the best results every time. Enjoy creating beautiful designs that look professional. With patience, you will improve quickly and have fun. Ready to bake and decorate? Give it a try today!


