Have you ever pulled your sourdough out of the Dutch oven, only to find the bottom burned and ruined? It’s frustrating, especially after all the time you spent mixing, proofing, and waiting.
But don’t worry—there are simple tricks you can use to keep your bread perfectly golden without that burnt taste. You’ll discover easy tips to protect your sourdough’s bottom while baking in a Dutch oven. Keep reading, and you’ll soon enjoy crusty, delicious bread every time.
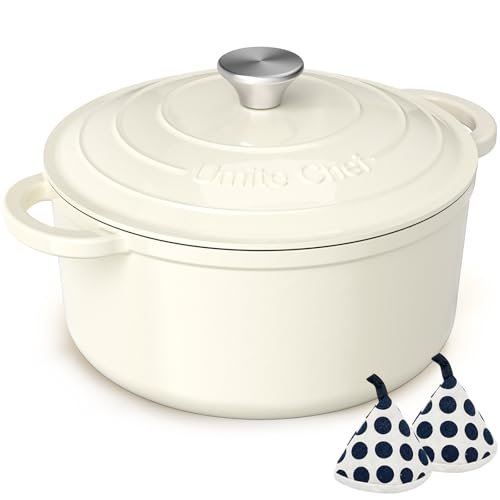
Choosing The Right Dutch Oven
Choosing the right Dutch oven plays a crucial role in preventing the bottom of your sourdough from burning. The material and size of the pot affect how heat is distributed and retained during baking. Picking the ideal Dutch oven can save you from frustrating burnt crusts and uneven baking.
Material Matters
Cast iron Dutch ovens are popular for sourdough because they hold heat evenly and create a stable baking environment. Enameled cast iron offers the same heat retention but is easier to clean and less prone to rust. However, thin aluminum or stainless steel pots tend to heat unevenly, increasing the risk of burning.
Have you noticed how your bread burns faster in a lightweight pot? That’s because heavier materials like cast iron prevent hot spots. This even heat distribution is key to a perfect crust without a burnt bottom.
Size And Shape Considerations
Your Dutch oven should comfortably fit your dough without crowding it. A pot that’s too small can cause the bread to bake unevenly, while one that’s too large may affect heat circulation. Typically, a 5 to 7-quart Dutch oven works well for most sourdough loaves.
The shape also matters. A deeper pot allows the dough to rise without hitting the lid, but a shallow one can encourage better steam circulation. Think about how your dough behaves—does it spread wide or rise tall? Choosing a shape that matches your dough’s nature helps avoid burning and promotes a beautiful crust.

Credit: www.kingarthurbaking.com
Preparing Your Dutch Oven
Getting your Dutch oven ready is key to baking sourdough without burning the bottom crust. How you prepare it directly affects heat distribution and moisture retention, which can make or break your loaf. Small adjustments here can save you from a burnt bottom and deliver a perfectly baked bread.
Preheating Techniques
Preheat your Dutch oven inside the oven for at least 30 minutes before baking. This step ensures the pot is hot enough to create the ideal crust without scorching the base.
Place both the pot and its lid in the oven during preheating. This allows the entire vessel to reach an even temperature, preventing cold spots that can cause uneven baking.
Try avoiding preheating on a direct stovetop flame if your Dutch oven isn’t designed for it. Uneven heat can cause warping or hot spots that burn the bread’s bottom.
Using Parchment Paper Or Liners
Line your Dutch oven with parchment paper before placing your dough inside. This simple step creates a barrier that prevents sticking and shields the bread’s bottom from intense direct heat.
Cut the parchment paper slightly larger than the base of your Dutch oven to allow easy lifting after baking. It also helps catch any drips and makes cleanup easier.
Some bakers use silicone baking mats as liners, which work similarly but can be reused. Experiment with both to find what fits your baking style best.
Dough Placement Tips
Proper dough placement inside a Dutch oven helps prevent burning the bottom of your sourdough bread. It supports even baking and helps achieve a nice crust without charred spots. Paying attention to how you place and prepare the dough can change your baking results significantly.
Avoiding Direct Contact With Bottom
Place the dough on a layer to keep it from touching the Dutch oven’s hot surface directly. Use parchment paper for a simple, safe barrier. This stops the dough from burning while still allowing heat to circulate.
Another option is to sprinkle cornmeal or flour on the bottom. This creates a thin cushion and prevents sticking. It also adds a subtle texture to the crust without burning.
Shaping And Scoring For Even Baking
Shape your dough tightly to keep its form during baking. A well-shaped dough rises evenly and cooks uniformly. Avoid loose or flat shapes that can cause uneven heat exposure.
Score the dough with shallow cuts before baking. These cuts guide steam release and help the bread expand properly. Proper scoring reduces the risk of burning by controlling how the heat interacts with the dough’s surface.

Credit: www.kingarthurbaking.com
Temperature And Timing Control
Baking sourdough can be a delightful experience, but burning the bottom of your loaf is a common mishap that many bakers face. Controlling temperature and timing is crucial to achieving that perfect crust without a charred base. By focusing on these elements, you can improve your sourdough baking skills and savor every bite of your homemade bread.
Optimal Oven Temperatures
Finding the right oven temperature is key to preventing the bottom of your sourdough from burning. Many bakers recommend preheating your oven to around 450°F (232°C) and then reducing it to 425°F (218°C) when you place the dough inside. This initial high heat helps in forming a crust, while the reduced temperature ensures the bottom doesn’t scorch.
Consider using an oven thermometer to ensure accuracy, as oven dials can often be misleading. You might be surprised at how off your oven's temperature setting can be, which makes this tool essential for consistent results. Adjusting your oven racks can also help; placing the Dutch oven on a higher rack can prevent excessive direct heat to the bottom.
Adjusting Bake Times For Crust Perfection
The timing of your bake is just as important as the temperature. A typical sourdough loaf bakes for about 40 to 50 minutes. However, to avoid a burnt bottom, you might consider baking it for 20 minutes covered and the remaining time uncovered.
Experiment with different baking times to find what works best for your specific oven and dough. If you find the bottom still browns too quickly, try reducing the initial bake time before removing the lid of your Dutch oven. Have you ever timed the cooling phase? Letting the loaf sit in the turned-off oven with the door ajar can also enhance the crust without risking burning.
Taking these steps can transform your sourdough baking experience. Have you tried adjusting your approach, and what were your results? Share your experiences to help others on their sourdough journey!
Using Heat Diffusers And Trivets
Using heat diffusers and trivets can be a game changer in preventing the bottom of your sourdough from burning in a Dutch oven. These tools create a buffer between the direct heat and your dough, allowing for a more even bake. This technique has saved many loaves from unwanted char, making your crust perfectly crisp without a scorched base.
Benefits Of Heat Diffusers
Heat diffusers distribute heat evenly across the Dutch oven’s surface. This prevents hot spots that often cause burning on the bottom of your bread.
They also help maintain a consistent temperature, which is essential for sourdough’s slow and steady rise. Using a diffuser can improve your crust’s texture, giving it a nice crunch without bitterness.
Have you noticed uneven browning in your loaves despite careful temperature control? A heat diffuser might be the missing piece in your baking setup.
Diy Trivet Options
If you don’t have a heat diffuser, a simple DIY trivet can do the trick. Try placing a small metal rack or even a thick layer of aluminum foil crumpled into a flat mat at the bottom of your Dutch oven.
Another option is to use clean, unglazed ceramic tiles or oven-safe stones as a trivet. These materials absorb and spread heat, reducing the chance of burning.
Using common kitchen items to create a trivet is cost-effective and easy. What household items could you repurpose today to protect your sourdough?

Credit: www.reddit.com
Alternative Baking Methods
Alternative baking methods offer great ways to avoid burning the bottom of sourdough bread. These techniques provide even heat and better control during baking. They help achieve a crispy crust without charred spots.
Using different tools can improve heat distribution. This prevents direct, intense heat from the oven floor. The result is a well-baked loaf with a golden bottom.
Baking On A Baking Stone
A baking stone absorbs and holds heat evenly. It creates a stable baking surface for sourdough bread. Place the stone on the oven rack and preheat it thoroughly.
The stone mimics the effect of a traditional brick oven. It reduces hot spots that cause burning. It also helps the bread rise better by providing steady heat.
For best results:
- Preheat the stone for at least 30 minutes.
- Use a peel to transfer the dough onto the stone.
- Place a pan of water in the oven for steam.
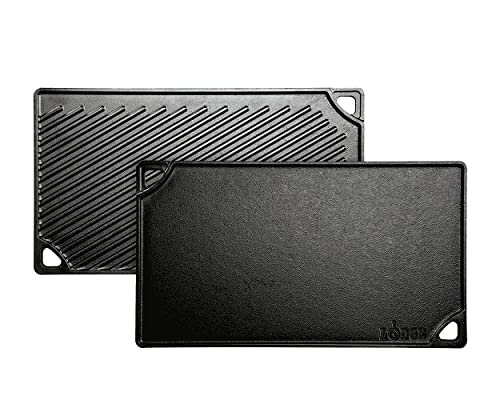
Using Cast Iron Skillets
Cast iron skillets offer excellent heat retention. They distribute heat evenly across the bottom of the bread. This prevents burning while baking sourdough.
Heat the skillet in the oven before placing the dough inside. The heavy material mimics the Dutch oven’s heat environment. It also creates a nice crust without overcooking the base.
Tips for using cast iron skillets:
- Preheat the skillet along with the oven.
- Lightly oil the skillet to prevent sticking.
- Cover with a lid or foil to trap steam.
Maintenance And Cleaning
Proper maintenance and cleaning keep your Dutch oven in top shape. This helps avoid burning the sourdough's bottom during baking. Clean cookware performs better and lasts longer. Follow these simple steps for care and upkeep.
Seasoning Your Dutch Oven
Seasoning adds a protective layer to the Dutch oven. It prevents food from sticking and burning. Start with a clean, dry pot. Rub a thin layer of vegetable oil all inside the pot and lid. Place it upside down in the oven at 350°F (175°C) for one hour. Let it cool inside the oven. Repeat this process if the surface looks dull or dry. Seasoning improves non-stick qualities and protects the metal.
Preventing Residue Build-up
Residue can cause burning and uneven heat distribution. Clean the Dutch oven after every use. Use warm water and a soft sponge or brush. Avoid soap if your Dutch oven is cast iron and seasoned. For stubborn stuck-on bits, soak in warm water for a few minutes. Do not use steel wool or harsh scrubbers. Dry the pot thoroughly after washing to avoid rust. Proper cleaning keeps your Dutch oven safe and efficient.
Frequently Asked Questions
How To Prevent Sourdough From Burning In Dutch Oven?
Use parchment paper under the dough to avoid direct contact with the hot surface. Lower oven temperature slightly and preheat the Dutch oven well to ensure even heat distribution.
What Temperature Is Best For Baking Sourdough In Dutch Oven?
Bake sourdough at 450°F (232°C) initially, then reduce to 425°F (218°C). This prevents the bottom from burning while ensuring a crispy crust and proper cooking.
Should I Use A Baking Stone Or Dutch Oven For Sourdough?
A Dutch oven traps steam, creating a crusty loaf. A baking stone provides direct heat but less steam. Dutch ovens are ideal to avoid burning and maintain moisture.
How Does Preheating The Dutch Oven Affect Sourdough Baking?
Preheating ensures the Dutch oven is evenly hot, promoting proper crust formation. It prevents the dough from sticking or burning on the bottom by stabilizing heat.
Conclusion
Avoiding a burnt sourdough bottom needs careful heat control. Use parchment paper or a baking sheet to protect your bread. Preheat the Dutch oven properly for even cooking. Try lowering the oven temperature if the bottom browns too fast. Keep an eye on baking time; shorter may help.
Small changes make a big difference in your bread’s crust. Baking sourdough should be fun, not frustrating. Follow these tips to enjoy perfect bread every time.