Imagine having fresh, fluffy whipped cream ready whenever you want, without any fancy tools or electricity. You can make it right in your kitchen using just a simple mason jar.
If you’ve ever thought whipping cream is hard or messy, this easy method will surprise you. You’ll discover how to make perfect whipped cream quickly, with minimal effort and ingredients you already have. Ready to impress yourself and your guests?
Keep reading, and you’ll never buy store-bought whipped cream again!
Ingredients Needed
Making whipped cream in a Mason jar requires just a few simple ingredients. These ingredients are easy to find and work well together to create a light, fluffy topping. Using fresh and quality components will give the best taste and texture.
Gathering everything beforehand makes the process smooth and quick. Here are the basic ingredients you need for homemade whipped cream in a Mason jar.
Heavy Cream
Heavy cream is the main ingredient. It contains enough fat to whip up into soft peaks. Choose fresh, cold heavy cream for the best results.
Sugar
Sugar adds sweetness to balance the cream’s flavor. Granulated sugar or powdered sugar both work. Powdered sugar dissolves faster, giving a smoother texture.
Vanilla Extract
Vanilla extract adds a nice flavor boost. Use pure vanilla extract for a natural taste. Just a small amount is enough to enhance the cream.
Optional Ingredients
- A pinch of salt to bring out the sweetness
- Cinnamon or cocoa powder for extra flavor
- Flavored extracts like almond or peppermint for variety
Choosing The Right Mason Jar
Choosing the right mason jar is key to making perfect whipped cream in a jar. The jar needs to be the right size and shape to allow air to mix well with the cream. Picking the wrong jar could mean your cream doesn’t whip up properly or spills everywhere.
Choosing The Perfect Size
Size matters a lot when whipping cream in a mason jar. You want a jar that is big enough to hold the cream and still leave enough room for shaking. A pint (16 oz) jar is usually the best choice.
Too small a jar will cause spills, and too large means the cream won’t whip efficiently. Think about how much whipped cream you want before picking the size.
Considering The Jar Shape
The shape of the jar affects how easily you can shake it to whip the cream. A wider jar gives you more space to move the cream around, which helps whip it faster. Narrow jars can make it harder to shake vigorously.
Look for jars with straight sides rather than curved ones. They offer better mixing space and easier cleaning after.
Material And Lid Type
Most mason jars are made of glass, which is ideal because it won’t absorb flavors or odors. Make sure the glass is sturdy to handle the shaking. Avoid thin or cheap glass that might crack.
The lid is just as important. A tight-sealing metal lid is best to prevent leaks when shaking. Plastic lids might not seal well and can cause messes.
Preparing The Cream
Preparing the cream is the foundation of making perfect whipped cream in a mason jar. The right preparation sets the stage for a light, fluffy texture that holds well. It’s a simple process, but attention to detail can make a big difference in your results.
Choosing The Right Cream
Start with heavy cream or heavy whipping cream that has at least 36% fat content. The fat is essential for whipping and holding the air you beat into the cream. Avoid using half-and-half or light cream because they won’t whip properly.
Have you checked the expiration date? Fresh cream whips better and tastes fresher. A slightly chilled cream also helps it whip faster and hold its shape longer.
Chilling Your Mason Jar And Ingredients
Cold tools make the whipping process easier and quicker. Place your mason jar and the cream in the fridge for about 15-20 minutes before starting. You can even chill the jar in the freezer for 5-10 minutes if you’re short on time.
When I first tried whipping cream in a warm jar, it took forever and never got stiff. Chilling everything first changed that instantly.
Adding Sweeteners And Flavorings
Decide if you want your whipped cream sweetened or flavored. Simple options include powdered sugar, vanilla extract, or a touch of cinnamon. Adding them before you start shaking helps the flavors blend evenly.
Be careful with liquid flavorings—they can thin the cream if you add too much. A teaspoon of vanilla or a tablespoon of powdered sugar usually works well for a pint of cream.
Step-by-step Shaking Method
Shake cream, sugar, and vanilla in a mason jar for fluffy whipped cream. Enjoy a simple, homemade treat!
Making whipped cream in a mason jar is not only a fun activity but also a rewarding one. You have the power to transform simple ingredients into a delicious topping. The shaking method offers a hands-on experience and a little workout for your arms!
Gather Your Ingredients And Tools
Before you begin, ensure you have a clean mason jar with a lid. Opt for a wide-mouth jar for easier access. You'll also need cold heavy cream, sugar, and vanilla extract.
Measure The Ingredients
Pour about half a cup of heavy cream into the mason jar. Add one tablespoon of sugar and a splash of vanilla extract. You can adjust the sweetness to your liking, but starting with these measurements is a safe bet.
Tighten The Lid
Seal the mason jar tightly with its lid. A secure lid prevents any messy spills. Double-check that it's on properly to avoid an unexpected cream shower.
Start Shaking
Hold the mason jar with both hands and shake it vigorously. Use your wrists and keep your arms relaxed. Feel free to take turns with a friend or family member to keep the process lively.
Check The Consistency
After about 3-5 minutes, open the jar to check if the cream has thickened. You're aiming for soft peaks, where the cream holds its shape but still falls over. If it's not ready, reseal the lid and shake for another minute or two.
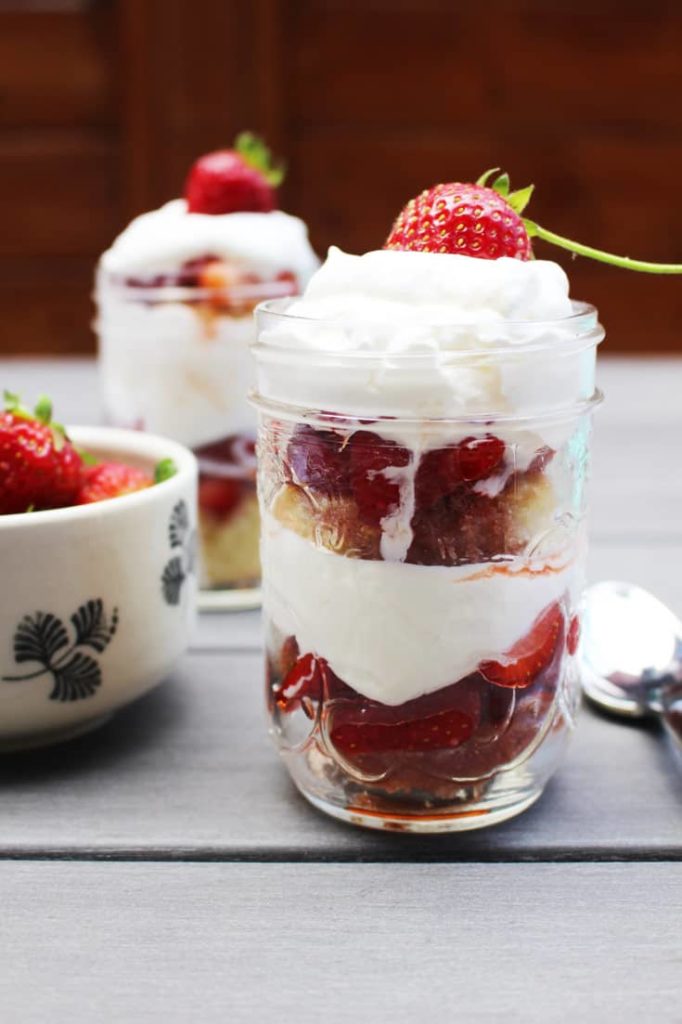
Enjoy Your Creation
Once your whipped cream reaches the desired consistency, it's ready to use. Top it on a pie, swirl it onto hot cocoa, or simply taste it as is. You've just made whipped cream with a personal touch! Whipping cream in a mason jar is an activity that connects you with the process. Isn't it satisfying to know exactly what goes into your treat? Give it a try and impress your friends with this simple yet effective method.
Tips For Perfect Whipped Cream
Getting perfect whipped cream in a mason jar is easier than you might think. The key lies in a few simple tips that make your cream fluffy, light, and stable. These tips will help you avoid common mistakes and enjoy a delicious topping every time.
Keep Everything Cold
Cold cream whips better and faster. Chill your mason jar, cream, and even the whisk or spoon beforehand. I once skipped this step, and my cream turned out runny and took forever to thicken. Have you noticed how cold ingredients change the texture of your dishes?
Choose The Right Cream
Use heavy cream or whipping cream with at least 30% fat content. Lower fat creams won’t hold their shape. I’ve tried light cream before, and it just didn’t whip up well, leaving me frustrated. What’s the fat percentage on your cream label?
Don’t Overfill The Jar
Fill the mason jar only halfway with cream. You need space for air to whip into the cream. I learned this the hard way when my jar overflowed and made a mess. How much space do you leave when whipping cream?
Shake With Steady, Strong Movements
Shake the jar vigorously but with control. Too slow won’t whip the cream, too fast can spill it out. I find a steady rhythm helps the cream thicken evenly. What’s your favorite shaking technique?
Add Sweeteners And Flavors At The Right Time
Add sugar, vanilla, or other flavors after the cream starts to thicken. Adding too early can prevent the cream from whipping properly. I once added sugar at the start, and it made whipping take much longer. Do you prefer plain or flavored whipped cream?

Credit: confessionsofagroceryaddict.com
Flavor Variations
Whipped cream in a mason jar is a fun and simple treat, but adding flavors takes it to the next level. You can easily customize your whipped cream to match your mood or the dessert you’re serving. Experimenting with different flavors is a great way to surprise your guests and keep your homemade whipped cream exciting.
Vanilla And Cinnamon
Adding a splash of vanilla extract gives your whipped cream a classic, sweet aroma. A pinch of cinnamon adds a warm, spicy kick that pairs perfectly with pies and hot drinks. Try mixing these two for a cozy, comforting flavor that feels like a hug in a jar.
Chocolate And Coffee
Mix cocoa powder or melted chocolate into your cream before shaking. For a bold twist, add a teaspoon of instant coffee or espresso powder. This combo works wonderfully on desserts like brownies or ice cream, turning simple whipped cream into a mocha delight.
Fruit Infusions
Crush fresh berries or add a spoonful of fruit jam to your cream. Strawberries, raspberries, and blueberries all blend beautifully for a fresh, tangy taste. This is a great way to add natural sweetness without extra sugar, making your whipped cream feel light and bright.
Herbal And Citrus Notes
Try adding a few drops of lemon or orange zest for a refreshing twist. Fresh herbs like mint or basil can be finely chopped and mixed in for a unique flavor profile. These additions bring a surprising burst of freshness that can balance richer desserts.
Sweet And Spicy
For a daring flavor, add a small pinch of cayenne pepper or chili powder with some honey or maple syrup. The heat complements the sweetness, creating a lively balance that wakes up your taste buds. This variation is perfect if you want to add an unexpected kick to your whipped cream.
Common Mistakes To Avoid
Making whipped cream in a Mason jar is simple and fun. Yet, some common mistakes can spoil the process. Avoiding these errors helps get the perfect fluffy cream every time.
Understanding these common pitfalls saves time and ingredients. It also makes your whipped cream smooth and light. Read on to learn what to watch out for.
Using Warm Cream Instead Of Cold
Cold cream whips better and faster. Warm cream may not thicken properly. Keep your cream in the fridge before starting. Chill the Mason jar too for best results.
Overfilling The Mason Jar
Leave enough space for the cream to expand. Overfilling makes shaking harder and less effective. Fill the jar halfway or less for better whipping.
Shaking Too Gently Or Too Hard
Gentle shaking takes too long and may not whip well. Shaking too hard can cause spills or overwhipping. Use steady, firm shakes for about 3 to 5 minutes.
Not Using Heavy Whipping Cream
Heavy whipping cream has enough fat to whip properly. Using light cream or milk will not work. Check the label before starting to ensure it’s heavy cream.
Adding Sugar Or Flavor Too Early
Add sugar or vanilla after the cream starts to thicken. Adding them too soon can prevent proper whipping. Wait until soft peaks form to sweeten your cream.

Credit: plumbranchhome.com
Storing And Serving
Storing and serving whipped cream made in a mason jar is easier than you might think. Once you've mastered the technique, keeping your whipped cream fresh and serving it beautifully becomes a simple part of your routine. The key is to handle it gently and store it properly to maintain its fluffy texture and rich flavor.
How To Store Whipped Cream In A Mason Jar
After whipping, seal your mason jar tightly with the lid to keep air out. Store it in the refrigerator to preserve freshness and prevent it from melting or separating. Whipped cream typically stays fresh for up to 24 hours this way.
Have you ever noticed your whipped cream turning watery or losing its fluff? That usually happens when it’s exposed to air or left at room temperature too long. Keeping the jar sealed and chilled slows down this process.
Tips For Serving Whipped Cream Straight From The Jar
Serving directly from the mason jar is convenient and adds a rustic charm to your presentation. Before serving, give the jar a gentle swirl or shake to fluff up the cream again. Use a spoon or a small spatula to scoop out the cream neatly.
If you want to get creative, try piping whipped cream using a plastic bag with a corner cut off. Have you ever surprised guests by serving whipped cream this way? It’s an easy trick that looks impressive without extra tools.
How To Re-whip Whipped Cream If It Starts To Separate
If you find your whipped cream has started to separate or become runny, don’t toss it. Simply take it out of the fridge and give it a quick shake or whisk to bring back its texture. Adding a little powdered sugar or vanilla extract while re-whipping can also help stabilize the cream.
Next time your cream looks a bit flat, try this quick fix before starting over. It saves time and reduces waste, keeping your dessert game strong.
Credit: www.ourhappymess.com
Frequently Asked Questions
How Long Does It Take To Make Whipped Cream In A Mason Jar?
It takes about 3 to 5 minutes of vigorous shaking to make whipped cream in a mason jar. Shaking speed affects the texture. Use cold heavy cream for best results.
Can I Add Flavors To Mason Jar Whipped Cream?
Yes, you can add vanilla extract, cocoa powder, or sweeteners before shaking. Adding flavors enhances taste and customizes whipped cream easily.
What Cream Should I Use For Mason Jar Whipped Cream?
Use cold heavy cream or heavy whipping cream with at least 36% fat content. This ensures the cream whips properly and holds stiff peaks.
How To Store Leftover Whipped Cream Made In A Mason Jar?
Store leftover whipped cream in the mason jar, sealed tightly, in the refrigerator. Use within 24 hours for best freshness and texture.
Conclusion
Making whipped cream in a mason jar is quick and fun. It needs only cream, sugar, and a jar with a lid. Shake the jar well until the cream thickens. No special tools or skills are needed. This method works great for small amounts.
Enjoy fresh whipped cream on desserts or drinks anytime. Try it at home and see how easy it is. Simple steps bring tasty results. Give it a shake and enjoy!