Are you ready to make perfect sushi rice right at home? Whether you’re a sushi lover or just want to try something new, getting the rice just right is key.
Using a rice cooker makes the process simple and foolproof, even if you’ve never cooked sushi rice before. In this guide, you’ll learn the exact steps to create fluffy, sticky rice that holds together perfectly for your sushi rolls. Keep reading, and you’ll be serving up delicious sushi rice with confidence in no time!

Credit: www.myeclecticbites.com
Choosing The Right Rice
Choosing the right rice is the first and most crucial step in making perfect sushi rice in a rice cooker. The texture and stickiness of the rice affect how well your sushi holds together and tastes. Picking the wrong type can leave you with dry, crumbly rice that won’t shape properly.
Short-grain Vs Medium-grain Rice
Short-grain rice is the classic choice for sushi. It’s plump, sticky, and has just the right amount of moisture to hold sushi rolls together. This sticky quality is what makes it easy to mold and shape your sushi without falling apart.
Medium-grain rice is less sticky and a bit firmer. It can work if you prefer a slightly chewier texture, but it won’t have the same cohesive quality as short-grain. If you try medium-grain, expect your sushi to have a different feel and possibly more difficulty staying intact.
Importance Of Quality Rice
Not all rice is created equal. High-quality rice has a fresh, clean flavor and a consistent texture that impacts your sushi’s taste and appearance. Cheap or old rice can be dry or overly soft, ruining the delicate balance you need.
I once used a low-quality brand to save money, and the rice turned out mushy and bland. It was a reminder that investing in good rice makes a noticeable difference. Have you noticed how even subtle changes in rice quality affect your cooking results?
Look for rice labeled specifically for sushi or Japanese cooking. These varieties are tested to deliver the right stickiness and flavor. Your sushi will thank you for it.

Credit: www.youtube.com
Preparing The Rice
Preparing the rice is a vital step for perfect sushi rice. It sets the foundation for sticky, flavorful grains that hold together well. Proper preparation improves texture and taste. Start by handling the rice with care. Follow simple techniques to clean and hydrate the grains before cooking.
Rinsing Techniques
Rinse the rice under cold water to remove excess starch. Use a fine-mesh sieve or bowl. Gently stir the rice with your hand. The water will turn cloudy at first. Drain and repeat this process 3 to 5 times. Stop rinsing when the water runs clear. Clear water means most starch is washed away. This prevents rice from becoming too sticky or mushy.
Soaking Time
Soak the rinsed rice in clean water before cooking. Soaking helps grains absorb water evenly. It improves texture and shortens cooking time. Use the same amount of water as rice volume for soaking. Let it sit for 20 to 30 minutes at room temperature. Avoid soaking longer to prevent over-hydration. After soaking, drain the rice well. Then place it in the rice cooker with fresh water for cooking.
Using The Rice Cooker
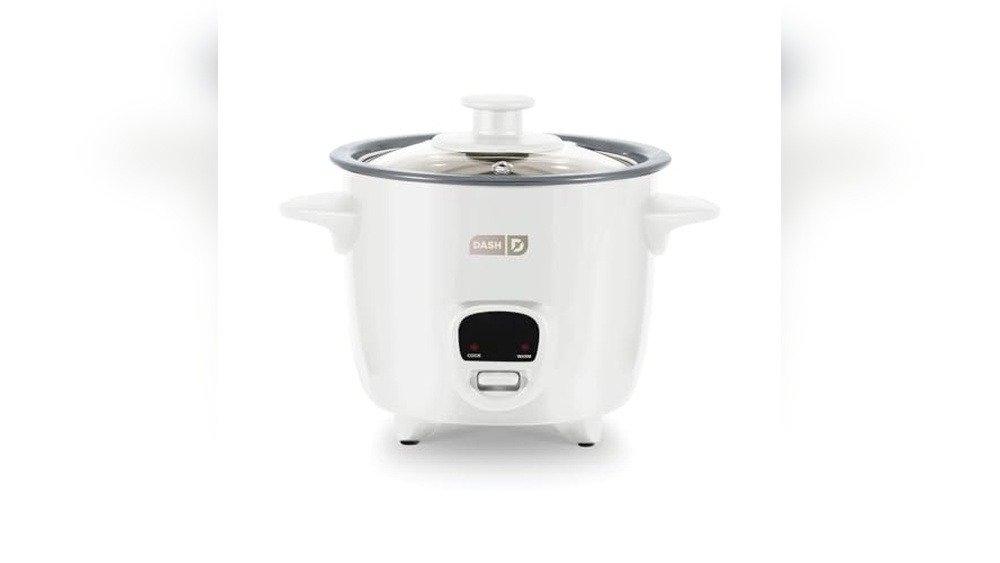
Using a rice cooker to make sushi rice takes much of the guesswork out of the process. It ensures even cooking and consistent texture, which is key for perfect sushi. Plus, it frees you up to focus on preparing other ingredients without worrying about your rice burning or sticking to the pot.
Water-to-rice Ratio
Getting the water-to-rice ratio right is crucial for sushi rice. Typically, use about 1 cup of water for every 1 cup of sushi rice. However, if your rice cooker has specific instructions or a sushi rice setting, it’s smart to follow those guidelines.
Keep in mind that rinsing your rice thoroughly before cooking reduces starch and prevents it from becoming too sticky. If you prefer firmer rice, slightly reduce the water by a tablespoon or two. Have you noticed how small changes in water can affect your rice texture?
Setting The Cooker
Most modern rice cookers have a “white rice” or “sushi rice” setting, which you should use if available. This setting adjusts cooking time and temperature for optimal results. If your cooker lacks this feature, simply use the standard white rice mode.
Remember to keep the lid closed during cooking. Opening it too soon lets steam escape, which can lead to uneven cooking. Have you ever tried lifting the lid early only to find your rice undercooked?
Timing Tips
After the rice cooker finishes, let the rice rest with the lid closed for about 10 minutes. This allows moisture to redistribute evenly. Avoid skipping this step; it makes your sushi rice fluffier and easier to work with.
Once done, transfer the rice promptly to a wooden or non-metal container to cool it down while seasoning. This step helps preserve the texture and flavor you worked hard to achieve. What’s your favorite trick to cool sushi rice without drying it out?
Seasoning The Rice
Seasoning the rice is the heart of making perfect sushi rice. It’s what transforms plain cooked rice into that slightly tangy, sweet, and sticky base you love. Getting this step right impacts the texture and flavor of your sushi, so it’s worth paying close attention.
Making Sushi Vinegar
Sushi vinegar is a simple mix but crucial for authentic taste. Typically, it combines rice vinegar, sugar, and salt. You can adjust the balance to suit your taste—some like it sweeter, others a bit tangier.
Heat these ingredients gently in a small saucepan or microwave until the sugar and salt dissolve completely. This ensures the flavors blend smoothly without altering the rice’s texture. Have you experimented with different vinegar brands? It can subtly change your sushi rice flavor.
Mixing Vinegar And Rice
Once your rice is cooked, transfer it to a large wooden or plastic bowl—avoid metal as it reacts with vinegar. While the rice is still hot, gently pour the sushi vinegar evenly over it.
Use a wooden spatula or rice paddle to cut and fold the rice, rather than stirring vigorously. This keeps the grains intact and prevents mushiness. How you mix affects the stickiness and appearance of your rice, so take your time here.
Cooling The Rice
After seasoning, the rice needs to cool quickly to stop further cooking and to develop the right texture. Spread it out evenly in the bowl and use a fan or a piece of cardboard to gently fan the rice while folding it.
This cooling process gives the rice its signature shine and perfect stickiness. Patience during this step can make a big difference—have you noticed how fast cooling changes the rice feel?
Common Mistakes To Avoid
Creating perfect sushi rice in a rice cooker can be tricky. Many face common mistakes that affect the texture and taste. Avoiding these errors ensures delicious sushi every time.
Overcooking Or Undercooking
Overcooking makes sushi rice mushy and sticky. It becomes hard to handle. Use the right water-to-rice ratio. Follow your rice cooker's instructions closely. Undercooked rice is crunchy and unpleasant. Check your rice cooker settings. Ensure the cooking time is correct. Test the rice before serving. Adjust the settings if necessary.
Adding Too Much Vinegar
Too much vinegar can overpower the rice's taste. The rice becomes too sour. Measure vinegar carefully. Use a standard measuring cup for accuracy. Mix vinegar into rice gently. Avoid breaking the grains. Allow the rice to cool slightly before adding vinegar. This helps in better absorption.
Storing Sushi Rice
Storing sushi rice properly is key to keeping its texture and flavor intact. Unlike regular rice, sushi rice needs special care because it has been seasoned with vinegar, sugar, and salt. If you don’t store it right, it can quickly lose its stickiness and taste.
Short-term Storage
After making sushi rice, let it cool to room temperature before storing. Use a clean, airtight container to keep moisture and air out. Avoid putting hot rice directly into the fridge; it can cause condensation and make the rice soggy.
If you plan to use the rice within a day, keep it at room temperature, covered with a damp cloth. This prevents the rice from drying out while maintaining its softness. But don’t leave it out for more than 4-6 hours to avoid bacteria growth.
Reheating Tips
Reheating sushi rice can be tricky because too much heat dries it out. The best way is to sprinkle a little water over the rice to add moisture before warming it up. Then, cover the container with a microwave-safe lid or wrap to trap steam.
Heat the rice in short bursts, about 20 seconds at a time, stirring gently between intervals. This helps the rice warm evenly without becoming hard. Have you ever noticed how reheated sushi rice can get tough? Using steam makes a big difference.

Credit: grilledcheesesocial.com
Frequently Asked Questions
How Do I Wash Sushi Rice Properly Before Cooking?
Rinse sushi rice under cold water until it runs clear. This removes excess starch for perfect texture. Use a fine mesh sieve and gently stir the rice while rinsing. Proper washing prevents clumping and ensures fluffy sushi rice every time.
What Is The Ideal Water-to-rice Ratio For Sushi Rice?
Use a 1:1. 2 rice to water ratio in the rice cooker. This means 1 cup of sushi rice to 1. 2 cups of water. This ratio ensures the rice is tender but not mushy, perfect for sushi preparation.
How Long Should Sushi Rice Cook In A Rice Cooker?
Sushi rice typically cooks in 30 to 40 minutes in a rice cooker. Most rice cookers automatically adjust, but check your model's instructions. Let the rice rest for 10 minutes after cooking for ideal moisture absorption.
Can I Use Regular Rice Instead Of Sushi Rice?
Regular rice is not recommended for sushi. Sushi rice is short-grain with higher starch, giving it stickiness and texture. Using regular rice results in less sticky, less flavorful sushi rice, affecting the overall sushi quality.
Conclusion
Making sushi rice in a rice cooker is simple and quick. You just need the right rice, water, and a bit of vinegar. Follow the steps carefully for the best taste. This method saves time and gives you tasty rice every time.
Now, you can enjoy sushi at home without much effort. Try it today and see how easy sushi rice can be.