Have you ever wanted to bake delicious sourdough bread at home but don’t have a Dutch oven? You’re not alone.
Many bakers believe a Dutch oven is a must-have for that perfect crust and soft inside. But what if you could achieve the same amazing results without one? In this post, you’ll discover simple, effective ways to bake your sourdough bread using tools you already have.
Get ready to impress yourself and your loved ones with homemade bread that looks and tastes like it came from a bakery—no special equipment needed. Keep reading, and you’ll find out exactly how to do it.
Choosing The Right Equipment
Choosing the right equipment affects the outcome of your sourdough bread. Without a Dutch oven, you need to pick tools that can mimic its heat retention and moisture control. The correct vessel and tools help create a crusty, well-baked loaf. Understanding your options improves baking success and enjoyment.
Alternative Baking Vessels
Several kitchen items can replace a Dutch oven for baking sourdough. Cast iron skillets or heavy baking pans work well. Glass or ceramic baking dishes also hold heat effectively. Use a deep roasting pan covered tightly with aluminum foil to trap steam. Each vessel should be oven-safe and able to hold heat evenly.
- Cast iron skillet with a lid or foil cover
- Heavy ceramic or glass baking dish with a lid
- Roasting pan covered with foil
- Clay baker or terracotta pot with a lid
Choose a vessel that fits your dough size and oven space. Preheat the vessel to mimic Dutch oven heat. This helps the bread rise and crust properly.
Tools For Crispy Crust
Achieving a crispy crust needs moisture and heat. Use tools that add steam during the first baking minutes. A metal tray placed at the oven’s bottom can hold water for steam. A spray bottle filled with water helps to mist the oven walls before baking.
- Metal tray or pan for water steam
- Spray bottle for misting
- Baking stone to retain heat
- Oven thermometer for precise temperature
Steam keeps the crust soft at first, allowing the bread to expand. Later, the crust hardens and crisps beautifully. Use these tools together to bake great sourdough without a Dutch oven.
Preparing Your Sourdough Starter
Getting your sourdough starter ready is the first key step to baking great bread without a Dutch oven. A lively, active starter brings flavor, texture, and rise to your dough. Let’s focus on how to prepare and know when your starter is ready to use.
Feeding And Activating
Feeding your starter means giving it fresh flour and water to keep the natural yeast and bacteria alive and strong. Use equal parts of flour and water by weight—this keeps your starter balanced and happy.
Here’s a simple feeding routine to try:
- Discard half of your starter to avoid overcrowding.
- Add fresh flour and water to the remaining starter.
- Mix well until smooth and cover loosely.
Keep it at room temperature to encourage activity. You’ll notice bubbles forming within hours—that’s a good sign your starter is waking up.
Signs Of Readiness
How do you know your starter is ready to bake? Look for these signs:
| Sign | What It Means |
|---|---|
| Bubbles on the surface and inside | Yeast is active and producing gas |
| Doubling in size within 4–6 hours | Starter is strong enough to leaven dough |
| A pleasant, slightly tangy smell | Healthy fermentation is occurring |
If your starter passes these tests, it’s ready to give your bread that signature rise and flavor. If not, keep feeding it daily and watch for those changes. Have you ever waited anxiously to see if your starter would bubble up? That moment can make all the difference in your baking success.
Mixing And Kneading The Dough
Mixing and kneading sourdough dough sets the foundation for a great loaf. This stage blends ingredients and develops gluten structure. Proper technique ensures the dough becomes elastic and smooth. It impacts the bread’s texture and rise.
Ingredient Ratios
Correct ingredient ratios create balanced dough. Use about 100% flour, 70% water, 20% starter, and 2% salt by weight. These percentages help maintain hydration and flavor.
| Ingredient | Percentage (%) |
|---|---|
| Flour | 100 |
| Water | 70 |
| Sourdough Starter | 20 |
| Salt | 2 |
Adjust water slightly for flour types or climate. More water creates a wetter dough, softer crumb. Less water leads to firmer dough and denser bread.
Techniques For Texture
Start by mixing flour and water. Rest for 30 minutes for autolyse. Add starter and salt after this rest.
Kneading develops gluten. Use these techniques for best results:
- Stretch and fold the dough every 30 minutes during bulk fermentation.
- Use gentle presses and folds instead of harsh kneading.
- Work on a floured surface to avoid sticking.
- Stop kneading when dough feels smooth and springs back.
These methods help create an airy and chewy crumb. Avoid over-kneading to keep dough light.

Credit: www.youtube.com
Shaping And Proofing The Loaf
Shaping and proofing the loaf ensures a good rise and texture in sourdough bread. Gently form the dough into a smooth, round shape. Let it rest in a warm spot until doubled in size.
Shaping and proofing the loaf are key steps in sourdough bread making. These steps determine the bread's texture and appearance. Even without a Dutch oven, you can achieve great results. Understanding shaping and proofing will improve your bread-making skills.
Shaping Methods
There are different ways to shape sourdough. Each method affects the loaf's final look. Here are some popular shaping techniques:
- Boules:This is a round, ball-like shape. Use your hands to gently tuck the dough's edges under, creating a smooth top.
- Batards:This shape is oval. Gently flatten the dough and fold it over itself, sealing the edges.
- Loaves:For a traditional loaf, roll the dough into a log shape. Ensure the seams are sealed well.
Proofing Tips Without Dutch Oven
Proofing helps the dough rise and develop flavor. Without a Dutch oven, you need some adjustments:
- Use a Baking Stone:Preheat it in the oven for even heat distribution.
- Steam in the Oven:Place a pan of water at the bottom for humidity.
- Cover with Foil:Use foil to trap steam around the dough.
- Room Temperature:Ensure your kitchen is warm for better proofing.
Understanding these techniques will help you bake delicious sourdough bread. Experiment with different shapes and proofing methods to find what works best for you.
Creating Steam Without A Dutch Oven
Creating steam is key to achieving that perfect crust on your sourdough bread. Without a Dutch oven, you might worry about losing that essential moisture during baking. However, there are simple and effective ways to trap steam in your oven, ensuring your bread rises beautifully and develops a crisp, golden crust.
Using A Baking Tray With Water
Place a shallow baking tray on the bottom rack of your oven while it preheats. Just before putting your dough in, pour hot water into the tray. This water will evaporate quickly, creating a humid environment inside your oven.
Make sure to use hot water to generate steam immediately. Keep the oven door closed as much as possible to trap this moisture. This trick mimics the steam environment of a Dutch oven, helping your bread crust to develop properly.
Diy Steam Solutions
If you want to get creative, try placing a metal pan with lava rocks or ceramic balls in the oven. Pour water over them once the bread is inside. The water will sizzle and produce steam steadily.
Another option is to spritz water inside the oven with a spray bottle right after placing your loaf inside. Be careful not to spray the oven's heating elements. This quick burst of steam helps your bread expand and form a crackly crust.
Have you ever noticed how professional bakers use steam injection? You can replicate that effect at home with these simple hacks. Experimenting with these methods can transform your sourdough baking without needing specialized equipment.

Credit: www.youtube.com
Baking For A Crispy Crust
Baking sourdough bread without a Dutch oven can feel challenging, especially when aiming for that perfect crispy crust. The crust is what gives sourdough its signature crunch and texture, making every bite satisfying. Luckily, you can still achieve a beautifully crisp crust by focusing on your oven settings and how you position your bread during baking.
Oven Temperature And Timing
Start by preheating your oven to a high temperature, usually between 450°F and 475°F (230°C to 245°C). A hot oven helps create steam inside the dough, which is essential for a crispy crust. But since you’re not using a Dutch oven to trap steam, consider adding a pan of hot water to the bottom of your oven to generate moisture.
Once you place your dough inside, reduce the temperature slightly after the first 10-15 minutes to around 425°F (220°C). This allows the crust to firm up without burning. Baking time usually ranges from 30 to 40 minutes, but keep an eye on the bread’s color and texture rather than the clock alone.
Positioning The Bread
The placement of your bread in the oven can significantly impact the crust’s crispiness. Position your dough on the middle or lower rack to ensure even heat circulation. This helps the bottom crust develop a nice crunch without burning the top.
If your oven has a convection setting, use it to improve air circulation and promote a crispier crust. However, if convection makes the bread brown too fast, switch it off midway. Experiment with rack positioning and settings to find what works best for your specific oven.
Cooling And Storing Your Bread
Cooling and storing your sourdough bread properly is just as important as the baking itself. How you handle your bread right after it comes out of the oven can make a big difference in its texture and flavor. Let’s look at some practical ways to cool and store your bread to keep it fresh and delicious for longer.
Cooling Techniques
After baking, let your sourdough cool completely on a wire rack. This allows air to circulate around the bread, preventing sogginess on the bottom. Avoid wrapping the bread while it’s still warm; this traps moisture and softens the crust.
If you don’t have a wire rack, you can improvise by placing the bread on a clean kitchen towel or cutting board and turning it occasionally. How long you cool your bread matters too—usually, an hour or two is enough to let the crumb set fully.
Storage Tips For Freshness
Once cooled, store your sourdough bread in a paper bag or wrapped loosely in a clean kitchen towel. This keeps the crust crisp while protecting the bread from drying out. Plastic bags can trap moisture and make the crust soggy, so use them only if you plan to freeze the bread.
For longer storage, slice your bread and freeze it in an airtight container or freezer bag. You can toast slices directly from the freezer, which brings back some of that fresh-baked flavor. Have you tried freezing your sourdough? It might save you some trips to the bakery without losing quality.
Troubleshooting Common Issues
Baking sourdough bread without a Dutch oven can lead to some common challenges. These problems affect the bread's shape, texture, and crust. Recognizing these issues helps you fix them quickly. Understanding the causes improves your baking results every time.
Flat Loaves
Flat loaves usually mean the dough did not rise enough. This can happen if the starter is weak or the dough was not proofed long enough. Over-kneading can also cause the dough to lose its strength. Make sure the dough feels elastic and springs back when touched. Use a healthy starter and give the dough enough time to rise in a warm place.
Dense Texture
A dense crumb often means the dough did not ferment enough. Insufficient fermentation stops the formation of air bubbles needed for a light texture. Using too much flour during shaping can also make the bread heavy. Avoid pressing the dough too hard when shaping. Allow the dough to ferment until it doubles in size and feels airy.
Lack Of Crust
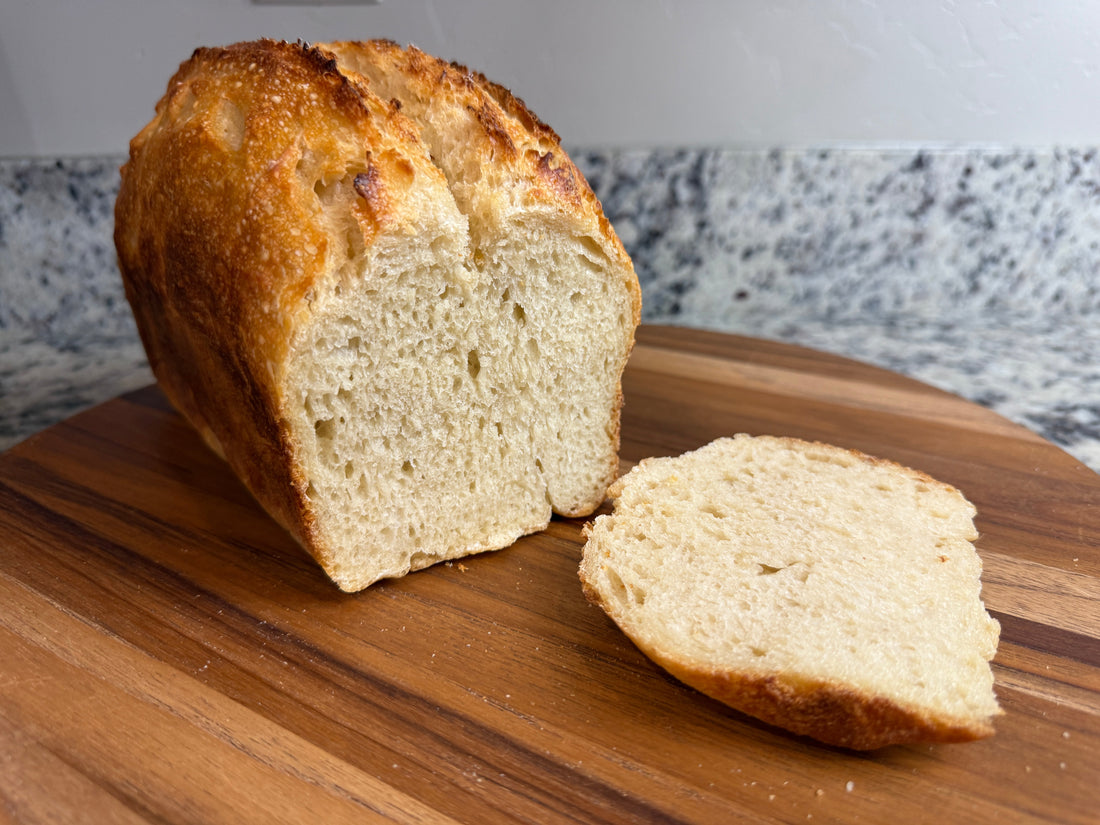
The crust may turn out soft or thin without a Dutch oven. This happens because the bread does not get enough steam during baking. Steam helps create a crispy outer layer. To add steam, place a shallow pan with water in the oven or spray water on the dough before baking. Baking on a preheated baking stone or tray also helps form a better crust.
Credit: robynonthefarm.com
Frequently Asked Questions
Can I Bake Sourdough Without A Dutch Oven?
Yes, you can bake sourdough without a Dutch oven. Use a heavy baking sheet or cast-iron skillet instead. Create steam by placing a pan of water in the oven. This helps achieve a crispy crust similar to a Dutch oven.
What Substitutes Work For A Dutch Oven In Baking?
Good substitutes include a cast-iron skillet, baking stone, or heavy-duty baking sheet. Cover the bread with a large metal bowl or foil during the first baking phase. This traps steam and mimics Dutch oven conditions for crust development.
How To Create Steam Without A Dutch Oven?
Place a shallow pan with boiling water on the oven's bottom rack. Spray water inside the oven before and during the first 10 minutes of baking. Steam keeps the crust moist, allowing the bread to expand and develop a crispy exterior.
Does Baking Sourdough Without A Dutch Oven Affect Crust?
Without a Dutch oven, crust may be less crispy but still tasty. Using steam methods helps develop a good crust. Proper dough hydration and baking temperature are key to a crusty, flavorful loaf.
Conclusion
Baking sourdough bread without a Dutch oven is simple and fun. You can use a baking sheet or a heavy pan instead. Steam helps create a crispy crust, so add water or cover the bread while baking. Practice makes perfect.
Each loaf will teach you something new. Enjoy the process and the delicious smell in your kitchen. Fresh sourdough bread is worth the effort, even without special tools. Try different methods and find what works best for you. Happy baking!