Are you ready to create a mouthwatering roast that melts in your mouth and fills your kitchen with irresistible aroma? Making a roast in a Dutch oven is easier than you think, and it guarantees juicy, tender results every time.
Whether you're cooking for family, friends, or just yourself, this method brings out the best flavors with minimal effort. Keep reading, and you'll discover simple steps and insider tips that turn an ordinary roast into a delicious masterpiece you’ll want to make again and again.
Your perfect roast is just a few easy moves away!
Choosing The Right Roast
Choosing the right roast is the first step to a delicious Dutch oven meal. The cut of meat affects the flavor, texture, and cooking time. Some roasts become tender and juicy after slow cooking. Others may stay tough or dry out. Knowing which cut works best helps you cook with confidence and enjoy every bite.
Best Cuts For Dutch Oven Roasts
Some cuts are perfect for slow, moist heat cooking in a Dutch oven. These include:
- Chuck roast – well-marbled and flavorful
- Brisket – rich and tender after long cooking
- Round roast – lean but benefits from slow cooking
- Shoulder roast – juicy and easy to shred
These cuts have enough fat and connective tissue. They break down during cooking, making the meat soft. Lean cuts like sirloin or tenderloin are not ideal. They cook fast and can become dry.
Selecting Fresh Meat
Always pick fresh meat for the best taste and texture. Look for these signs:
- Bright, consistent color without dark spots
- Firm texture that springs back when pressed
- Minimal liquid in the packaging
- Fresh, mild smell without sour or strong odors
Fresh meat cooks better and tastes richer. Avoid meat that looks gray or slimy. Freshness impacts the final dish more than seasoning or cooking time.
Preparing The Roast
Preparing the roast is a key step before cooking it in a Dutch oven. This step ensures the meat has great flavor and cooks evenly. Proper preparation improves the texture and taste of your roast. Start with trimming and seasoning, then consider marinating to add depth.
Trimming And Seasoning
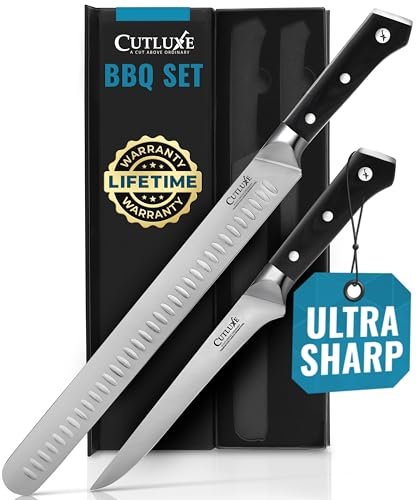
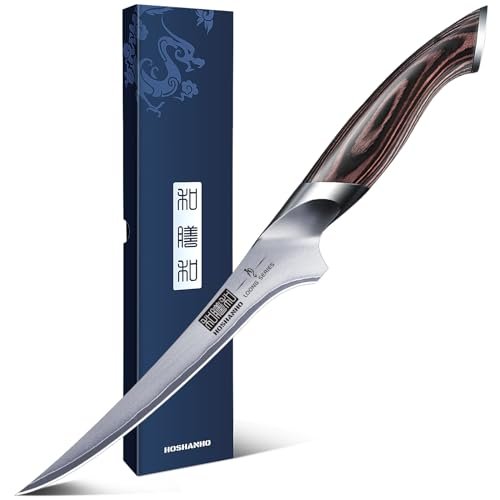
Remove excess fat and silver skin from the roast. This helps prevent chewy bits and allows seasoning to stick better. Use a sharp knife for clean cuts.
Season the roast generously with salt and pepper. These basics enhance the natural flavor of the meat. You can also add garlic powder, paprika, or herbs like rosemary and thyme for extra taste.
- Pat the meat dry with paper towels before seasoning.
- Rub spices evenly over all sides of the roast.
- Let the seasoned roast sit for 15-30 minutes to absorb flavors.
Marinating Tips
Marinating adds moisture and flavor to the roast. Use an acidic base like vinegar, lemon juice, or wine to tenderize the meat.
Include herbs and spices in the marinade for a rich aroma. Fresh garlic, onions, and bay leaves work well.
- Place the roast and marinade in a large resealable bag or container.
- Marinate in the refrigerator for 4 to 24 hours, depending on roast size.
- Remove the roast from the marinade and pat dry before cooking.
Setting Up The Dutch Oven
Setting up your Dutch oven properly is key to making a perfect roast. The right preparation helps cook the meat evenly and enhances flavors. It also prevents sticking and burning. Start by choosing the right size and preheating the Dutch oven carefully.
Choosing The Right Size
Select a Dutch oven that fits your roast comfortably. It should be large enough to hold the meat and some vegetables without crowding. If the pot is too small, the roast will cook unevenly. Too large, and juices may evaporate too quickly. A good rule is to have about 1 to 2 inches of space around the roast.
Preheating Techniques
Preheat the Dutch oven to ensure even cooking from the start. Place it on medium heat for 5 to 10 minutes before adding the roast. Avoid overheating to prevent burning the pot’s surface. For ovens without a stovetop, preheat inside the oven at 350°F (175°C) for 15 minutes. Always handle the hot pot with care to avoid burns.
Searing The Meat
Searing the meat creates a brown crust that locks in juices and adds flavor. Heat oil in the Dutch oven and brown the roast on all sides. This step builds a tasty base for a rich, tender roast.
Searing the meat is a crucial step in making a mouthwatering roast in a Dutch oven. This process locks in flavors and creates a beautiful crust that elevates the overall taste. It's not just about getting the color right; it's about developing deep, rich flavors that will permeate the entire dish.
Achieving A Perfect Brown
To achieve a perfect brown, start by ensuring your Dutch oven is preheated over medium-high heat. The right temperature is key to creating that gorgeous sear. If the pan is too cold, the meat will steam instead of searing, resulting in a lackluster crust. Pat your meat dry with paper towels to remove any excess moisture, as wet meat will not brown effectively. Season generously with salt and pepper right before placing it in the Dutch oven. Press the meat firmly against the hot surface and let it cook undisturbed for a few minutes. This patience allows a golden crust to form. Flip it only when it naturally releases from the pan, indicating it's ready.
Avoiding Common Mistakes
Avoid overcrowding the pan, as this can lead to steaming rather than searing. If you're cooking a large roast, sear it in batches to maintain the high temperature of the Dutch oven. Using oils with high smoke points, like canola or vegetable oil, can prevent burning. Butter adds flavor but can burn quickly, so consider adding it later. One common mistake is moving the meat around too much. Resist the urge to check or flip it frequently. Let the heat work its magic and only turn when it's ready. Have you ever wondered why your roasts never look like the ones in cookbooks? It might be as simple as giving your meat the time and space it needs to sear properly. By following these tips, you'll be on your way to roast perfection.
Adding Vegetables And Aromatics
Adding vegetables and aromatics to your Dutch oven roast brings rich flavors and aroma. They create a tasty base and keep the meat moist. These ingredients blend with the meat juices, making a delicious sauce.
Choosing the right vegetables and herbs enhances the roast's taste. Let’s explore the best options to use.
Best Vegetables To Include
- Carrots – add sweetness and color
- Onions – provide natural savory flavor
- Celery – offers a mild, fresh taste
- Potatoes – absorb juices and soften well
- Garlic – gives a rich, deep aroma
- Parsnips – add earthiness and slight sweetness
Cut vegetables into large chunks for even cooking. They should not become mushy by the end.
Using Herbs And Spices
- Rosemary – piney and fragrant, perfect for roast
- Thyme – adds subtle, earthy notes
- Bay leaves – give a gentle herbal aroma
- Peppercorns – add mild heat and depth
- Parsley – freshens the dish when added late
Place herbs inside the Dutch oven with vegetables. This helps their flavors infuse the meat and sauce.

Credit: pinkowlkitchen.com
Cooking The Roast
Cooking the roast in your Dutch oven is where all the preparation pays off. This stage requires attention to temperature and timing to ensure your roast turns out tender and flavorful. The right approach helps the meat cook evenly and soak up all the delicious aromas from your seasonings and vegetables.
Oven Temperature And Timing
Set your oven to a moderate temperature, usually between 325°F to 350°F (163°C to 177°C). This range allows the roast to cook slowly, breaking down tough fibers without drying out.
Plan for about 20 to 25 minutes of cooking per pound of meat. A 3-pound roast, for example, will need roughly 60 to 75 minutes in the oven.
Cover your Dutch oven with its lid to keep moisture inside. This creates a steamy environment that keeps the roast juicy and tender.
Checking For Doneness
How do you know when your roast is perfectly cooked? Using a meat thermometer is the most reliable way to check.
- For medium-rare, aim for an internal temperature of 135°F (57°C).
- Medium is around 145°F (63°C).
- Well done reaches 160°F (71°C) or higher.
Remember, the roast will continue to cook a bit after you take it out of the oven. Let it rest for 10 to 15 minutes before slicing. This resting period allows juices to redistribute, making every bite tender and juicy.
Resting And Serving
Resting and serving your roast is a crucial part of the cooking process. It allows the meat to finish cooking evenly and helps keep it juicy and tender. Taking time to rest also improves flavor and makes carving easier.
Why Resting Matters
After cooking, the roast is full of hot juices. Resting lets these juices move back into the meat. This prevents them from spilling out when you cut the roast. The meat stays moist and soft.
Resting also lets the temperature inside the roast even out. This means every bite tastes just right. Cover the roast loosely with foil. Let it rest for about 15 to 20 minutes before cutting.
Carving Tips
Use a sharp knife for clean, smooth slices. Cut against the grain of the meat. This means slicing across the lines of muscle, not along them. It makes the meat easier to chew.
- Hold the roast steady with a fork or tongs.
- Cut thin slices for more tenderness.
- Serve the slices with some of the pan juices for extra flavor.
Arrange the slices on a warm platter. This keeps the roast hot for serving. Enjoy the tender, juicy roast you made in your Dutch oven.

Credit: midwestfoodieblog.com
Tips For Extra Flavor
Enhancing the flavor of your roast in a Dutch oven transforms a simple meal into something special. Small changes in your cooking liquid and sauces can make a big difference. These tips help deepen the taste and create a rich, satisfying dish.
Using Broth And Wine
Broth adds a natural, savory base to your roast. Choose beef, chicken, or vegetable broth depending on your meat. Broth keeps the meat moist and infuses it with subtle flavors.
Wine introduces acidity and complexity. Red wine suits beef or lamb, while white wine works well with pork or chicken. Use wine sparingly to avoid overpowering the roast. Let the alcohol cook off to leave behind only the rich taste.
Combine broth and wine for a balanced liquid. This mix helps tenderize the meat and creates a delicious cooking sauce. Always simmer the liquid before adding the roast to blend flavors.
Adding Depth With Sauces
Sauces add layers of flavor that elevate your roast. Start by browning onions and garlic in the Dutch oven. This creates a flavorful base for your sauce.
Incorporate tomato paste for a sweet, tangy element. It thickens the sauce and enriches the color. Herbs like rosemary, thyme, and bay leaves boost aroma and taste.
Finish with a splash of Worcestershire sauce or soy sauce. These bring umami and a subtle saltiness that complements the meat. Simmer the sauce slowly, letting all ingredients meld together.
Cleaning And Caring For Your Dutch Oven
Cleaning your Dutch oven soon after use keeps it in good shape. Use warm water and a soft brush to remove food gently. Dry it well and apply a thin layer of oil to protect the surface.
Cleaning and caring for your Dutch oven is crucial to ensure it continues to deliver those delicious roasts. A well-maintained Dutch oven lasts a lifetime, offering you countless meals. By dedicating a little time to its upkeep, you not only preserve its quality but also enhance your cooking experience.
Proper Cleaning Techniques
After enjoying your savory roast, it's time to give your Dutch oven some TLC. Let it cool down naturally before you start cleaning. Sudden temperature changes can cause it to crack. Use warm water and a soft sponge to wash it gently. Avoid using harsh detergents or steel wool, as they can damage the enamel. If food residues are stubborn, soak the pot in warm water for a few minutes. For stuck-on food, a paste of baking soda and water works wonders. Scrub gently with a soft brush to avoid scratching the surface. Remember, patience is key when cleaning tough spots.
Maintaining Seasoning
Seasoning your Dutch oven keeps it non-stick and rust-free. If yours is cast iron, seasoning is vital. After cleaning, dry it thoroughly to prevent rust. Apply a thin layer of vegetable oil on the inside surface. Heat it on the stove or in the oven until it starts to smoke lightly. This process bonds the oil to the metal, creating a protective layer. Regular seasoning not only prolongs the life of your Dutch oven but also enhances its performance. Have you ever noticed how some meals taste better with time? A well-seasoned Dutch oven might just be the secret ingredient. By investing a little effort into cleaning and maintaining your Dutch oven, you're not just preserving a pot; you're nurturing a culinary companion. What memorable meal will you craft next with your well-cared-for Dutch oven?

Credit: supermancooks.com
Frequently Asked Questions
What Size Dutch Oven Is Best For Roasting?
A 5 to 7-quart Dutch oven is ideal for roasting. It fits most roasts and ensures even heat distribution. This size allows enough space for vegetables and liquids, promoting tender, flavorful results.
How Long Should I Cook A Roast In A Dutch Oven?
Cook the roast for about 3 to 4 hours at 325°F (163°C). Cooking time varies by roast size and type. Slow cooking ensures the meat becomes tender and juicy.
Can I Use A Dutch Oven For All Roast Types?
Yes, Dutch ovens work well for beef, pork, and lamb roasts. They provide consistent heat and moisture retention. This method enhances flavor and tenderness across various roast cuts.
Should I Sear The Roast Before Dutch Oven Cooking?
Searing the roast before cooking is recommended. It locks in juices and adds a rich, caramelized flavor. Use medium-high heat for 3-5 minutes per side before roasting.
Conclusion
Cooking a roast in a Dutch oven brings great flavors and tender meat. This method uses slow, even heat that helps the roast stay juicy. You only need a few simple ingredients and some time. The Dutch oven keeps everything moist and rich.
Try this recipe for a cozy, homemade meal. Enjoy the delicious results with family and friends. Simple steps lead to a tasty, satisfying roast every time. Give it a try and see how easy cooking can be.