Making a perfect pie crust can seem tricky, especially without a food processor. But what if you could create a flaky, delicious crust using just a few simple tools in your kitchen?
You don’t need fancy gadgets to impress your family and friends with a homemade pie. In this post, you’ll discover easy steps and insider tips to make a pie crust from scratch—no food processor required. Ready to master this classic skill and bake pies that everyone will love?
Keep reading, and you’ll be slicing into your own homemade pie in no time.
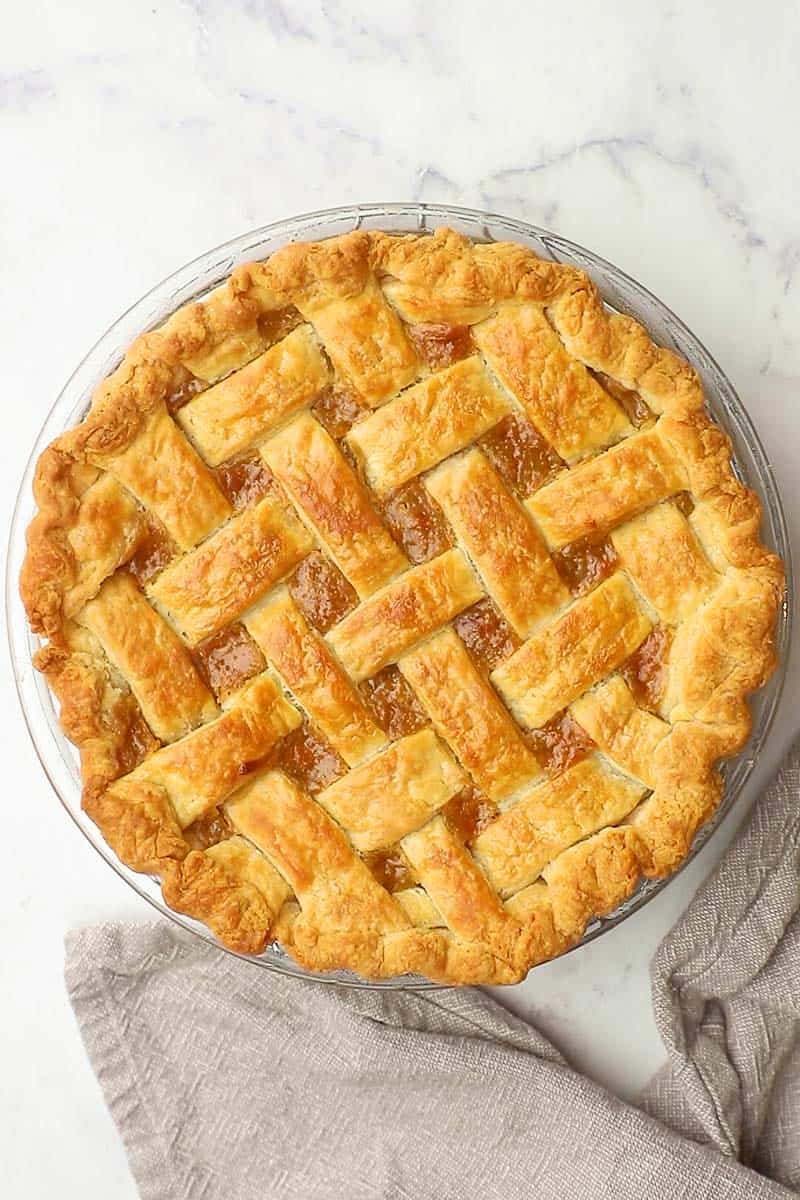
Credit: www.ourhappymess.com
Ingredients For Pie Crust
Making a pie crust without a food processor starts with simple, basic ingredients. These ingredients create a flaky, tender crust perfect for any pie. Choosing the right components ensures the dough holds together well and tastes delicious.
Most pie crust recipes use just a few staples found in every kitchen. The key is in the balance between flour, fat, liquid, and a pinch of salt. Each plays an important role in the texture and flavor of the crust.
Flour
All-purpose flour is the most common choice. It provides structure to the crust. Using cold flour helps keep the dough light and flaky.
Fat
Butter, shortening, or lard are popular fats for pie crust. Butter adds great flavor and helps create a crisp texture. Shortening and lard give a tender, crumbly finish. Keep the fat cold to prevent the dough from becoming tough.
Liquid
Ice-cold water binds the flour and fat together. Adding just enough water prevents the dough from being dry or sticky. Some recipes use milk or vinegar for extra tenderness.
Salt
A small pinch of salt enhances the flavor. It balances the richness of the fat. Salt also helps control the dough’s texture.
Choosing The Right Flour
Choosing the right flour is key to making a perfect pie crust without a food processor. The flour you pick affects texture, flavor, and how easily the dough comes together. Understanding your options helps you control the outcome and avoid common pitfalls.
Understanding Different Types Of Flour
Not all flours behave the same in pie crusts. All-purpose flour is the most common choice because it offers a balance of protein that creates a tender yet sturdy crust.
Pastry flour has lower protein, making it ideal if you want a more delicate, flaky crust. Bread flour, with its high protein, can make the crust tough if used alone.
How Protein Content Affects Your Crust
Protein in flour forms gluten when mixed with water, giving dough its elasticity. Too much gluten can make your crust chewy and hard to roll out.
Lower protein flours produce less gluten, resulting in a more tender and crumbly crust. Do you want your crust to be flaky or sturdy? That answer guides your flour choice.
Mixing Flours For The Best Texture
Combining flours can give you the best of both worlds. For example, mixing all-purpose and pastry flour can balance tenderness and strength.
You might try 50% all-purpose and 50% pastry flour for a crust that holds up well but still flakes nicely. Experimenting with ratios helps you discover your ideal texture.
Gluten-free Alternatives To Consider
If you need a gluten-free crust, choose flours like rice flour, almond flour, or a gluten-free baking mix. These flours behave differently and may require extra binding agents like xanthan gum.
Gluten-free crusts often need gentle handling and chilling to avoid crumbling. Have you tried gluten-free pie crusts before? Adjusting your flour can open new baking possibilities.
Selecting The Best Fat
Choosing the right fat is crucial when making a pie crust without a food processor. The fat you pick affects the texture, flavor, and how easy the dough is to work with. Understanding the differences between fats helps you create a crust that matches your taste and baking style.
Butter Vs Shortening
Butter gives your crust a rich, creamy flavor that’s hard to beat. It also helps create a flaky texture because of its water content turning into steam during baking.
Shortening, on the other hand, produces a tender, crumbly crust. It has no water, so it doesn’t make the dough tough, and it stays solid longer, which can be helpful when you’re handling the dough by hand.
Think about what matters more to you: flavor or ease of handling? Some bakers even mix butter and shortening to get the best of both worlds.
Using Lard Or Oil
Lard is a traditional choice that creates an incredibly flaky crust. It’s less common today but worth trying if you want a tender, buttery texture without the butter flavor.
Oil, while not typical for pie crusts, can be used in a pinch. It makes the dough easier to mix but results in a softer, less flaky crust. If you choose oil, try using vegetable or canola oil for a neutral taste.
Have you ever experimented with lard or oil in your baking? You might find a surprising new favorite for your pie crust.
Cold Ingredients Matter
Cold ingredients keep the butter firm, creating a flaky pie crust. Chilling flour and water helps dough stay crisp without a food processor.
Cold ingredients are crucial for making a perfect pie crust. Keeping everything cold helps the butter stay solid. This is key for achieving a flaky texture. Warm ingredients can melt the butter, ruining the crust's consistency. By using cold ingredients, you ensure the crust remains light and tender.
Why Cold Ingredients Are Essential
Cold butter creates layers in the dough. These layers give the crust its flakiness. When the butter melts during baking, it releases steam. This steam creates pockets in the dough, making it rise. Using chilled water keeps the butter from melting too early. This is why cold ingredients are so important.
How To Keep Ingredients Cold
Start by chilling your butter in the fridge. Cut it into small cubes before chilling for even cooling. Use ice-cold water when mixing the dough. You can add ice cubes to the water to ensure it stays cold. Consider chilling your mixing bowl and utensils. This prevents them from warming the ingredients.
The Science Behind Cold Ingredients
Cold ingredients prevent the dough from becoming sticky. Sticky dough is hard to handle and doesn't bake well. Cold butter makes a dough that is easy to roll out. It also prevents overmixing, which can make the crust tough. The science behind cold ingredients is simple yet effective.
Pro Tips For Keeping Ingredients Cold
Use a marble or metal surface for rolling the dough. These surfaces stay cooler than wood. You can also freeze the butter for a few minutes before use. This ensures it stays solid. Always have a glass of ice water ready to add to the dough. Quick action keeps everything as cold as possible.
Common Mistakes To Avoid
Avoid using room-temperature butter. It can make the dough greasy and dense. Do not rush the chilling process. Allow the dough to rest in the fridge before rolling. This relaxes the gluten and keeps the butter cold. Avoid overworking the dough, which warms it up. Keep everything cold for the best pie crust.
Tools You Will Need
Making a pie crust without a food processor might seem tricky, but with the right tools, it becomes a smooth and enjoyable process. Having these essential items on hand will help you achieve a flaky, tender crust by hand. Let’s look at the tools that will make your pie crust journey easier and more effective.
Pastry Cutter
A pastry cutter is your best friend when you don’t have a food processor. It helps you cut cold butter or shortening into the flour quickly and evenly. Using a pastry cutter prevents the dough from warming up too much, which keeps your crust flaky.
If you don’t have a pastry cutter, two forks or even your fingers can work, but it takes more time and care. Do you notice how using the right tool speeds up the process and improves texture?
Mixing Bowls
Choose a large, sturdy mixing bowl to combine your ingredients comfortably. A wide bowl gives you enough space to mix flour, fat, and liquid without spilling. Glass or metal bowls work well because they stay cool, helping keep the butter firm.
Having multiple bowls on hand can also help separate dry and wet ingredients, making the mixing less messy. Have you ever tried making dough in a small bowl and ended up with flour everywhere?
Rolling Pin
A rolling pin is essential for flattening your dough evenly before fitting it into your pie dish. Wooden rolling pins provide good control and a natural grip, but silicone or marble ones work too. Chill your rolling pin for a few minutes to prevent sticking and keep your dough cool.
Without a rolling pin, you can use a clean bottle, but it requires extra care to roll out the dough evenly. How often do you realize a good rolling pin makes all the difference in your pie’s appearance and texture?
Step-by-step Mixing Technique
Making a pie crust without a food processor may seem tricky, but the right mixing technique can make all the difference. It’s all about how you combine your ingredients by hand to get that perfect flaky texture. Let’s break down the process into clear, manageable steps to help you master the art of pie crust mixing.
Cutting Fat Into Flour
Start by chilling your butter or shortening. Cold fat is key to creating those tender flakes in your crust. Use a pastry cutter, two knives, or even your fingers to cut the fat into the flour.
Work quickly and gently to break the fat into pea-sized pieces. If the pieces are too small, your crust might turn out tough. Too large, and the dough won’t hold together well.
Adding Cold Water Gradually
Once your fat and flour mixture resembles coarse crumbs, it’s time to add cold water. Add it slowly, a tablespoon at a time, mixing lightly with a fork or your hands.
Ask yourself, how much water does the dough actually need? It varies based on humidity and flour type. Stop adding water as soon as the dough starts to come together but is not sticky.
Forming The Dough
Use your hands to gently press the dough into a ball. Avoid overworking it—too much handling warms the fat and toughens the crust. If the dough feels crumbly, press it together firmly but gently.
Divide the dough into two discs, wrap them in plastic, and chill for at least 30 minutes. This resting time helps relax the gluten and solidify the fat, making your crust easier to roll out and flakier when baked.
Avoiding Common Mistakes
Making a pie crust without a food processor can feel tricky, but avoiding a few common mistakes will make your crust flaky and delicious. These pitfalls often sneak in unnoticed and can turn your perfect dough into a tough or crumbly mess. Recognizing and steering clear of these errors will save you time and frustration in the kitchen.
Overmixing Dough
It’s tempting to keep mixing to get everything combined perfectly, but overmixing activates the gluten in the flour. This makes your crust tough instead of tender and flaky. Mix just until the ingredients come together—small lumps of butter or shortening are okay and actually help create flakiness.
Ask yourself: is the dough holding together without being overly smooth? That’s the sweet spot you want to hit.
Using Warm Ingredients
Warm butter or water can ruin your crust’s texture by melting the fat too soon. Fat needs to stay cold to create pockets in the dough that bake into flakey layers. Always chill your butter and use ice-cold water—this little extra step makes a huge difference.
Have you ever noticed how a warm kitchen can sneakily warm your ingredients? Work quickly or chill your tools if needed.
Skipping Rest Time
Resting the dough in the fridge isn’t optional—it’s essential. Rest time relaxes the gluten and allows the moisture to distribute evenly. Without it, your dough can shrink or crack during baking.
Try to rest your dough for at least 30 minutes. If you’ve ever rushed this step, did your crust behave as expected? Give it a proper chill and watch the difference.
Chilling And Rolling Out Dough
Chilling and rolling out your pie dough correctly makes a huge difference in the final texture and ease of handling. It helps the dough relax and firms up the fats, which prevents shrinking and cracking during baking. If you skip or rush these steps, your crust might turn out tough or uneven.
Proper Chilling Time
After mixing your dough, wrap it tightly in plastic wrap and chill it in the fridge for at least 30 minutes. I’ve found that 1 hour works best for me—it lets the gluten rest and keeps the butter cold, which creates a flakier crust. Avoid skipping this step just because you’re in a hurry; dough that isn’t chilled enough tends to tear when rolling out.
If you’re in a rush, you can pop the dough in the freezer for 15–20 minutes, but don’t let it freeze solid. Keep an eye on the texture—if it feels too hard, let it sit a few minutes at room temperature before rolling.
Rolling Tips For Even Crust
Place your chilled dough on a floured surface to prevent sticking. Roll from the center outward using gentle, even pressure to keep the thickness consistent. If you notice cracks forming at the edges, don’t press harder; just smooth them gently with your fingers or add a tiny pinch of water.
Try to rotate the dough a quarter turn every few rolls to keep it round and even. When the dough gets too soft or sticky, pop it back in the fridge for a few minutes. Have you ever struggled with dough sticking to the rolling pin? Rolling the pin itself in flour or using a silicone rolling mat can solve this common problem.
Shaping And Crimping The Crust
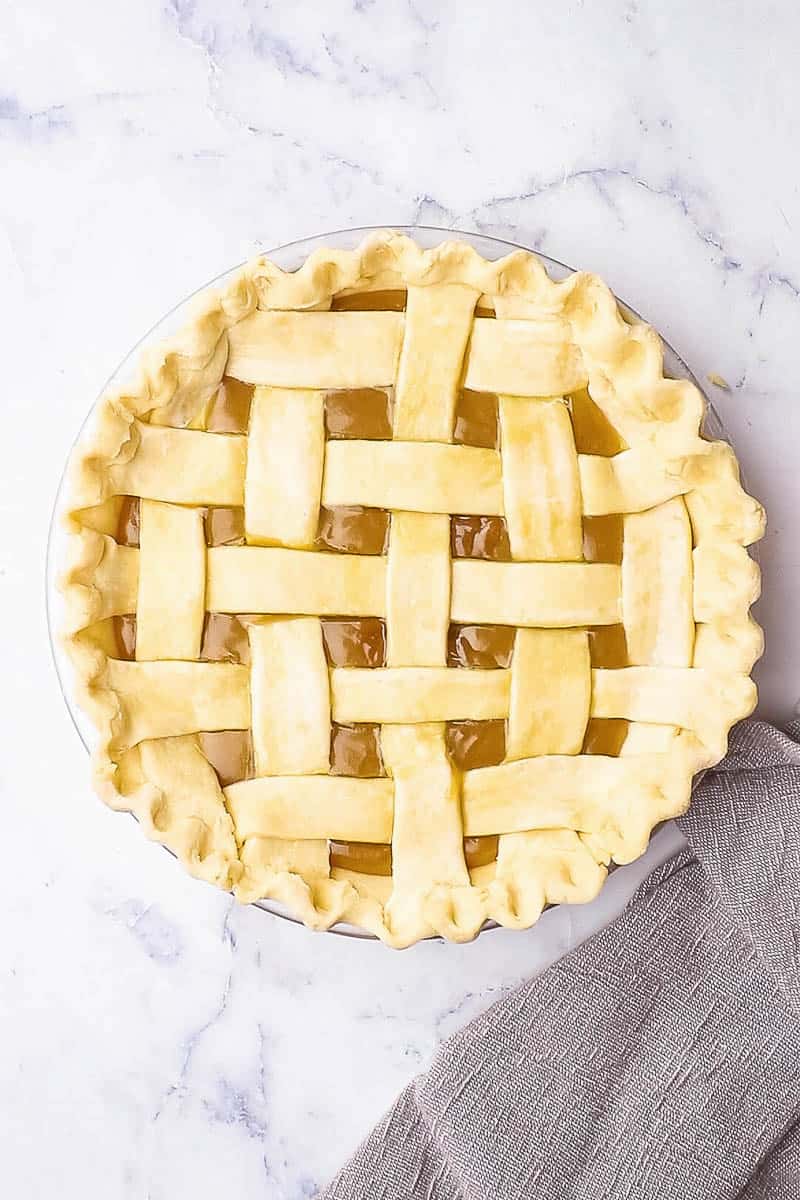
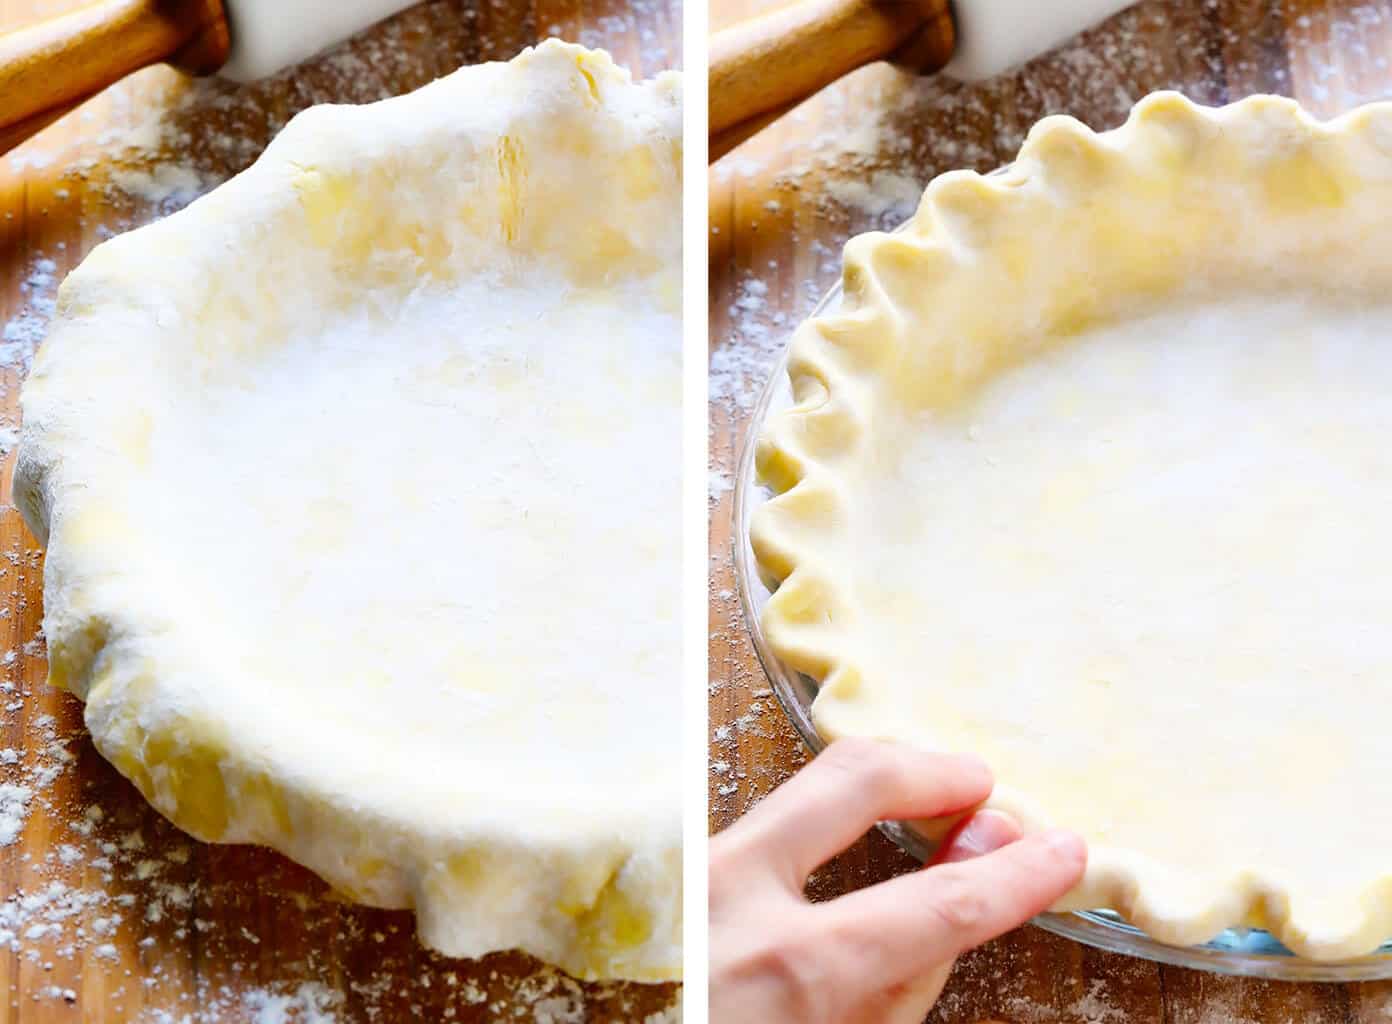
Press the dough gently into the pie pan, making sure it fits evenly. Pinch the edges between your fingers to create a neat, crimped border that holds the filling well.
Shaping and crimping the crust is an art. It transforms your pie into a masterpiece. Even without a food processor, you can achieve a perfect crust. The process involves gentle handling and a bit of creativity. Let's explore how to shape and crimp your pie crust effectively.
Transferring Dough To Pan
Carefully roll out your dough on a floured surface. Ensure it's slightly larger than your pie pan. Gently lift the dough with a rolling pin. Position it over the pan with steady hands. Let the dough drape over the pan edges. Press it lightly into the pan's bottom and sides. This ensures there are no air bubbles.
Creating Decorative Edges
Trim excess dough around the pan, leaving an inch overhang. Fold the dough under itself to create a thick edge. Use your thumb and fingers for crimping. Press the dough at intervals for a wavy pattern. For a forked edge, press a fork around the rim. Be creative with your designs. They add personality to your pie.
Credit: www.ourhappymess.com
Baking Tips For Perfect Crust
Perfect pie crust needs more than just mixing ingredients. Baking techniques play a big role. These tips help get a crust that is crisp, flaky, and well-cooked. You can avoid common problems like sogginess and uneven baking with simple tricks.
Blind Baking
Blind baking means baking the pie crust without filling. It keeps the crust firm and crisp. Use pie weights or dried beans to hold the crust's shape. Line the crust with parchment paper before adding weights. Bake until edges turn golden. This method is best for wet or delicate fillings.
Preventing Soggy Bottoms
Soggy crust ruins the pie experience. To avoid this, brush the crust with a beaten egg white before baking. It creates a seal that blocks moisture. Another way is to bake the crust at a higher temperature for the first few minutes. This helps set the crust fast. Also, use a metal or glass pie pan for better heat conduction.
Credit: www.gimmesomeoven.com
Frequently Asked Questions
How Do I Make Pie Crust Without A Food Processor?
You can make pie crust by hand using a pastry cutter or fork. Combine flour and cold butter, then cut the butter into small pieces. Add cold water gradually and mix until the dough forms. Chill before rolling out for best results.
What Tools Replace A Food Processor For Pie Crust?
Common tools include a pastry cutter, fork, or your fingers. These help cut butter into flour evenly. A mixing bowl and rolling pin are essential for combining and shaping the dough.
How To Keep Pie Crust Flaky Without A Food Processor?
Use very cold butter and minimal water. Cut butter into small pieces and avoid overmixing. Chill the dough before rolling to maintain flakiness. Handle the dough gently to keep texture light and flaky.
Can I Use Vegetable Shortening Instead Of Butter?
Yes, vegetable shortening can be used for a tender crust. It creates a different texture, often flakier but less flavorful. Combine shortening with cold water and flour just like with butter for best results.
Conclusion
Making pie crust without a food processor is easy and fun. Use simple tools like a fork or your hands. Mix cold butter and flour quickly for a flaky crust. Keep the dough cold and don’t overwork it. Practice helps you get better each time.
Soon, you will enjoy homemade pies with a perfect crust. Baking without fancy tools saves money and feels rewarding. Try this method and enjoy fresh pies anytime. Simple steps, great results!