Craving a hot, gooey grilled cheese sandwich but don’t have a pan or grill nearby? What if you could make one using just your toaster?
Sounds surprising, right? You’re about to discover a simple, quick way to enjoy this classic comfort food with tools you already have at home. Stick with me, and by the end, you’ll be making perfect grilled cheese sandwiches in your toaster—crispy, melty, and ready in minutes.
Let’s get started!

Credit: easyhealthyrecipes.com
Choosing The Right Bread
Choosing the right bread is key for a perfect grilled cheese sandwich in a toaster. The bread holds the cheese and toasts evenly. Not all breads work well with toaster grilling. Picking the right type and thickness makes a big difference. The bread should toast nicely without burning or becoming soggy.
Best Bread Types For Grilling
- White bread:Classic choice, soft texture, toasts evenly.
- Sourdough:Adds tangy flavor, sturdy enough for melting cheese.
- Whole wheat:Nutty taste, healthy option, toasts well.
- Rye bread:Strong flavor, pairs nicely with sharp cheese.
- Multigrain:Adds crunch and fiber, holds up to toasting.
Bread Thickness Tips
Choose bread slices about ¼ to ½ inch thick. Thin slices may burn quickly or tear. Thick slices toast slower and can stay doughy inside. Medium thickness balances crispness and softness. This thickness ensures the cheese melts perfectly inside. Avoid very thick bread that won’t fit in the toaster slots.
Selecting Cheese Varieties
Choosing the right cheese is key for a tasty grilled cheese sandwich made in a toaster. The cheese must melt well and taste great. Picking the best cheese types helps you enjoy every bite.
Melting Properties To Consider
Some cheeses melt smoothly and stretch nicely. Others stay firm or separate when heated. Good melting cheeses create a creamy texture inside the sandwich. Avoid cheeses that turn oily or dry out.
- Cheddar: Melts well and has a sharp taste.
- American: Known for smooth melting and mild flavor.
- Mozzarella: Soft, stretchy, and mild in flavor.
- Swiss: Melts nicely with a nutty flavor.
- Provolone: Creamy texture and mild taste.
Flavor Combinations
Mixing cheeses can boost flavor and texture. Combining mild and strong cheeses creates balance. Add extra ingredients like herbs or spices for more taste.
- Cheddar and Mozzarella: Sharp and creamy blend.
- Swiss and Provolone: Nutty with smooth melt.
- Cheddar with a sprinkle of smoked paprika: Adds warmth.
- American with a dash of mustard powder: Mild with a kick.
Preparing The Sandwich
Preparing the sandwich is the key to a perfect grilled cheese in a toaster. Getting the right balance of bread and cheese is important. Also, the butter or spread helps create a crispy, golden crust. Follow simple steps to prepare your sandwich carefully.
Layering Cheese And Bread
Start with two slices of bread. Choose bread that fits your toaster slots easily. Place a slice of cheese on one bread slice. Use cheese that melts well, like cheddar or American. Add a second slice of cheese for extra gooeyness. Cover with the other bread slice. Press gently to hold the sandwich together.
Adding Butter Or Spread
Spread butter or margarine evenly on both outside bread slices. This helps the sandwich toast to a golden brown. Use room temperature butter for easy spreading. Alternatively, use mayonnaise for a crispy texture. Avoid too much butter to prevent sogginess. Make sure the spread covers the entire surface for even toasting.
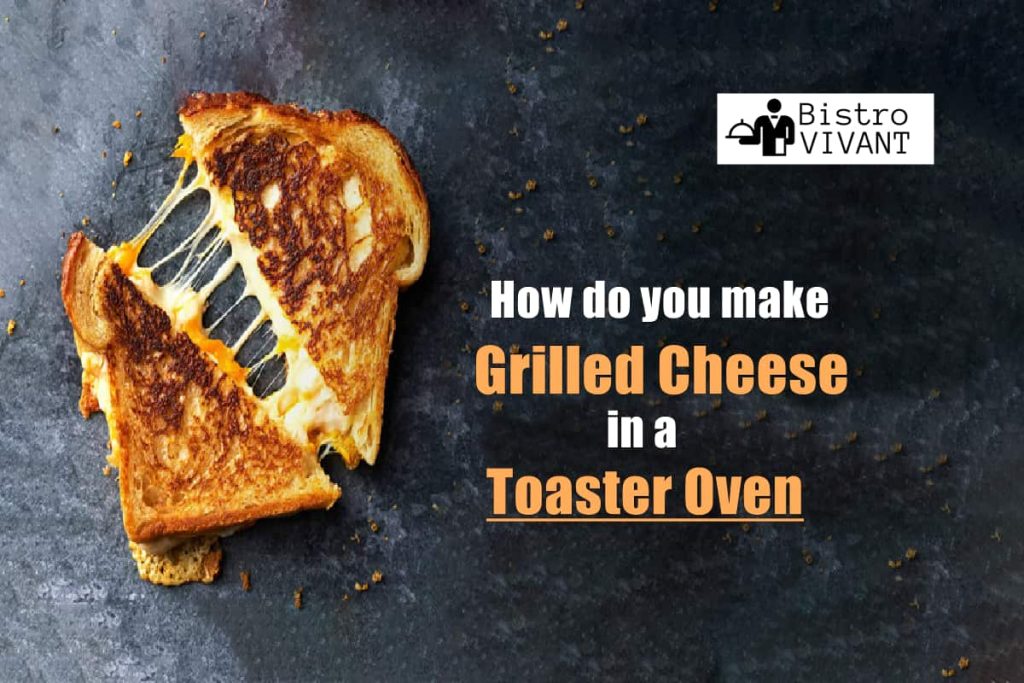
Credit: bistrovivant.com
Toaster Safety Tips
Grilling a cheese sandwich in a toaster might sound like a quick fix, but it comes with safety challenges you shouldn’t ignore. Handling heat and melted cheese inside a toaster requires care to avoid accidents and keep your appliance in good shape. Here are some key safety tips to keep your kitchen safe and your sandwich delicious.
Avoiding Mess And Damage
Have you ever had cheese drip inside your toaster? It can cause smoke, unpleasant smells, or even damage the heating elements. To prevent this, never put loose cheese or wet ingredients directly into the toaster slots.
Use bread slices thick enough to hold your cheese without spilling. Also, keep an eye on the toaster while it’s running—don’t leave it unattended. If you notice any smoke or burning smell, turn off the toaster immediately and unplug it.
Using Toaster Bags
Toaster bags are simple, heat-resistant pouches designed to hold sandwiches safely inside the toaster. These bags keep melted cheese and fillings contained, preventing mess and protecting your toaster from damage.
Using toaster bags also helps you avoid cleaning the toaster after every use. They’re reusable, easy to clean, and make your grilled cheese perfectly toasted without sticking. Have you tried using one yet? It could change how you make quick snacks forever.
Step-by-step Toasting Process
Transforming a humble grilled cheese sandwich into a crispy, melted masterpiece using your toaster is easier than you might think. This simple step-by-step toasting process will guide you through creating a delicious meal with minimal effort and maximum flavor. Whether you're a busy professional or a parent on-the-go, mastering this technique will add a quick and satisfying meal option to your repertoire.
Setting Toaster Temperature
The first step in your journey to a perfect grilled cheese is setting your toaster to the right temperature. Aim for a medium to medium-high setting. This ensures that the bread becomes golden and crispy without burning before the cheese melts.
In my own experience, a medium setting usually works best, but every toaster is different. Adjust based on how quickly your toaster usually browns bread. Remember, a slightly lower temperature is better than too high, as you can always toast it a bit more.
Timing For Perfect Melt
Timing is crucial to achieving that gooey cheese pull. Typically, it takes about 3 to 5 minutes to toast a grilled cheese to perfection. Keep a close eye on your toaster during these minutes to avoid any mishaps.
A little secret I’ve learned is to check halfway through and flip the sandwich, ensuring even melting of the cheese. Have you ever tried this trick? It can make a world of difference in achieving that perfect melt.
Once the cheese has melted to your liking and the bread is golden brown, your grilled cheese is ready to enjoy. Serve it with a side of your favorite soup or enjoy it as is. Your taste buds will thank you for this quick and delightful snack!
Alternative Methods
Grilled cheese sandwiches can be made in many ways beyond the classic stovetop. Alternative methods offer quick and easy options for busy days. These methods use common kitchen appliances to create a warm, melty sandwich without a pan. Exploring these options can save time and still deliver great taste.
Using A Toaster Oven
A toaster oven cooks sandwiches evenly with a crispy outside. Preheat the toaster oven to 375°F (190°C). Assemble your sandwich with cheese and bread. Place it on the toaster oven tray or a small baking sheet. Toast for about 5-7 minutes until the bread is golden and cheese melts. Flip the sandwich halfway for even cooking. This method works well for thick sandwiches and gives a crunchy texture.
Microwave Quick Fix
The microwave is the fastest way to melt cheese. Place your sandwich on a microwave-safe plate. Cover it with a microwave-safe lid or paper towel. Heat on high for 30-45 seconds. Check if the cheese is melted. If not, heat in 10-second bursts to avoid soggy bread. This method is best for soft bread and quick meals but may not give a crispy crust.
Serving Suggestions
Serving a grilled cheese sandwich made in a toaster can be simple yet delightful. The right sides and toppings can make each bite more enjoyable. These suggestions help balance flavors and textures. They also add color and freshness to your meal.
Side Dishes To Pair
- Tomato soup – warm and comforting, a classic match
- Pickles – crunchy and tangy, cuts through the cheese
- Fresh salad – light greens with a mild vinaigrette
- Potato chips – salty crunch for a satisfying contrast
- Carrot sticks – sweet and crisp for a healthy touch
Creative Toppings
- Sliced avocado – creamy texture, mild flavor boost
- Apple slices – adds sweetness and crunch
- Crispy bacon bits – smoky and savory flavor
- Fresh basil leaves – herbal freshness that brightens taste
- Drizzle of honey – sweet note balancing salty cheese

Credit: revcook.com
Frequently Asked Questions
Can You Make Grilled Cheese In A Toaster Safely?
Yes, you can make grilled cheese in a toaster by using a toaster bag. It prevents cheese from melting inside the toaster and keeps it clean. Always monitor the process to avoid burning or fire hazards.
What Type Of Bread Works Best For Toaster Grilled Cheese?
Thicker slices like sourdough or white sandwich bread work best. They hold the cheese well and toast evenly without falling apart or burning quickly.
How To Prevent Cheese From Sticking In The Toaster?
Use a toaster bag or wrap the sandwich in foil. This keeps the cheese contained and stops it from dripping and sticking inside the toaster slots.
How Long Does It Take To Toast Grilled Cheese In A Toaster?
It typically takes 3 to 5 minutes on medium heat. Check frequently to avoid burning and achieve the perfect golden-brown crust.
Conclusion
Making a grilled cheese sandwich in a toaster is quick and simple. You only need bread, cheese, and a toaster. Toast the bread carefully to avoid burning. Press the sandwich gently to melt the cheese inside. This method saves time and uses common kitchen tools.
Try it at home for a warm, tasty snack. Enjoy your easy and delicious grilled cheese anytime.