Have you ever thought about turning a simple log into a beautiful, functional cutting board? Making your own cutting board from a log is easier than you might think, and it gives you a unique piece that stands out in your kitchen.
Imagine the satisfaction of using a board you crafted yourself—sturdy, natural, and full of character. In this guide, you’ll discover simple steps to transform a raw log into a smooth, durable cutting board. Ready to impress your friends and upgrade your cooking space?
Let’s get started!

Credit: 100things2do.ca
Choosing The Right Log
Choosing the right log is the foundation of making a beautiful and durable cutting board. The log you pick affects everything from the board’s appearance to how well it holds up over time. Paying close attention to the wood’s quality will save you time and effort during the crafting process.
Selecting Wood Type
Not all wood is suitable for cutting boards. You want hardwoods like maple, walnut, or cherry because they resist knife marks and bacteria better than softwoods. These woods also offer a nice grain pattern that adds character to your board.
Think about the wood’s natural oils, too. Some, like teak, have oils that protect the surface but can be tricky to work with. What qualities matter most to you—durability, appearance, or ease of maintenance?
Checking For Cracks And Knots
Inspect the log carefully for cracks. Even small splits can grow over time, making your board weak or unsafe. Knots might look interesting but can be problematic as they tend to loosen or fall out.
Hold the log up to the light or tap it gently to detect hidden cracks. If the wood feels soft or hollow in spots, it’s best to find a healthier piece. Would you rather spend extra time fixing flaws or start with a solid log?
Sizing Your Log
Choose a log size that matches the cutting board you want to create. If the log is too thick, it will be heavy and hard to handle. Too thin, and you might not get the board thickness you need for stability and durability.
Measure the diameter and length before you start. Keep in mind the final board will be smaller after trimming and sanding. What size cutting board fits your kitchen tasks best—a small prep board or a large serving platter?
Gathering Tools And Materials
Creating a cutting board from a log requires careful preparation. Gathering the right tools and materials is the first step. Having everything ready ensures a smooth woodworking process. This section covers what you need before starting your project.
Essential Tools List
- Hand saw or chainsaw for cutting the log
- Electric planer or hand plane to smooth the surface
- Sanding blocks or electric sander for finishing
- Clamps to hold the board in place
- Chisel for shaping edges
- Measuring tape and pencil for marking
Safety Equipment
- Safety goggles to protect your eyes
- Work gloves to protect your hands
- Dust mask to avoid inhaling sawdust
- Ear protection for loud tools
- Sturdy footwear to protect your feet
Additional Supplies
- Food-safe wood oil or mineral oil for finishing
- Clean cloths for applying oil
- Wood glue for any repairs
- Sandpaper in various grits for fine sanding
- Plastic or rubber feet to protect surfaces
Preparing The Log
Preparing the log is the first key step in making a cutting board. It sets the foundation for a strong, smooth, and safe surface. Proper preparation ensures the board lasts long and looks great.
Removing Bark
Remove the bark carefully using a sharp knife or a drawknife. Bark can hold dirt and insects that damage the wood. Pull away any loose pieces. Check the log for leftover bits and clean them off thoroughly.
Cutting To Size
Cut the log into a flat, manageable piece using a saw. Choose the size that fits your kitchen needs. A good cutting board is thick enough to stay sturdy but light enough to handle easily.
Smoothing The Surface
Sand the surface starting with coarse sandpaper. Move to finer grits for a smooth finish. This removes rough patches and splinters. A smooth surface is safe for cutting and easy to clean.
Shaping The Cutting Board
Shaping your cutting board from a log transforms a raw piece of wood into a functional kitchen essential. This stage is where your vision starts to take form, combining precision and creativity. How you shape the board affects not only its look but also how comfortable and safe it is to use.
Marking The Design
Begin by deciding on the shape and size of your cutting board. Use a pencil to sketch your design directly onto the log’s flat surface. Clear, bold lines help guide your cuts and reduce mistakes.
Consider practical aspects like thickness and handle placement. You might want to add rounded corners or a juice groove—mark those areas carefully. Taking time here saves effort during cutting and sanding.
Using Power Tools
Power tools speed up the shaping process and make cutting through the log easier. A jigsaw or bandsaw works great for following your marked lines precisely. Always wear safety gear—eye protection and gloves are must-haves.
If the log is thick, a chainsaw can quickly rough out the shape before finer tools come in. Remember to control the tool steadily to avoid uneven edges. Pausing often to check your progress helps keep the board balanced and symmetrical.
Hand Finishing Techniques
After power tools, hand finishing brings smoothness and polish to your board. Use rasps and files to refine edges and soften corners. Sandpaper of various grits—starting coarse and moving to fine—removes tool marks and prepares the surface.
Hand sanding gives you control over how smooth or textured the board feels. It also allows you to fix small imperfections that machines might miss. Do you prefer a silky finish or a bit of natural grain texture under your hands?
Sanding And Smoothing
Sanding removes rough spots and creates a smooth surface on the cutting board. Using fine-grit sandpaper ensures an even finish, ready for sealing and use. Smooth edges prevent splinters and make the board safe to handle.
Sanding and smoothing are crucial steps in making a cutting board from a log. They ensure the board is safe, functional, and visually appealing. This process removes rough spots and reveals the natural beauty of the wood. Let's explore the important aspects of sanding and smoothing.
Choosing Sandpaper Grits
Selecting the right sandpaper grit is essential for effective sanding. Start with coarse grit, like 80-grit, to remove rough patches. This grit smooths out major imperfections on the wood surface. Then, move to a medium grit, such as 120-grit. This helps refine the surface, making it smoother. Finally, finish with a fine grit, like 220-grit, for a polished appearance. Each grit level prepares the board for the next step.
Sanding Techniques
Proper sanding techniques enhance the quality of your cutting board. Always sand with the grain of the wood. This prevents scratches and ensures a smooth finish. Use even pressure as you sand to avoid creating dips. An orbital sander can speed up the process, but hand sanding gives more control. Take your time and check the surface regularly. Your goal is an even, smooth texture.
Cleaning The Surface
After sanding, cleaning the surface is vital. Dust and debris can spoil the finish. Use a vacuum or a soft brush to remove dust from the wood. A damp cloth can help pick up finer particles. Make sure the board is completely dry before applying any finish. This ensures the finish adheres properly and looks great. Keeping the surface clean enhances the board's final appearance.

Credit: www.reddit.com
Applying Finish
Applying finish to your homemade cutting board is a crucial step that protects the wood and enhances its natural beauty. Without the right finish, your board might absorb moisture and odors, leading to warping or cracking. Choosing and applying the proper finish ensures your cutting board stays durable and safe for food use.
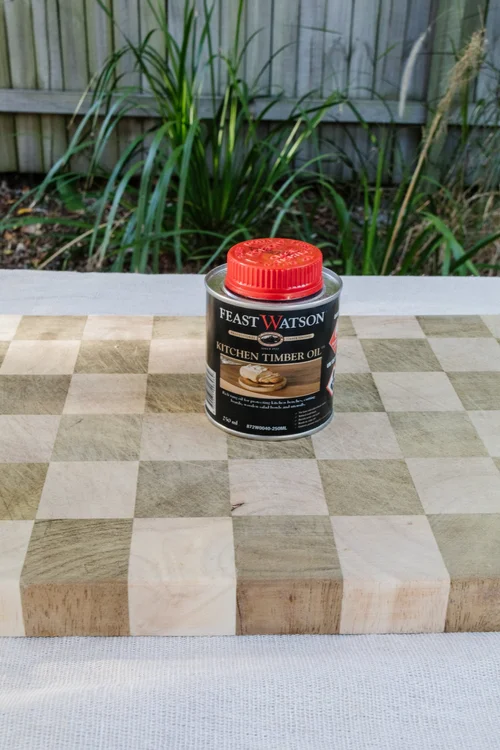
Food-safe Oils And Waxes
Not all finishes are safe for cutting boards since they come in contact with food. Look for food-safe oils like mineral oil, walnut oil, or tung oil. These oils soak into the wood, preventing it from drying out while being completely non-toxic.
Waxes, such as beeswax or carnauba wax, create a smooth, protective layer on the surface. Combining oil and wax often gives the best results—oil penetrates the wood and wax seals it. Avoid finishes like polyurethane or varnish, as they can chip and contaminate food.
Application Tips
Apply the oil generously with a clean cloth or paper towel. Rub it in the direction of the wood grain to ensure even absorption. Don’t rush—let the oil soak for at least 20 minutes before wiping off the excess.
For wax, warm it slightly for easier spreading and buff the board afterward to a soft shine. Reapply oil and wax every few weeks or whenever the board looks dry. Have you noticed how a well-oiled board feels smoother and more pleasant to work with?
Drying And Curing
After applying the finish, allow your cutting board to dry in a well-ventilated area. This usually takes 12 to 24 hours depending on the oil used. Make sure the board is completely dry before using it to prevent sticky or tacky surfaces.
Proper curing strengthens the finish and maximizes protection. If you plan to apply multiple coats, wait until each layer is fully cured before adding the next. How often you maintain your cutting board depends on how frequently you use it, but regular care extends its life significantly.
Maintaining Your Cutting Board
Maintaining your cutting board is key to keeping it functional and beautiful for years. A well-cared-for board resists cracks, warping, and bacteria build-up. Simple, regular care routines can make a big difference in how your cutting board performs and looks.
Cleaning Tips
After each use, wash your cutting board with warm water and mild soap. Avoid soaking it or putting it in the dishwasher, as water can cause the wood to swell and crack.
To remove tough stains or odors, sprinkle coarse salt or baking soda on the surface, then scrub gently with a lemon half. This natural method sanitizes without harsh chemicals.
Dry your board immediately with a clean towel and stand it upright to air dry completely. Moisture left on the surface invites bacteria and damage.
Reapplying Finish
Applying a food-safe oil keeps your board from drying out and cracking. Mineral oil is a popular choice because it’s odorless and safe for food contact.
Rub oil evenly over the entire surface using a clean cloth. Let it soak in overnight, then wipe off any excess the next day.
Reapply oil regularly—once a month or whenever the board looks dry. This simple step keeps the wood nourished and extends its life.
Storage Advice
Store your cutting board in a dry, well-ventilated area. Avoid placing it near heat sources like stoves or radiators which can dry the wood too quickly.
If you have multiple boards, store them standing on their edges instead of flat. This allows air to circulate and prevents moisture buildup.
Think about how you use your board—does it need to be within easy reach or stored away safely? Your storage choice affects how long your cutting board will last and stay in good shape.

Credit: www.youtube.com
Frequently Asked Questions
What Type Of Wood Is Best For Cutting Boards?
Hardwoods like maple, walnut, and cherry are ideal for cutting boards. They resist knife marks and bacteria, making them safe and durable.
How Do You Prepare A Log For A Cutting Board?
Cut the log into slabs, then dry and flatten them. Sand the surface smooth before applying a food-safe finish.
What Tools Are Needed To Make A Cutting Board?
You need a saw, planer, sander, clamps, and food-safe finish. These tools help shape and protect the board effectively.
How Long Does It Take To Make A Cutting Board From A Log?
It typically takes several days to dry and cure the wood. Actual crafting can take a few hours depending on skill level.
Conclusion
Making a cutting board from a log is simple and fun. You only need a few tools and some patience. Each board will be unique and useful in your kitchen. Enjoy the process and the natural beauty of wood. This project brings a sense of pride and creativity.
Try it yourself and see the results. Woodworking can be easy with the right steps. Keep practicing to improve your skills and have fun.