Imagine stirring your favorite hot drink with a spoon that melts into rich, creamy chocolate as it warms. Sounds delicious, right?
Making a chocolate spoon at home is easier than you think—and it adds a special touch to your coffee, hot cocoa, or dessert. In this guide, you’ll discover simple steps to create your own chocolate spoons that impress your friends and satisfy your sweet tooth.
Ready to turn an ordinary cup into an extraordinary treat? Keep reading, because your new favorite kitchen hack is just ahead.
Choosing The Right Chocolate
Choosing the right chocolate is crucial for making a perfect chocolate spoon. The type of chocolate you pick affects the flavor, texture, and how well it melts and sets. Let’s look at what you need to know before buying your chocolate.
Types Of Chocolate
Chocolate comes in several forms: dark, milk, and white. Dark chocolate offers a rich, intense flavor and works well if you want a less sweet spoon. Milk chocolate is creamier and sweeter, making it popular for kids and those who prefer a milder taste.
White chocolate isn’t technically chocolate since it lacks cocoa solids, but it melts smoothly and looks beautiful when shaped. Think about what flavor experience you want before choosing.
Quality Matters
Not all chocolates are created equal. Higher-quality chocolate has a better cocoa butter content, which helps your spoon hold its shape and gives a silky finish. Cheap chocolate often contains fillers like vegetable oil, leading to a grainy texture.
I once tried making chocolate spoons with a low-quality brand and ended up with spoons that melted too quickly and tasted waxy. Investing in good-quality chocolate makes your effort worthwhile and the taste memorable.
Melting Points
Chocolate’s melting point varies depending on its type and formulation. Dark chocolate usually melts between 86°F and 90°F, while milk and white chocolates melt at slightly lower temperatures. Knowing this helps you melt the chocolate gently without burning or seizing it.
Have you ever overheated chocolate and ended up with a clumpy mess? Avoid that by melting chocolate slowly in a double boiler or microwave in short bursts. This control ensures your chocolate spoon will have a smooth and glossy finish.
Gathering Your Supplies
Before you start crafting your delicious chocolate spoons, gathering the right supplies is crucial. Having everything ready makes the process smoother and more enjoyable. It also helps you avoid last-minute trips to the store or scrambling to find that one tool.
Tools Needed
- Microwave-safe bowl or double boiler:to melt your chocolate gently without burning.
- Spoons:metal or plastic spoons work fine for molding chocolate.
- Spatula or spoon:for stirring the chocolate.
- Baking sheet or tray:lined with parchment paper to place your spoons on while they set.
- Measuring cups and spoons:if you plan to add precise amounts of extra ingredients.
Having these tools ready will keep your workspace organized and make the whole experience more fun. Have you ever tried melting chocolate without the right bowl? It’s messy and frustrating.
Molds And Spoons
Choosing the right molds or spoons is key to your chocolate spoon’s final look and feel. You can use regular teaspoons or invest in silicone molds shaped like spoons or fun designs.
Silicone molds are flexible and make it easy to pop out the chocolate spoons without breaking them. On the other hand, using actual spoons means you skip the molds altogether, which is great if you want a rustic, homemade vibe.
Optional Add-ins
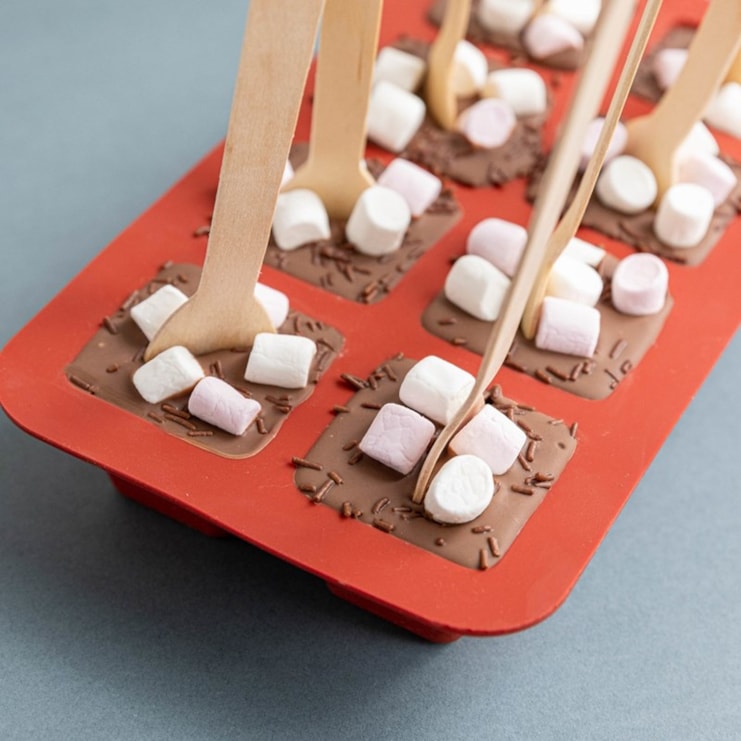
Think about what flavors or textures you want to add to your chocolate spoons. Nuts, sprinkles, sea salt, or even tiny marshmallows can turn a simple chocolate spoon into a treat you crave.
Adding these extras is your chance to get creative. Ever thought about mixing a pinch of chili powder for a surprising kick or a bit of crushed peppermint for a festive twist?
Melting Chocolate Properly
Melting chocolate properly is the key to creating smooth, glossy chocolate spoons that taste as good as they look. If chocolate overheats or is heated unevenly, it can become grainy or seize up, ruining your spoon-making project. Understanding the best ways to melt chocolate will save you time and frustration, and make your chocolate spoons perfect every time.
Double Boiler Method
The double boiler method uses gentle, indirect heat to melt chocolate evenly. Fill a pot with a few inches of water and bring it to a simmer.
Place a heatproof bowl on top, making sure the bottom doesn’t touch the water. Add chopped chocolate to the bowl and stir frequently as it melts.
This method gives you control and reduces the risk of burning. Have you noticed how chocolate melts slowly but smoothly this way?
Microwave Method
The microwave method is faster but requires careful attention to prevent overheating. Chop your chocolate into small, even pieces for consistent melting.
Heat the chocolate in short bursts of 15-20 seconds, stirring well after each session. This helps distribute heat evenly and stops the chocolate from burning.
It’s tempting to rush, but patience here ensures silky chocolate ready for your spoon molds.
Avoiding Seizing
Seizing happens when chocolate comes into contact with even a small amount of water and turns grainy. Have you ever tried stirring chocolate and suddenly seen it clump up?
To prevent this, always keep utensils and bowls dry. If you need to add flavor or liquid, use oils or melted butter instead of water-based liquids.
If your chocolate does seize, don’t toss it—try adding a teaspoon of warm milk or cream and stirring gently. Sometimes, you can bring it back to a usable texture.
Credit: www.theguardian.com
Shaping The Chocolate Spoons
Melt chocolate in a bowl over simmering water. Pour it into spoon molds. Let them cool completely before removing.
Shaping the chocolate spoons is a fun and creative process. It allows you to transform melted chocolate into delightful utensils. Whether you use molds or shape them freehand, each method offers a unique experience. Let's explore these techniques to craft perfect chocolate spoons.
Using Spoon Molds
Molds make the process straightforward and uniform. Begin by melting your favorite chocolate. Pour the melted chocolate into the spoon molds. Tap the mold gently to remove air bubbles. Place the mold in the refrigerator to set the chocolate. Once hardened, gently pop the spoons out of the mold.
Freehand Spoon Shaping
Freehand shaping requires a bit more skill but offers flexibility. Pour melted chocolate onto a baking sheet lined with parchment paper. Use a spoon to shape the chocolate into spoon forms. Make sure the handle and bowl are distinct. Refrigerate until the chocolate hardens completely.
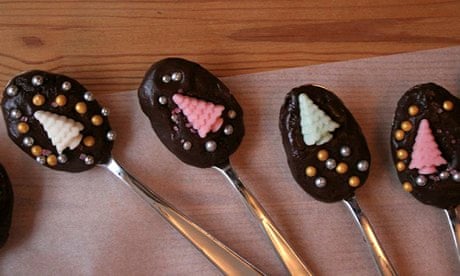
Adding Decorative Touches
Decorative touches enhance the appeal of chocolate spoons. Sprinkle crushed nuts or candies on the melted chocolate. Drizzle white or dark chocolate over the finished spoons. Add edible glitter for a festive look. Let your creativity shine with each spoon you make.
Setting And Cooling
Setting and cooling are key to making perfect chocolate spoons. Cooling helps chocolate harden properly. Proper setting keeps the spoon smooth and shiny. Follow these tips to get the best results.
Refrigeration Tips
Place the chocolate spoons in the fridge to speed up setting. Keep them on a flat tray lined with parchment paper. Avoid stacking spoons to prevent damage. Leave spoons in the fridge for 15 to 30 minutes. Check regularly to avoid condensation forming on the chocolate.
Room Temperature Setting
Set chocolate spoons at room temperature for a natural finish. Find a cool, dry spot away from direct sunlight or heat. This method takes longer but gives a better shine. Allow spoons to set for 1 to 2 hours. Avoid touching the spoons during this time to keep them smooth.
Checking For Firmness
Test if the chocolate is firm by gently pressing the back of a spoon. It should feel hard and not sticky. If soft, return spoons to fridge or wait longer at room temperature. Firm chocolate will snap cleanly when bent. Proper firmness ensures spoons hold their shape well.
Storing And Serving
Storing and serving chocolate spoons properly keeps them fresh and tasty. It also makes your presentation more inviting. Handling them with care preserves their shape and flavor. A few simple tips help your chocolate spoons stay perfect until use.
Best Storage Practices
- Store chocolate spoons in a cool, dry place away from sunlight.
- Use an airtight container to prevent moisture and odors.
- Avoid storing near strong-smelling foods like spices or onions.
- Keep spoons flat to avoid bending or breaking.
- Refrigerate only if the room temperature is very warm, but allow spoons to reach room temperature before serving.
Serving Ideas
- Place chocolate spoons on a decorative plate or tray.
- Wrap them in clear cellophane tied with a ribbon for gifts.
- Serve alongside small bowls of whipped cream or marshmallows.
- Use as a stirrer for dessert cups or hot drinks.
- Arrange with other sweet treats like cookies or pastries.
Pairing With Hot Beverages
Chocolate spoons melt slowly in warm drinks. They add rich flavor and sweetness.
- Stir into hot chocolate for an extra chocolate boost.
- Mix with coffee or espresso for a mocha taste.
- Use with warm milk for a creamy chocolate drink.
- Try with chai or spiced tea for a unique twist.
- Top drinks with whipped cream before adding the spoon.
Creative Variations
Adding creative variations to your chocolate spoons transforms a simple treat into a personalized delight. Experimenting with different flavors, textures, and designs invites fun and makes your chocolate spoons stand out. What could be more satisfying than sipping a hot drink while stirring with a spoon that reflects your unique taste?
Flavored Chocolates
Try mixing in flavored extracts or spices to your melted chocolate before pouring it into the mold. Peppermint, orange zest, or chili powder can add a surprising twist that wakes up your taste buds.
Using white chocolate as a base lets you add color with natural powders like matcha or freeze-dried berries. These not only give vibrant colors but also subtle flavors that complement your beverage.
Nut And Fruit Additions
Adding chopped nuts or dried fruits creates delightful textures and bursts of flavor. Almonds, hazelnuts, or pistachios offer a satisfying crunch, while dried cranberries or raisins add a chewy sweetness.
Toast your nuts lightly before adding them to enhance their flavor. You’ll notice how this simple step elevates the overall experience of your chocolate spoon.
Themed Designs
Creating chocolate spoons around a theme can make your treats perfect for gifts or special occasions. Think about shaping spoons with edible glitter for festive celebrations or using colored chocolate to match a party’s color scheme.
You can also embed small candy shapes or edible images that reflect holidays or hobbies. This approach makes your chocolate spoons not just tasty but memorable conversation starters.
Credit: www.thepresentfinder.co.uk
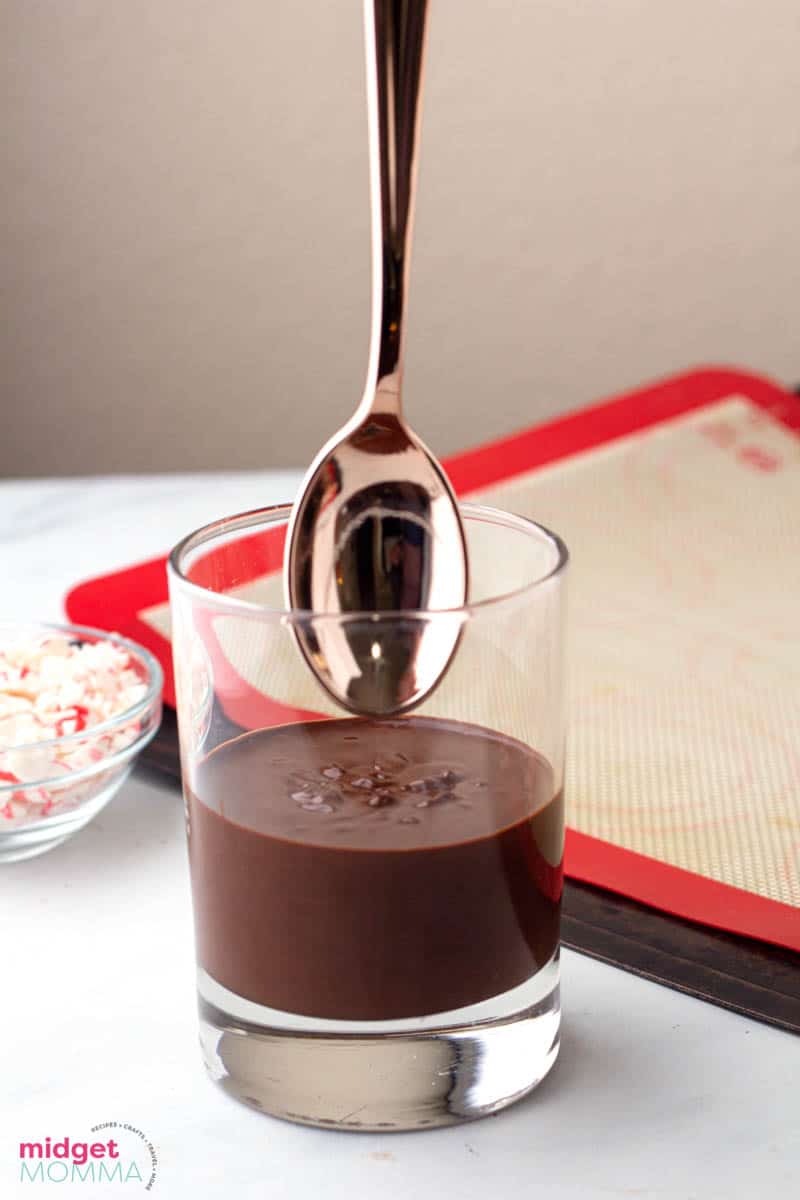
Credit: www.midgetmomma.com
Frequently Asked Questions
What Ingredients Do I Need For A Chocolate Spoon?
You need high-quality chocolate, spoon-shaped molds, and optional toppings like sprinkles or nuts. Use chocolate bars or chips for melting.
How Do I Melt Chocolate Properly For Spoons?
Melt chocolate using a double boiler or microwave in short bursts. Stir frequently to avoid burning and ensure smooth texture.
Can I Use Any Type Of Chocolate For Making Spoons?
Yes, you can use dark, milk, or white chocolate. Choose based on your taste preference and desired sweetness level.
How Long Does It Take To Set Chocolate Spoons?
Chocolate spoons usually set in 20 to 30 minutes at room temperature. Refrigeration can reduce setting time to about 10 minutes.
Conclusion
Making a chocolate spoon is simple and fun. You only need a few ingredients and tools. It’s perfect for gifts or a tasty treat at home. Try different chocolates and shapes to enjoy variety. Use it to stir hot drinks and add rich flavor.
Kids and adults will love this easy recipe. Enjoy your delicious, homemade chocolate spoon anytime. Keep practicing to improve your skills and creativity.