Have you ever wanted to create your own chocolate shapes at home? Making a chocolate mold is easier than you think, and it lets you turn simple chocolate into fun, personalized treats.
Whether you're planning a special gift or just want to impress your friends, learning this skill will give you full control over your chocolate creations. Keep reading, and you’ll discover step-by-step how to make your own chocolate mold quickly and confidently.
Your next delicious masterpiece is just around the corner!
Choosing The Right Chocolate
Choosing the right chocolate is the foundation of making a perfect chocolate mold. The texture, shine, and snap of your molded chocolate depend heavily on the type and quality of chocolate you select. Are you aiming for a glossy finish or a rich, creamy bite? Your choice will shape the entire experience.
Types Of Chocolate For Molding
Not all chocolates behave the same when melted and molded. You’ll typically find three main types suitable for molding:
- Couverture Chocolate:This is the best choice for professional results. It contains a higher percentage of cocoa butter, which helps it melt smoothly and set with a shiny, crisp finish.
- Semi-Sweet and Bittersweet Chocolate:These are common and widely available. They work well for molds but might need tempering to achieve a glossy look.
- Compound Chocolate:Made with vegetable fats instead of cocoa butter, compound chocolate is easier to work with since it doesn’t require tempering. However, it lacks the same richness and snap of real chocolate.
Think about what you want your final product to feel like. Do you want that satisfying snap when you bite into it? If yes, couverture or real chocolate is the way to go.
Tempering Chocolate Basics
Tempering is a crucial step that transforms melted chocolate into a shiny, firm masterpiece. Without tempering, chocolate can look dull and feel soft or crumbly after it sets.
The goal of tempering is to stabilize the cocoa butter crystals. You do this by carefully heating and cooling the chocolate to specific temperatures. This process gives chocolate its glossy finish and that satisfying snap.
You can temper chocolate using simple methods like the seeding method, where you melt most of the chocolate, then add chopped pieces to cool it down gradually. Have you ever noticed your homemade chocolate looking streaky or dull? That’s usually because it wasn’t tempered properly.

Credit: www.reddit.com
Selecting A Mold
Choosing the right mold is key to making chocolate that looks as good as it tastes. Your mold affects how easy it is to remove the chocolate, how shiny it appears, and even how it breaks when you bite. Think about what you want your final chocolate to look like and how you plan to use it before picking a mold.
Materials For Chocolate Molds
Chocolate molds come in different materials, each with its own benefits. Plastic molds are common and affordable, making them great for beginners. They are lightweight and usually dishwasher safe, but they can scratch easily, which might affect the chocolate’s shine.
Silicone molds are flexible and perfect if you want to pop out your chocolates without breaking them. They work well for detailed designs but might not give the same glossy finish as plastic. Metal molds, like stainless steel, hold their shape well and cool chocolate quickly, but they are often pricier and less common for home use.
Think about how often you’ll use the mold and whether you want glossy or matte chocolates. Which material fits your needs better: convenience or a professional look?
Shape And Size Considerations
The shape of your mold impacts the chocolate’s appearance and how it feels when you eat it. Simple shapes like squares or circles are easier to fill and unmold, especially if you are new to chocolate making.
Complex shapes with sharp edges or intricate patterns look impressive but can be tricky. They might require more patience and skill to fill evenly without air bubbles. Also, consider the size—small chocolates are perfect for quick treats, while larger ones make a statement gift.
Ask yourself what purpose your chocolates serve. Are you making bite-sized pieces for a party or a large centerpiece for a special occasion? The right shape and size make a big difference in how your chocolates are enjoyed and shared.
Preparing The Mold
Preparing the mold is a key step in making chocolate molds. It ensures the chocolate releases easily and looks smooth. Careful preparation helps avoid cracks and uneven surfaces. This step takes patience and attention to detail.
Cleaning And Drying
Start by washing the mold with warm water and mild soap. Use a soft cloth or sponge to avoid scratches. Rinse the mold thoroughly to remove all soap residue. Dry the mold completely with a clean towel. Any water left can cause chocolate to seize or stick.
Applying A Release Agent
Apply a thin layer of release agent to the mold surface. Use food-safe oils like coconut or vegetable oil. A light brush or paper towel works well for this. Avoid too much oil; it can create spots on the chocolate. This step helps the chocolate come out clean and smooth.
Melting The Chocolate
Melting chocolate is a crucial step in making chocolate molds. The chocolate must melt smoothly without burning or seizing. Proper melting ensures a shiny, silky texture that sets well in the mold. There are two easy ways to melt chocolate safely: using a microwave or a double boiler. Each method controls heat differently to avoid overheating the chocolate.
Microwave Method
Start by chopping the chocolate into small, even pieces. Place the pieces in a microwave-safe bowl. Heat the chocolate in short bursts of 20 to 30 seconds. Stir well after each burst to spread the heat evenly. Repeat heating and stirring until the chocolate is fully melted. Be careful not to overheat. Chocolate can burn quickly in the microwave.
Double Boiler Method
Fill a pot with a few inches of water. Bring the water to a gentle simmer. Place a heatproof bowl on top of the pot. The bowl should not touch the water. Add chopped chocolate to the bowl. Stir the chocolate slowly as it melts. Remove the bowl from heat once chocolate is smooth. This method melts chocolate gently and evenly.
Pouring And Setting
Pour melted chocolate into your mold, ensuring it fills every corner. Let it set at room temperature or refrigerate for quicker results.
Pouring and setting chocolate into molds is a delicate art that can elevate your homemade chocolates to professional levels. The process involves precision, patience, and a few secrets that can make all the difference. Whether you're crafting intricate designs or simple shapes, mastering this step is key to achieving flawless results.
Filling The Mold
Begin by gently pouring the melted chocolate into your mold. Use a steady hand to ensure even distribution across all cavities. A small offset spatula or scraper can help spread the chocolate, ensuring it reaches every nook and cranny.
Removing Air Bubbles
Trapped air bubbles can ruin the smooth finish of your chocolates. To avoid this, gently tap the mold against the countertop several times. The vibrations will help release any air pockets, allowing the chocolate to settle uniformly.
Cooling Techniques
Proper cooling is crucial to achieve a glossy finish and perfect texture. Place your filled mold in the refrigerator for about 15-20 minutes. Avoid the freezer, as rapid cooling can cause the chocolate to crack. Have you ever noticed how some chocolates have a dull, matte finish? This often results from improper cooling. By taking care to cool your chocolate slowly, you ensure a beautiful, shiny surface that looks as good as it tastes. Engage with your process, and you'll not only create something delicious but also learn what works best for you. What small tweaks could make your chocolate-making experience more successful?
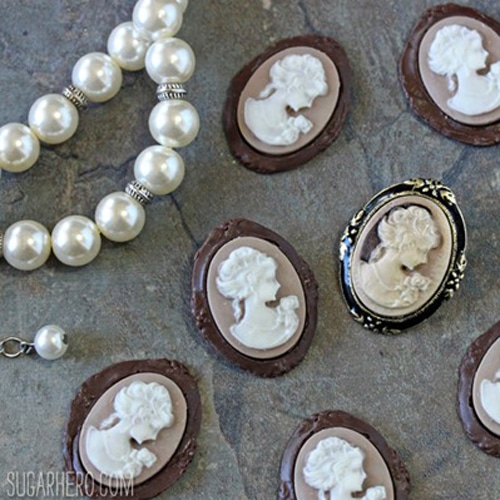
Credit: www.sugarhero.com
Demolding And Finishing Touches
Removing your chocolate from the mold is a delicate part of the process. It requires patience and care to keep the shape perfect. After demolding, small finishing touches can enhance the chocolate’s look and taste. These final steps make your creation stand out and look professional.
Careful Removal Tips
Let the chocolate cool completely before removing it. Cold chocolate is less likely to break or crack. Gently bend the mold to loosen the chocolate piece.
Press lightly on the mold's back to push the chocolate out. Avoid using sharp tools that can damage the chocolate or mold. If the chocolate sticks, place the mold in the fridge for a few minutes and try again.
- Work slowly and gently
- Keep hands clean and dry
- Use a soft cloth to hold the chocolate
Adding Decorations
Decorations add beauty and flavor to your chocolate mold. Use edible glitter, nuts, or colored cocoa butter for a special look. Paint details with a small brush and melted white or dark chocolate.
Sprinkle crushed candy or dried fruit for texture. Place decorations before the chocolate fully hardens. This helps them stick well.
- Use bright colors for contrast
- Apply decorations gently
- Let the chocolate dry completely before handling
Troubleshooting Common Issues
Making chocolate molds can sometimes bring unexpected problems. These issues may affect the look and texture of your chocolate. Knowing how to fix common problems helps you get better results every time.
Blooming Chocolate
Blooming looks like white or gray spots on chocolate. It happens when fat or sugar moves to the surface. Temperature changes cause blooming most often. Chocolate stored in a warm place then cooled quickly can bloom.
To avoid blooming:
- Store chocolate in a cool, dry place
- Temper chocolate correctly before molding
- Keep molds at room temperature before use
If blooming appears, the chocolate is safe to eat. The look changes, but the taste stays good.
Cracks And Breaks
Cracks happen if chocolate cools too fast or too slow. Thin parts of the mold are more likely to crack. Using chocolate that is too cold or too hot also causes breaks.
To prevent cracks:
- Cool chocolate slowly at room temperature
- Use proper chocolate thickness in the mold
- Handle molds gently during removal
If cracks happen, try melting and re-pouring the chocolate. This fixes most breaks.
Sticky Or Dull Surfaces
Sticky surfaces mean chocolate was not fully set. Humidity can cause stickiness. Dull chocolate usually means it was not tempered well. Poor tempering stops the chocolate from shining.
To fix sticky or dull chocolate:
- Temper chocolate carefully before pouring
- Keep molds dry and cool during setting
- Store finished chocolates in a dry place
Proper tempering and storage make chocolate smooth and shiny every time.

Credit: www.kotibeth.com
Frequently Asked Questions
What Materials Are Best For Making Chocolate Molds?
Silicone and plastic are ideal for chocolate molds. Silicone is flexible and easy to remove chocolate. Plastic molds offer detailed shapes but require gentle handling. Both materials are food-safe and reusable, perfect for homemade chocolate creations.
How Do You Prepare Chocolate Before Molding?
Melt chocolate gently using a double boiler or microwave. Stir frequently to avoid burning. Temper the chocolate for a glossy finish and snap. Proper preparation ensures smooth texture and easy mold release.
Can I Reuse Chocolate Molds Multiple Times?
Yes, chocolate molds can be reused many times. Clean molds gently with warm water and dry thoroughly. Avoid abrasive scrubbing to maintain mold quality. Proper care extends mold life and ensures consistent chocolate shapes.
How Long Should Chocolate Set In Molds?
Chocolate typically sets in molds within 20 to 30 minutes at room temperature. For faster results, refrigerate for 10 to 15 minutes. Avoid freezing, as it can cause condensation and affect texture.
Conclusion
Making a chocolate mold is simple and fun. You only need a few tools and some chocolate. Pour the melted chocolate into your mold carefully. Let it cool until it becomes hard. Then, gently remove the chocolate from the mold.
You can create many shapes and designs this way. Enjoy sharing your homemade chocolate treats with friends and family. Keep practicing to improve your skills and try new ideas. Chocolate molding brings joy and a sweet reward every time. Give it a try and have fun!