Are you tired of running out of ice or buying bags from the store? Installing an ice maker in your refrigerator can solve that problem for good.
It might sound tricky, but with the right steps, you can do it yourself and enjoy a steady supply of ice anytime. In this guide, you’ll discover simple, clear instructions that make the process easy to follow. By the end, you’ll have your ice maker up and running, saving you time and hassle.
Ready to get started? Let’s dive in!

Credit: www.youtube.com
Check Compatibility
Checking compatibility is crucial before installing an ice maker in a refrigerator. This step ensures the ice maker fits and works properly with your fridge model. Avoiding compatibility issues saves time and prevents damage.
Start by gathering basic information about your refrigerator. This helps find the right ice maker model for your appliance. Compatibility depends on model design, size, and electrical connections.
Identify Refrigerator Model
Locate the model number on your refrigerator. It is usually on a sticker inside the fridge or on the door frame. Write down the model number exactly as it appears.
Knowing your refrigerator model helps in searching for compatible ice makers. Each model has specific parts designed to fit it perfectly.
Verify Ice Maker Compatibility
Compare your refrigerator model number with the ice maker specifications. Check the manufacturer’s guide or product description for compatibility details.
Look for information about size, power requirements, and connection type. Ensure the ice maker matches these criteria to guarantee proper installation.
- Check voltage and wiring compatibility.
- Confirm physical dimensions fit your fridge space.
- Review water line connection types.
Using a compatible ice maker prevents leaks, electrical issues, and malfunctioning. It also helps maintain your refrigerator’s efficiency and lifespan.

Credit: www.thisoldhouse.com
Gather Tools And Materials
Before you dive into installing your new ice maker, gathering the right tools and materials is crucial. Missing a key item halfway through can cause delays and frustration. Getting organized upfront saves time and keeps the process smooth.
List Essential Tools
Having the correct tools makes the installation safer and easier. Here’s a list you should have ready:
- Screwdriver set:Both Phillips and flathead screwdrivers are often needed for screws and panels.
- Adjustable wrench:Useful for tightening water line fittings securely.
- Drill with bits:Sometimes required for mounting brackets or making holes for tubing.
- Teflon tape:Helps seal threaded water connections and prevent leaks.
- Utility knife:Handy for cutting tubing or packaging.
- Bucket or towels:To catch water spills when disconnecting or connecting lines.
Have you ever started a project only to realize you’re missing a simple screwdriver? Avoid that hassle by double-checking your toolbox before you begin.
Prepare Replacement Parts
Your new ice maker might come with some parts, but you’ll want to prepare extras to avoid surprises. Check if you have:
- Ice maker assembly:Ensure it’s compatible with your refrigerator model.
- Water inlet valve:Sometimes it’s best to replace this along with the ice maker to prevent leaks.
- Water tubing:Have additional tubing on hand if the existing line looks worn or too short.
- Mounting screws and brackets:These should be included, but it’s smart to have spares ready.
One time, I had to pause my installation because the water tubing was too short, causing a frustrating trip to the store. Do you have everything you need within reach to avoid interrupting your workflow?
Turn Off Power And Water
Turning off the power and water supply is essential before installing an ice maker. This step keeps you safe from electric shock and water leaks. It also prevents damage to your refrigerator and home. Follow these simple actions to prepare your fridge for installation.
Unplug Refrigerator
Locate the refrigerator’s power cord at the back. Pull the plug carefully from the electrical outlet. Avoid yanking the cord to prevent damage. Make sure the fridge is completely disconnected from electricity. This stops any accidental power flow during installation.
Shut Off Water Supply
Find the water valve that feeds your refrigerator. It is usually under the sink or near the fridge. Turn the valve clockwise to close it tightly. Confirm no water flows by opening the ice or water dispenser briefly. Stopping water prevents leaks and flooding while you work.
Remove Existing Components
Removing existing components is a crucial part of installing a new ice maker in your refrigerator. It ensures that the new unit fits properly and works efficiently. Skipping this step can lead to installation issues and even damage your appliance.
Take Out Ice Bin
Start by carefully pulling out the ice bin from your freezer. Most bins slide out easily, but some may have clips or locks you need to release first.
Handle the bin gently to avoid spilling any leftover ice or damaging the container. If it feels stuck, check for hidden fasteners or screws before forcing it out.
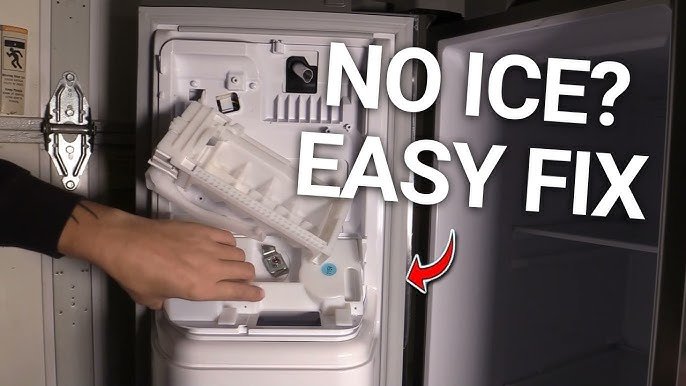
Detach Old Ice Maker
Once the ice bin is removed, locate the old ice maker unit. It is usually attached to the freezer wall with screws and connected to a water line and wiring harness.
Disconnect the wiring harness by pressing the release tab or gently pulling it apart. Then, shut off the water supply and detach the water line to prevent leaks during removal.
Unscrew the mounting screws and carefully lift the old ice maker out. Keep these screws handy—they might be needed for installing the new unit.
Have you noticed how much easier the process becomes when you take your time and avoid rushing? Precision here saves headaches later.
Install New Ice Maker
Installing an ice maker in a refrigerator is a straightforward task. Begin by locating the water supply line. Connect it to the ice maker using the provided tubing. Secure the ice maker inside the freezer compartment. Plug it in, and soon you’ll enjoy fresh ice at your convenience.
Installing a new ice maker in your refrigerator can seem daunting. But with the right guidance, it becomes a manageable task. This guide breaks down the installation process into simple steps.
Mount Ice Maker Assembly
First, ensure the freezer is empty and clean. Locate the mounting points inside your freezer. Secure the ice maker assembly to these points. Use the screws provided in your ice maker kit. Ensure the assembly is firmly attached. A loose mount can lead to malfunction.
Connect Water Line
Locate the water inlet valve at the back of your fridge. Connect the water line from the ice maker to this valve. Ensure the connection is tight to prevent leaks. Turn on the water supply to check for leaks. If dry, proceed to the next step.
Attach Wiring Harness
Find the wiring harness connector on the ice maker. Align it with the connector in the freezer. Snap them together firmly. Ensure the connection is secure. A loose connection can cause electrical issues. Once attached, ensure all wires are safely tucked away.

Credit: www.youtube.com
Test Ice Maker Functionality
Testing your ice maker after installation ensures it works correctly. This step saves time and avoids future issues. Check both power and water supply to confirm proper setup.
Restore Power And Water
Turn the refrigerator’s power back on at the outlet or circuit breaker. Open the water supply valve to let water flow into the ice maker. Listen for sounds of water entering or ice maker motor running. Ensure no leaks appear around the water connection.
Run Initial Test Cycle
Activate the ice maker’s test mode if available. Watch the ice maker fill and cycle through making ice. Check for ice cubes forming and dropping into the bin. This cycle may take 30 minutes to complete. Remove any error codes or reset the ice maker if needed.
Troubleshoot Common Issues
Troubleshooting is key to keeping your ice maker working well. Many common issues can appear after installation. Quick fixes often solve these problems without calling a technician.
Address Water Leaks
Water leaks can cause damage and waste water. Check the water supply line first for any cracks or loose connections. Tighten fittings carefully but do not overtighten. Inspect the water inlet valve for blockages or damage. Replace the valve if it looks worn out.
Look inside the refrigerator for ice buildup. Ice can block the water flow and cause leaks. Clear any ice with warm water or a hairdryer on low heat. Make sure the drain pan is properly positioned and not cracked. Empty the pan regularly to avoid overflow.
Fix Ice Production Problems
If your ice maker stops producing ice, check the power supply. The ice maker needs electricity to work. Ensure the ice maker switch is turned on. Look for a reset button and press it to restart the cycle.
Check the water filter. A clogged filter blocks water flow. Replace the filter if it is old or dirty. Make sure the freezer temperature is set between 0°F and 5°F (-18°C to -15°C). Temperatures outside this range can stop ice production.
Clear any ice jams in the ice mold. Remove stuck ice cubes gently to avoid damage. Wait at least six hours for the ice maker to produce a new batch after clearing jams.
Frequently Asked Questions
How Do I Connect The Water Line To The Ice Maker?
To connect the water line, turn off the water supply first. Attach the water line to the refrigerator's water inlet using a compression fitting. Ensure the connection is tight to prevent leaks. Turn the water supply back on and check for any drips.
What Tools Are Needed To Install An Ice Maker?
You need a drill, adjustable wrench, screwdriver, and tubing cutter. These tools help in mounting the ice maker and connecting water lines. Having Teflon tape and a bucket is useful to manage water spills during installation.
How Long Does It Take To Install An Ice Maker?
Installing an ice maker typically takes 1 to 2 hours. This includes mounting, connecting the water line, and testing the system. Time may vary based on your experience and refrigerator model.
Can I Install An Ice Maker Myself Or Hire A Professional?
You can install an ice maker yourself if you’re comfortable with basic plumbing. However, hiring a professional ensures proper installation and avoids potential leaks or damage. Consider your skill level before deciding.
Conclusion
Installing an ice maker in your refrigerator saves time and effort. Follow the steps carefully for a smooth setup. Double-check all connections to avoid leaks or errors. Test the ice maker before closing the fridge door. Enjoy fresh ice anytime at home.
With patience and care, the process is simple. Now you can keep drinks cold without extra trips.