Want to add a touch of charm and creativity to your mason jars? Learning how to frost a mason jar is easier than you think, and it can transform ordinary jars into stunning decor pieces or personalized gifts.
Whether you're planning a cozy night in, a special event, or simply want to brighten up your space, frosted mason jars offer a beautiful, frosty finish that catches the eye. Keep reading, and you’ll discover simple steps and insider tips to make your jars look professionally frosted—no special skills needed.
Ready to turn your jars into frosty works of art? Let’s get started!
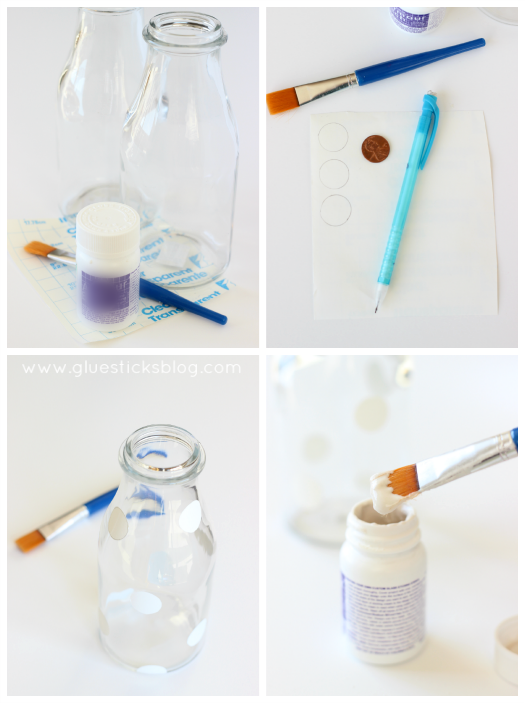
Credit: gluesticksblog.com
Materials Needed
Frosting a mason jar gives it a soft, elegant look. Collecting the right materials makes the process smooth and fun. Prepare everything before starting. This saves time and avoids mistakes.
Choosing The Right Mason Jar
Select jars with smooth, clean surfaces. Clear glass jars work best for frosting. Avoid jars with labels or rough textures. Different sizes offer various creative options. Pick a size that fits your project well.
Types Of Frosting Methods
- Etching Cream: Creates a permanent frosted look.
- Spray Frosting: Easy to apply and quick drying.
- Frosted Glass Paint: Allows control over design and texture.
- Salt or Sugar Frosting: Temporary and decorative effect.
Each method needs specific materials. Choose one based on your skill and jar type.
Additional Supplies
- Painter’s tape or stencils for design control
- Gloves to protect your hands
- Brushes or sponges for applying paint or cream
- Newspaper or plastic sheet to protect surfaces
- Rubbing alcohol to clean jars before frosting
- Water and soap for cleaning after frosting
Preparing The Jar
Preparing the jar is an important part of frosting a mason jar. It ensures the frosting sticks well and looks smooth. A clean and dry surface helps the frosting last longer and prevents peeling. Start by making sure the jar is spotless and free from any dirt or oils.
Cleaning And Drying
Wash the mason jar with warm water and soap. Use a sponge or cloth to scrub all sides thoroughly. Rinse the jar well to remove all soap. Dry the jar completely with a clean towel. Leaving any water can cause the frosting to bubble or peel.
Removing Labels And Residue
Soak the jar in warm, soapy water for about 10 minutes. This loosens the label and glue. Peel off the label gently. Use a sponge or cloth to scrub off leftover glue. For stubborn residue, apply a small amount of cooking oil or rubbing alcohol. Rub until the surface is smooth and clean. Rinse and dry the jar again before frosting.
Frosting Techniques
Frosting a mason jar gives it a soft, elegant look. It also adds privacy and style. Several techniques create this frosted effect. Each method has unique steps and materials. Choose one based on the tools you have and the finish you want. The following techniques are simple and effective for beginners and craftspeople alike.
Using Frosted Glass Spray Paint
Frosted glass spray paint is quick and easy. Start by cleaning the jar to remove dust and grease. Shake the spray can well before use. Spray lightly in even strokes about 8-10 inches away from the jar. Let the paint dry between coats. Two or three thin layers create the best frosted look. Avoid heavy sprays to prevent drips. This method works well for a smooth, consistent finish.
Applying Etching Cream
Etching cream chemically frosts glass for a permanent effect. Wear gloves and protect your workspace. Apply the cream evenly with a brush. Follow the product instructions for timing, usually 5-10 minutes. Rinse off the cream with water after the time ends. The jar surface will appear frosted and slightly rough. This technique is ideal for detailed designs using stencils. It provides a durable and professional appearance.
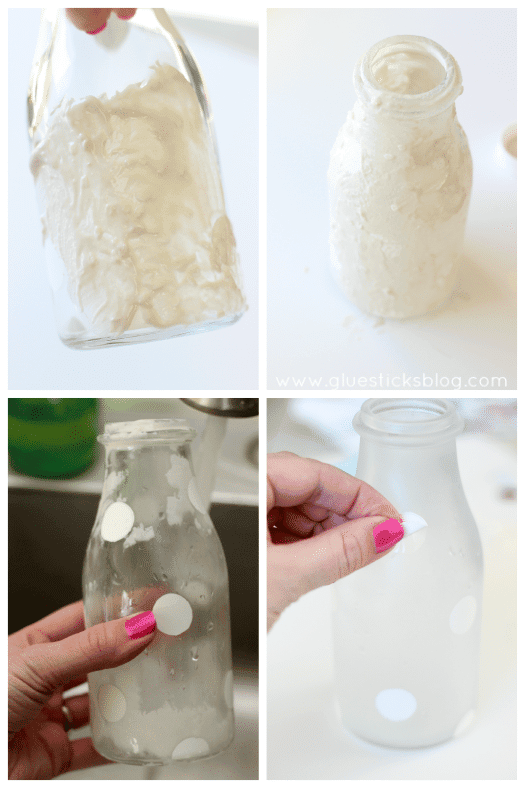
Diy Frosting With Glue And Baking Soda
This homemade method uses simple household items. Mix equal parts white glue and baking soda. Stir until the mixture is smooth. Use a brush to apply the paste onto the jar. Spread it evenly for a uniform frost. Let it dry for several hours or overnight. The texture becomes rough and frosted once fully dry. This technique is budget-friendly and fun for kids’ projects. It also allows creative textures and patterns.
Step-by-step Frosting Process
Frosting a mason jar adds charm to your home decor. It’s a simple craft that creates beautiful, frosted glass effects. Follow these steps to achieve a perfect frosted look on your mason jars.
Applying The Frosting Material
Choose a frost spray or etching cream. Shake the spray can thoroughly before use. For etching cream, use a brush for even application. Ensure the jar surface is clean and dry. Hold the spray can 6 inches from the jar. Apply a light, even coat of spray. For etching cream, spread it evenly with a brush. Cover the entire surface you want frosted.
Drying And Setting Times
Let the jar sit undisturbed after application. Follow the specific drying times on product instructions. Frost spray usually dries within 10 minutes. Etching cream may need 5 to 10 minutes. Ensure the jar is completely dry before handling. This prevents smudges and ensures a smooth finish. If needed, apply a second coat for deeper frost.
Adding Patterns Or Designs
Use painter's tape or stickers to create designs. Apply the tape in desired patterns before frosting. Stencils can also be used for intricate designs. After the frosting dries, carefully remove the tape or stencils. This reveals clear patterns against the frosted background. Be gentle to avoid scratching the frost finish.
Enhancing Your Frosted Jar
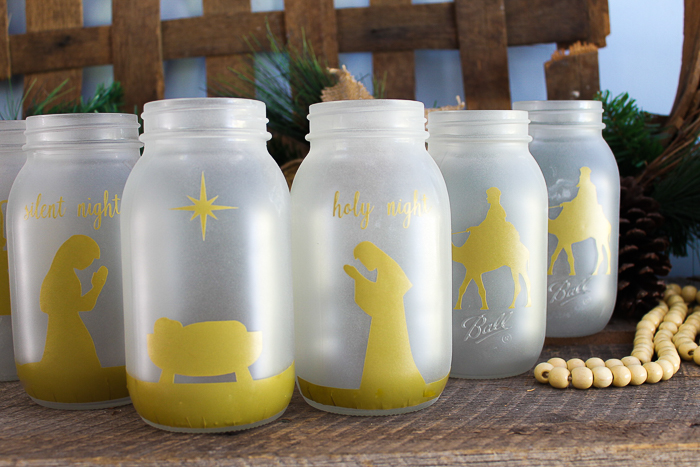
Once your mason jar is frosted, you have a great base to get creative and personalize it. Enhancing your frosted jar can turn a simple project into a charming decoration or a functional piece for your home. Think about what suits your style and the purpose you want your jar to serve.
Adding Decorative Elements
Adding decorative touches can make your frosted jar truly unique. You might try wrapping twine, ribbon, or lace around the neck for a rustic or elegant look. Stick-on gems, decals, or hand-painted designs can add personality without overwhelming the frosted finish.
Consider using stencils to create patterns with acrylic paint or permanent markers. These small details catch the eye and elevate the jar beyond a plain frosted surface. What simple decoration would reflect your personality or the theme of your space?
Lighting Options
Frosted jars diffuse light beautifully, making them perfect for soft illumination. Place a tea light candle or a small LED light inside to create a cozy glow. Battery-operated fairy lights are another excellent choice, filling the jar with tiny points of warm light.
This lighting option works well for indoor ambiance or outdoor gatherings. You can even hang your lit jars with wire handles to add a magical touch to your evening space. How might a warm glow from a frosted jar change the mood in your room?
Using As Planters Or Vases
Your frosted jar can become a stylish planter or vase. Fill it with soil and small succulents or herbs for a low-maintenance indoor garden. Alternatively, use it as a vase for fresh or dried flowers, allowing the frosted glass to soften the stems’ look.
Adding stones or colored sand at the bottom can create visual interest and help with drainage. This dual-purpose use makes your frosted jar both beautiful and practical. What plants or flowers do you think would look best in your frosted jar?
Credit: gluesticksblog.com
Tips For Best Results
Getting a perfectly frosted mason jar is satisfying, but it takes more than just slapping on some spray or paint. Small details can make a big difference in how your frosted finish looks and lasts. Let’s look at tips that help you avoid frustration, keep your jars looking great, and stay safe throughout the process.
Avoiding Common Mistakes
One common mistake is not cleaning the jar thoroughly before frosting. Any dirt or oil will cause uneven frosting and peeling later. Use rubbing alcohol to wipe the surface clean and dry it completely.
Another trap is spraying too close or too heavy. This causes drips and blotches that ruin the smooth finish. Hold the spray about 8-12 inches away and apply several light coats instead of one thick layer.
Also, don’t rush the drying time. Touching the jar before it’s fully dry can smudge or ruin the frosted effect. Patience here pays off with a flawless finish.
Maintaining Frosted Finish
After frosting, you’ll want to keep your jars looking fresh. Avoid washing them in hot water or putting them in the dishwasher, as heat can soften or strip the frosted layer.
Use a damp cloth to gently clean the surface instead of scrubbing. Storing jars in a cool, dry place protects the finish from moisture damage.
If you notice any scratches or dull spots, lightly sanding the area with very fine grit sandpaper and reapplying the frosting spray can bring back the original look.
Safety Precautions
Frosting sprays often contain chemicals that can irritate skin and lungs. Always work in a well-ventilated area or outside to avoid inhaling fumes.
Wear gloves to protect your hands and consider safety glasses to prevent any spray from reaching your eyes. Keep the spray away from open flames since it’s usually flammable.
Have you ever ignored safety tips because the project seemed small? That small oversight can lead to bigger problems. Taking a few extra minutes to protect yourself ensures your crafting stays fun and injury-free.
Credit: www.thecountrychiccottage.net
Frequently Asked Questions
What Materials Do I Need To Frost A Mason Jar?
You need glass frosting spray, painter’s tape, rubbing alcohol, and a clean cloth. These materials help create a smooth frosted finish on the jar. Painter’s tape allows for design masking. Rubbing alcohol cleans the glass for better adhesion.
How Long Does Frosting A Mason Jar Take?
The frosting process typically takes about 15 to 30 minutes. This includes cleaning, taping, spraying, and drying time. Drying usually requires at least 10 minutes to ensure a durable frosted look.
Can I Use Regular Paint To Frost A Mason Jar?
Regular paint is not ideal for frosting jars. Glass frosting spray or etching cream gives a better translucent, frosted appearance. Regular paint may peel or not create the desired semi-transparent effect.
How Do I Create Patterns While Frosting Mason Jars?
Use painter’s tape or stencils to mask areas before spraying. This technique allows you to create clean lines or shapes. Remove the tape carefully once the spray dries to reveal your pattern.
Conclusion
Frosting a mason jar is simple and fun. You just need a few tools and patience. Try different methods to find what works best for you. These jars can add charm to your home or gifts. Enjoy the process and show off your creativity.
Small steps lead to great results. Now, you can make your own frosted jars with ease. Give it a try today!