Want to make your Thanksgiving table look extra special this year? Folding a cloth napkin into a turkey shape is a simple trick that will impress your guests and add a festive touch to your meal.
You don’t need fancy skills or expensive tools—just a few easy steps and your napkins will transform into charming little turkeys. Keep reading, and you’ll learn how to do it quickly and perfectly every time. Your guests will love the effort, and you’ll enjoy the compliments!
Credit: jewishjournal.com
Materials Needed
Folding a cloth napkin into a turkey shape is a fun way to decorate your table. Having the right materials makes the process smooth and enjoyable. Gather everything before you start to avoid interruptions.
Cloth Napkin
Choose a square cloth napkin for best results. Cotton or linen works well because they hold folds nicely. Pick a color that fits your table theme, like brown, orange, or red.
Flat Surface
Use a clean, flat surface to fold your napkin. A table or countertop works perfectly. This gives you space to make neat folds.
Optional: Napkin Rings Or Pins
Napkin rings or small pins can help keep your turkey shape in place. They add stability, especially if the napkin is thin or slippery.
Iron (optional)
An iron can help remove wrinkles before folding. Smooth napkins fold better and look sharper. Use a low heat setting to avoid damage.
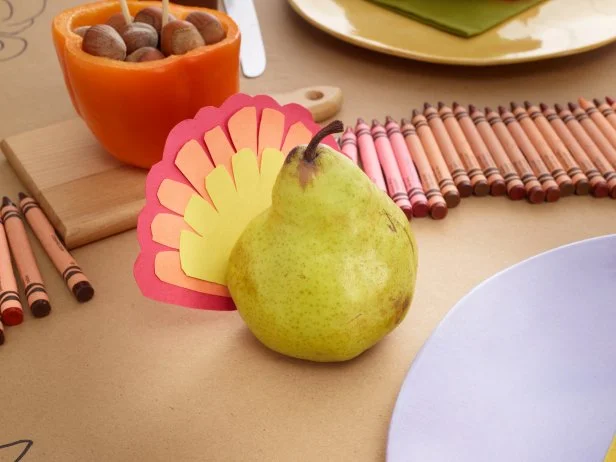
Credit: www.foodnetwork.com
Choosing The Right Napkin
Choosing the right napkin sets the foundation for a stunning turkey fold. The material, size, and color all affect how well your turkey shape will hold and stand out on your table. Picking the perfect napkin makes your effort shine and impresses your guests effortlessly.
Material Matters
Cotton and linen napkins work best for folding a turkey. They hold creases sharply, which helps your turkey keep its shape throughout the meal. Avoid slippery fabrics like polyester that won’t stay folded and can look messy.
Think about the texture too. A slightly stiff napkin is easier to manipulate than a very soft one. If you’ve ever tried folding a napkin that just won’t stay put, you know how frustrating it can be.
Size Counts
Napkins that are at least 18 inches square give you enough fabric to create detailed folds. Smaller napkins can make the turkey look cramped and lose definition. Larger napkins might be harder to handle but allow for a more dramatic turkey shape.
Check your napkin’s size before you start folding. If your napkin is too small, the turkey might look like a tiny blob rather than a crisp, recognizable figure.
Color And Pattern Selection
Choose colors that match your table setting and the holiday vibe. Earth tones like brown, orange, or deep reds highlight the turkey theme nicely. Solid colors work best to show off your folds clearly.
Busy patterns can distract from the turkey shape. If you love patterned napkins, pick subtle prints that won’t overshadow your design. Have you ever seen a turkey fold lost in a swirl of colors? It’s a missed opportunity to wow your guests.
Preparing The Napkin
Preparing the napkin is the first step in folding a cloth napkin into a turkey. The napkin needs to be clean and well-pressed for the best results. A crisp napkin holds its shape better and looks more elegant on the table.
Choose a square napkin made of cotton or linen. These materials are easier to fold and keep the form longer. Avoid thin or slippery fabrics that may not stand up well.
Choosing The Right Napkin Size
Select a napkin that is at least 18 inches square. Larger napkins create a fuller turkey shape. Smaller napkins may look too flat or small on the table.
Ironing The Napkin
- Set the iron to the fabric's recommended temperature.
- Use steam to remove all wrinkles.
- Make sure the napkin is completely flat before folding.
Finding A Clean, Flat Surface
Prepare a clean table or countertop for folding. A smooth surface helps keep edges sharp. Avoid textured or cluttered spaces that can interfere with folding.
Folding The Base
Folding the base of your cloth napkin is a crucial step in creating a turkey shape that stands tall and looks festive on your table. This part gives your turkey a sturdy foundation, so it won’t flop over during your dinner. Getting the base right sets the tone for the rest of the fold, making the whole process smoother and more enjoyable.
Choose The Right Napkin Size And Fabric
Start with a square cloth napkin about 18 to 20 inches on each side. Thicker fabrics like cotton or linen hold shapes better than thin ones. If your napkin is too flimsy, the base won’t support the rest of the folds well.
Create A Crisp Center Fold
Lay your napkin flat and fold it in half diagonally to form a triangle. Smooth out any wrinkles to keep the edges sharp. This crisp fold helps your turkey’s body stay neat and gives a clean outline for the next steps.
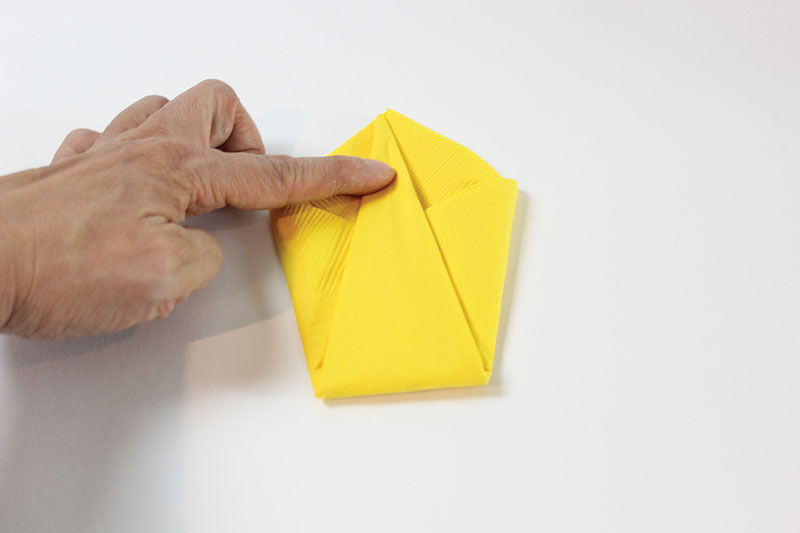
Fold The Corners Toward The Center
- Take each corner of the triangle and fold it inward toward the middle point.
- This creates a smaller square shape with layered edges.
- Press down firmly to make sure the folds stay in place.
This step builds the thickness needed for the base to support the turkey's body and tail feathers later on.
Secure The Base For Stability
Once you have the smaller square, flip it over carefully. Fold the bottom edge up slightly to create a flat bottom. This little adjustment stops the turkey from tipping forward.
Have you noticed how a small fold can change the entire structure's balance? That’s the secret to making your turkey napkin look professional and stay upright throughout your meal.
Creating The Turkey Body
Fold the cloth napkin carefully to form the turkey’s body shape. Pinch and tuck the fabric to create a neat, rounded base. This simple fold brings charm to your holiday table setting.
Creating the turkey body from a cloth napkin can be a delightful way to add a touch of whimsy to your dining table. This task might seem a bit tricky at first, but once you get the hang of it, you’ll find it’s quite enjoyable. Imagine the surprise and joy on your guests' faces when they see a charming turkey napkin at their place setting!
Choose The Right Napkin
Selecting the right napkin is essential for a successful turkey fold. Opt for a square, cloth napkin, ideally made of a material that holds its shape well, like cotton or linen. A napkin with a festive color or pattern can add to the turkey's charm, making your table setting even more inviting.
Initial Folds
Start by laying the napkin flat in front of you. Fold it in half diagonally to create a triangle. This initial fold serves as the foundation for the turkey’s body, so ensure it’s neat and crisp.
Forming The Base
With the long edge facing you, fold the bottom point up towards the top, stopping about halfway. This fold begins to shape the turkey’s body, giving it a sturdy base to stand on. Keep the folds tight to maintain the structure.
Creating The Wings
To form the wings, fold the left and right corners towards the center, letting them overlap slightly. These folds will give your napkin turkey the appearance of spread wings, adding a touch of realism to your creation. Adjust as needed to ensure symmetry.
Final Adjustments
Lastly, stand your turkey upright by adjusting the base folds until it balances. Fine-tune the wings and body to perfect the shape. Take a moment to admire your handiwork and enjoy the sense of accomplishment from creating something both practical and decorative. With these steps, you're not just folding a napkin; you're crafting a conversation piece. Who knew a simple napkin could spark such delight?
Shaping The Tail Feathers
Shaping the tail feathers is a key part of folding a cloth napkin into a turkey. It creates the colorful fan that makes the turkey look festive and full. This step adds charm and detail to your table setting.
To shape the tail feathers, start by focusing on the napkin’s corners. These will become the feathers that spread out behind the turkey’s body. Careful folding here gives the napkin a neat and attractive look.
Fanning Out The Napkin Corners
Lay the napkin flat with the corners pointing up, down, left, and right. Fold each corner toward the center, but leave a small gap between folds. This creates layers that look like feathers.
Creating Even Feather Layers
Adjust each folded corner so the edges line up evenly. Press down gently to keep the folds sharp. Even layers make the tail feathers look tidy and balanced.
Securing The Tail Feather Shape
- Hold the center of the folded napkin firmly.
- Use a small napkin ring or ribbon to wrap around the base.
- This keeps the feathers in place and supports the turkey shape.
Forming The Head And Beak
Forming the head and beak is a key part of folding a cloth napkin into a turkey. This step brings the turkey to life and gives it character. The head and beak give the napkin turkey its charming and recognizable look.
Start by focusing on the top corner of the napkin. This area will shape the head. You want to create a pointed shape that resembles a turkey’s head.
Folding The Top Corner To Create The Head
- Take the top corner of the napkin and fold it down diagonally.
- Make a small triangle by folding the corner towards the center.
- Press the fold firmly to hold the shape.
- Adjust the size to fit the turkey’s body proportion.
Shaping The Beak
- From the triangle head, fold a smaller tip outward to form the beak.
- Make a sharp fold to create a pointy beak shape.
- Ensure the beak sticks out slightly to be visible.
- Flatten and sharpen the folds for a neat appearance.
Securing The Head And Beak
- Check the head and beak folds for stability.
- Use a small pin or tuck the folds tightly to keep them in place.
- Adjust angles so the head faces forward or slightly sideways.
- Make sure the beak stands out clearly from the head.

Credit: www.aol.com
Final Touches
Perfect the turkey shape by adjusting the napkin’s folds and smoothing edges. Tuck in any loose fabric for a neat look. Small details make your cloth napkin turkey stand out beautifully.
The final touches of your cloth napkin turkey can make all the difference. They bring charm and personality to your table setting. A well-folded turkey napkin can impress guests and enhance your decor. Here’s how to add those perfect finishing details.
Adjusting The Feathers
Fluff the napkin to mimic real turkey feathers. Gently pull the edges for a fuller look. Ensure the layers are visible and symmetrical. This creates a realistic and appealing turkey shape.
Perfecting The Head
Tweak the napkin's top to form a neat turkey head. Fold it slightly to resemble a beak. Adjust until you achieve a clear head shape. A well-defined head adds character to your napkin turkey.
Creating A Stable Base
Ensure the base is flat and balanced. This prevents the turkey from toppling over. Press down gently to stabilize the napkin. A stable base keeps your turkey standing proudly.
Adding A Decorative Touch
Place a small seasonal item near the turkey. Use a mini pumpkin or a sprig of rosemary. These elements enhance your table’s festive theme. They complement the turkey without overshadowing it.
Final Inspection
Look over your turkey from all angles. Check for any uneven folds or loose ends. Make small adjustments for a polished appearance. A final inspection ensures perfection before guests arrive.
Tips For Displaying Your Turkey Napkin
Displaying your turkey napkin is just as important as folding it neatly. A well-placed turkey napkin adds charm and a festive touch to your table setting. It can spark conversation and bring smiles, making your gathering more memorable.
Choose A Visible Spot On The Table
Place your turkey napkin where guests will notice it immediately. The edge of each plate or the center of the dinner plate works well. Avoid hiding it under other items, so your effort shines.
Have you ever seen a beautiful napkin tucked away and missed its charm? Don’t let your turkey napkin be one of those unnoticed details.
Pair The Napkin With Complementary Tableware
Match your turkey napkin with plates, glasses, and cutlery that highlight its colors and shape. Warm autumn tones or rustic dinnerware make the turkey design pop. This enhances the overall look without overwhelming the table.
Think about your color scheme before setting the table. Does your turkey napkin stand out or blend in too much?
Add Simple Decorative Accents
Enhance the turkey napkin with small items like mini pumpkins, cinnamon sticks, or fresh herbs. These little touches boost the fall vibe without cluttering the space. Keep decorations low so they don’t hide the turkey shape.
Try placing a sprig of rosemary next to the napkin—it adds color and a pleasant scent, creating a multi-sensory experience for your guests.
Ensure Easy Access For Guests
Arrange your turkey napkin so guests can easily pick it up and unfold it. If it’s too tightly folded or tucked in, people might struggle or avoid using it. Comfort and functionality are key.
Ask yourself: does your napkin invite guests to use it, or does it just serve as decoration?
Frequently Asked Questions
How Do You Start Folding A Cloth Napkin Into A Turkey?
Begin by laying the napkin flat and folding it diagonally into a triangle. This creates the base shape to form the turkey’s body and feathers.
What Materials Are Best For Turkey Napkin Folding?
Use a crisp, square cloth napkin. Cotton or linen works best for easy folding and a neat, sturdy turkey shape.
How Long Does It Take To Fold A Turkey Napkin?
It usually takes 3 to 5 minutes. With practice, you can fold a turkey napkin quickly and impress your guests.
Can Kids Easily Fold A Cloth Napkin Turkey?
Yes, kids can learn with simple instructions. It’s a fun, creative activity that improves their fine motor skills.
Conclusion
Folding a cloth napkin into a turkey adds fun to your table. It makes your meal feel special and warm. This simple craft brings smiles and starts good talks. Practice a few times to get it just right. Soon, your guests will notice and enjoy the small touch.
Try it for holidays or any dinner night. A little effort creates a big, happy difference. Give it a go and watch your table shine!