You’ve spent time crafting your cutting board, but the job isn’t done yet. How you finish it can make all the difference between a board that lasts for years and one that quickly wears out or damages your knives.
If you want your cutting board to look great, feel smooth, and stay safe for food prep, this guide is exactly what you need. Keep reading, and you’ll discover simple steps and expert tips to finish your cutting board perfectly every time.
Your kitchen—and your knives—will thank you.
Choosing The Right Sandpaper
Choosing the right sandpaper is crucial for finishing your cutting board smoothly and safely. The texture and quality of your sanding can make a big difference in how your board looks and feels. Picking the right grit ensures you remove rough spots without damaging the wood or leaving scratches.
Grit Levels Explained
Sandpaper grit refers to the number of abrasive particles per square inch. Lower numbers mean rougher grit, which removes material faster but leaves scratches. Higher numbers produce a finer finish but take more time.
Start with a coarse grit like 80 or 100 to even out any rough patches or saw marks. Then move to a medium grit around 150 to 180 to smooth the surface further. Finish with a fine grit between 220 and 320 to get a silky finish that feels great to the touch.
Remember, using too fine a grit at the start can waste time and leave uneven surfaces. Too coarse a grit at the end can leave visible scratches. Getting the sequence right helps your board look professional and last longer.
When To Change Grit
Change your sandpaper grit as soon as the surface feels consistently smooth at the current level. If you keep sanding with the same grit, you risk uneven texture and longer sanding time.
Check your work by running your hand over the board after each pass. If the roughness is gone but scratches remain, it’s time to switch to a finer grit. If you see deep scratches or wood fibers still standing up, stick with the coarser grit a bit longer.
Don’t forget to replace sandpaper when it clogs with dust or wears out. Using old sandpaper can cause uneven sanding and frustration. Have a few grit levels ready, so you can switch seamlessly and keep your workflow smooth.

Credit: www.amazon.ca
Sanding Techniques
Sanding is a crucial step to finish your cutting board smoothly and safely. It removes rough spots and prepares the surface for sealing. Choosing the right sanding technique impacts both the look and feel of your board.
Hand Sanding Vs. Power Sanding
Hand sanding gives you control and precision, especially around edges and corners. It’s slower but lets you feel the surface texture, which helps avoid over-sanding. If you want a personal touch and minimal risk of damage, hand sanding is your best friend.
Power sanding speeds up the process and is great for large, flat areas. However, it’s easy to remove too much wood or create uneven spots if you’re not careful. Have you ever noticed how quickly a power sander can change the shape of your board? That’s why it’s important to keep the sander moving constantly and avoid focusing on one spot for too long.
Sanding With The Grain
Always sand in the direction of the wood grain. Sanding against it can cause scratches that become hard to remove later. I once ignored this rule and ended up spending hours fixing deep scratches that ruined my board’s smooth finish.
Following the grain helps the sandpaper glide smoothly and preserves the wood’s natural beauty. As you move through finer grits, you’ll notice the surface becoming silkier and more refined. Try running your hand over the board after each sanding step—can you feel the difference?
Cleaning The Surface
Cleaning the surface of your cutting board before finishing is a crucial step that affects the final look and durability. Dirt, dust, and tiny wood particles left behind can ruin a smooth finish and make oil or varnish less effective. Taking the time to properly clean ensures your cutting board will not only look great but last longer.
Removing Dust And Debris
After sanding, your cutting board will be covered in fine dust and small wood chips. Use a soft brush or a clean, dry cloth to gently sweep away this debris. Be thorough—dust trapped in the grain or corners can create bumps and uneven textures.
If you want an even cleaner surface, try wiping the board with a slightly damp cloth. This helps lift stubborn dust particles without soaking the wood. Just make sure to let the board dry completely before moving on.
Preparing For Oil Or Finish
Once the surface is clean and dry, consider giving your cutting board a final wipe with a tack cloth. This sticky cloth picks up any remaining microscopic dust that might interfere with the finish.
Think about the type of finish you will use—mineral oil, beeswax, or a specialized cutting board conditioner. Each finish may require a slightly different preparation, such as warming the oil to help it soak in better.
Have you ever rushed this step and ended up with a blotchy or sticky surface? Taking a few extra minutes now can save you frustration later and give your board a professional-quality finish.

Credit: food52.com
Selecting The Best Finish
Choosing the right finish protects your cutting board and keeps it safe for food. Natural oils and waxes work well and are easy to apply. Avoid finishes that contain harmful chemicals to keep your board healthy and durable.
Selecting the best finish for your cutting board can be a game-changer. The right finish enhances the board's beauty and extends its life. It also ensures safety, especially for food preparation. A good finish protects the wood and makes it easy to clean. Let's explore some popular finishing options.
Food-safe Oils
Food-safe oils are a popular choice for finishing cutting boards. They penetrate the wood and enhance its natural color. Mineral oil is a common option due to its safety and availability. It is odorless and tasteless, making it ideal for food contact surfaces. Apply it generously, allowing the wood to absorb the oil. Reapply regularly to maintain the board's condition.
Wax And Sealants
Wax and sealants provide a protective layer on your cutting board. They are often used after applying oil. Beeswax is a natural and safe choice. It creates a barrier that prevents moisture. Sealants can add an extra layer of protection. They keep the wood from drying out. Mix wax with mineral oil for a smooth finish. Apply in circular motions and buff for a shiny surface.
Applying Oil And Finish
Applying oil and finish protects your cutting board and enhances its beauty. It keeps the wood from drying out and cracking. Proper oil and finish make the board safe for food use and easy to clean. Using the right technique helps the oil soak in deeply, improving durability.
Proper Application Techniques
Start with a clean, dry cutting board. Use a soft cloth or brush to apply the oil evenly. Rub the oil gently in circular motions. Cover all surfaces, including edges and corners. Let the oil soak for at least 20 minutes. Wipe off any extra oil with a clean cloth to avoid sticky spots. For best results, use food-safe oils like mineral oil or walnut oil. Avoid vegetable oils that can go rancid.
Timing And Reapplication
Allow the first coat of oil to absorb fully before applying another. Usually, two or three coats are enough for good protection. Let the board rest overnight after the final coat. Reapply oil regularly to keep the wood healthy. A simple rule: oil your board once a month or when it looks dry. Frequent oiling extends the life of your cutting board. Store the board in a dry place to help the finish last longer.
Maintaining Your Cutting Board
Maintaining your cutting board is key to keeping it safe, beautiful, and long-lasting. Without proper care, even the best-finished board can crack, warp, or harbor bacteria. But with a little attention, you can enjoy a smooth, clean surface that’s perfect for every meal prep.
Regular Cleaning Tips
Cleaning your cutting board properly after each use protects the wood and prevents unwanted odors. Avoid soaking it in water or putting it in the dishwasher, as this can cause the wood to swell and split.
- Wipe the board with a damp cloth and mild dish soap right after use.
- Rinse quickly under warm water, then dry immediately with a clean towel.
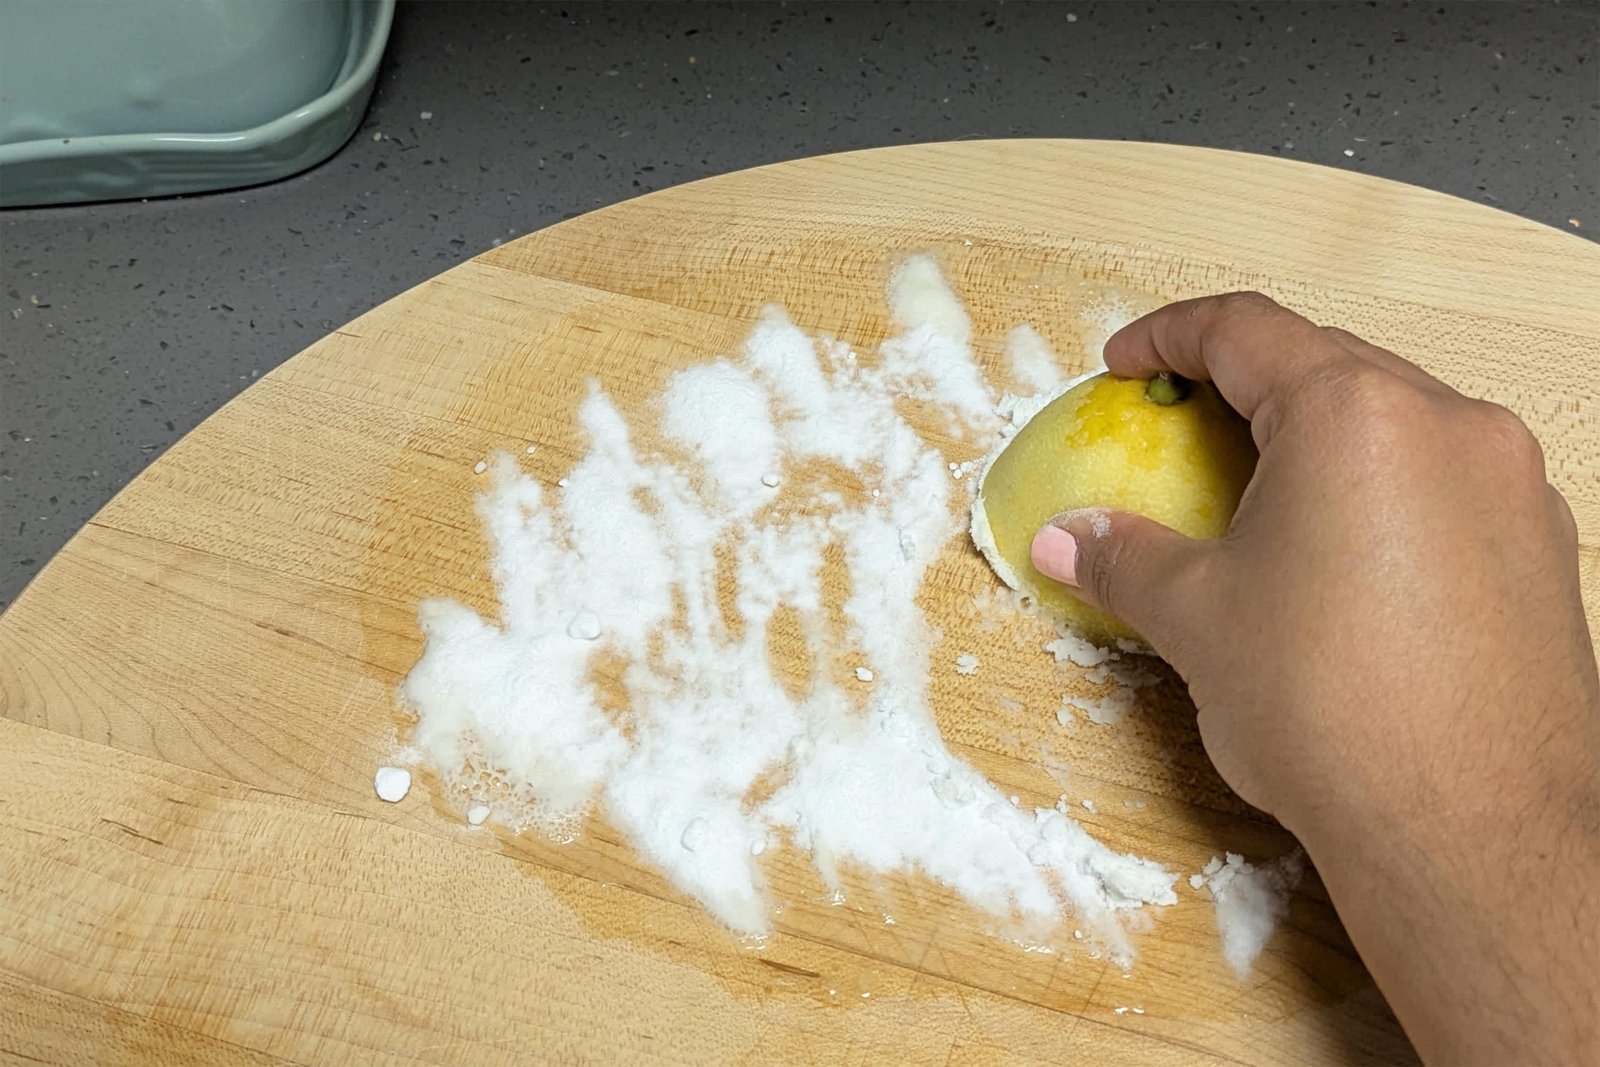
- Sprinkle coarse salt and rub it with half a lemon to remove stains and smells naturally.
Have you noticed how some boards stay fresh while others get stained and smelly? The difference is in how you clean and dry them. Make drying a priority—air drying standing upright works best to avoid moisture buildup.
When To Refinish
Your cutting board needs refinishing when the surface becomes rough, dull, or starts to absorb moisture. If water beads no longer form on the surface, it’s a clear sign the protective finish has worn off.
Look for deep knife marks or cracks that collect food particles or bacteria. These areas can be sanded down to restore a smooth surface before applying a fresh coat of finish.
Ask yourself: does your board still feel smooth and look vibrant? If not, it’s time to sand it lightly with fine-grit sandpaper and apply a new layer of food-safe mineral oil or board cream. This simple step can bring your cutting board back to life and extend its usefulness for years.
Credit: rootstotable.com
Frequently Asked Questions
How Do You Sand A Cutting Board Properly?
Start with coarse grit sandpaper and gradually use finer grits. Sand evenly to remove rough spots and scratches. Finish with a smooth surface to prevent food particles from sticking. Always sand along the wood grain for best results.
What Is The Best Finish For A Cutting Board?
Food-safe mineral oil is the best finish for cutting boards. It protects the wood from moisture and prevents cracking. Apply multiple coats and let the oil soak in overnight. Avoid finishes with harmful chemicals to ensure food safety.
How Often Should I Reapply Cutting Board Oil?
Reapply cutting board oil every 1 to 2 months, or when the board looks dry. Regular oiling maintains moisture, prevents warping, and extends the board’s life. Clean and dry the board before applying oil for optimal absorption.
Can I Use Beeswax To Finish A Cutting Board?
Yes, beeswax is excellent for finishing cutting boards. It provides a protective, water-resistant layer and enhances the wood’s natural shine. Often, beeswax is combined with mineral oil for better durability and food safety.
Conclusion
Finishing a cutting board protects it and keeps it looking good. Use safe oils like mineral oil for best results. Apply the finish regularly to avoid drying and cracking. Sand the surface smooth before each coat for a nice feel.
Take your time and work carefully to get the best finish. A well-finished board lasts longer and stays safe for food. Keep these simple steps in mind for a great cutting board finish. Your kitchen will thank you.