Cooking a whole chicken in a Dutch oven is easier than you might think. Imagine juicy, tender meat with crispy skin, all made in one pot.
You don’t need fancy skills or complicated tools to achieve this. Whether you’re new to cooking or want a reliable way to make a tasty meal, this method will save you time and impress your family. Keep reading to discover simple steps and tips that will make your next chicken dinner unforgettable.
Credit: www.sugarmaplefarmhouse.com
Choosing The Right Chicken
Choosing the right chicken can make or break your Dutch oven cooking experience. The quality and type of chicken affect not only the flavor but also the cooking time and texture. Knowing what to look for helps you get the best results every time.
Fresh Vs Frozen Chicken
Fresh chicken tends to have a juicier texture and richer flavor. It cooks more evenly, which is ideal for a whole chicken in a Dutch oven.
Frozen chicken is convenient and often more affordable. However, it needs to be fully thawed before cooking, or you risk uneven cooking and dryness.
Think about your schedule and how much prep time you have. Would you prefer to shop for fresh chicken the day you cook, or keep frozen chicken on hand for last-minute meals?
Size And Weight Considerations
The size of your chicken should match the size of your Dutch oven. A chicken that’s too big won’t cook evenly, while one that’s too small might dry out.
A chicken weighing between 3 to 5 pounds usually fits well in a standard 5 to 7-quart Dutch oven. This size cooks thoroughly without crowding the pot.
Ask yourself: How many people are you feeding? If you need leftovers or want to feed a crowd, plan accordingly and adjust the chicken size.
Organic And Free-range Options
Organic and free-range chickens often have better flavor because of their diet and living conditions. They tend to be leaner, which can affect cooking time and moisture.
These options cost more but can be worth it if you want a healthier and tastier meal. Keep in mind that organic chickens might require a slightly longer cook to break down the muscle fibers.
Would you rather invest in quality ingredients for a memorable meal or save money with conventional options? Your answer will guide your choice here.

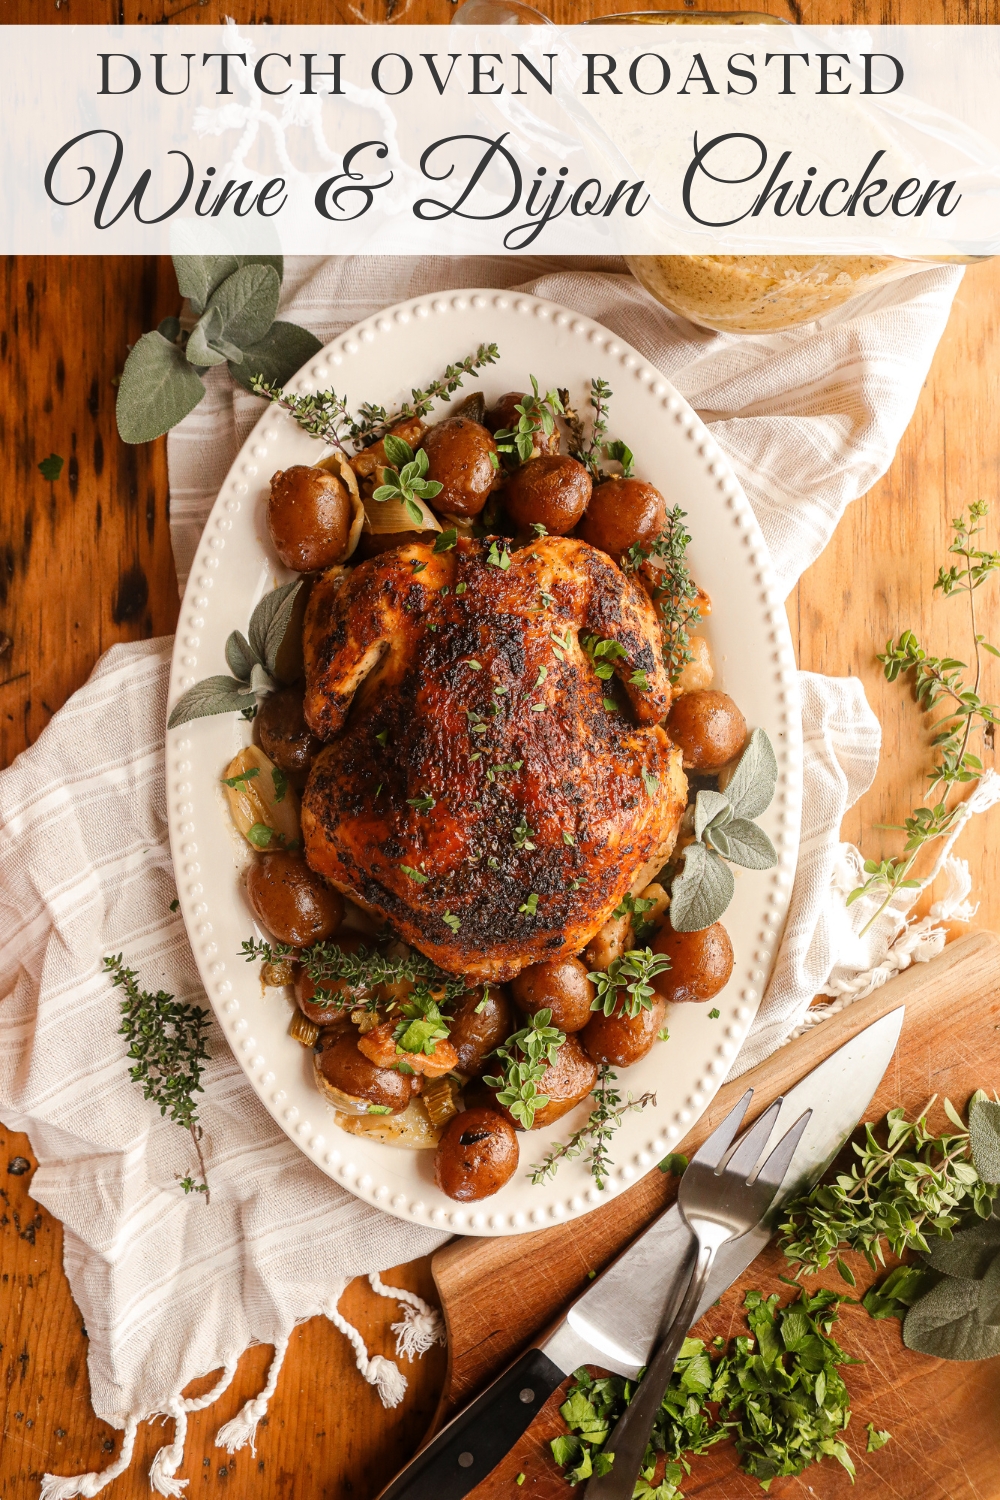
Credit: www.theseasonedmom.com
Selecting Your Dutch Oven
Selecting the right Dutch oven is key to cooking a whole chicken perfectly. The choice affects cooking time, flavor, and ease of use. Understanding different features helps find the best fit for your kitchen. This guide covers materials, size, and seasoning options. Each factor plays a role in your cooking success.
Material Types
Dutch ovens come in various materials. Cast iron holds heat evenly and lasts long. It’s great for slow cooking and roasting. Enameled cast iron has a smooth coating. It resists rust and needs less maintenance. Aluminum models are lightweight but may not hold heat well. Choose material based on heat retention and care needs.
Size And Capacity
The Dutch oven’s size must fit the whole chicken comfortably. A 5 to 7-quart pot works best for most whole chickens. Too small a pot crowds the chicken and slows cooking. Too large a pot wastes heat and energy. Consider the size of your stove and storage space too.
Seasoned Vs Enameled
Seasoned Dutch ovens have a natural non-stick layer from oil baking. They improve with use but need regular seasoning. Enameled Dutch ovens have a glass-like coating inside. They are easy to clean and don’t need seasoning. Both types cook well, so choose based on care and cleaning preference.
Preparing The Chicken
Preparing the chicken is a vital step for a delicious Dutch oven meal. Proper preparation ensures even cooking and rich flavors. It starts with cleaning, followed by seasoning and optional stuffing. Each step helps to enhance taste and texture.
Cleaning And Patting Dry
Rinse the chicken under cold water. Remove any leftover feathers or giblets inside the cavity. Pat the chicken dry with paper towels. Dry skin helps to achieve a crispy, golden finish.
Seasoning Techniques
Generously season the chicken inside and out. Use salt and pepper for basic flavor. Add garlic powder, paprika, or herbs for extra taste. Rub the spices under the skin to reach the meat. This step boosts flavor in every bite.
Stuffing Options
Stuffing adds aroma and moisture inside the chicken. Use simple ingredients like lemon halves, garlic cloves, and fresh herbs. Avoid overfilling to allow heat circulation. Choose ingredients that complement your seasoning for balanced flavor.
Setting Up The Dutch Oven
Begin by preheating your Dutch oven for even cooking. Place the whole chicken inside, breast side up, for juicy results. Add vegetables and seasonings for extra flavor, then cover and cook until the chicken is tender and fully cooked.
Setting up the Dutch oven is essential for cooking a whole chicken. Proper preparation ensures even cooking and enhances flavors. Follow these simple steps for a delicious meal.
Preheating The Pot
Place the Dutch oven on your stovetop. Set the heat to medium. Allow the pot to warm for about 5 minutes. This step is crucial for even cooking. A hot pot sears the chicken skin, locking in juices. You can test the heat by sprinkling water inside. If it sizzles, the pot is ready.
Adding Aromatics And Vegetables
Select your favorite aromatics and vegetables. Common choices are onions, garlic, and carrots. Chop them into large chunks. Toss them into the Dutch oven. They will infuse the chicken with rich flavors. The vegetables also act as a rack, lifting the chicken. This prevents sticking and promotes even cooking.
Positioning The Chicken
Pat the chicken dry with paper towels. Season the chicken generously with salt and pepper. Place it breast-side up on top of the vegetables. Ensure the chicken fits snugly in the pot. This setup allows for even roasting. The juices from the chicken will flavor the vegetables below. Cover with the lid to maintain moisture. You're now ready to start cooking.
Cooking Process
Cooking a whole chicken in a Dutch oven is a rewarding experience that fills your kitchen with rich aromas and guarantees tender, flavorful meat. The cooking process is straightforward but requires attention to temperature, timing, and how you cover and check the chicken. Understanding these elements helps you avoid common pitfalls like drying out the chicken or undercooking it.
Oven Temperature And Timing
Set your oven temperature between 325°F and 350°F (163°C - 177°C) for even cooking. This range allows the chicken to cook gently, keeping the meat juicy while creating a golden-brown skin.
Timing depends on the chicken's weight. A good rule is about 20 minutes per pound. For example, a 4-pound chicken will take roughly 1 hour and 20 minutes.
Starting with a hotter oven can help crisp the skin, but lowering it soon after prevents the meat from drying out. Have you noticed how a slow roast changes the texture compared to high heat?
Covering And Monitoring
Cover the Dutch oven with its lid to trap moisture and heat, which steams the chicken gently. This keeps the meat tender and infuses flavors from any herbs or vegetables you add.
Check the chicken occasionally but avoid lifting the lid too often. Each peek lets heat escape, increasing cooking time and drying the meat.
If you want crispier skin, remove the lid during the last 15-20 minutes of cooking. This small step can make a big difference in texture and flavor.
Checking For Doneness
Use a meat thermometer to test the thickest part of the chicken, usually the thigh. The internal temperature should reach 165°F (74°C) to be safe and perfectly cooked.
If you don’t have a thermometer, pierce the thigh and watch the juices. Clear juices mean the chicken is done; pink or red juices indicate more cooking is needed.
Remember, resting the chicken for 10-15 minutes after cooking lets the juices redistribute. Have you ever cut into a chicken right away and noticed the juices running out? Waiting makes every bite juicier.
Serving Tips
Serving a whole chicken cooked in a Dutch oven is more than just plating the dish. How you rest, carve, and pair the chicken can elevate the entire meal experience. These simple tips will help you make the most out of your perfectly cooked bird.
Resting The Chicken
Let your chicken rest for at least 10 to 15 minutes after taking it out of the Dutch oven. This pause allows the juices to redistribute, making every bite juicy and tender.
Cutting into the chicken too soon can cause those flavorful juices to run out, leaving the meat dry. Patience here pays off with a tastier meal.
Carving Techniques
Use a sharp knife to carve the chicken cleanly. Start by removing the legs and thighs, then slice the breast meat against the grain for maximum tenderness.
Carving neatly not only makes the chicken look appealing but also makes it easier for your guests to serve themselves. Have you tried slicing the breast in thin slices? It can make the meat go further, especially if you’re feeding a crowd.
Pairing With Sides
Think about sides that complement the rich flavor of your Dutch oven chicken. Roasted vegetables, creamy mashed potatoes, or a fresh salad balance the meal well.
Don’t overlook simple accompaniments like crusty bread or a tangy cranberry sauce to add texture and brightness. What sides do you find bring out the best in your roast chicken?
Troubleshooting Common Issues
Cooking a whole chicken in a Dutch oven is rewarding, but sometimes things don’t go as planned. You might face dry meat, undercooked spots, or bland flavors. Don’t let these common issues ruin your meal—simple fixes can bring your dish back to perfection.
Dry Chicken Solutions
Dry chicken often means it cooked too long or at too high a temperature. Try lowering your oven temperature by 25°F and checking the chicken earlier than the recipe suggests. Adding a bit of broth or butter inside the cavity before cooking keeps the meat moist and juicy.
If your chicken still ends up dry, slice it thin and toss it in a sauce or gravy. This can bring life back to the meat. Have you ever tried resting your chicken covered with foil for 10 minutes? This helps redistribute juices and keeps it tender.
Undercooked Meat Fixes
Undercooked chicken is a safety risk and can be frustrating. If you find pink spots or raw texture, return the chicken to the oven immediately. Cover it with a lid or foil to avoid drying out while finishing the cooking.
Use a meat thermometer to check the internal temperature; it should read 165°F (74°C) at the thickest part. If you don’t have one, pierce the thickest part and see if the juices run clear. What’s your go-to tool for testing doneness in the kitchen?
Flavor Enhancements
Sometimes the chicken can taste bland despite perfect cooking. Adding aromatics like garlic, onions, and herbs inside the Dutch oven can boost flavor. Don’t forget to season the chicken generously with salt and pepper before cooking.
Finish your chicken with a squeeze of fresh lemon juice or a sprinkle of fresh herbs right before serving. This simple step lifts the whole dish. Have you experimented with spices like smoked paprika or cumin for a unique twist on classic roast chicken?
Variations And Flavor Twists
Cooking a whole chicken in a Dutch oven offers many chances to change flavors. You can make simple tweaks that bring new tastes and aromas to the dish. These changes keep your meals exciting and fresh each time. Explore these ideas to add unique touches to your chicken recipes.
Herb And Spice Blends
Herbs and spices create the base for bold flavor profiles. Try classic mixes like rosemary, thyme, and garlic for a savory touch. For warmth, add paprika, cumin, and chili powder. Fresh herbs added at the end brighten the dish. Experiment with different blends to suit your mood.
Marinades And Brines
Marinades soak the chicken with flavor before cooking. Use lemon juice, olive oil, garlic, and herbs for a fresh taste. Brining the chicken keeps it juicy and tender. A simple brine of salt, sugar, and water works well. Add spices like peppercorns or bay leaves for extra aroma.
Adding Broth Or Wine
Pouring broth or wine into the Dutch oven deepens the flavor. Chicken broth adds richness and keeps the meat moist. White wine gives a subtle fruity note. These liquids also create a tasty base for sauces. Adjust the amount to control how much sauce you want.
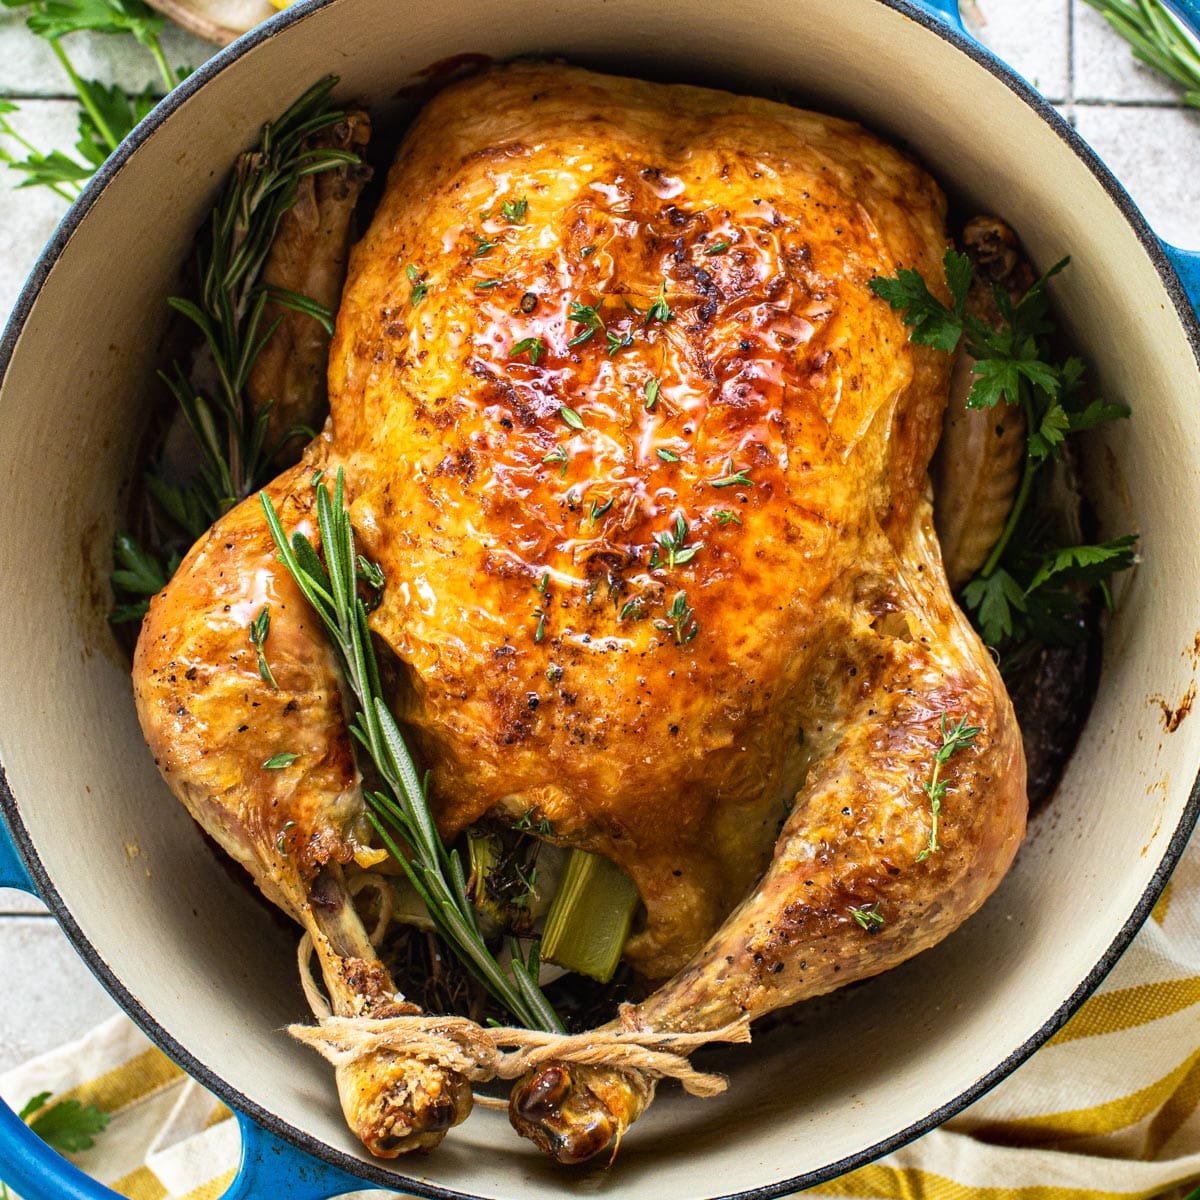
Credit: www.theseasonedmom.com
Frequently Asked Questions
How Long To Cook A Whole Chicken In A Dutch Oven?
Cook a whole chicken in a Dutch oven for 1 to 1. 5 hours. Maintain 350°F (175°C) oven temperature for even cooking. Use a meat thermometer to ensure the internal temperature reaches 165°F (74°C).
What Ingredients Enhance Dutch Oven Chicken Flavor?
Use garlic, herbs like thyme and rosemary, salt, and pepper. Adding onions and lemon inside the chicken cavity boosts flavor. Olive oil or butter helps brown the skin perfectly while cooking.
Can I Cook Frozen Chicken In A Dutch Oven?
It is best to thaw chicken before cooking in a Dutch oven. Cooking frozen chicken increases cooking time and may cook unevenly. Thaw in the refrigerator overnight for safe and even cooking.
How To Keep Dutch Oven Chicken Moist?
Cover the Dutch oven with its lid while cooking to trap moisture. Basting the chicken occasionally with its juices helps. Cooking at moderate heat prevents drying out the meat.
Conclusion
Cooking a whole chicken in a Dutch oven is simple and satisfying. This method keeps the meat juicy and tender. You only need a few ingredients and some patience. The chicken cooks evenly, making your meal delicious. Try different herbs and spices to add flavor.
This way of cooking saves time and effort. Perfect for family dinners or special occasions. Enjoy a tasty, home-cooked meal without stress. Give it a try and taste the difference yourself.