Are you ready to make a pork roast that’s juicy, flavorful, and melts in your mouth? Cooking a pork roast in a Dutch oven is one of the best ways to achieve that perfect balance of crispy outside and tender inside.
Whether you’re a beginner or just looking for a foolproof method, this guide will show you exactly how to get it right every time. Keep reading, and soon you’ll be serving a delicious meal that everyone will ask for again and again.
Choosing The Right Pork Roast
Choosing the right pork roast is the first step for a delicious meal. The cut you pick affects texture, flavor, and cooking time. A good roast holds up well in a Dutch oven, where slow cooking brings out rich flavors. Consider the cut, freshness, and size before buying your pork roast.
Cuts Suitable For Dutch Oven Cooking
Some cuts work better in a Dutch oven than others. Look for cuts with good marbling and fat. These stay juicy and tender during long cooking. Popular choices include:
- Shoulder roast (also called pork butt)
- Boston butt
- Pork loin roast
- Picnic shoulder
These cuts break down slowly, making them perfect for braising. Leaner cuts may dry out quickly.
Selecting Fresh Meat
Freshness matters for taste and safety. Choose pork with a pinkish color and firm texture. Avoid meat that looks dull or has a strong odor. Check the packaging date and buy from trusted sources. Fresh pork improves flavor and keeps the roast tender.
Size And Weight Considerations
Pick a roast size that fits your Dutch oven comfortably. A 3 to 5-pound roast works well for most Dutch ovens. Larger roasts may cook unevenly and take longer. Smaller roasts cook faster but may dry out. Think about the number of servings and cooking time.
Credit: alittlespoon.com
Preparing The Pork Roast
Preparing the pork roast is a crucial step for a delicious meal. It sets the stage for even cooking and deep flavor. Proper prep helps the meat stay juicy and tender. Follow these simple steps to get your pork roast ready for the Dutch oven.
Trimming And Seasoning
Start by trimming excess fat from the pork roast. Leave a thin layer to keep the meat moist. Remove any silver skin or tough bits. Season the roast generously with salt and pepper. Add herbs like rosemary or thyme for extra aroma. Rub the spices evenly all over the meat.
Marinating Tips
Marinating adds flavor and tenderness. Use a simple mix of oil, vinegar, garlic, and herbs. Place the pork in a resealable bag or bowl. Pour the marinade over and coat the meat well. Let it sit in the fridge for at least 2 hours or overnight. Turn the roast occasionally to marinate evenly.
Bringing Meat To Room Temperature
Remove the pork roast from the fridge 30-60 minutes before cooking. This helps it cook more evenly inside and out. Cold meat can cook unevenly, causing dryness. Let it rest uncovered on the counter. Pat it dry with paper towels to remove moisture. Dry meat sears better and forms a nice crust.
Setting Up The Dutch Oven
Setting up the Dutch oven correctly is key to cooking a tender pork roast. This step builds the base of flavors and ensures even cooking. Proper preparation creates a rich, delicious meal your family will enjoy.
Choosing The Right Dutch Oven
Select a heavy, cast iron Dutch oven for even heat distribution. Choose one with a tight-fitting lid to trap moisture. The size should fit your pork roast comfortably, leaving some space around it. Avoid thin or lightweight pots that heat unevenly.
Preheating And Oil Selection
Preheat the Dutch oven over medium heat before adding oil. This helps sear the pork roast well, locking in juices. Use oils with a high smoke point, like vegetable or canola oil. Avoid butter or olive oil as they burn easily at high heat.
Layering Aromatics And Vegetables
Place a bed of aromatics and vegetables at the bottom of the Dutch oven. Use ingredients like onions, garlic, carrots, and celery. They add flavor and prevent the pork from sticking. Arrange them in an even layer to promote steam and aroma.
Cooking Process
Cooking a pork roast in a Dutch oven ensures a tender and juicy dish. Start by searing the meat on all sides to lock in flavors. Then, roast slowly with aromatic herbs and vegetables for a delightful meal.
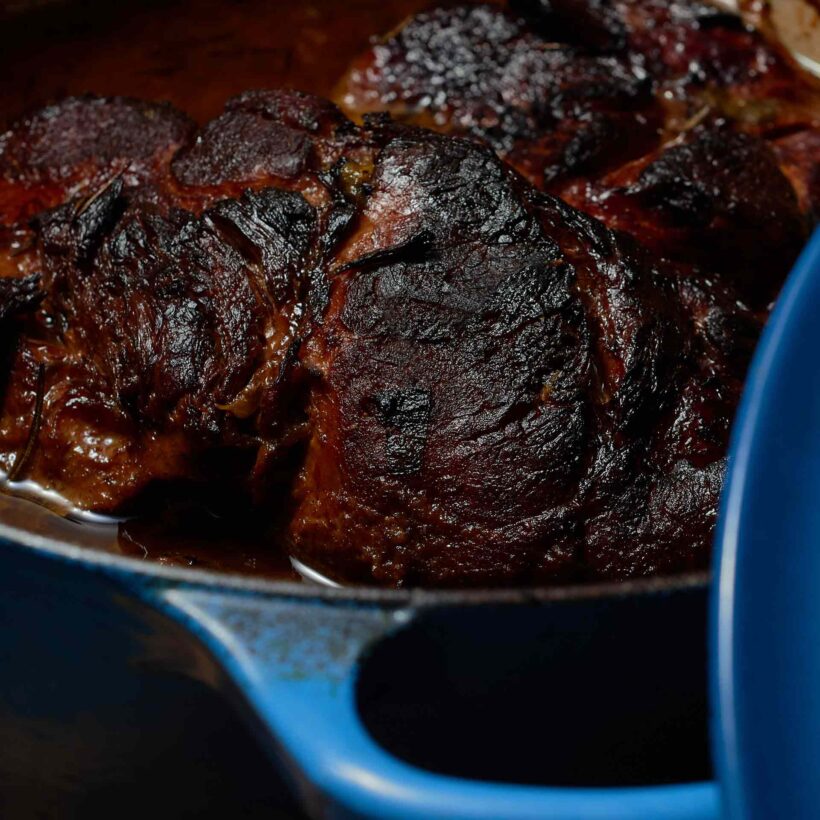
Cooking a pork roast in a Dutch oven can transform an ordinary meal into a culinary delight. The Dutch oven, with its heavy lid and thick walls, helps in evenly distributing heat, ensuring your pork roast cooks to perfection. Let's dive into the cooking process to make your pork roast a success.
Searing The Pork Roast
Start by preheating your Dutch oven on the stovetop. A high heat setting works best for this initial step. Searing locks in the juices and gives the roast a beautiful, caramelized crust. Place the pork roast in the hot Dutch oven. Let each side brown for about 4-5 minutes. This process enhances the meat's flavor and adds depth to the dish. Once the roast is seared, remove it from the Dutch oven and set it aside. This ensures the meat doesn't overcook while you prepare the next steps.
Adding Liquids And Herbs
After searing, it's time to add liquids and herbs. Pour in a cup of chicken broth or apple cider, depending on your taste preference. These liquids help keep the pork moist during cooking. Add herbs like rosemary and thyme to infuse the roast with aromatic flavors. You can also throw in some garlic cloves for an extra kick. Stir the liquid and herbs well, scraping up any bits from the bottom of the Dutch oven. This mix becomes the base of a delightful sauce.
Oven Temperature And Timing
Preheat your oven to 325°F (165°C). This temperature is optimal for slow cooking, allowing the flavors to meld beautifully. Place the seared pork roast back in the Dutch oven. Cover with the lid and transfer the Dutch oven to the oven. Cook the roast for approximately 25 minutes per pound. Use a meat thermometer to ensure the internal temperature reaches at least 145°F (63°C) for safe consumption. What other herbs might add a surprising twist to the flavor? Consider experimenting to make the dish uniquely yours.
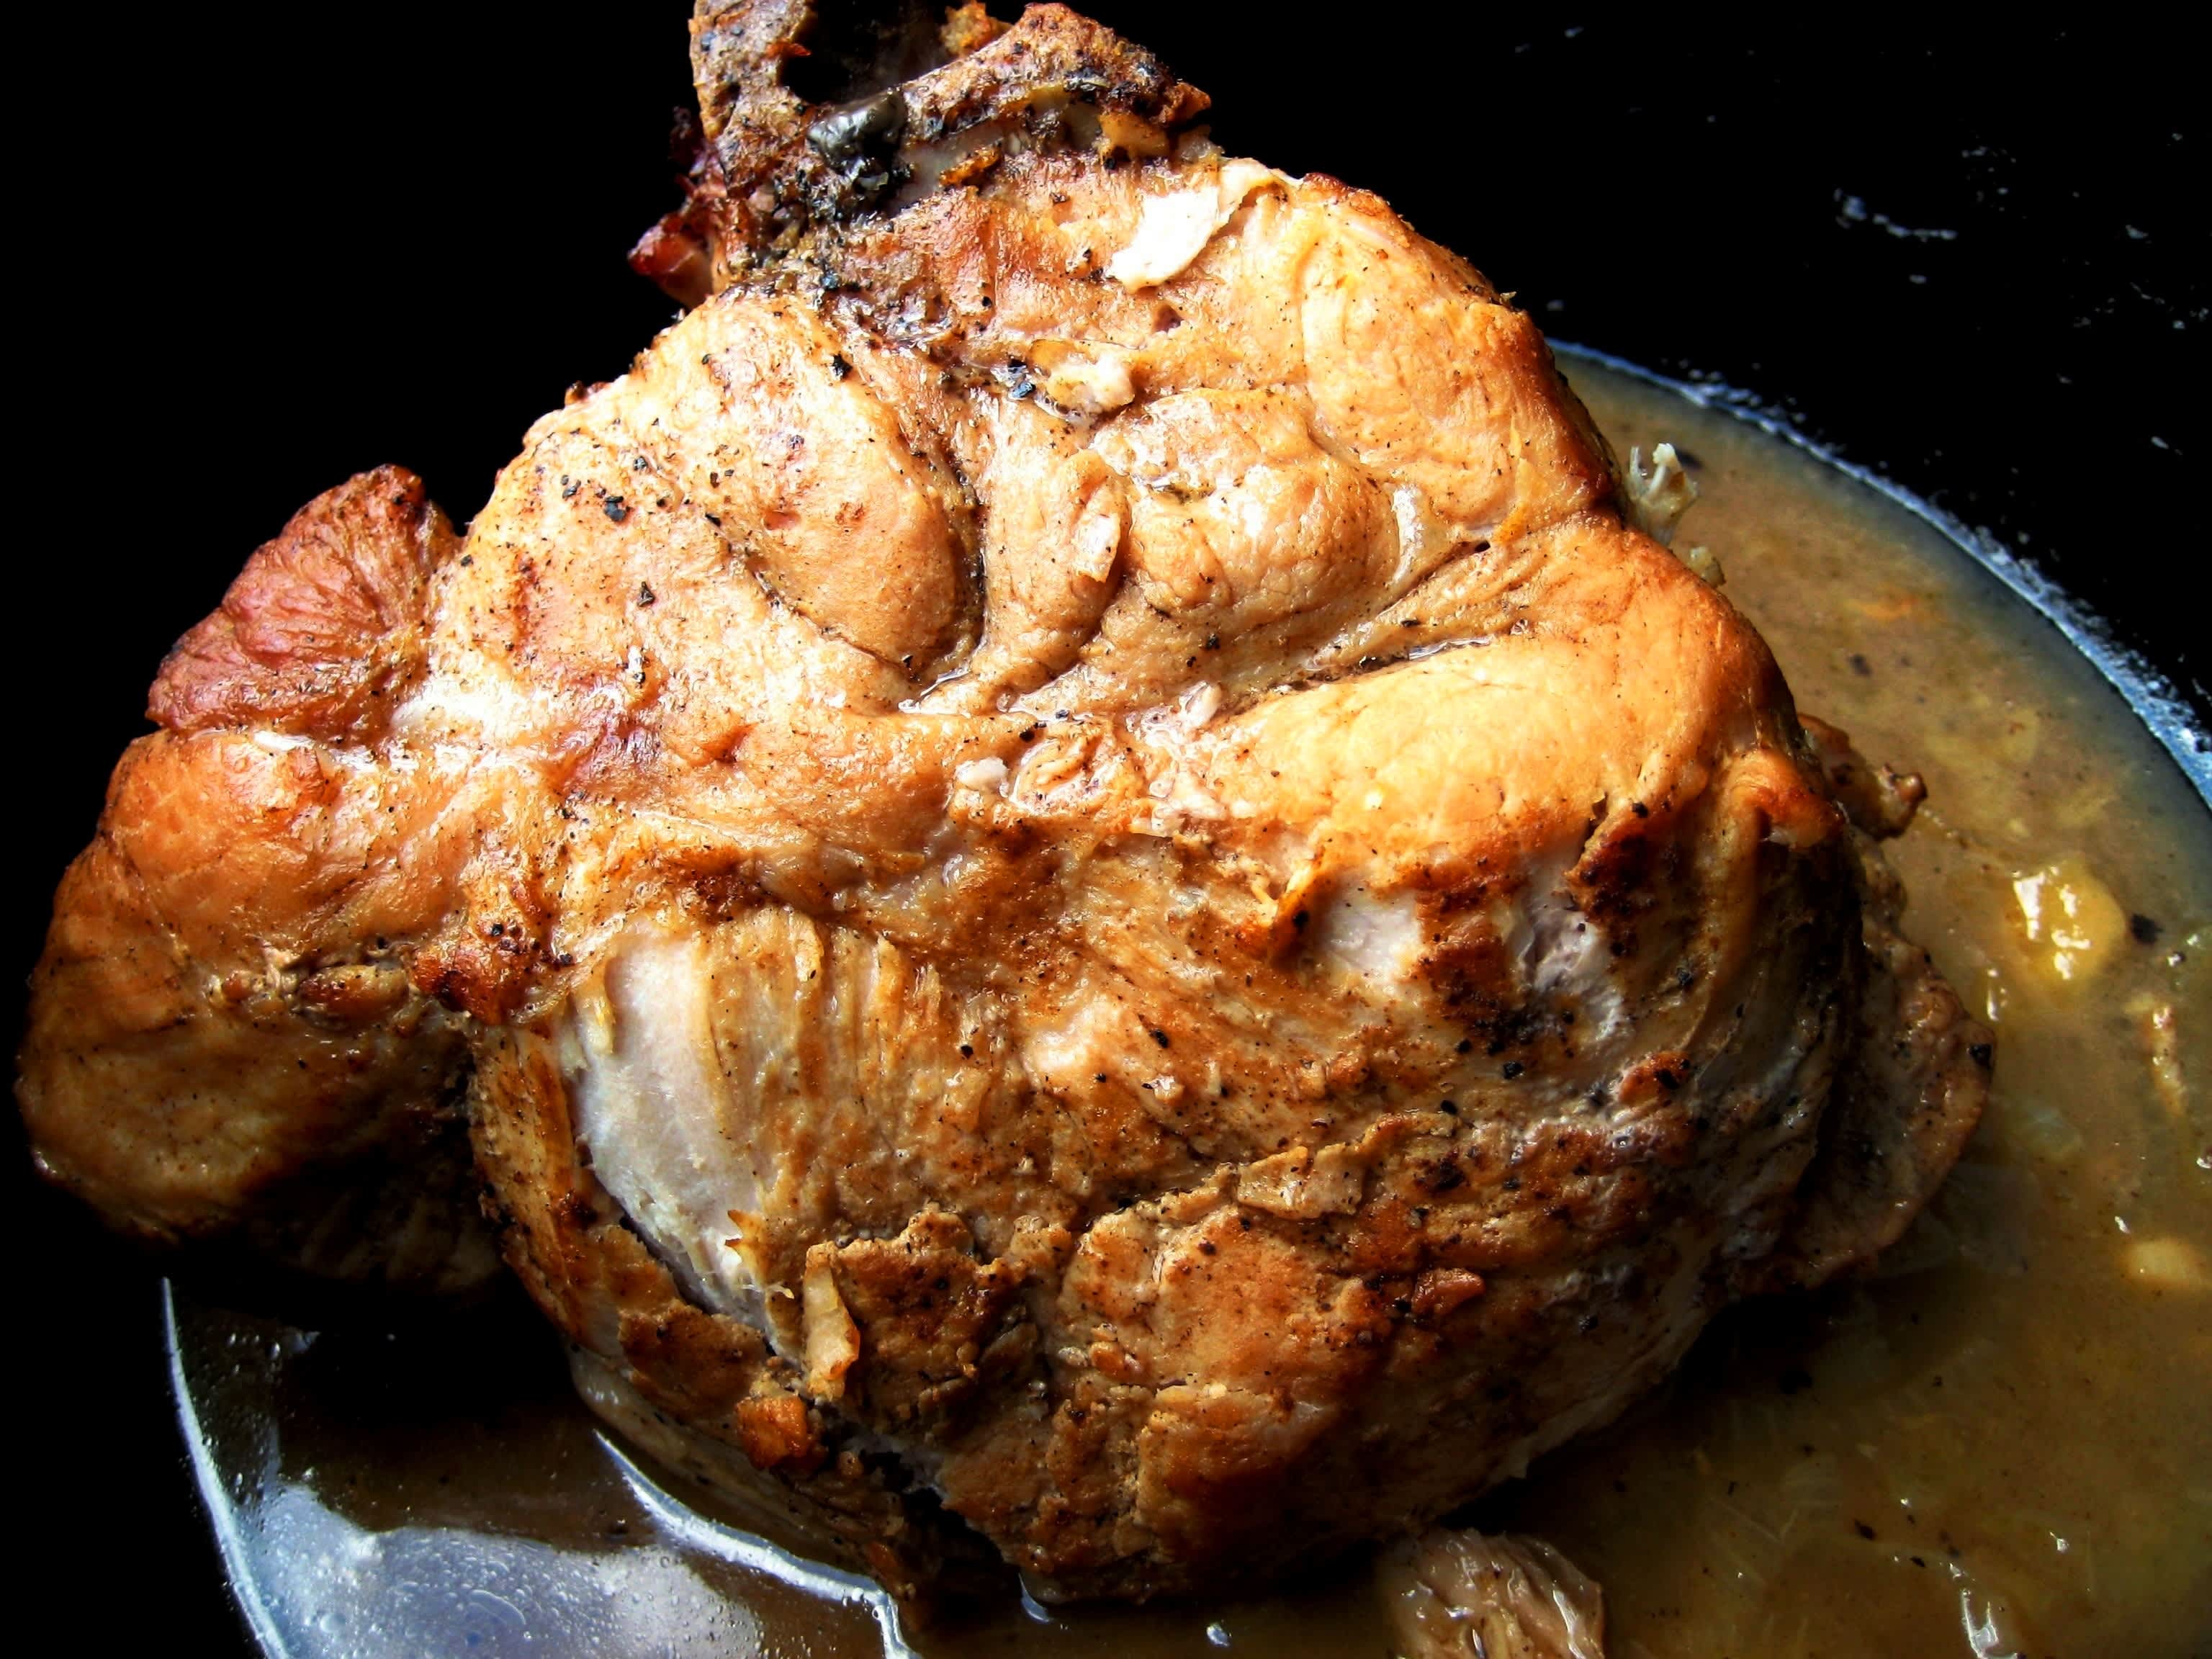
Checking Doneness
Knowing exactly when your pork roast is perfectly cooked is key to enjoying its full flavor and juicy texture. Checking doneness isn’t just about avoiding undercooked or dry meat—it’s about hitting that sweet spot where tenderness and taste meet. Let’s look at practical ways you can tell your roast is ready to serve.
Using A Meat Thermometer
A meat thermometer is the most reliable tool to check doneness. Insert it into the thickest part of the roast, avoiding bone or fat, to get an accurate reading.
Your pork roast is safe to eat when it reaches an internal temperature of 145°F (63°C). At this point, the meat is juicy and slightly pink in the center, which many chefs recommend for the best flavor.
Don’t rely on guesswork—using a thermometer takes the stress out of cooking and ensures you don’t overcook your roast. Have you ever cut into a roast only to find it dry? A quick temperature check can prevent that disappointment.
Visual And Texture Cues
Visual signs also help gauge doneness. The roast’s surface should be golden brown with a slight crust from the Dutch oven’s heat.
When you press the meat with your finger or a utensil, it should feel firm but still have a little bounce. If it feels very soft or mushy, it’s likely undercooked; too firm means it’s overdone.
Look at the juices as well—clear juices indicate doneness, while pink or red juices suggest it needs more time. Have you tried slicing a small piece to see its texture before the final serving? This simple test can save your meal.
Resting The Meat
Resting is often overlooked but crucial. After removing your roast from the Dutch oven, let it rest for at least 10-15 minutes.
This allows the juices to redistribute, making each slice moist and flavorful rather than dry. Cover the roast loosely with foil to keep it warm during this time.
Skipping rest can cause those delicious juices to spill out when you cut, leaving the meat dry. Have you noticed how resting changes the texture and taste of your roast? It’s a small step with a big impact.
Credit: www.food.com
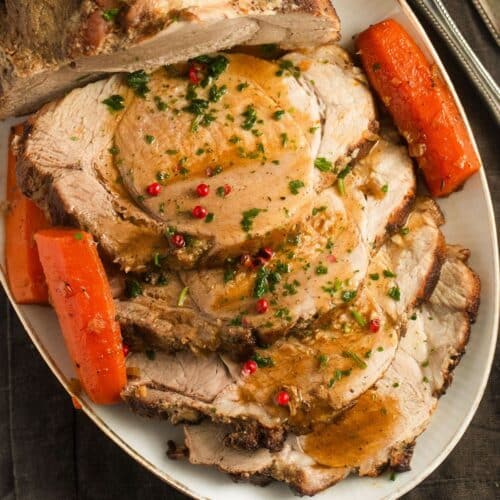
Serving Suggestions
Serving a pork roast cooked in a Dutch oven is all about presentation and balance. How you carve the meat and pair it with sides and sauces can enhance every bite. The right serving techniques bring out the best flavors and textures of your roast.
Careful carving ensures tender, juicy slices. Pairing with complementary sides creates a full, satisfying meal. Sauces and gravies add moisture and depth.
Carving Techniques
Let the pork rest for 10-15 minutes after cooking. This keeps the juices inside the meat. Use a sharp carving knife for clean slices. Cut against the grain to make the meat tender. Slice into even pieces about ¼ inch thick. Arrange slices on a warm platter for serving.
Side Dishes That Complement Pork Roast
- Roasted root vegetables like carrots and potatoes
- Steamed green beans or asparagus for freshness
- Mashed potatoes with a touch of garlic
- Simple garden salad with a light vinaigrette
- Apple sauce or cranberry relish for sweetness
Sauces And Gravies
Use pan drippings to make a flavorful gravy. Combine drippings with broth and a little flour. Simmer until thick and smooth. Mustard sauce pairs well with pork’s rich flavor. Apple cider reduction adds a subtle fruity note. Serve sauces in small bowls to let guests choose.
Tips For Juicy And Tender Results
Getting a pork roast perfectly juicy and tender in a Dutch oven takes more than just setting the timer. It’s about understanding how to control heat, lock in moisture, and boost flavor throughout the cooking process. These tips will help you avoid common pitfalls and bring out the best in your roast every time.
Avoiding Overcooking
Overcooking is the fastest way to dry out your pork roast. Use a meat thermometer to check the internal temperature—it should reach about 145°F (63°C) for medium-rare and 160°F (71°C) if you prefer it well done.
Turn down the oven or stove heat once the roast hits the target temperature to keep it from continuing to cook in the residual heat. Let the roast rest for at least 10 minutes after cooking; this helps the juices redistribute instead of running out when you cut into it.
Moisture Retention Tricks
Moisture retention is key to tenderness. Adding a small amount of liquid—like broth, apple juice, or even water—to the Dutch oven keeps the environment humid and prevents drying.
- Cover the Dutch oven with its lid tightly to trap steam.
- Baste the roast occasionally with its own juices to keep the surface moist.
- Consider wrapping the roast in foil during resting to lock in moisture.
Have you ever noticed how a roast left uncovered loses that juicy texture? Keeping a moist environment inside the Dutch oven makes a huge difference.
Flavor Enhancements
Flavor and tenderness go hand in hand. Season your pork roast generously with salt and pepper before cooking; salt helps break down proteins, making meat more tender.
Add aromatics like garlic, onions, herbs, or even a splash of cider vinegar to the cooking liquid. These ingredients infuse the meat with complex flavors and can slightly tenderize it during the slow cooking process.
Don’t forget the power of a good sear before placing the roast in the Dutch oven. This step locks in juices and creates a delicious crust that enhances the overall taste experience.
Cleaning And Maintaining Your Dutch Oven
Cleaning and maintaining your Dutch oven keeps it in great shape for many meals. Proper care extends its life and improves cooking results. This section shares simple tips to care for your Dutch oven after cooking.
Post-cooking Care
Allow your Dutch oven to cool before cleaning. Avoid sudden temperature changes to prevent cracking. Use warm water and a soft brush or sponge to clean it. Skip harsh soaps or metal scrubbers that damage the surface. For stuck-on food, soak it in warm water for a while. Dry the Dutch oven thoroughly with a cloth or paper towel.
Storage Tips
Store your Dutch oven with the lid off or slightly ajar. This stops moisture buildup and prevents rust. Keep it in a dry place away from humidity. Place a paper towel inside to absorb any leftover moisture. Avoid stacking heavy pots on top of it to protect the enamel coating.
Seasoning Your Dutch Oven
Seasoning keeps your Dutch oven’s surface smooth and non-stick. Rub a thin layer of cooking oil on the inside after cleaning and drying. Heat it gently in the oven for about an hour. This process fills tiny pores and protects the metal. Repeat seasoning every few months or if food starts to stick.
Credit: whereismyspoon.co
Frequently Asked Questions
How Long To Cook Pork Roast In A Dutch Oven?
Cook the pork roast for about 3 to 4 hours at 325°F. Check for an internal temperature of 145°F for safe consumption. Cooking time varies by roast size and oven accuracy.
What Seasonings Work Best For Pork Roast?
Use garlic, rosemary, thyme, salt, and pepper for a flavorful pork roast. These herbs enhance the meat's natural taste and complement slow cooking.
Should I Sear The Pork Roast Before Slow Cooking?
Yes, searing the roast on all sides locks in juices and adds a rich crust. This step improves flavor and texture before slow cooking in the Dutch oven.
Can I Add Vegetables To Cook With Pork Roast?
Absolutely, add potatoes, carrots, and onions around the roast. They absorb the pork’s flavors and cook perfectly in the Dutch oven’s moist environment.
Conclusion
Cooking a pork roast in a Dutch oven is simple and tasty. The pot keeps the meat juicy and full of flavor. You only need a few ingredients and some patience. This method works well for beginners and experts alike.
Try different herbs and vegetables for variety. Serve your roast with sides you enjoy. Enjoy the warmth and comfort of a homemade meal. Cooking this way saves time and effort. Give it a try and see how easy good cooking can be!