Imagine coming home to a meal that’s juicy, flavorful, and cooked to perfection—all in one pot. Cooking a chicken in a Dutch oven is a simple way to achieve just that.
You don’t need fancy skills or complicated recipes. With a few easy steps, your kitchen will fill with mouthwatering aromas that make everyone eager to eat. If you want to learn how to turn a whole chicken into a delicious, tender dish using your Dutch oven, keep reading.
This guide will show you exactly how to do it, so your next meal becomes a hit without any stress.
Choosing The Right Chicken
Choosing the right chicken sets the foundation for a successful Dutch oven meal. The type and quality of chicken you select will affect the flavor, cooking time, and texture of your dish. Understanding your options helps you make a choice that fits your recipe and taste preferences perfectly.
Whole Vs. Cut Pieces
Cooking a whole chicken in a Dutch oven creates a beautiful centerpiece with juicy, tender meat and crispy skin. It’s ideal if you want a hands-off approach since the bird cooks evenly and stays moist.
Cut pieces, such as thighs, breasts, or drumsticks, cook faster and allow you to control portions better. They also absorb marinades and seasonings more easily, giving you a chance to experiment with bold flavors.
Which do you prefer: the rustic charm of a whole roast or the convenience of quick-cooking pieces?
Fresh Or Frozen Options
Fresh chicken often has a better texture and flavor, especially if you can find it from a trusted local source. It also reduces cooking time since you won’t need to thaw it first.
Frozen chicken is convenient and usually available year-round. If you choose frozen, thaw it properly in the fridge overnight to keep the meat tender and safe to cook.
Think about your schedule and how much prep time you have before deciding between fresh and frozen.
Organic And Free-range Benefits
Organic and free-range chickens generally offer richer taste and firmer texture due to their natural diet and living conditions. They’re often raised without antibiotics or added hormones, which appeals to health-conscious cooks.
Choosing these options supports sustainable farming and animal welfare. Plus, the higher fat content in free-range chicken can enhance the flavor when cooked slowly in a Dutch oven.
Are you ready to invest a bit more for a chicken that tastes better and aligns with your values?
Credit: www.themidwestkitchenblog.com
Selecting Your Dutch Oven
Selecting the right Dutch oven is essential for cooking a perfect chicken. The Dutch oven you choose affects heat distribution, cooking time, and flavor. Knowing the key features helps you pick the best one for your kitchen.
Material Types
Cast iron is the most common material. It holds heat well and cooks evenly. Enameled cast iron is easier to clean and doesn’t need seasoning. Some Dutch ovens come in aluminum, which heats quickly but may not hold heat as long. Choose a material that fits your cooking style and care preferences.
Size Matters
Size depends on the chicken you plan to cook. A 5 to 7-quart Dutch oven suits a whole chicken comfortably. Smaller sizes may crowd the bird, causing uneven cooking. Larger sizes allow space for vegetables and broth. Pick a size that fits your recipes and kitchen space.
Lid Features
A tight-fitting lid keeps moisture inside, making the chicken juicy. Some lids have a self-basting design with small bumps underneath. These help keep the meat moist by dripping condensation back onto the chicken. Make sure the lid seals well and matches the Dutch oven size.
Preparing The Chicken
Preparing the chicken properly sets the foundation for a delicious meal cooked in your Dutch oven. Taking a little extra time here can make a big difference in flavor and texture. Let’s break down the key steps you need to get your chicken ready for cooking.
Cleaning And Patting Dry
Start by rinsing the chicken under cold water to remove any residue or packaging fluids. Use your hands to gently clean the surface, but avoid soaking the chicken for too long. After rinsing, pat the chicken dry thoroughly with paper towels.
Drying the chicken is crucial because excess moisture can prevent the skin from crisping up during cooking. Have you noticed how dry skin crisps better and tastes more flavorful? That’s why this step should never be skipped.
Seasoning Techniques
Seasoning your chicken well is the secret to building layers of flavor. Sprinkle salt and pepper generously all over the bird, including inside the cavity if you’re cooking a whole chicken. Don’t forget to season under the skin if you can gently loosen it—it allows the spices to penetrate deeper.
You can also add herbs like rosemary, thyme, or garlic powder for extra aroma. Try mixing your seasoning in a small bowl first, then rub it evenly over the chicken to ensure every bite is tasty. What’s your favorite herb or spice to add to chicken?
Marinating Tips
Marinating adds moisture and flavor, making your chicken juicier and more tender. Use a simple marinade with ingredients like olive oil, lemon juice, garlic, and herbs. Let the chicken soak in the marinade for at least 30 minutes, or up to overnight in the fridge for deeper taste.
Make sure to place the chicken in a sealed container or a zip-top bag to keep the marinade close to the meat. Avoid marinating too long in acidic mixes, as they can start to break down the texture. Have you experimented with different marinades to find what suits your taste best?
Setting Up Your Dutch Oven
Choose a clean, well-seasoned Dutch oven for even heat. Preheat it gently to avoid sticking and ensure juicy chicken.
Setting Up Your Dutch Oven Cooking chicken in a Dutch oven can be a rewarding experience. The process starts with setting up your Dutch oven properly. This ensures even cooking and delicious flavors. Follow these steps to prepare your Dutch oven for a tasty chicken dish.
Preheating Instructions
Preheat the oven to 350°F (175°C). While the oven heats, place the Dutch oven inside. Let it warm up for about 10 minutes. This helps distribute heat evenly. A preheated Dutch oven sears the chicken perfectly.
Adding Fats And Aromatics
Once preheated, remove the Dutch oven carefully. Add a tablespoon of olive oil or butter. Swirl it around to coat the bottom. Then, add chopped onions, garlic, or your favorite herbs. These aromatics enhance the chicken's flavor. Stir gently for a minute.
Layering Ingredients
Place the chicken pieces skin-side down in the Dutch oven. Make sure they touch the bottom for a crispy skin. Add vegetables like carrots and potatoes around the chicken. Pour a cup of chicken broth over everything. This adds moisture and flavor. Cover the Dutch oven with its lid tightly. Now, it's ready to go into the oven.
Cooking Methods
Cooking a chicken in a Dutch oven offers versatile methods. Each method changes the flavor and texture. Choosing the right method depends on your taste and time.
Searing For Flavor
Searing creates a golden crust on the chicken. Heat the Dutch oven until very hot. Add oil and place the chicken skin-side down. Cook until the skin is brown and crisp. This step locks in juices and adds deep flavor.
Oven Roasting Steps
Oven roasting cooks the chicken evenly and slowly. Preheat the oven to 375°F (190°C). Place the chicken inside the Dutch oven with vegetables or herbs. Cover with the lid and roast for about 1 to 1.5 hours. The result is tender, juicy meat with crispy skin.
Simmering And Braising
Simmering and braising use liquid to cook the chicken gently. Add broth, wine, or water to the Dutch oven. Bring the liquid to a low boil, then reduce heat to simmer. Cover and cook for 1.5 to 2 hours. This method makes the chicken soft and full of flavor.
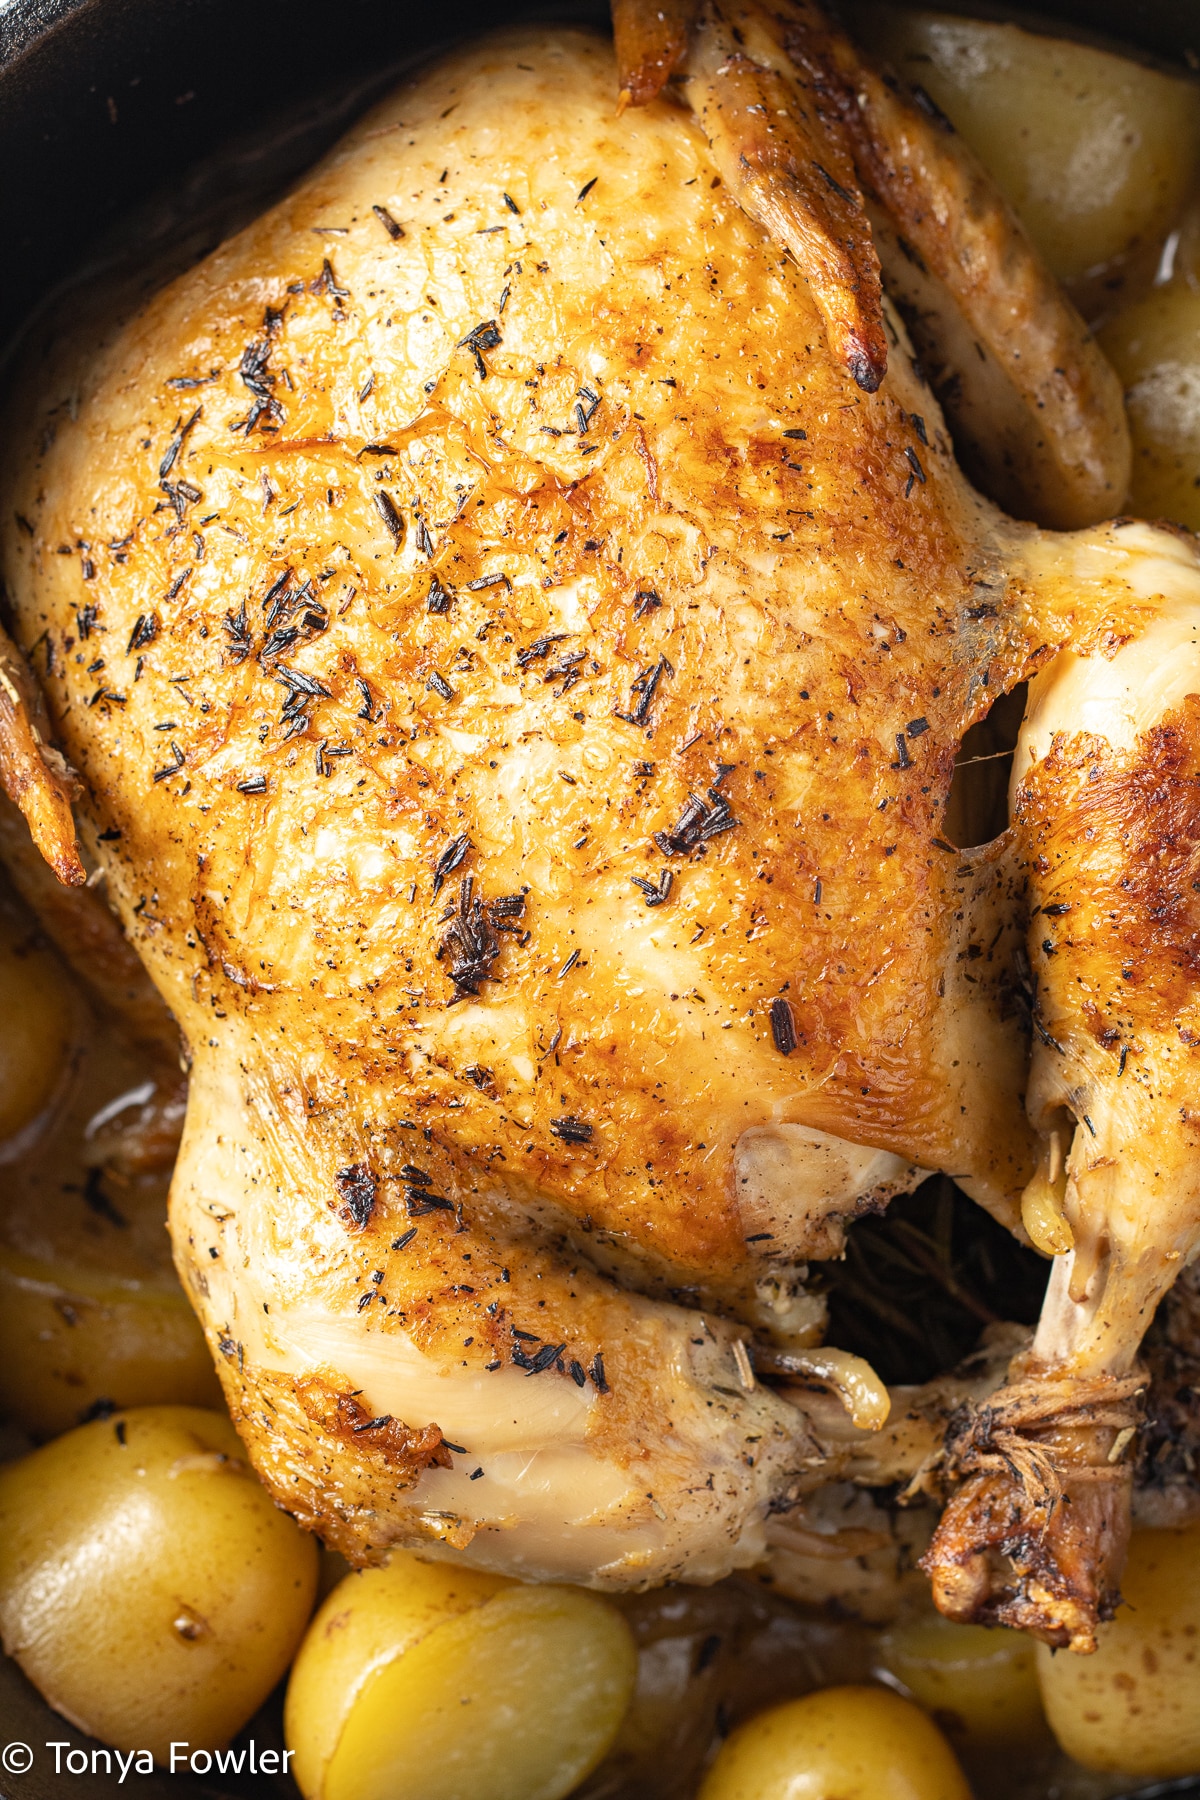
Credit: www.theseasonedmom.com
Achieving Juicy Results
Getting a juicy chicken out of your Dutch oven is all about managing heat, moisture, and timing. You want the chicken to stay tender and flavorful without drying out. Here’s how to make that happen.
Controlling Temperature
Keeping the temperature steady is key. Too high, and the chicken dries out; too low, and it won’t cook evenly. Aim for moderate heat—around 325°F to 350°F if you’re using an oven.
Use a thermometer to check the internal temperature of your chicken. It should reach 165°F in the thickest part to be safe and juicy. Avoid opening the lid too often, as this lets heat escape and can cause uneven cooking.
Using Moisture Locks
Adding moisture inside the Dutch oven traps steam that keeps the chicken juicy. You can add a cup of broth, water, or even wine to the bottom before cooking. This liquid creates a humid environment that prevents the chicken from drying out.
Another trick is to baste the chicken with its own juices halfway through cooking. This helps keep the skin crispy while locking moisture inside the meat. Have you tried placing herbs or lemon slices under the chicken? They release moisture and infuse flavor simultaneously.
Resting The Chicken
After cooking, let your chicken rest for at least 10 to 15 minutes before carving. This pause allows the juices to redistribute rather than spill out when you cut into it. Skipping this step often results in dry slices.
Cover the chicken loosely with foil during resting to keep it warm. This simple habit can make a noticeable difference in how moist your chicken tastes at the table. What’s your favorite way to rest meat after cooking?
Flavor Variations
Experimenting with flavor variations can transform your Dutch oven chicken from simple to spectacular. Small tweaks in herbs, vegetables, or sauces can create an entirely new experience each time you cook. Think about the flavors you enjoy most and how you might combine them to make your dish uniquely yours.
Herb And Spice Combinations
Choosing the right herbs and spices can elevate your chicken’s taste profoundly. Try classic blends like rosemary, thyme, and garlic for a fragrant, earthy profile. Or, go bold with smoked paprika, cumin, and chili powder for a smoky, spicy kick.
Don’t hesitate to mix fresh and dried herbs—fresh basil or parsley added at the end brightens the dish, while dried herbs infused during cooking build deep flavor. Have you ever considered adding a cinnamon stick or star anise to add subtle warmth? These small additions can surprise your palate.
Adding Vegetables
Vegetables not only add nutrition but also enhance the chicken’s flavor as they cook together. Root vegetables like carrots, potatoes, and onions absorb the chicken’s juices and become deliciously tender. Adding celery or bell peppers brings a fresh, slightly crunchy contrast.
Think about layering vegetables in the Dutch oven to create a natural roasting rack for your chicken. This technique keeps the bird elevated and infuses the veggies with rich drippings. What vegetables do you have on hand that could add texture and flavor?
Sauces And Glazes
Sauces and glazes can finish your Dutch oven chicken with a burst of flavor and a beautiful glaze. A simple mixture of honey and Dijon mustard brushed on during the last 20 minutes creates a sticky, tangy coating. Or try a balsamic reduction for a sweet and acidic punch.
Consider adding liquids like white wine, chicken broth, or even a splash of orange juice to the pot to keep the chicken moist and build a flavorful sauce. You can spoon this over your chicken when serving to add extra richness. What bold or subtle sauce will you try to personalize your dish?
Troubleshooting Common Issues
Cooking chicken in a Dutch oven can sometimes lead to unexpected challenges. Whether your chicken ends up dry, unevenly cooked, or stuck to the pot, these issues can be frustrating. The good news is that with a few simple tweaks, you can fix these problems and enjoy a perfectly cooked meal every time.
Dry Chicken Fixes
If your chicken turns out dry, it usually means it’s been overcooked or cooked at too high a temperature. Try lowering the heat and cooking the chicken more slowly to retain moisture.
Adding a bit of broth, wine, or even water to the Dutch oven creates steam that keeps the chicken juicy. You can also baste the chicken occasionally with its own juices to lock in moisture.
Have you ever noticed how tightly wrapping a roast helps keep it moist? Similarly, covering your Dutch oven properly traps heat and moisture, preventing dryness.
Uneven Cooking Solutions
Uneven cooking often happens when the chicken is too large or the heat is too intense on one side. Try rotating the chicken halfway through cooking to ensure all sides get equal heat.
Cutting the chicken into smaller pieces can also help cook it more evenly. Smaller pieces cook faster and reduce the risk of raw spots.
Make sure your Dutch oven sits flat on the burner or in the oven. An uneven surface can cause hot spots, leading to inconsistent cooking.
Preventing Sticking
Sticking is a common issue, especially if you don’t use enough fat or if the pot isn’t hot enough before adding the chicken. Heat your Dutch oven properly and add a generous amount of oil or butter before cooking.
Don’t move the chicken too soon after placing it in the pot. Let it sear and develop a crust, which naturally releases from the surface.
Have you tried deglazing the pot with a splash of liquid after cooking? This not only prevents sticking but also creates a delicious base for your sauce or gravy.
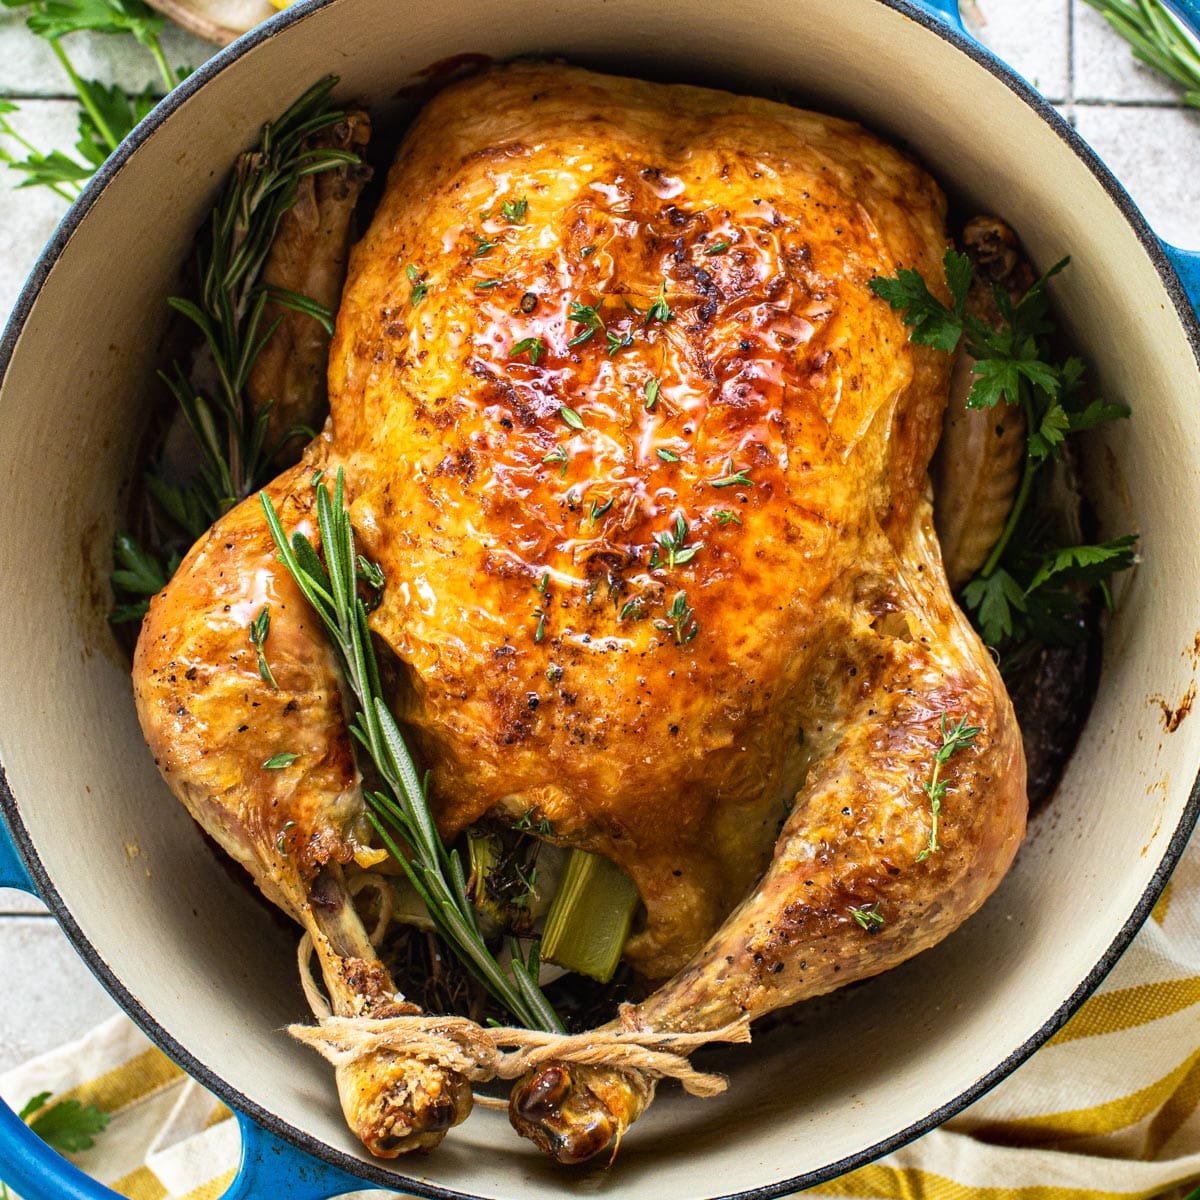
Serving Suggestions
Serve the chicken hot, straight from the Dutch oven for best flavor. Pair it with roasted vegetables or a fresh salad for a complete meal. Let the juices rest before slicing to keep the meat tender and juicy.
Cooking chicken in a Dutch oven creates a flavorful, tender meal. Serving this dish well enhances the experience. Here’s how to pair, present, and store your chicken feast.
Side Dishes Pairings
Pair your chicken with simple, tasty sides. Roasted vegetables, such as carrots and potatoes, add color and flavor. A fresh green salad with a light vinaigrette balances the richness. Consider fluffy mashed potatoes or steamed rice for a hearty touch. Crusty bread can soak up the delicious juices.
Presentation Tips
Presentation makes your meal special. Arrange the chicken on a large platter. Surround it with colorful vegetables. Use fresh herbs like parsley or thyme for a pop of color. Slice the chicken for easy serving. Keep the table setting simple and elegant. Use white plates to highlight the dish's colors.
Storage And Leftovers
Store leftovers properly to enjoy them later. Place the chicken in an airtight container. Keep it in the fridge for up to three days. Reheat it gently to maintain moisture. Use leftover chicken in salads or sandwiches. Make a hearty chicken soup with the bones and scraps.

Credit: www.itisakeeper.com
Frequently Asked Questions
How Long To Cook Chicken In A Dutch Oven?
Cook chicken in a Dutch oven for 1 to 1. 5 hours. Use medium heat and ensure internal temperature reaches 165°F (74°C). This guarantees tender, juicy chicken with perfect doneness.
What Temperature Is Best For Dutch Oven Chicken?
Maintain medium heat around 325°F to 350°F when cooking chicken in a Dutch oven. This temperature allows even cooking without drying out the meat.
Can I Cook Whole Chicken In A Dutch Oven?
Yes, a whole chicken cooks well in a Dutch oven. It retains moisture and flavors while roasting evenly, producing juicy, tender results.
Should I Brown Chicken Before Using Dutch Oven?
Browning chicken before slow cooking in a Dutch oven enhances flavor. Sear the chicken on all sides until golden brown, then continue cooking.
Conclusion
Cooking chicken in a Dutch oven is simple and rewarding. You get juicy, flavorful meat every time. The even heat helps cook the chicken well. You can add vegetables and herbs for extra taste. This method fits any skill level in the kitchen.
Try it for your next meal and enjoy comfort food made easy. With practice, you will feel confident and proud of your dish. Give it a try and taste the difference yourself.