Are you tired of constantly refilling your LP gas tank every time you want to grill? Switching your LP gas grill to natural gas could be the game-changer you need.
Natural gas can be convenient, but grill conversion is model-specific and can create a fire or leak hazard. Check the exact model manual and warranty; use only a conversion explicitly approved by its manufacturer, and have a qualified gas technician do the work. As an Amazon Associate, Gear Cookware earns from qualifying purchases. If your grill is not approved for conversion, compare factory-built natural-gas grills such as the Weber Genesis natural-gas grill lineup.
Keep reading to unlock the easy way to upgrade your grilling experience and enjoy the convenience you deserve.
Tools And Materials Needed
Before you begin converting your LP gas grill to natural gas, gathering the right tools and materials is crucial. Having everything at hand will make the process smoother and safer. You don’t want to pause midway because you forgot a key part or tool.
Think about the last time you started a project unprepared. Did it slow you down or cause frustration? Being prepared with the correct equipment ensures your grill conversion goes smoothly and your safety stays intact.
Essential Tools For Conversion
- Adjustable Wrench:You’ll need this to disconnect and reconnect gas lines securely.
- Screwdrivers:Both flathead and Phillips screwdrivers help remove panels and burner components.
- Pipe Thread Sealant or Teflon Tape:This prevents gas leaks when connecting fittings.
- Drill with Bits:Sometimes, you may need to drill new holes for mounting or modifying components.
- Leak Detection Spray or Soapy Water:Use this to check connections for leaks after installation.
Materials Required For The Conversion
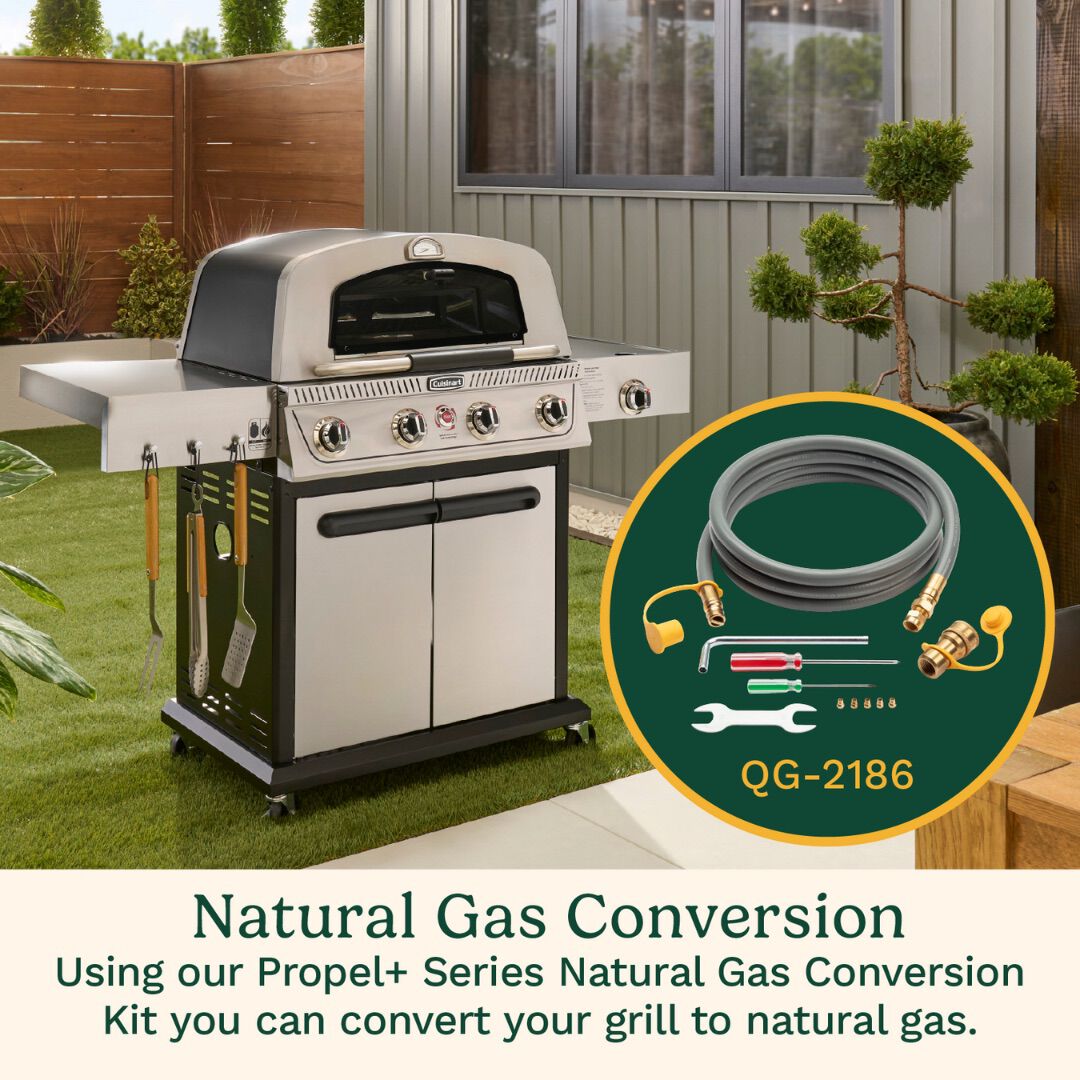
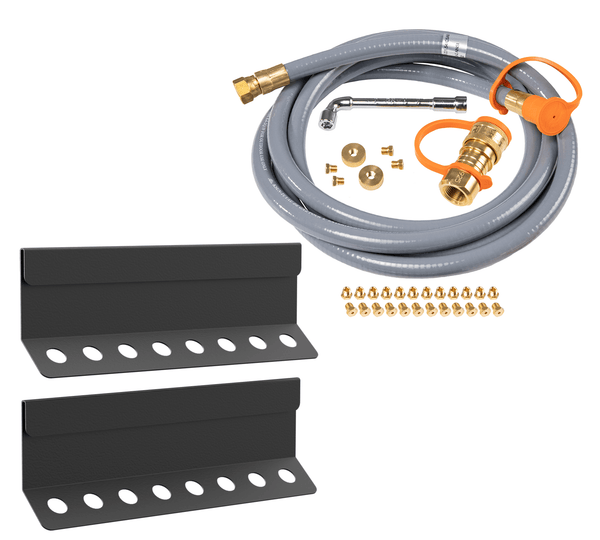
- Natural Gas Conversion Kit:This kit includes orifices, regulators, and hoses designed specifically for your grill model.
- Natural Gas Hose:A hose rated for natural gas that connects your grill to the gas supply.
- Gas Regulator:Ensures the natural gas pressure matches your grill’s requirements.
- New Burner Orifices:These control the flow of natural gas and replace the LP-specific orifices.
- Thread Sealant or Gas-Safe Tape:To secure all threaded connections and prevent leaks.
Why Skipping Proper Materials Can Cost You
Using the wrong parts or tools can lead to poor performance or even dangerous gas leaks. I once tried to save money by skipping the recommended natural gas regulator and ended up with uneven flames and a frustrating grill session. Investing in the right materials upfront saves time, money, and keeps you safe.
What safety checks will you perform once your grill is converted? Having the right tools and materials is just the first step toward a successful conversion. Your attention to detail here will pay off every time you fire up the grill.
Credit: www.cuisinart.com
Safety Precautions
Switching your LP gas grill to natural gas can save you money and provide convenience, but safety must be your top priority throughout the process. Handling gas lines and connections involves risks that you cannot overlook. Taking the right precautions protects you, your family, and your home from potential hazards.
Check For Gas Leaks Before You Start
Before making any changes, inspect your grill and gas lines for leaks. Use a simple soap and water solution on all fittings and connections—bubbles mean a leak is present. Never skip this step; even a small leak can lead to dangerous situations.
Turn Off All Gas Supplies
Ensure both the propane tank and natural gas supply are completely turned off before touching any parts. This prevents accidental gas flow that could ignite unexpectedly. Double-check that valves are closed tightly.
Use The Correct Conversion Kit
Not all grills convert the same way. Use a conversion kit specifically designed for your grill model. Kits include the right orifices and regulators needed to handle natural gas pressure safely.
Wear Protective Gear
Protect your hands with gloves and wear safety glasses during the conversion. Small gas fittings and tools can slip, causing minor injuries. Taking this simple step keeps you safe while working.
Work In A Well-ventilated Area
Gas fumes can accumulate quickly in tight spaces. Perform the conversion outside or in a very open area to avoid inhaling harmful gases. Good ventilation reduces the risk of fire and health issues.
Test Your Grill After Conversion
Once you’ve installed the new parts, test the grill carefully. Turn on the natural gas supply and check for leaks again using the soap solution. Light the grill only when you’re sure there are no leaks.
Know When To Call A Professional
If you feel unsure at any point, don’t hesitate to seek expert help. Gas work requires precision, and mistakes can be costly. Hiring a licensed technician may save you from bigger problems later.
Identify Your Grill Type
Identifying your grill type is the crucial first step before converting your LP gas grill to natural gas. Not all grills are built the same, and understanding the specific model you own can save you time and avoid costly mistakes. Knowing your grill’s make and design will help you find the right conversion kit and ensure a safe and efficient switch.
Check The Grill’s Model And Serial Number
Locate the model and serial number tag, usually found on the back or inside the cabinet of the grill. This information tells you the exact grill type and helps you find compatible parts. If you can’t find the tag, consult your user manual or the manufacturer’s website.
Determine If Your Grill Is Designed For Conversion
Some grills are made only for LP and must never be converted. Check the manufacturer’s manual for the exact model and serial number; if it does not explicitly approve conversion and identify the approved kit, do not retrofit it. A factory-built natural-gas grill is the safer alternative.
Identify The Type Of Burners And Valves
Burners and valves differ between LP and natural gas grills due to pressure differences. Inspect your grill’s burner type—are they tube or cast iron? Also, check if the valves are adjustable or fixed; this affects how easily you can swap to natural gas.
Understand Your Grill’s Gas Pressure Requirements
LP gas operates at a higher pressure than natural gas. Knowing your grill’s pressure rating is essential to avoid leaks or poor performance. Look for pressure specifications on the grill or in the manual and match them with the conversion kit’s requirements.
Inspect Your Grill’s Hose And Regulator
Your current hose and regulator are designed for LP gas and likely won’t work with natural gas. Identify the type and size of these components so you can replace them with natural gas-compatible parts. This step ensures your grill will function safely after conversion.
Shut Off The Gas Supply
Before you begin converting your LP gas grill to natural gas, the very first and most important thing is to shut off the gas supply. This step ensures safety and prevents any accidental gas leaks while you're working on the conversion. Taking the time to properly turn off the gas can save you from potential hazards and costly mistakes.
Locate The Gas Valve
Start by finding the gas valve connected to your grill's propane tank. It’s usually a knob or lever near the tank itself. Turning this valve clockwise will close it and stop the flow of gas.
Have you ever tried turning off a valve only to realize it was stuck or hard to turn? If so, try using a pair of gloves or a wrench for better grip, but never force it too much to avoid damage.
Disconnect The Propane Tank
Once the valve is closed, carefully disconnect the propane tank from the grill. This usually involves unscrewing the regulator hose from the tank valve.
Handle the tank gently and place it in a well-ventilated area away from your workspace. This reduces any risk of gas build-up and keeps your environment safe.
Check For Gas Leaks
After shutting off and disconnecting, it's smart to check if any gas is still escaping. You can do this by applying a soapy water solution to the valve and hose connections.
If you see bubbles forming, gas is leaking. Tighten connections or replace faulty parts before proceeding. A simple leak test could prevent serious accidents.
Remove Lp Gas Components
Removing LP gas components is a key step in converting your grill to natural gas. This process clears out parts designed only for propane use. It prepares the grill for safe, efficient operation with natural gas. Careful removal prevents leaks and malfunctions.
Focus on identifying and detaching the right parts. Each component has a specific role in propane delivery. Removing them carefully ensures a clean setup for natural gas parts.
Disconnect The Lp Gas Tank And Hose
First, turn off the LP gas tank valve completely. Detach the hose connecting the tank to the grill. Check for any gas smell before proceeding. Removing the hose prevents unwanted gas flow during conversion.
Remove The Lp Regulator
The regulator controls propane pressure. Unscrew it from the grill's gas inlet. Handle the regulator carefully to avoid damage. This part will be replaced or bypassed for natural gas use.
Take Out The Lp Burner Orifices
LP burners have smaller orifices designed for propane. Unscrew the orifices from each burner tube. Replace them with natural gas orifices for proper gas flow. Keeping LP orifices can cause poor performance or safety issues.
Inspect And Remove The Lp Valve If Needed
Some grills have valves specific to LP gas. Check your grill’s manual for details. Remove the valve if it is only compatible with propane. This step ensures the gas delivery system matches natural gas requirements.

Credit: www.charbroil.com
Install Natural Gas Conversion Kit
Installing a natural gas conversion kit is a crucial step when switching your LP gas grill to natural gas. This kit includes all the necessary parts to ensure your grill runs safely and efficiently on natural gas instead of propane. Taking your time during installation can save you from costly mistakes and improve your grilling experience.
Replace Orifices
The orifices control the flow of gas to the burners, so swapping LP orifices with natural gas ones is essential. Natural gas requires larger orifices because it has a lower pressure and different flow characteristics compared to propane. Make sure to carefully remove the old orifices and install the new ones that come with your conversion kit.
Don't rush this step—incorrect orifices can cause uneven flames or inefficient burning. Have you noticed uneven flames or poor heat distribution before? That might be a sign your orifices need checking.
Adjust Regulator
Your grill's regulator manages gas pressure, which differs significantly between LP and natural gas. Most conversion kits come with a regulator designed for natural gas, so replacing or adjusting it is necessary. This ensures the grill receives the correct pressure for safe and efficient operation.
If you skip this, you risk damaging your grill or creating unsafe conditions. Have you checked your regulator's compatibility before? It’s a small step that protects your investment.
Swap Hoses And Fittings
The hoses and fittings designed for LP gas may not be suitable for natural gas because of differences in pressure and gas composition. Use the hoses and fittings included in your natural gas conversion kit. They are built to handle natural gas safely and prevent leaks.
Always inspect these components for wear or damage before installation. Would you want to risk a gas leak just to save a few bucks on parts? Safety comes first when working with gas appliances.
Connect To Natural Gas Line
Converting your LP gas grill to natural gas can be a rewarding project that saves you from frequent propane tank refills. One crucial step in this transformation is connecting your grill to the natural gas line. This process might seem daunting, but with the right guidance, you can confidently tackle it. Always prioritize safety and ensure you're following local regulations and guidelines.
Check Gas Pressure
Before making any connections, it's essential to verify the gas pressure of your natural gas line. Natural gas typically operates at a different pressure than propane. Using a gas pressure gauge, ensure that the pressure matches the specifications recommended by your grill manufacturer. If you’re unsure, consulting a professional is a wise decision. The right pressure ensures optimal grill performance and safety.
Use Proper Connectors
Once you've confirmed the gas pressure, focus on using the appropriate connectors for your grill. These connectors are crucial for ensuring a secure and leak-free connection. You might need a conversion kit, which often includes connectors, hoses, and nozzles designed for natural gas. Always use connectors that are specifically labeled for natural gas use. Improper connectors can lead to leaks and potential hazards, so double-check compatibility before proceeding.
Have you ever tried to force a connector that didn’t quite fit? It’s not worth the risk. Investing in quality connectors can save you from future headaches and ensure a smooth grilling experience.
By taking these steps, you can enjoy the convenience of a natural gas grill without the hassle of changing propane tanks. Remember, safety and precision are key. Have you considered the benefits of never running out of fuel mid-barbecue? It might just be the upgrade your backyard needs.
Test For Leaks
Testing for leaks is a vital part of converting your LP gas grill to natural gas. This step ensures safety by checking if gas escapes from connections or hoses. A small leak can cause dangerous situations. Follow clear steps to confirm there are no leaks before using the grill.
Prepare A Soap Solution
Create a simple soap solution by mixing water and liquid dish soap. Use about one cup of water with a few drops of soap. Stir gently to avoid too many bubbles. The soap solution helps reveal leaks by forming bubbles where gas escapes.
Apply The Soap Solution To Connections
Use a brush or spray bottle to apply the soap solution. Cover all gas connections, fittings, and hoses. Make sure to coat every possible joint where gas might leak. Do this carefully and evenly for accurate testing.
Turn On The Gas Supply
Slowly open the natural gas valve to allow gas flow. Keep the grill burners off during this test. Watch the soap-covered areas closely for any bubbles. Bubbles indicate gas is leaking from that spot.
Look For Bubbles
- Check each connection carefully.
- Observe for any small or large bubbles.
- Pay attention to hidden or tight spaces.
Even tiny bubbles mean a leak. Do not ignore them or continue using the grill.
Fix Any Leaks Found
Turn off the gas supply immediately. Tighten loose fittings or replace damaged parts. Reapply soap solution and test again. Repeat until no bubbles appear. Only use the grill when all leaks are fixed.
Adjust Flame And Burners
Adjusting the flame and burners ensures safe and efficient grilling after converting from LP to natural gas. Properly set burners create a steady, even flame for better cooking results. Check flame color and size to avoid gas waste or flare-ups.
Converting your LP gas grill to natural gas involves several steps. A key step is adjusting the flame and burners to ensure safe and efficient grilling. Proper adjustments provide even heat distribution for better cooking results. Below are important considerations for this process.
Check Burner Compatibility
Make sure your burners can support natural gas. Some grills come with dual-fuel capabilities. Check the manual or contact the manufacturer. If not compatible, consider getting a conversion kit.
Replace Orifices
Natural gas requires different orifices than LP gas. Orifices control gas flow to the burners. Replace LP orifices with those designed for natural gas. This ensures the right gas pressure.
Adjust Air Shutter
The air shutter controls the air-to-gas mix. Adjust it to achieve the best flame. A proper mix results in a blue flame with yellow tips. This indicates efficient burning and less soot.
Test Flame Height
Light your grill and observe the flame. It should be stable and even. Adjust the control knobs to achieve a consistent flame height. This step ensures your grill cooks food evenly.
Inspect Burner Alignment
Make sure burners are aligned correctly. Misaligned burners can cause uneven heat distribution. Proper alignment ensures that flames reach the cooking surface evenly.
Perform A Leak Test
Always perform a leak test after adjustments. Use soapy water around connections. Bubbles indicate leaks. Fix any leaks before using the grill. Safety first. Proper adjustment of the flame and burners is crucial. It ensures your grill operates safely and efficiently. Enjoy grilling with confidence knowing your setup is correct.
Credit: blackstoneproducts.com
Maintenance Tips After Conversion
Maintaining your gas grill after converting it to natural gas ensures safety and long life. Natural gas grills need regular care to work well and stay safe. Follow these tips to keep your grill in top shape and enjoy great cooking every time.
Check Gas Connections Regularly
Look for leaks or loose fittings around hoses and valves. Use soapy water to spot bubbles that show leaks. Tighten connections if needed. This prevents gas leaks and keeps your grill safe.
Clean Burner Tubes And Ports
Burner tubes can get clogged with dirt or spider webs. Clean them often to keep gas flowing smoothly. Use a soft brush or pipe cleaner to clear blockages. Proper cleaning avoids uneven flames and poor heat.
Inspect The Regulator And Hose
Make sure the regulator and hose show no cracks or damage. Replace parts that look worn out. A good regulator controls gas pressure well and helps your grill work correctly.
Keep The Grill Surface Clean
Remove food debris and grease from grates after each use. Use a grill brush to scrape off stuck bits. Clean surfaces prevent flare-ups and improve cooking performance.
Store The Grill Properly
Cover your grill when not in use to protect it from weather. Keep it in a dry place if possible. Proper storage helps avoid rust and damage to components.
Frequently Asked Questions
How Do I Convert An Lp Gas Grill To Natural Gas?
To convert, purchase a natural gas conversion kit specific to your grill model. Replace the orifices and regulator as instructed. Connect the grill to a natural gas line safely, ensuring no leaks. Always follow manufacturer guidelines for a secure conversion.
What Tools Are Needed To Convert Lp Grill To Natural Gas?
You need a wrench, screwdriver, pipe thread sealant, and the conversion kit. A gas leak detector or soapy water helps check connections. Having these tools ensures a smooth and safe conversion process for your grill.
Is It Safe To Convert Lp Grill To Natural Gas?
Yes, if done correctly following manufacturer instructions and safety precautions. Ensure all connections are tight and leak-free. If unsure, hire a professional to prevent hazards like gas leaks or fire. Safety is paramount during conversion.
Can All Lp Grills Be Converted To Natural Gas?
No. Some manufacturers prohibit conversion, and an unsupported conversion can void the warranty or create an unsafe condition. Follow the exact model manual and use a qualified gas technician.
Conclusion
Only proceed if the manufacturer approves conversion for your exact grill model and a qualified gas technician performs the work. Otherwise, choose a grill built for natural gas.