If you want fresh, clear ice every time you open your fridge, keeping your ice maker clean is a must. Over time, ice makers can build up dirt, minerals, and even mold, which can affect the taste and safety of your ice.
But don’t worry—cleaning your ice maker is easier than you think. In this guide, you’ll learn simple, step-by-step tips to make sure your ice stays pure and your fridge runs smoothly. Keep reading to discover how a clean ice maker can make a big difference in your daily routine.
Signs Your Ice Maker Needs Cleaning
Knowing when to clean your ice maker helps keep your ice fresh and safe. Dirt and bacteria build up over time. This affects ice quality and machine performance. Watch for clear signs that your ice maker needs cleaning. Acting early prevents bigger problems and saves time.
Cloudy Or Off-tasting Ice
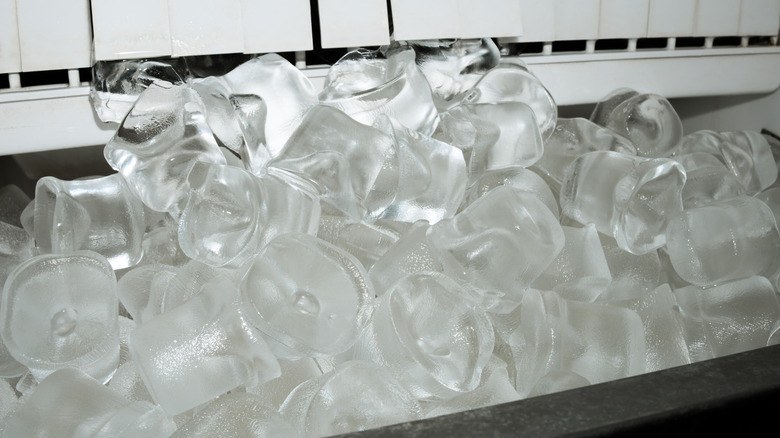
Ice should be clear and taste neutral. Cloudy ice or strange flavors mean contaminants are present. Minerals, dirt, or mold can cause this. Drinking bad-tasting ice is unpleasant and unhealthy. Clean the ice maker to restore pure, fresh ice.
Slow Ice Production
Ice makers usually produce ice quickly. A sudden drop in ice output signals a problem. Blockages or dirty parts slow down the freezing process. Cleaning removes buildup that blocks water flow. This helps your ice maker work efficiently again.
Visible Mold Or Residue
Look inside the ice maker for black spots or white residue. Mold and mineral deposits harm ice quality and safety. They also damage machine parts over time. Regular cleaning removes mold and residue. This keeps your ice clean and your ice maker in good shape.
Credit: www.chowhound.com
Tools And Supplies Needed
Cleaning your ice maker becomes much easier and more effective when you have the right tools and supplies on hand. Gathering everything beforehand saves time and helps you avoid interruptions. Let's look at the essentials you’ll need to get the job done thoroughly and safely.
Cleaning Solutions
Choosing the right cleaning solution is key to removing buildup without damaging your ice maker. Mild dish soap diluted in warm water works well for most cleaning tasks. For tougher stains or mineral deposits, a mix of white vinegar and water can do wonders, breaking down scale gently but effectively.
Avoid harsh chemicals that might leave residues or harm plastic parts. You want to ensure the ice you make afterward is fresh and safe to consume. Have your cleaning solution ready in a spray bottle or bowl for easy access.
Soft Cloths And Brushes
Using soft cloths prevents scratches on sensitive surfaces inside your ice maker. Microfiber cloths are ideal because they trap dirt and absorb moisture efficiently. Alongside cloths, a small soft-bristle brush helps reach tight corners and crevices where grime hides.
Consider having cotton swabs handy too for detailed cleaning around buttons or small components. These gentle tools make a big difference in getting your ice maker spotless without causing damage.
Safety Gear
Protecting yourself during cleaning is often overlooked but very important. Wearing rubber gloves keeps your hands safe from cleaning solutions and prevents skin irritation. Additionally, goggles can protect your eyes from accidental splashes, especially when using vinegar or other liquids.
Do you have a clean workspace and good lighting? These factors improve safety and help you see what needs attention. Setting up with the right safety gear lets you focus on cleaning with confidence and care.
Preparing Your Ice Maker
Preparing your ice maker properly sets the stage for a thorough and effective cleaning. It ensures safety and prevents damage to the unit while making the process smoother. Taking time to prepare also helps you spot any issues early, like stuck ice or worn parts, which could affect performance.
Turning Off The Ice Maker
Start by turning off your ice maker to avoid any accidents or water leaks. Most models have an on/off switch or a control arm that you can flip to stop ice production.
If you can’t find a switch, unplug the fridge or turn off the power at the circuit breaker. This step is crucial to prevent the machine from running while you clean it.
Have you ever tried cleaning without turning it off? It’s a hassle and can cause spills or damage. Taking a moment now saves trouble later.
Removing Ice And Components
Next, clear out all the ice from the tray or bin. Leaving ice inside can block your access to the parts that need cleaning.
Remove any detachable components like the ice bin, trays, or covers. These parts often hold dirt and mineral buildup that you want to clean separately.
- Check your fridge manual to see which parts are safe to remove and how to do it without breaking anything.
- Use warm water to soften any stuck ice before trying to remove it.
- Place the ice in a cooler if you want to keep it for later use.
Handling these parts carefully makes the cleaning process more efficient and prevents accidental damage. Have you noticed any odd smells or tastes from your ice? Removing and cleaning these components can often fix those issues.

Credit: www.youtube.com
Step-by-step Cleaning Process
Keeping your ice maker clean is essential for fresh, great-tasting ice and a smoothly running fridge. The cleaning process might seem daunting, but breaking it down into clear, manageable tasks makes it straightforward. Let’s walk through the key areas to focus on so your ice maker stays in top shape.
Cleaning The Ice Bin
Start by removing the ice bin from your fridge. Empty out any remaining ice and rinse the bin with warm, soapy water. Use a soft cloth or sponge to scrub away any residue or buildup.
Make sure to rinse thoroughly to remove all soap traces, as leftover soap can affect the ice’s taste. Dry the bin completely before placing it back. Have you noticed how a clean bin instantly improves the ice’s freshness?
Wiping The Ice Mold
The ice mold is where the water freezes into cubes, so keeping it spotless is crucial. Use a damp cloth with a mild cleaner to wipe the mold carefully. Avoid harsh chemicals that can damage the surface or leave harmful residues.
Pay special attention to corners and edges where mineral deposits or slime can collect. If you find stubborn deposits, a mixture of equal parts vinegar and water works well to dissolve buildup. How often do you think about cleaning this hidden part of your ice maker?
Cleaning Water Lines And Filters
Water lines and filters deliver the clean water that turns into ice. Over time, these can clog or harbor bacteria, impacting ice quality. Check your fridge manual to locate the water lines and filters before starting.
Replace the water filter as recommended by the manufacturer—usually every six months. To clean the water lines, run a cleaning solution or vinegar through the system if your fridge allows. Flushing the lines regularly ensures fresh water flow and better ice taste. Have you ever tasted ice that just didn’t feel right? This step might be the fix.
Sanitizing Your Ice Maker
Sanitize your ice maker regularly for fresh, clean ice. Remove the ice bin and wash it with warm, soapy water. Dry thoroughly before replacing. Gently wipe the interior with a soft cloth and a mixture of water and vinegar. Reassemble the parts and run a cleaning cycle.
Cleaning your ice maker is crucial for removing bacteria, mold, and mineral deposits that can affect the taste and quality of your ice. Regular sanitizing helps prevent the growth of unwanted microorganisms and keeps your ice maker in good working condition. To sanitize your ice maker, you need to use a combination of cleaning agents and thorough rinsing. This process is essential for maintaining a clean and hygienic environment.
Using Food-safe Sanitizers
Choose a food-safe sanitizer that is specifically designed for cleaning ice makers and refrigerators. Some common options include:
- Bleach solution (1 tablespoon of unscented chlorine bleach per 1 gallon of water)
- White vinegar solution (1 part white vinegar to 2 parts water)
- Sanitizing tablets or powders
Make sure to read and follow the instructions on the packaging for proper usage and safety precautions.
Rinsing Thoroughly
After sanitizing your ice maker, rinse it thoroughly with clean water to remove any remaining cleaning agent residues. Use a soft cloth or sponge to wipe down all surfaces, including the ice tray, ice maker bin, and surrounding areas.
Make sure to dry the ice maker with a clean towel to prevent water spots and mineral deposits. Regularly sanitizing and rinsing your ice maker will help maintain its performance and keep your ice clean and safe to consume.

Credit: www.housework.com
Reassembling And Testing
After thoroughly cleaning your ice maker, reassembling and testing it properly is crucial. This stage ensures everything fits back securely and your ice maker works as it should. Taking your time here can prevent leaks, jams, or other issues that might spoil the ice or damage your fridge.
Putting Parts Back Together
Start by placing each cleaned part back in its original spot. Pay close attention to the ice tray, water line connections, and any screws or clips you removed. If any seals or gaskets look worn, replace them to avoid future leaks.
Use a soft cloth to wipe down areas where parts connect, ensuring no dirt or debris remains. If you have a manual or photos from disassembly, refer to them to avoid mistakes. Tighten screws just enough—too loose and parts shift; too tight and you risk cracking plastic components.
Running A Test Cycle
Once your ice maker is reassembled, it's time to test it. Turn your fridge back on and initiate a test cycle if your model has one. This lets you observe the ice maker filling, freezing, and ejecting ice cubes without waiting for a full freeze cycle.
Listen carefully for unusual sounds like clanks or hisses, which can indicate misaligned parts or water flow issues. Check the ice bin for any leaks or improperly formed cubes. If something seems off, don’t hesitate to open it up and inspect again—catching problems early saves you a headache later.
Maintenance Tips For Cleaner Ice
Keeping your ice maker clean is key to fresh and safe ice. Regular care helps stop bacteria and odors. It also improves ice taste and machine life. Follow simple steps to keep your ice fresh and your machine running well.
Regular Cleaning Schedule
Set a cleaning routine for your ice maker. Clean it at least every three months. Wipe down the ice bin and trays weekly. Remove old ice before making new batches. This stops bacteria buildup and keeps ice fresh.
Using Filtered Water
Use filtered water to make ice. It reduces minerals and impurities. This keeps ice clear and tasty. Change water filters as recommended by the fridge brand. Clean water helps your ice maker work better and last longer.
Avoiding Ice Contamination
Keep the ice maker door closed tightly. Avoid touching ice with dirty hands. Use clean scoops or cups for ice. Store ice away from strong-smelling foods. These habits stop germs and smells from spoiling your ice.
Frequently Asked Questions
How Often Should I Clean My Fridge Ice Maker?
Clean your ice maker every 3 to 6 months. Regular cleaning prevents mold, bacteria, and unpleasant odors. Frequent cleaning ensures ice tastes fresh and maintains appliance efficiency.
What Materials Do I Need To Clean An Ice Maker?
You need warm water, mild dish soap, a soft cloth, and a toothbrush. Avoid harsh chemicals or abrasive tools. These materials gently remove dirt and scale without damaging components.
Can Vinegar Be Used To Clean My Ice Maker?
Yes, vinegar is effective for removing mineral deposits. Mix equal parts vinegar and water, then wipe the ice maker parts. Rinse thoroughly with clean water afterward to remove vinegar residue.
How Do I Safely Clean The Ice Maker’s Water Line?
Turn off the water supply before cleaning. Use a small brush or pipe cleaner to remove buildup inside the line. Flushing with vinegar solution helps disinfect and clear blockages.
Conclusion
Cleaning your ice maker keeps your ice fresh and your fridge healthy. Regular care stops mold and bad smells from growing. A clean ice maker works better and lasts longer. Take a few minutes every month to clean it well.
Your drinks will taste better with clean ice. Keep this simple habit to enjoy fresh ice every day. Small steps make a big difference in your kitchen. Start now and see the easy benefits yourself.