If you love grilling, you know how important it is to keep your Weber gas grill clean. A spotless grill not only cooks better but also lasts longer.
But cleaning your grill doesn’t have to be a tough chore. In this guide, you’ll discover simple, effective steps to make your Weber grill shine like new. Ready to get your grill sparkling and enjoy tastier meals? Keep reading, and you’ll learn exactly how to do it with ease.
Preparing Your Grill
Preparing your Weber gas grill before cleaning is essential. It makes the process safer and more effective. Proper preparation helps remove grease and food residues easily. Follow these steps to get your grill ready for a thorough clean.
Gathering Cleaning Supplies
Collect all necessary tools and materials before starting. You will need:
- A grill brush with sturdy bristles
- Warm, soapy water
- A sponge or cloth
- Bucket or container for water
- Protective gloves
- Paper towels or clean rags
Having everything ready saves time and effort during cleaning.
Ensuring Safety First
Safety is crucial when working with gas grills. Make sure the grill is cool before you begin. Avoid any sparks or open flames nearby. Wear gloves to protect your hands from grease and sharp edges. Keep a fire extinguisher close for emergencies.
Disconnecting The Gas Source
Turn off the gas supply to prevent leaks and accidents. Locate the gas valve and close it completely. Detach the propane tank or gas line carefully. Check for any gas smell before starting to clean. Disconnecting the gas ensures your safety throughout the process.

Credit: canoe.com
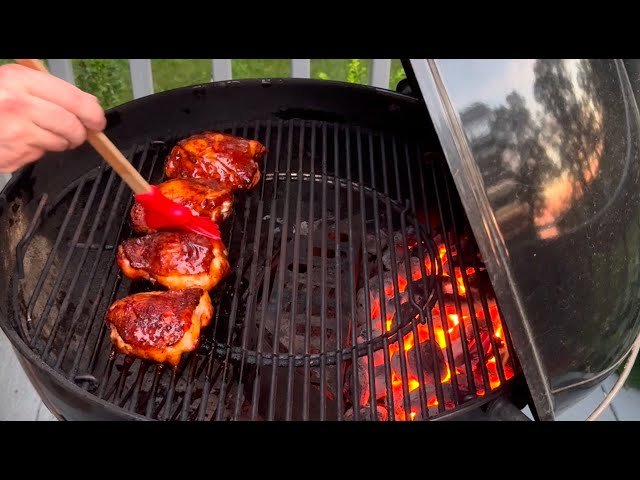
Cleaning Grill Grates
Cleaning your Weber gas grill grates is essential to keep your food tasting great and your grill working efficiently. Grease and food residue build up quickly, affecting heat distribution and potentially causing flare-ups. Taking the time to clean your grates properly not only extends their life but also ensures your next barbecue is safe and delicious.
Removing And Soaking Grates
Start by carefully lifting the grates off your grill. If you’ve never removed them before, check your model’s manual to avoid any damage. Once removed, soak the grates in warm, soapy water for at least 20 minutes to loosen stubborn grime.
Adding a cup of vinegar or a few tablespoons of baking soda can boost the cleaning power. Soaking helps break down burnt-on grease and makes scrubbing much easier. Have you noticed how soaking changes the effort needed to clean those tough spots?
Scrubbing With The Right Tools
Use a grill brush with stiff, stainless steel bristles to tackle the grime. Avoid wire brushes that shed bristles, as they can be dangerous if ingested. Instead, opt for a nylon bristle brush or a grill stone for a safer, effective clean.
Focus on scrubbing each bar of the grate individually, applying moderate pressure to remove residue without damaging the surface. For extra stubborn spots, a paste made from baking soda and water can provide extra scrubbing power. How much easier does cleaning get when you have the right tools at hand?
Drying And Seasoning
After scrubbing, rinse the grates thoroughly with clean water and dry them completely to prevent rust. Use a clean towel or let them air dry in a sunny spot. Once dry, apply a thin layer of cooking oil to the grates to season them.
This seasoning creates a non-stick surface and protects the metal from rusting. You can use vegetable oil, canola oil, or specially made grill grate oil. Have you tried seasoning your grates before your next cookout? It can make a noticeable difference in both maintenance and food release.
Cleaning Burner Tubes
Cleaning the burner tubes of your Weber gas grill is essential for maintaining even heat distribution and preventing flare-ups. Dirty or blocked burner tubes can cause uneven flames, affecting your grilling results and safety. Taking the time to clean and inspect these parts ensures your grill performs at its best every time you fire it up.
Accessing Burner Tubes
To clean the burner tubes, you first need to locate and access them. Open your grill lid and remove the cooking grates to expose the burners. Depending on your Weber model, you might also need to remove the flavorizer bars or heat shields that sit above the burners.
Most burner tubes are held in place by screws or clips, so keep a screwdriver handy. Carefully detach the tubes, making sure not to damage any gas connections. Have you checked your grill’s manual recently? It often provides useful tips for safely accessing these parts.
Clearing Blockages
Once you have the burner tubes out, check the small holes along the tubes where gas flows through. These can get clogged with grease, dirt, or spider webs. Use a soft brush or a pipe cleaner to gently clear out any debris from these holes.
A wire brush can be helpful, but avoid using anything too harsh that might damage the tubes. Blowing compressed air through the tubes is also effective for removing stubborn blockages. Think about the last time you noticed uneven flames—could a blocked burner tube have been the cause?
Checking For Damage
After cleaning, inspect the burner tubes closely for any signs of rust, cracks, or holes. Even small damage can cause gas leaks or uneven heating, which are safety concerns. If you spot any issues, it’s best to replace the burner tubes rather than risk using a compromised part.
Sometimes, discoloration or minor surface rust can be cleaned off, but deep corrosion means the tube’s integrity is compromised. Do you want to risk a poor grilling experience or potential hazards? Keeping your burner tubes in good condition is a small effort that pays off in safety and performance.

Credit: www.bonappetit.com
Cleaning The Interior
Cleaning the interior of your Weber gas grill keeps it safe and working well. Dirt and grease can build up inside, causing flare-ups and uneven heat. Regular cleaning improves flavor and extends your grill’s life. Focus on key areas like debris, heat deflectors, and the firebox for best results.
Removing Debris And Grease
Start by turning off the grill and disconnecting the gas. Remove the cooking grates and set them aside. Use a small brush or vacuum to clear out loose debris inside. Grease often collects at the bottom. Scoop out any thick grease or food scraps carefully. Avoid letting grease spill on the ground.
Scraping The Heat Deflectors
Heat deflectors sit under the grates and protect burners. They catch drippings and help heat spread evenly. Use a metal scraper or spatula to remove stuck-on grease and carbon buildup. Scrape gently to avoid damage. After scraping, wipe deflectors with a damp cloth. Clean deflectors improve heat flow and reduce flare-ups.
Wiping Down The Firebox
The firebox holds burners and collects drips. Use warm, soapy water and a sponge to wipe inside. Avoid harsh chemicals that might harm metal parts. Rinse with clean water and dry with a cloth. Remove any remaining grease or dirt spots. Keeping the firebox clean prevents rust and keeps burners working well.
Cleaning The Exterior
Cleaning the Exterior Ensure your Weber gas grill shines by gently scrubbing the outside with warm, soapy water. Rinse thoroughly and dry using a soft cloth to prevent rust and maintain its appearance.
Cleaning the exterior of your Weber gas grill is essential for maintaining its pristine look and ensuring its longevity. A well-kept grill not only enhances your cooking experience but also adds elegance to your outdoor space. Taking care of the exterior might seem tedious, but with the right approach, it can be quite straightforward and rewarding.
Washing Stainless Steel Surfaces
Stainless steel surfaces of your grill can lose their shine over time due to exposure to the elements. Use a mild dish soap and warm water to wash these surfaces. A soft cloth or sponge works best to avoid scratches. Rinse thoroughly to remove any soap residue, and dry with a clean towel to prevent water spots. Have you ever noticed how a little care can make your grill gleam like new?
Polishing And Protecting
Once the stainless steel is clean, applying a polish can make a huge difference. Choose a stainless-steel polish that is specifically designed for outdoor appliances. Apply with a microfiber cloth in the direction of the grain for the best results. This not only enhances the shine but also adds a protective layer against future stains. How often do you take a moment to admire the fresh, polished look of your grill?
Cleaning Control Knobs And Handles
Control knobs and handles are often overlooked but are crucial to clean regularly. Remove the knobs if possible and wash them with soapy water. Use a toothbrush to scrub around the knobs and handles, reaching the tricky spots. Wipe everything down with a damp cloth and ensure it's all dry before reassembling. Have you ever thought about how clean knobs and handles can improve the overall look of your grill?
Maintaining Your Grill
Maintaining your Weber gas grill keeps it working well and lasting longer. Regular care prevents buildup and rust. It also ensures food tastes great every time you cook. Simple habits make a big difference in grill performance and safety.
Regular Cleaning Schedule
Clean the grill after each use to remove grease and food bits. Brush the grates with a grill brush while still warm. Wipe down the exterior with a damp cloth. Check burners for blockages once a month. Empty the drip tray regularly to avoid flare-ups.
Seasonal Deep Cleaning Tips
Take the grill apart for a deep clean every few months. Remove grates, flavorizer bars, and burner tubes. Soak parts in warm, soapy water to loosen grime. Scrub with a soft brush or sponge. Rinse well and dry all parts before reassembling. Clean inside the grill body using a putty knife to scrape off stuck debris.
Storing Your Grill Properly
Store the grill in a dry place during winter or long breaks. Use a breathable grill cover to protect from dust and rain. Disconnect the propane tank if storing indoors. Keep the grill lid closed to prevent moisture buildup. Check for rust or damage before next use.
Troubleshooting Common Issues
Cleaning a Weber gas grill often solves many cooking problems. Some issues happen regularly, but they have simple fixes. Understanding these can save time and keep your grill working well.
Flare-ups And Grease Fires
Flare-ups happen when grease catches fire. This can burn food and damage the grill. Clean the grease tray and grill grates often. Remove excess fat from food before cooking. Keep a spray bottle with water nearby to control small flames.
Uneven Heat Distribution
Uneven heat can cause some food to burn and some to stay raw. Check the burners for blockages or rust. Clean the burner tubes with a brush to clear holes. Make sure the heat shields are in place to spread heat evenly.
Gas Flow Problems
Gas flow issues cause weak flames or no flame at all. Inspect the gas hose for cracks or leaks. Use a soap and water mix to find leaks; bubbles show a problem. Ensure the propane tank is full and the valve is fully open. Clean the burner ports to remove dirt or spider webs.

Credit: www.oasisoutdoorliving.com.au
Frequently Asked Questions
How Often Should I Clean My Weber Gas Grill?
Clean your Weber gas grill after every 5-6 uses to maintain efficiency. Regular cleaning prevents grease buildup and flare-ups, ensuring better taste and safety.
What Is The Best Way To Clean Weber Grill Grates?
Use a grill brush with stiff bristles to scrub warm grates. For deep cleaning, soak grates in soapy water, then rinse and dry before use.
Can I Use Soap To Clean My Weber Gas Grill?
Yes, mild dish soap works well for cleaning grill parts. Avoid harsh chemicals as they can damage surfaces and affect food flavor.
How Do I Clean The Grease Tray On A Weber Grill?
Remove the grease tray and scrape off excess grease. Wash it with warm soapy water, rinse, dry, and replace it properly to avoid fire hazards.
Conclusion
Cleaning your Weber gas grill keeps it ready for great meals. Regular care stops rust and buildup on the grates. Use a brush and warm soapy water for best results. Don’t forget to clean the drip tray and burners too.
A clean grill lasts longer and cooks food better. Make cleaning part of your grilling routine. Enjoy tasty, safe BBQs every time you fire up your Weber. Simple steps bring big benefits. Keep your grill shining and ready to use!