
Your water bottle’s mouthpiece is where germs love to hide. If you don’t clean it properly, those tiny germs can affect your health.
But don’t worry—cleaning your water bottle mouthpiece is easier than you think. You’ll discover simple, effective steps to keep your mouthpiece fresh and safe. By the end, you’ll feel confident knowing every sip you take is clean and healthy. Ready to learn how?
Let’s dive in!
Why Clean The Mouthpiece
Cleaning the mouthpiece of your water bottle is essential for daily use. This small part often collects dirt and germs. Ignoring it leads to health problems and unpleasant tastes. A clean mouthpiece keeps your water fresh and safe to drink.
Health Risks Of Neglect
Dirty mouthpieces can cause sickness. Germs build up and spread to your mouth. This can lead to sore throats, stomach issues, and infections. People with weak immune systems face higher risks. Regular cleaning lowers the chance of these problems.
Bacteria And Mold Growth
The mouthpiece stays moist, creating a perfect place for bacteria and mold. These microbes multiply fast in warm, wet conditions. Mold can cause allergic reactions and breathing issues. Bacteria may cause bad breath and other infections. Cleaning stops these harmful growths and keeps your bottle safe.

Credit: hydronair.com
Tools You’ll Need
Cleaning your water bottle mouthpiece effectively requires the right tools. Having these on hand makes the process easier and ensures you remove all the grime and bacteria. Let’s look at the essential items you should gather before you start scrubbing.
Cleaning Brushes
Small brushes designed specifically for bottle parts are a must-have. They reach tight spots that your fingers can’t, especially inside the mouthpiece. Look for brushes with soft bristles to avoid damaging the material.
I once tried cleaning a narrow mouthpiece with just a sponge—it didn’t work well. Investing in a few different sizes of brushes made a huge difference in keeping my bottles spotless.
Natural Cleaning Agents
Natural agents like baking soda and vinegar are excellent for breaking down residue without harsh chemicals. They’re safe, affordable, and easy to find in any kitchen. Mixing a teaspoon of baking soda with warm water creates a gentle scrubbing solution.
Have you ever wondered if you really need store-bought cleaners? Natural options often work better and avoid leaving behind any synthetic smells or residues.
Disinfecting Solutions
To kill germs and bacteria, you’ll need a good disinfectant. Mild solutions like diluted hydrogen peroxide or a few drops of bleach in water are effective. Always rinse thoroughly afterward to keep your mouthpiece safe for use.
Using disinfectants might sound intimidating, but when used correctly, they provide peace of mind that your bottle is truly clean. Do you know how often you should disinfect your mouthpiece? It’s more frequent than you might think!
Step-by-step Cleaning Process
Cleaning the mouthpiece of your water bottle is essential for maintaining hygiene and ensuring every sip tastes fresh. A thorough cleaning routine not only removes dirt and bacteria but also extends the life of your bottle. Let's break down the process into easy, manageable tasks you can do at home.
Disassembling The Mouthpiece
Start by carefully taking apart the mouthpiece. Most water bottles have removable parts like caps, seals, and straws. Separating these components helps you reach hidden areas where grime can build up.
Have you noticed how some tiny crevices collect dirt? Disassembling makes it easier to clean those spots thoroughly.
Soaking Techniques
Fill a bowl with warm water and add a few drops of mild dish soap or white vinegar. Soak the mouthpiece parts for 10 to 15 minutes to loosen stubborn residue.
This soaking step is like giving your bottle a gentle deep clean before scrubbing. It softens the buildup, making the next steps more effective.
Scrubbing Tips
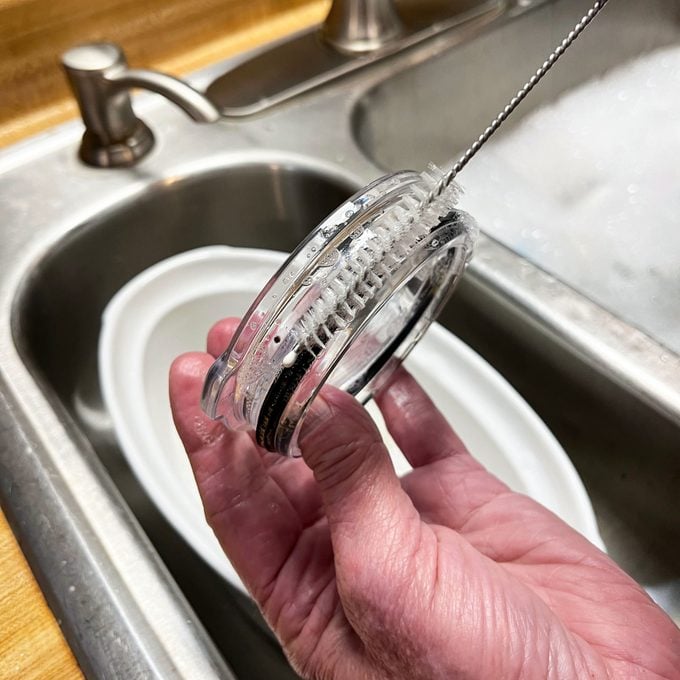
Use a small brush, like a toothbrush or a pipe cleaner, to scrub all parts of the mouthpiece. Focus on the nooks and crannies, especially around valves and seals.
If your brush can’t reach certain spots, try a cotton swab dipped in soapy water. This targeted approach helps you remove hidden grime you might otherwise miss.
Rinsing Thoroughly
Rinse each piece under running water to wash away soap and loosened dirt. Make sure no soap residue remains, as it can affect the taste of your water.
Feel the surface with your fingers; if it still feels slippery or soapy, rinse again. Clean water should feel smooth and fresh.
Drying Properly
Allow the mouthpiece parts to air dry completely on a clean towel or drying rack. Avoid putting them back together while still damp to prevent mold growth.
Have you ever found a musty smell in your bottle? Letting parts dry fully stops moisture from causing that unpleasant odor.

Credit: splitflask.com
Quick Cleaning Hacks
Keeping your water bottle mouthpiece clean is crucial for health. A dirty mouthpiece can harbor bacteria and mold. To ensure your bottle is safe to use, try some quick cleaning hacks. These methods are easy and effective. Let's dive into them.
Using Baking Soda And Vinegar
Baking soda and vinegar are powerful cleaners. They help remove stubborn grime. Here's how to use them:
- Mix one tablespoon of baking soda with vinegar.
- Pour the mixture into the mouthpiece.
- Let it fizz and sit for 10 minutes.
- Rinse thoroughly with warm water.
This combination kills bacteria and removes odors.
Dishwasher Safe Mouthpieces
Some mouthpieces are dishwasher safe. Check if yours is one of them:
- Detach the mouthpiece from the bottle.
- Place it on the top rack of your dishwasher.
- Use a normal wash cycle.
- Ensure it is completely dry before reattaching.
Dishwashing offers a deep clean with minimal effort.
Portable Cleaning Wipes
Portable wipes are handy for quick cleans. Ideal for on-the-go cleaning:
- Grab a cleaning wipe from the pack.
- Wipe the mouthpiece thoroughly.
- Dispose of the wipe responsibly.
- Rinse with water if possible.
These wipes are convenient and effective for daily use.
Maintenance Tips
Maintaining your water bottle mouthpiece keeps it clean and safe to use. Regular care prevents germs and bad smells. It also helps the bottle last longer. Follow these simple tips to keep your mouthpiece fresh and hygienic.
Regular Cleaning Schedule
Clean the mouthpiece after every use. Rinse with warm water and mild soap. Use a small brush to scrub inside hard-to-reach spots. Deep clean once a week with vinegar or baking soda. Let it dry completely before reassembling.
Storage Advice
Store the bottle with the mouthpiece open to air out. Avoid putting it in tight, dark places. Keep it away from dirt and dust. Use a clean pouch or container if you carry it around. This stops mold and bacteria growth.
Replacing Worn Mouthpieces
Check the mouthpiece for cracks, tears, or discoloration. Replace it if you notice damage or persistent odor. Using a worn mouthpiece can cause leaks and health risks. Buy replacements from the bottle’s brand for the best fit.
Credit: www.rd.com
Frequently Asked Questions
How Often Should I Clean My Water Bottle Mouthpiece?
Clean your water bottle mouthpiece daily to prevent bacteria buildup. Regular cleaning keeps it hygienic and safe for drinking.
What’s The Best Method To Clean A Water Bottle Mouthpiece?
Use warm water, mild soap, and a small brush to scrub the mouthpiece. Rinse thoroughly and air dry.
Can I Use Vinegar To Clean The Mouthpiece?
Yes, dilute vinegar with water for a natural disinfectant. Soak the mouthpiece for 10-15 minutes, then rinse well.
How Do I Remove Stubborn Mold From The Mouthpiece?
Soak the mouthpiece in a baking soda and water paste. Scrub gently with a brush, then rinse completely.
Conclusion
Cleaning your water bottle mouthpiece keeps your drinks fresh and safe. Regular care stops germs from growing. Use simple tools like brushes and soap for best results. Rinse well to remove all dirt and soap. Dry it fully before using or storing.
Clean mouthpieces help you enjoy every sip without worry. Make this a quick habit for healthy hydration every day. Small steps lead to big health benefits.


