Is your Whirlpool ice maker not making ice as fresh and clean as it used to? You rely on it every day for cool drinks and entertaining guests, so keeping it spotless is key to great-tasting ice.
Cleaning your ice maker might seem tricky, but with the right steps, you can do it quickly and easily. In this guide, you’ll discover simple tips to get your Whirlpool ice maker sparkling clean again. Keep reading to learn how to improve your ice quality and keep your appliance running smoothly.

Credit: www.searshomeservices.com
Preparing Your Ice Maker
Preparing your Whirlpool ice maker for cleaning is essential to ensure the process is effective and safe. Proper preparation prevents damage to the machine and helps you clean every corner thoroughly. Taking the time to get everything ready also saves you frustration later on.
Gathering Cleaning Supplies
Start by collecting all the supplies you will need. Having everything at hand keeps the process smooth and efficient. You’ll want:
- Mild dish soap or a gentle cleaner
- A soft cloth or sponge
- A toothbrush or small brush for crevices
- White vinegar or a manufacturer-approved ice maker cleaner
- A towel to catch drips
- A bowl or container to hold ice and parts
These items help you avoid using harsh chemicals that can damage your ice maker or leave harmful residues.
Turning Off The Ice Maker
Before you touch anything inside your ice maker, make sure it is turned off. This prevents the machine from running while you clean, which can cause electrical issues or injury. Check your Whirlpool model’s manual for the exact switch or button to use.
If your ice maker is connected to the fridge, it’s often safest to unplug the entire appliance. Have you ever tried cleaning with the power on and ended up with soggy hands or a shocked feeling? Turning off the power completely avoids that risk.
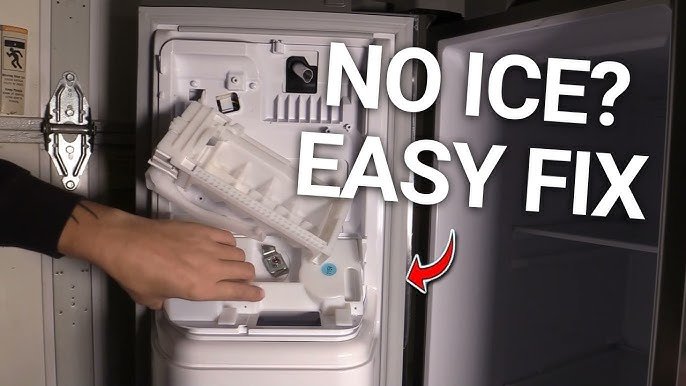
Removing Ice And Components
Next, clear out all the ice from the ice bin. This stops melting ice from mixing with cleaning solutions and keeps the area dry. Place the ice in a bowl to use later or discard it if it looks cloudy or stale.
After removing the ice, take out any detachable parts like the ice bin, trays, or the ice maker cover. These parts often require separate cleaning and can trap dirt or mold. Handle these components gently to avoid breaking delicate pieces.
Cleaning The Ice Maker Interior
Cleaning the interior of your Whirlpool ice maker is key to keeping your ice fresh and your appliance running smoothly. Over time, mineral deposits and mold can build up inside, affecting taste and hygiene. Taking a few simple steps to clean the inside can make a big difference in the quality of your ice.
Wiping Down Surfaces
Start by unplugging your ice maker for safety. Use a soft cloth or sponge to wipe down all accessible surfaces inside the ice maker. Pay special attention to corners and crevices where residue tends to accumulate.
I've noticed that neglecting these spots leads to a stale smell in the ice, which is easily avoidable by regular wiping. Avoid abrasive materials that could scratch the interior and cause damage over time.
Using A Cleaning Solution
Prepare a mild cleaning solution by mixing warm water with a small amount of dish soap or white vinegar. This helps break down any mineral deposits and kills bacteria effectively.
Dip your cloth or sponge into the solution and thoroughly clean all the interior parts you can reach. Make sure not to soak any electrical components, as this could cause damage.
Rinsing Thoroughly
After cleaning, rinse the interior with clean water to remove any soap or vinegar residue. Use a damp cloth to wipe down all surfaces again, ensuring no cleaning solution remains behind.
Skipping this step can leave behind tastes or even damage the ice maker over time. Have you ever noticed a strange taste in your ice? This simple rinse might be the fix you need.
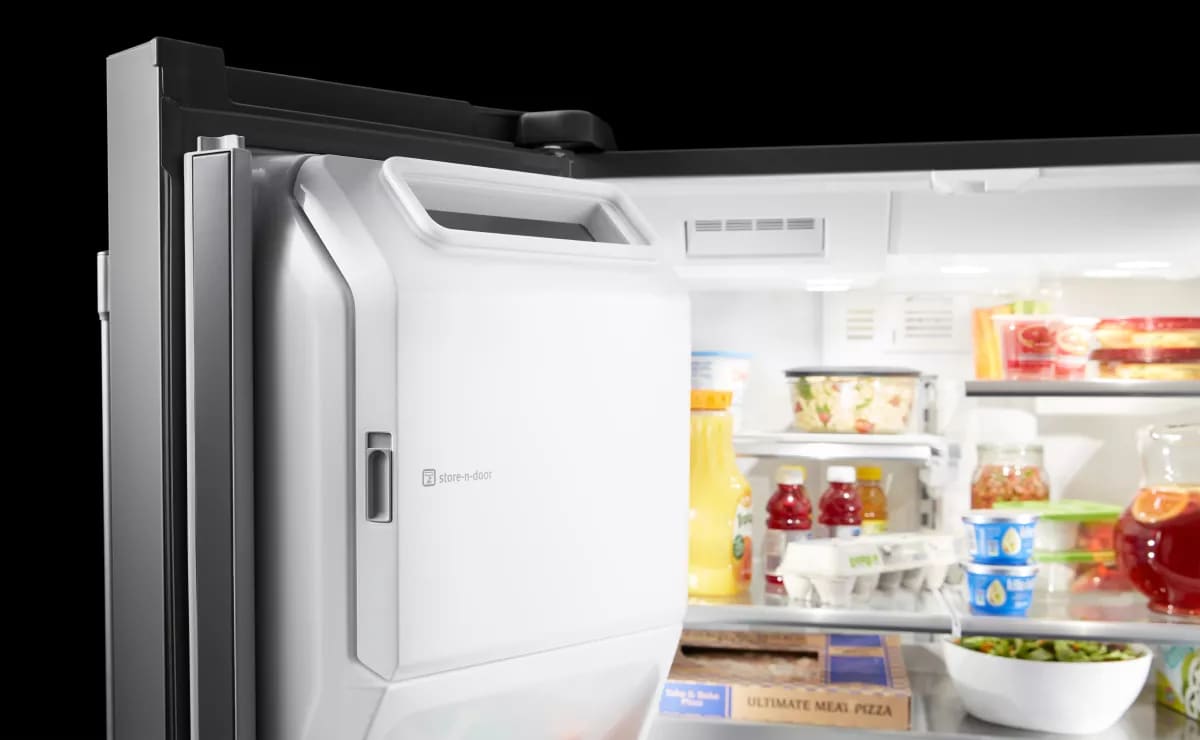
Sanitizing The Ice Bin
Sanitizing the ice bin is a key part of keeping your Whirlpool ice maker running smoothly and your ice tasting fresh. Over time, the bin can collect residues and bacteria that affect the quality of your ice. Taking the time to properly clean and sanitize it ensures every cube is safe and clean for your drinks.
Emptying And Washing The Bin
Start by removing all the ice from the bin. This gives you clear access to every corner that needs cleaning. Once empty, detach the bin carefully according to your model’s instructions.
Use warm water mixed with a mild dish soap to wash the bin thoroughly. Pay close attention to corners and crevices where mold or slime might hide. A soft cloth or sponge works best to avoid scratching the surface.
Have you noticed a strange smell coming from your ice? This step often clears up odors caused by trapped moisture or old ice.
Drying And Reinstalling
After washing, dry the ice bin completely with a clean towel. Leaving the bin damp can encourage bacterial growth or mold, which defeats your cleaning efforts. Air drying for a few minutes also helps ensure no moisture remains.
Once dry, reinstall the bin carefully back into your ice maker. Make sure it fits snugly to prevent any leaks or issues during ice production. Now, your ice maker is ready to produce fresh, clean ice again.
Credit: www.maytag.com
Cleaning The Water Lines
Cleaning the water lines in your Whirlpool ice maker keeps the ice fresh and safe. Water lines can collect dirt, minerals, and bacteria. This buildup blocks water flow and lowers ice quality. Regular cleaning clears the lines and ensures smooth water movement. Follow these simple steps to maintain your ice maker’s water lines.
Checking For Blockages
Start by turning off the ice maker and unplugging it. Locate the water lines at the back of the unit. Look for kinks, cracks, or visible dirt. Use a flashlight to inspect inside the water inlet valve. Blockages often appear as mineral deposits or debris. Gently press the lines to feel for hard spots. These signs show where cleaning is needed most.
Flushing The Lines
Prepare a cleaning solution with equal parts water and white vinegar. Disconnect the water supply line from the ice maker. Place a container under the line to catch the liquid. Slowly pour the vinegar solution into the water line. Let it sit for 5 to 10 minutes to dissolve deposits. Flush the line by running clean water through it afterward. Reconnect the line and check for leaks before powering the ice maker on.
Reassembling And Testing
Carefully put all parts back into the ice maker after cleaning. Test the unit by running a full ice cycle to ensure proper operation. Check for leaks or unusual noises before regular use.
Reassembling and testing your Whirlpool ice maker ensures optimal performance. After cleaning, putting everything back in place is crucial. Follow these steps to restore your ice maker to its full potential.
Putting Parts Back Together
Begin by reattaching the ice maker's key components. Align each part carefully to avoid damage. Ensure all screws and clips are securely tightened. Double-check the connections to the water line and electrical source. This prevents leaks and electrical issues later.
Turning The Ice Maker On
Once reassembled, plug the unit back into the power source. Turn the ice maker switch to the "On" position. Listen for any unusual sounds. This helps identify any problems early. A quiet operation indicates a successful reassembly.
Running A Test Cycle
Activate a test cycle to ensure everything works smoothly. Place a container beneath the ice chute to catch ice. Wait for the machine to complete a cycle. Inspect the ice for clarity and size consistency. This confirms the ice maker is functioning correctly. If issues arise, revisit the reassembly steps.
Maintenance Tips For Longevity
Proper maintenance keeps your Whirlpool ice maker working well longer. Small, regular efforts prevent big problems. Clean parts often to avoid buildup and bad tastes. Pay attention to water quality and machine use. Simple habits extend the life of your ice maker.
Regular Cleaning Schedule
Set a cleaning routine every one to three months. Use warm water and mild soap for best results. Remove and clean ice trays and water lines carefully. Wipe down the exterior to keep dust away. A clean machine makes fresh, clear ice.
Avoiding Common Issues
Watch for signs like slow ice production or strange noises. Check for ice jams and remove them quickly. Replace worn-out parts before they cause damage. Keep the ice bin free from old ice. Proper care stops small problems from growing.
Using Filtered Water
Filtered water reduces mineral buildup inside the machine. It improves ice taste and clarity. Use a water filter compatible with your Whirlpool model. Change filters regularly to keep water clean. Clean water means cleaner ice and longer machine life.

Credit: www.reddit.com
Frequently Asked Questions
How Often Should I Clean My Whirlpool Ice Maker?
You should clean your Whirlpool ice maker every 3 to 6 months. Regular cleaning prevents mold, bacteria, and mineral buildup. This keeps ice fresh and tasting good. Frequent use or hard water may require more frequent cleaning.
What Materials Do I Need To Clean The Ice Maker?
You need a soft cloth, mild detergent, warm water, and a toothbrush. Avoid harsh chemicals that can damage parts. Using these materials ensures safe and effective cleaning without harming the ice maker.
Can I Use Vinegar To Clean My Whirlpool Ice Maker?
Yes, diluted white vinegar is safe and effective for cleaning. Vinegar removes mineral deposits and disinfects surfaces. Rinse thoroughly with water afterward to avoid vinegar taste in ice cubes.
How Do I Reset My Whirlpool Ice Maker After Cleaning?
After cleaning, turn the ice maker off and on again. Some models require pressing a reset button or unplugging for a few minutes. Refer to your user manual for model-specific instructions.
Conclusion
Cleaning your Whirlpool ice maker keeps ice fresh and machines working well. Regular care stops dirt and mold from building up inside. It helps avoid bad smells and clogs that slow ice production. Follow simple steps to clean the machine safely and quickly.
Keep your ice maker clean for better ice and longer life. A small effort now saves costly repairs later. Enjoy clear, tasty ice every day with easy maintenance.