You love using mason jars for your favorite recipes, crafts, or storage. But have you ever struggled with stubborn stains or lingering smells?
Knowing how to clean a mason jar properly can save you time and keep your jars looking fresh and spotless. In this guide, you’ll discover simple, effective tricks that make cleaning easy—so your jars are always ready for your next project.
Keep reading, and say goodbye to frustrating messes for good!
Credit: www.housedigest.com
Choosing The Right Mason Jar
Choosing the right mason jar is important for cleaning and usage. Different jars suit different tasks. Picking the proper type and size helps with better results and easier maintenance.
Types Of Mason Jars
Mason jars come in various styles and materials. The most common is glass, which is durable and easy to clean. Some jars have smooth sides, while others have embossed designs.
- Regular-mouth jars: Ideal for everyday use and easy to fill.
- Wide-mouth jars: Perfect for storing larger items or easier access.
- BPA-free plastic jars: Lightweight and less fragile but less heat resistant.
Choose a type that fits the cleaning method and storage needs.
Common Uses And Sizes
Mason jars serve many purposes, from food storage to crafts. Knowing their size helps in selecting the right one for cleaning.
| Size | Common Use |
|---|---|
| 4 oz (half-pint) | Small jams, spices, and samples |
| 8 oz (pint) | Preserving fruits and vegetables |
| 16 oz (pint) | Salads, beverages, and sauces |
| 32 oz (quart) | Bulk storage, soups, and dry goods |
Select a size that matches your use and cleaning ease. Larger jars might need extra care during washing.

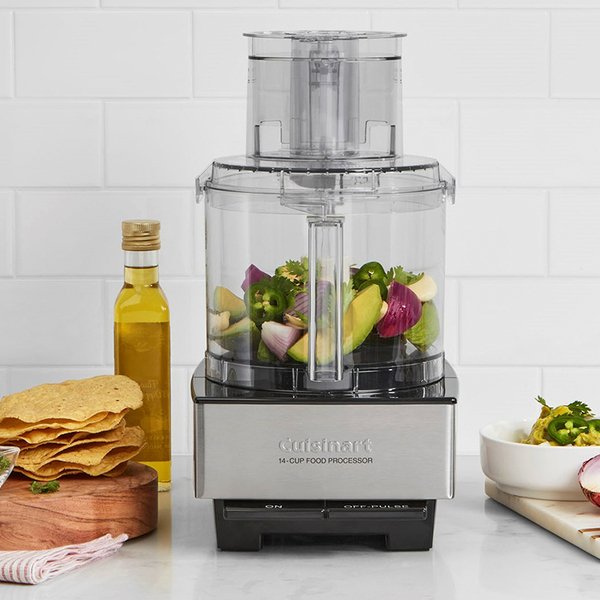
Credit: food52.com
Basic Cleaning Supplies
Cleaning a mason jar properly starts with having the right supplies. Basic cleaning supplies make the process easier and more effective. Choosing tools and solutions that are safe and suitable ensures your jars stay in good condition.
Essential Cleaning Tools
- Soft sponge or dishcloth to avoid scratches
- Bottle brush for reaching inside the jar
- Rubber gloves to protect your hands
- Drying rack or clean towel for air drying
- Small brush for cleaning jar lids and threads
Safe Cleaning Solutions
- Mild dish soap for gentle cleaning
- White vinegar to remove odors and stains
- Baking soda as a natural scrub
- Warm water to help dissolve residue
- Optional: Lemon juice for a fresh scent
Step-by-step Cleaning Process
Cleaning a mason jar is easy and quick with the right steps. A clean jar ensures safe food storage and a pleasant appearance. Follow these simple steps for a sparkling mason jar.
Pre-rinsing The Jar
Start by rinsing the jar with warm water. This removes loose dirt and residue. Hold the jar under running water for a few seconds. Check for any stubborn spots that need attention.
Soaking Techniques
Fill a basin with warm, soapy water. Submerge the jar and let it soak for 10 minutes. This softens any tough grime. For a deeper clean, add a splash of vinegar. Vinegar helps break down grease and odors.
Scrubbing Tips
Use a soft brush for the inside and outside. A sponge works well for lighter cleaning. For tough spots, try a baking soda paste. Mix baking soda with water and scrub gently. Focus on the jar's neck and bottom.
Cleaning The Lid And Seal
Remove the lid and seal from the jar. Rinse them under warm water. Check for any residue on the seal. Use a brush to clean the grooves. Ensure the lid and seal are completely dry before reassembling.
Removing Tough Stains And Odors
Removing tough stains and odors from your mason jar can feel like a challenge, especially if you've stored strong-smelling or colorful items in it. However, with a few simple ingredients and techniques, you can restore your jar to its original clarity and freshness. Are you ready to bring your mason jar back to life without harsh chemicals?
Using Baking Soda And Vinegar
Baking soda and vinegar form a powerful duo against stubborn stains and lingering smells. Start by adding a couple of tablespoons of baking soda to your jar. Then pour in some white vinegar; the fizzing action helps break down grime.
After the bubbling stops, scrub the inside with a bottle brush or sponge. Rinse thoroughly with warm water. This method is especially effective on jars that held tomato sauce or pickled vegetables, which tend to leave strong odors.
Lemon And Salt Method
Lemon’s natural acidity and salt’s abrasiveness make a great combo for tackling tough stains. Cut a lemon in half and dip the cut side into coarse salt. Use it to scrub the inside of your jar in circular motions.
The lemon juice brightens the glass, while salt helps lift stains without scratching. After scrubbing, leave the lemon juice inside the jar for 10 minutes before rinsing. This approach works wonders for jars stained by tea or coffee.
Specialized Stain Removers
If you want a quicker fix, consider stain removers made for glassware. Products like Bar Keepers Friend or Oxiclean can target deep stains and odors effectively. Follow the instructions carefully and avoid using abrasive pads that might damage your jar.
These cleaners often require soaking your jar for a short time, which loosens stubborn residues. Have you tried one of these products before? You might be surprised how easily they bring back the jar’s sparkle.
Drying And Storing Mason Jars
After washing your mason jars thoroughly, drying and storing them correctly is key to keeping them spotless and ready for use. Moisture left inside or on the jars can lead to mold or unpleasant odors. Proper drying and smart storage will protect your jars and save you time next time you want to use them.
Best Drying Practices
Air drying is one of the safest ways to dry mason jars without risking damage. Place jars upside down on a clean dish rack so water drains completely. Avoid using towels to dry the inside, as they can leave lint or fibers behind.
If you’re short on time, try drying jars in a warm oven. Set the oven to about 170°F (75°C) and place jars upside down on a baking sheet for 10–15 minutes. This method evaporates moisture quickly and also sanitizes the jars.
Have you ever noticed a funny smell when storing jars wet? That’s a sign moisture trapped inside is causing bacteria growth. So, make sure your jars are 100% dry before storing.
Storage Tips To Maintain Cleanliness
Store your mason jars with lids off or loosely placed to allow air circulation. Sealing damp jars can trap moisture and cause mildew. If space allows, keep jars in a cool, dry cupboard away from direct sunlight.
Consider using a dedicated container or basket to keep jars organized and dust-free. Label the storage area so you always know where your clean jars are. This small habit saves time and keeps your kitchen tidy.
Have you tried storing mason jars with a small packet of silica gel inside? It helps absorb any leftover moisture and keeps jars fresh. You can reuse these packets multiple times, making them an easy addition to your storage routine.
Cleaning Mason Jars For Food Safety
Cleaning mason jars properly is crucial for food safety. These jars often store homemade jams, sauces, and pickles. Any leftover bacteria can spoil the food or cause illness. Proper cleaning removes dirt and germs effectively.
Focus on thorough cleaning and sanitizing before use. This ensures your jars are safe for storing food and preserves freshness.
Sanitizing Methods
Sanitizing kills harmful bacteria on mason jars. Use one of these safe methods:
- Boiling jars in water for 10 minutes
- Washing with hot, soapy water, then rinsing with a bleach solution (1 tablespoon bleach per gallon of water)
- Using a dishwasher with a sanitize cycle
- Heating jars in a preheated oven at 225°F (107°C) for 20 minutes
Always let jars dry completely after sanitizing. Use clean towels or air dry on a clean rack.
Avoiding Cross-contamination
Cross-contamination spreads bacteria from one item to another. Prevent it by following these tips:
- Wash hands before handling jars
- Use clean utensils and surfaces
- Keep jars and lids separate until ready to use
- Do not touch the inside or rim of jars after cleaning
- Store cleaned jars in a clean, dry place
Following these steps helps keep your food safe and fresh for longer.
Troubleshooting Common Issues
Cleaning mason jars can sometimes lead to unexpected challenges that slow you down or leave your jars less than perfect. Knowing how to troubleshoot common issues helps you keep your jars sparkling and ready for your next project. Let’s tackle some of the most frequent problems you might face and how to fix them effectively.
Cloudiness Prevention
Have you noticed your mason jar looking foggy or cloudy after washing? This usually happens due to mineral deposits from hard water or leftover soap residue.
To prevent cloudiness, try rinsing your jars with distilled white vinegar after washing. The vinegar breaks down minerals and helps restore clarity. Also, avoid using too much soap—excess soap is hard to rinse off and can leave a film behind.
If cloudiness persists, soak the jar in a mixture of equal parts vinegar and water for 15 minutes before rinsing thoroughly. This simple step can often bring back the jar’s original shine.
Dealing With Rust And Residue
Rust spots and stubborn residue can turn your beloved mason jars into a cleaning nightmare. Rust often appears on the metal lids or bands rather than the glass itself.
To tackle rust, scrub the metal parts gently with a paste made from baking soda and water. This abrasive paste helps lift rust without damaging the metal. Rinse and dry immediately to prevent rust from returning.
If residue remains inside the jar, try soaking it overnight with warm water and a tablespoon of baking soda or lemon juice. Both ingredients are great at breaking down grime and odors. Have you ever tried using a bottle brush with firm bristles? It can reach those hard-to-clean corners and make a big difference.

Credit: food52.com
Frequently Asked Questions
How Do You Clean A Mason Jar Naturally?
To clean a mason jar naturally, use warm water, vinegar, and baking soda. Soak the jar in vinegar for 10 minutes. Scrub with baking soda paste to remove stains. Rinse with warm water and air dry.
Can You Wash Mason Jars In A Dishwasher?
Yes, mason jars are dishwasher safe. Place jars and lids on the top rack. Use a gentle cycle to prevent damage. Make sure jars are dry before storing to avoid mold growth.
How To Remove Stubborn Stains From Mason Jars?
Use a mixture of baking soda and water to form a paste. Apply it to stains and scrub gently with a brush. For tough stains, soak jars in warm vinegar for 15 minutes before scrubbing.
Is It Safe To Use Soap On Mason Jars?
Yes, mild dish soap is safe for cleaning mason jars. Avoid harsh chemicals that can leave residues. Rinse thoroughly with warm water to remove all soap traces before drying.
Conclusion
Cleaning a mason jar is simple and quick. Use warm water, soap, and a brush to reach every corner. Rinse well to remove all soap. Dry it completely to avoid spots or mold. Clean jars last longer and stay safe for food.
Keep your jars fresh for storing or crafts. Regular cleaning saves time and effort later. A clean mason jar makes a big difference. Try these easy steps for sparkling jars every time.