Grilling a whole chicken on your gas grill can seem tricky, but it’s easier than you think. Imagine biting into juicy, flavorful chicken with crispy skin, all cooked right in your backyard.
You don’t need fancy tools or complicated recipes. With the right steps, you’ll impress your family and friends at your next barbecue. Keep reading, and you’ll learn exactly how to get that perfect, mouth-watering result every time you fire up your gas grill.
Your next cookout just got a whole lot better.

Credit: www.youtube.com
Choosing The Right Chicken
Choosing the right chicken is the foundation of a delicious barbecue. The flavor, texture, and cooking time all hinge on the type of chicken you select. Let’s break down what to look for so your grilled chicken turns out juicy and full of taste.
Whole Chicken Size And Weight
The size of your chicken affects both cooking time and how it fits on your grill. A bird that weighs between 3.5 to 4.5 pounds usually cooks evenly without drying out.
If you pick a chicken that's too large, you might struggle to cook it through without burning the skin. Smaller chickens cook faster but can dry out if you’re not careful.
Think about how many people you’re feeding. A 4-pound chicken typically serves 4 people comfortably, giving you a good balance of meat and cooking ease.
Fresh Vs. Frozen Chicken
Fresh chicken often has better flavor and a firmer texture, which can improve your barbecue experience. However, frozen chicken can be just as good if thawed properly.
Never grill chicken straight from the freezer. Thaw it slowly in the fridge for 24 hours to ensure even cooking.
Have you noticed how fresh chicken tends to sizzle differently on the grill? That’s because it retains more moisture, leading to juicier meat once grilled.
Organic And Free-range Options
Organic and free-range chickens often have a richer flavor due to their diet and living conditions. You might find their meat firmer and less watery compared to conventionally raised chickens.
Choosing these options can also mean fewer antibiotics and hormones in your meal, which matters to many home cooks.
If you want a chicken with a bit more character on the grill, trying a free-range bird might be worth it. You’ll likely notice a difference in taste that’s worth the extra cost.
Preparing The Chicken
Getting your chicken ready before it hits the grill makes a huge difference in flavor and texture. Taking the time to properly prepare it ensures even cooking and helps your seasoning stick better. Let’s dive into how you can prep your whole chicken to get the best barbecue experience.
Cleaning And Patting Dry
Start by rinsing the chicken under cold water to remove any leftover juices or debris. This step isn’t about washing away bacteria but about cleaning the surface for better seasoning adherence.
After rinsing, use paper towels to pat the chicken completely dry. Moisture on the skin prevents it from crisping up on the grill, so dry it thoroughly.
Trimming Excess Fat
Take a close look at the chicken’s cavity and skin for any extra fat or loose bits. Removing these pieces helps reduce flare-ups on the grill and keeps the cooking process cleaner.
Use a sharp knife or kitchen scissors to trim away excess fat, especially around the neck and tail areas. This step also improves the final presentation of your grilled chicken.
Seasoning And Marinades
Decide if you want a quick dry rub or a longer marinade soak. A dry rub with salt, pepper, garlic powder, and paprika can be applied just before grilling for instant flavor.
If you prefer marinating, plan ahead to soak the chicken for at least 2 to 4 hours or overnight for deeper taste. Use a mixture with acid like lemon juice or vinegar, combined with herbs and oil, to tenderize and infuse flavor.
Have you experimented with different herbs or spice blends on your chicken? Trying new combinations can turn a simple barbecue into a signature dish.
Setting Up The Gas Grill
Setting up your gas grill properly is crucial to barbecuing a whole chicken that’s juicy on the inside and crispy on the outside. Getting the temperature and heat zones right can make all the difference. It’s not just about turning on the burners; it’s about creating an environment where your chicken cooks evenly without burning.
Preheating The Grill
Preheating your gas grill is the first step to ensure even cooking. Turn all burners to high and close the lid for about 10-15 minutes. This heats the grill grates and the cooking chamber, helping to sear the chicken and lock in juices.
Have you noticed how cold grills make food stick and cook unevenly? That’s why skipping preheat can cost you a perfect barbecue experience. A well-preheated grill also reduces flare-ups by burning off leftover residue.
Direct Vs. Indirect Heat Zones
Creating heat zones means setting up areas of your grill with different temperatures. Turn one side of your grill on high for direct heat and leave the other side off or low for indirect heat.
Place the chicken initially over direct heat to get a crispy skin, then move it to indirect heat to cook through without burning. This two-zone setup lets you control cooking speed and avoid flare-ups that char your chicken prematurely.
Using A Drip Pan
Position a drip pan under the chicken on the indirect heat side to catch fats and juices. This prevents flare-ups and keeps your grill cleaner. You can even add water, beer, or herbs to the pan to create steam and add flavor during cooking.
I once skipped the drip pan and ended up with a smoky mess and uneven cooking. Using one not only protects the grill but also helps maintain a moist cooking environment for your chicken.
Grilling Techniques
Grilling a whole chicken on a gas grill requires careful heat control to cook it evenly. Use indirect heat and turn the chicken often for juicy, tender meat. Season well and watch the temperature to avoid burning.
Grilling a whole chicken on a gas grill is a delightful way to enjoy a juicy, flavorful meal. The secret lies in mastering a few essential grilling techniques. Whether you're a seasoned grill master or a backyard beginner, understanding these techniques can turn your barbecue into a memorable feast.
Placing The Chicken On The Grill
Begin by preheating your gas grill. Aim for a medium heat, around 350°F. Place the chicken breast-side up on the grill, using indirect heat for even cooking. Consider using a roasting rack to elevate the chicken slightly, allowing heat to circulate. This ensures the chicken cooks evenly without burning the skin. If your grill has multiple burners, keep the flame off directly beneath the chicken to avoid flare-ups.
Managing Grill Temperature
Keeping the grill at a consistent temperature is crucial. Too hot, and you risk charring the exterior before the inside is cooked. Too cool, and you’ll be grilling for hours. Monitor the temperature using a built-in or external grill thermometer. Adjust the burners as needed to maintain that sweet spot of 350°F. Remember, patience is your friend here. Don't rush the process for faster results.
Rotating And Basting
Rotate the chicken every 20-30 minutes. This helps ensure even cooking and prevents any one side from drying out. Use a meat thermometer to check that the internal temperature reaches 165°F. Basting is your opportunity to infuse flavor and keep the meat moist. Use a brush to apply your favorite marinade or sauce. Just be cautious not to open the grill too frequently, as this can cause temperature fluctuations. What’s your secret basting sauce that makes everyone come back for more?
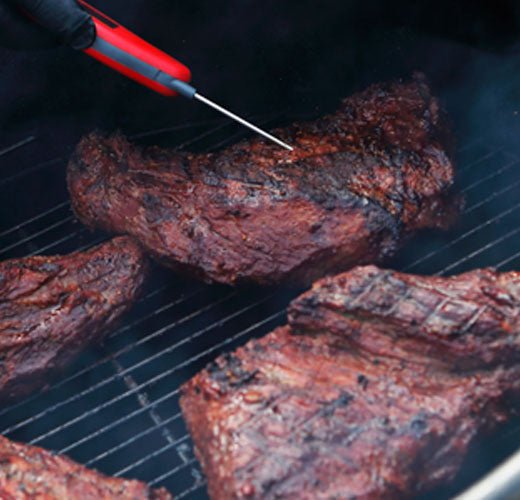
Checking Doneness
Checking the doneness of your whole chicken on a gas grill is crucial to ensure it’s safe to eat and perfectly juicy. Overcooking can dry it out, while undercooking poses health risks. You want that tender, flavorful chicken that keeps everyone asking for seconds.
Using A Meat Thermometer
A meat thermometer is your best friend for accurate doneness. Insert it into the thickest part of the thigh, avoiding the bone, to get a true reading.
The internal temperature should reach 165°F (74°C)for safe consumption. If you don’t have a digital thermometer, consider investing in one—it takes the guesswork out of grilling.
Have you ever cut into a chicken only to find it pink inside? A thermometer saves you from that unpleasant surprise every time.
Visual And Texture Cues
Even without a thermometer, you can check doneness by looking and feeling your chicken. The skin should be golden brown and crispy, not pale or overly burnt.
When you poke the meat with a fork or skewer, the juices should run clear, not pink or red. Also, the meat should feel firm but springy, not mushy or rubbery.
Try gently wiggling the drumstick—if it moves easily at the joint, your chicken is likely done. These cues help you trust your instincts next time you grill.
Resting The Chicken
Resting your chicken after grilling is a step many skip but shouldn’t. Let it sit uncovered for about 10-15 minutes to allow the juices to redistribute.
This rest period makes the meat more tender and juicy when you cut into it. Think of it as the final touch that turns a good chicken into a great one.
Next time you grill, resist the urge to slice immediately—you’ll notice the difference in every bite.

Credit: www.youtube.com
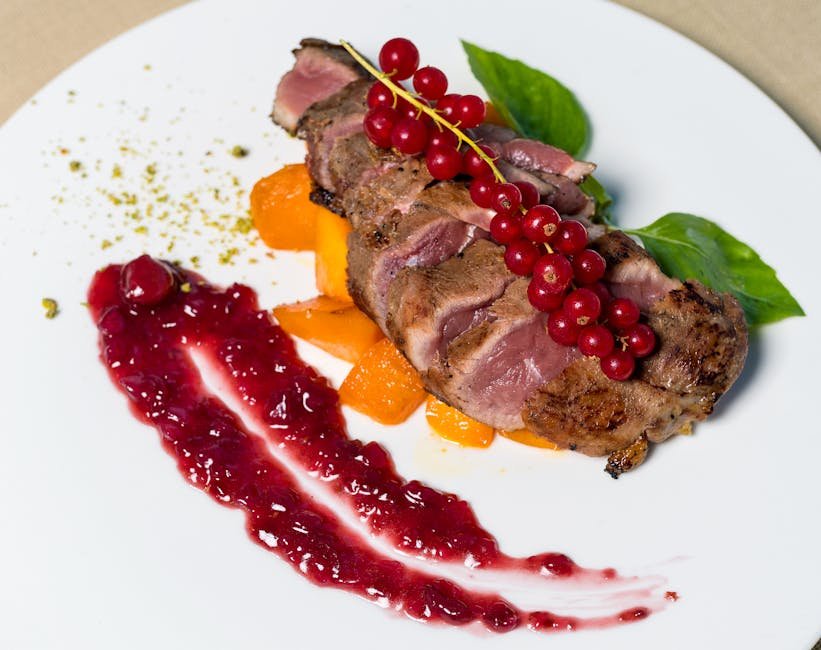
Serving Tips
Serving a whole barbecued chicken straight from the grill is a delight. Proper serving makes every bite enjoyable and showcases your grilling efforts. This section covers simple tips to carve, pair, and store your chicken for the best experience.
Carving The Chicken
Let the chicken rest for 10 minutes after grilling. This keeps the juices inside. Use a sharp knife to start cutting at the joints. Separate the legs and wings from the body. Slice the breast meat against the grain into even pieces. Arrange the pieces nicely on a serving platter.
Pairing With Sides And Sauces
Choose simple sides that complement smoky flavors. Fresh salads, grilled vegetables, or corn on the cob work well. Offer sauces like barbecue, honey mustard, or garlic aioli. Place sauces in small bowls for easy dipping. This allows guests to enjoy their preferred flavors.
Storing Leftovers
Cool leftovers quickly to keep them safe. Remove the chicken from the bone for faster cooling. Store in airtight containers or wrap tightly with foil. Refrigerate within two hours of cooking. Eat leftovers within three days for best taste and safety. Reheat gently to keep meat moist.
Troubleshooting Common Issues
Troubleshooting common issues while barbecuing a whole chicken on a gas grill can save your meal and improve your grilling skills. Even experienced grillers face challenges like dry meat, flare-ups, or uneven cooking. Understanding how to handle these problems will help you serve juicy, perfectly cooked chicken every time.
Avoiding Dry Meat
Dry chicken is often the result of high heat or overcooking. Keep your grill temperature steady around 350°F (175°C) to ensure even cooking without drying out the meat.
Marinate or brine your chicken beforehand to lock in moisture. Using a drip pan with water under the chicken can also create a humid environment that keeps the meat juicy.
Have you ever pulled a chicken off the grill only to find it dry inside? Monitoring the internal temperature with a meat thermometer can prevent this. Aim for 165°F (74°C) in the thickest part of the thigh for safe, moist chicken.
Preventing Flare-ups
Flare-ups happen when fat drips onto the burners, causing sudden flames that can char your chicken. Trim excess fat before grilling to reduce this risk.
If flare-ups occur, move the chicken away from direct heat immediately. Closing the lid helps control oxygen and flames, allowing flare-ups to subside.
Another tip is to keep a spray bottle of water nearby to quickly douse small flames. Have you noticed how flare-ups can ruin the skin? Managing them keeps your chicken looking and tasting great.
Fixing Undercooked Or Overcooked Chicken
Undercooked chicken is unsafe, while overcooked chicken loses tenderness. If you find your chicken undercooked, close the grill lid and cook over indirect heat until it reaches the proper temperature.
For overcooked chicken, try slicing and serving it with a sauce or broth to add moisture back. Avoid slicing the bird too early; resting the chicken for 10 minutes after grilling lets juices redistribute.
Have you ever cut into your chicken only to see pink meat? Don’t panic—use a reliable thermometer and adjust heat accordingly. It’s better to slow-cook than rush and risk unsafe poultry.

Credit: www.101cookingfortwo.com
Frequently Asked Questions
How Long To Grill A Whole Chicken On Gas Grill?
Grill a whole chicken for 45-60 minutes over medium heat. Use indirect heat and turn occasionally for even cooking.
What Temperature Should Gas Grill Be For Chicken?
Set your gas grill to 350°F (175°C) for optimal whole chicken grilling. This temperature ensures juicy, fully cooked meat.
How To Prevent Chicken From Drying On Gas Grill?
Use indirect heat and baste regularly to keep chicken moist. Avoid overcooking by monitoring internal temperature carefully.
Do You Need To Truss A Whole Chicken?
Trussing helps the chicken cook evenly and retain moisture. Tie legs and wings snugly for best grilling results.
Conclusion
Grilling a whole chicken on a gas grill brings great flavor and fun. Keep the heat steady and watch the chicken closely. Use a meat thermometer to check doneness. Let the chicken rest before cutting to keep it juicy. Try different spices to match your taste.
This simple method makes a tasty meal for family or friends. Enjoy the smoky, tender results every time you grill. Practice a few times, and you will get better fast. Barbecue chicken is a great way to enjoy outdoor cooking.